14 Photoshop adjustment tools to retouch your images
Make finishing touches to your images in Photoshop with these tips and tricks.

The final tweaks that you make to your image can be the most crucial part in your painting process. That’s the part that you often agonise over, too. It’s easy to create art, but to perfect it is a whole other story. The adjustment tools have always been a part of Photoshop for this reason.
Long before so many other tools have been deemed important – tweaking your image in the closing stages always has been. They range from tonal corrections to colour-editing sliders, but they all hold their own uses in the program.
Everyone has their favourite adjustment tools, but while some people utilise them throughout their workflow, they’re often seen as a unifier of a project at the end. The adjustments are such an integral part of Photoshop CC, that it’s worth learning what each of them do. They work best in tandem with one another, but the key – like any part of Photoshop, including using Photoshop actions – is simply to experiment with what works for you, as many of the fixes overlap.
Once you’ve mastered these tools, you’ll never end a project without them again. We've divided these adjustments into four areas: tonal fixes, colour tools, creating a comic-book effect and applying filters.
Tonal fixes in Photoshop
01. Add an adjustment layer
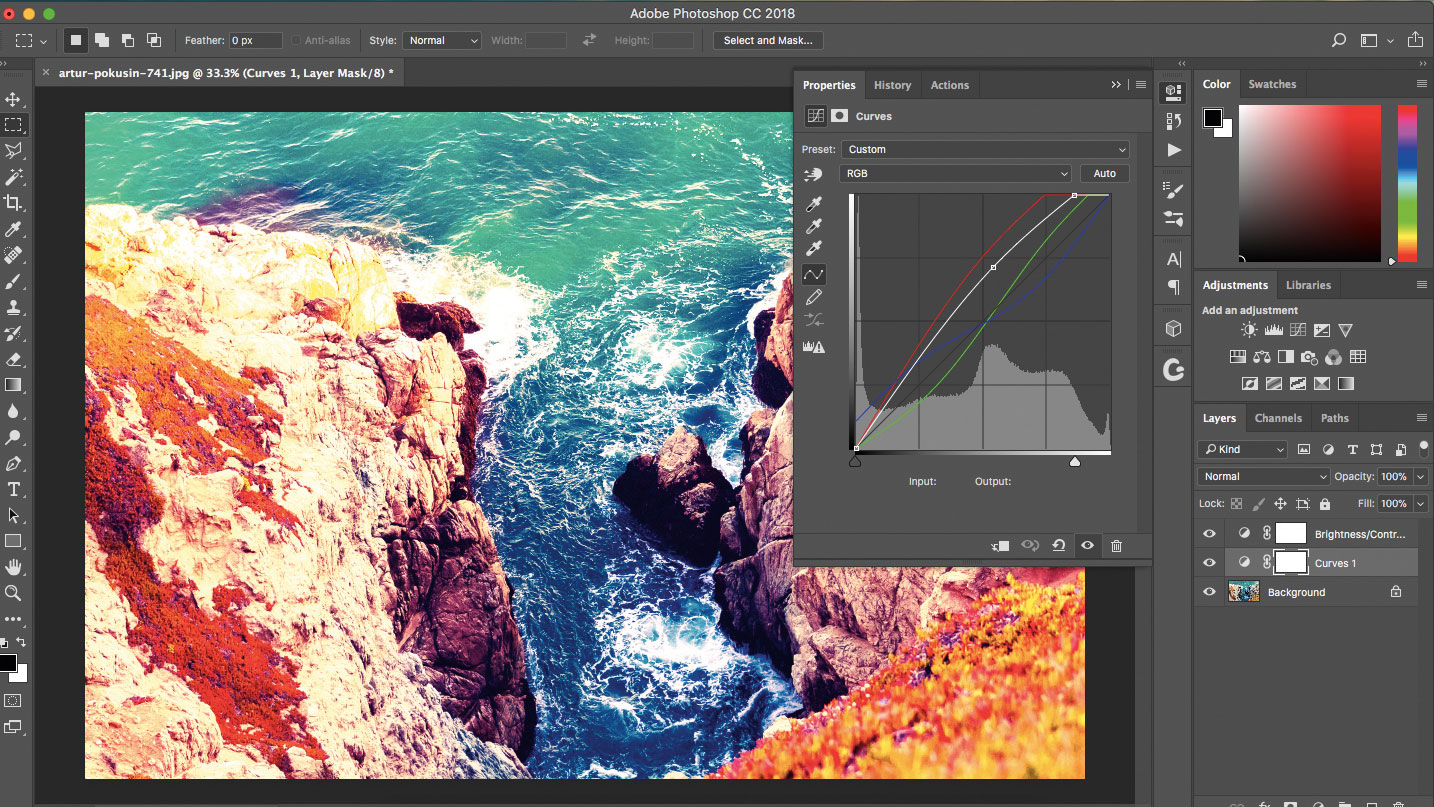
There are many ways to add an adjustment layer. Either go to the top bar and click Layer > Adjustment layer, or add an adjustment panel from Windows > Adjustments. Alternatively, click the circle icon at the bottom of the layer panel. The Brightness/Contrast, Levels and Exposure tools give you control over blacks, whites, highlights and shadows in your artwork.
Click on the half filled circle next to each layer to bring up the Properties menu for individual adjustment layers. This will enable you to adjust each layer.
02. Adjust brightness and contrast
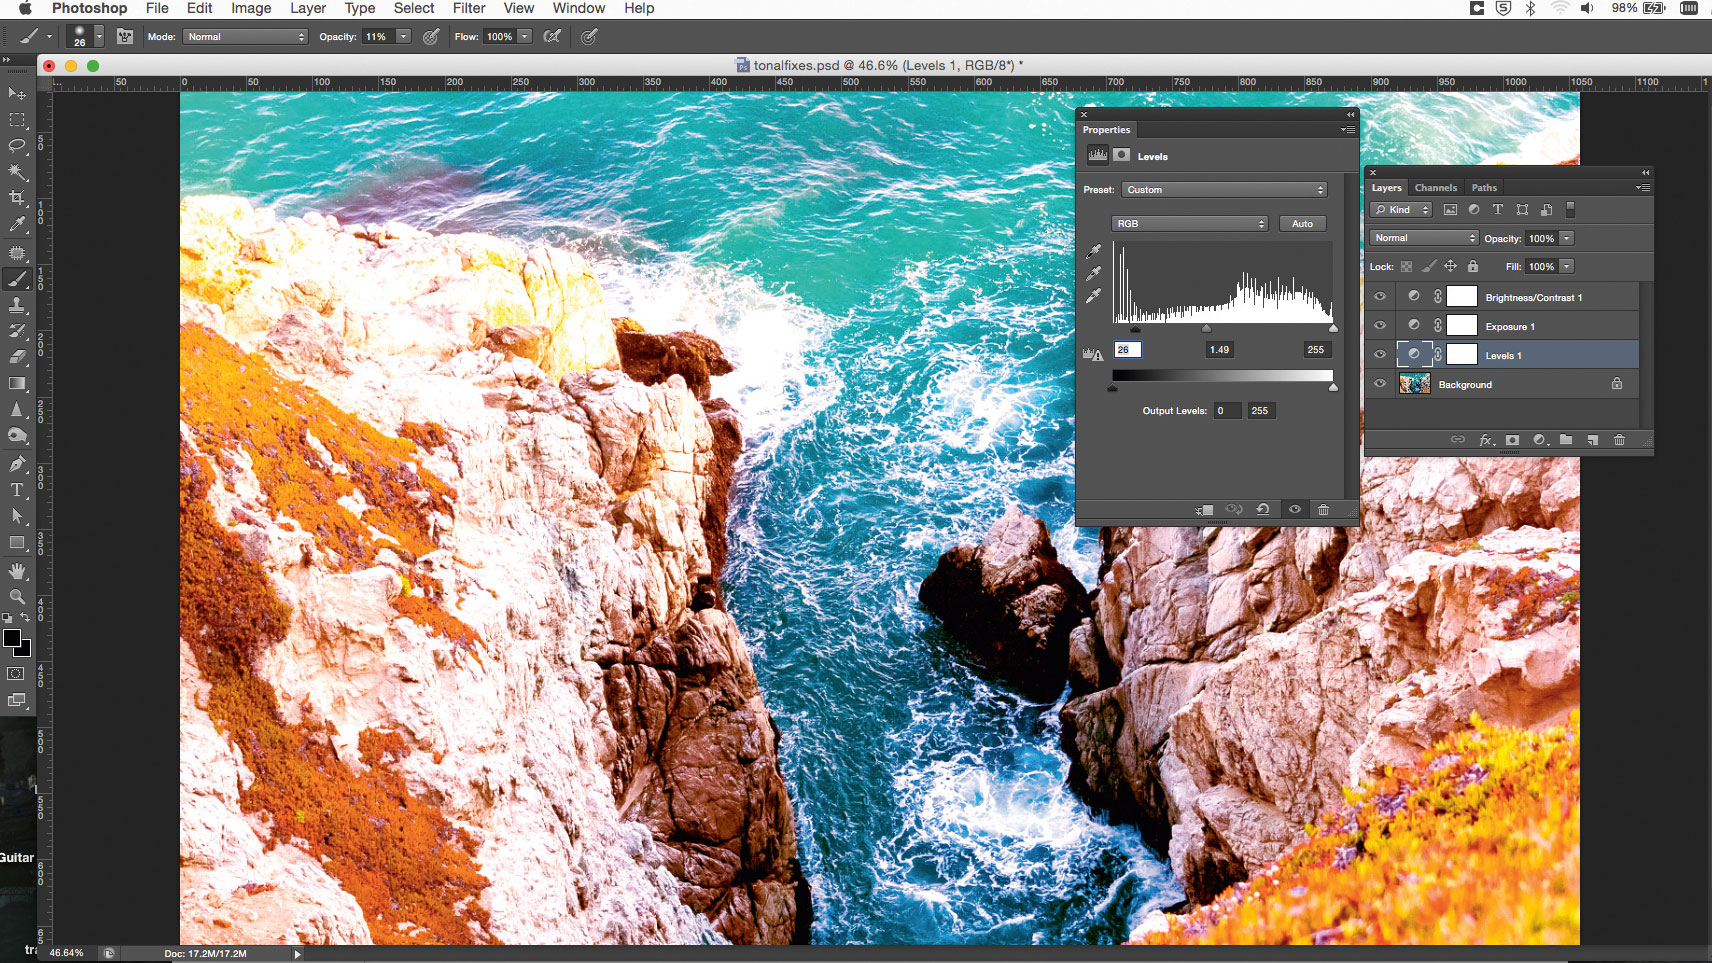
The Levels adjustment provides you with a histogram. It can control the brightness, contrast, lights and darks in your image, as well as colour.
The Brightness/Contrast tool is another way to tweak images, and relies on sliders. It’s a good second step after using Curves to correct the tone of your image.
03. Alter the whites and blacks in your image
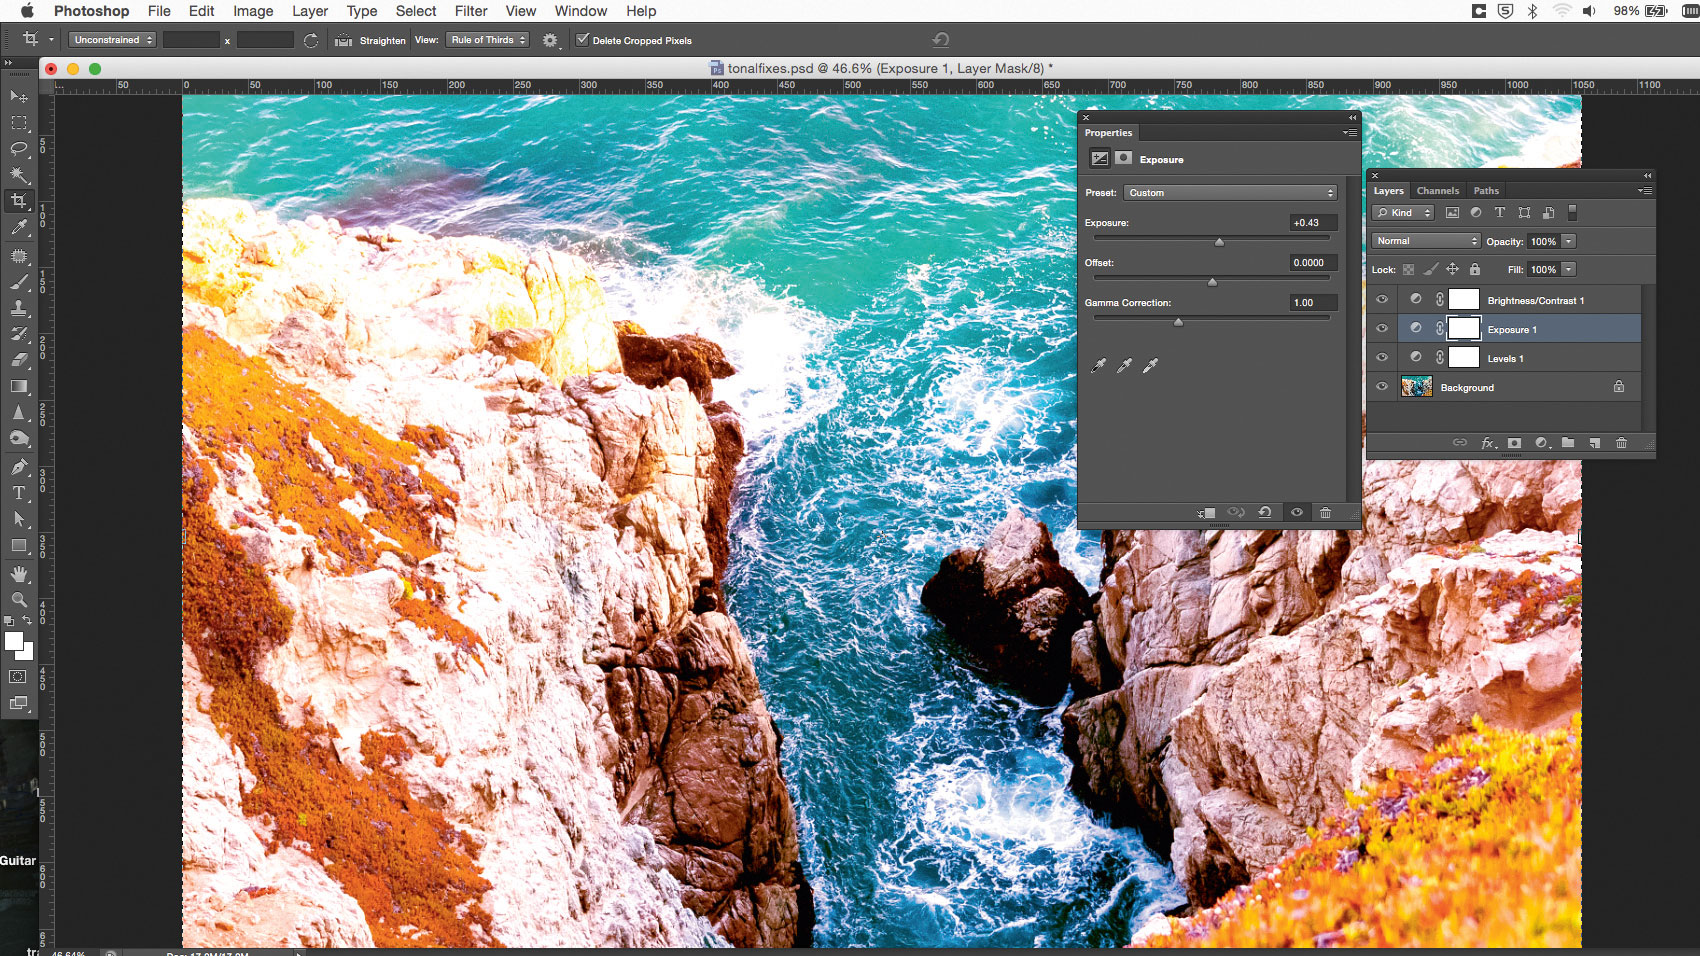
In this adjustment window, you can alter the whites and blacks in your image to pick up more or less light and shade.
Colour tools in Photoshop
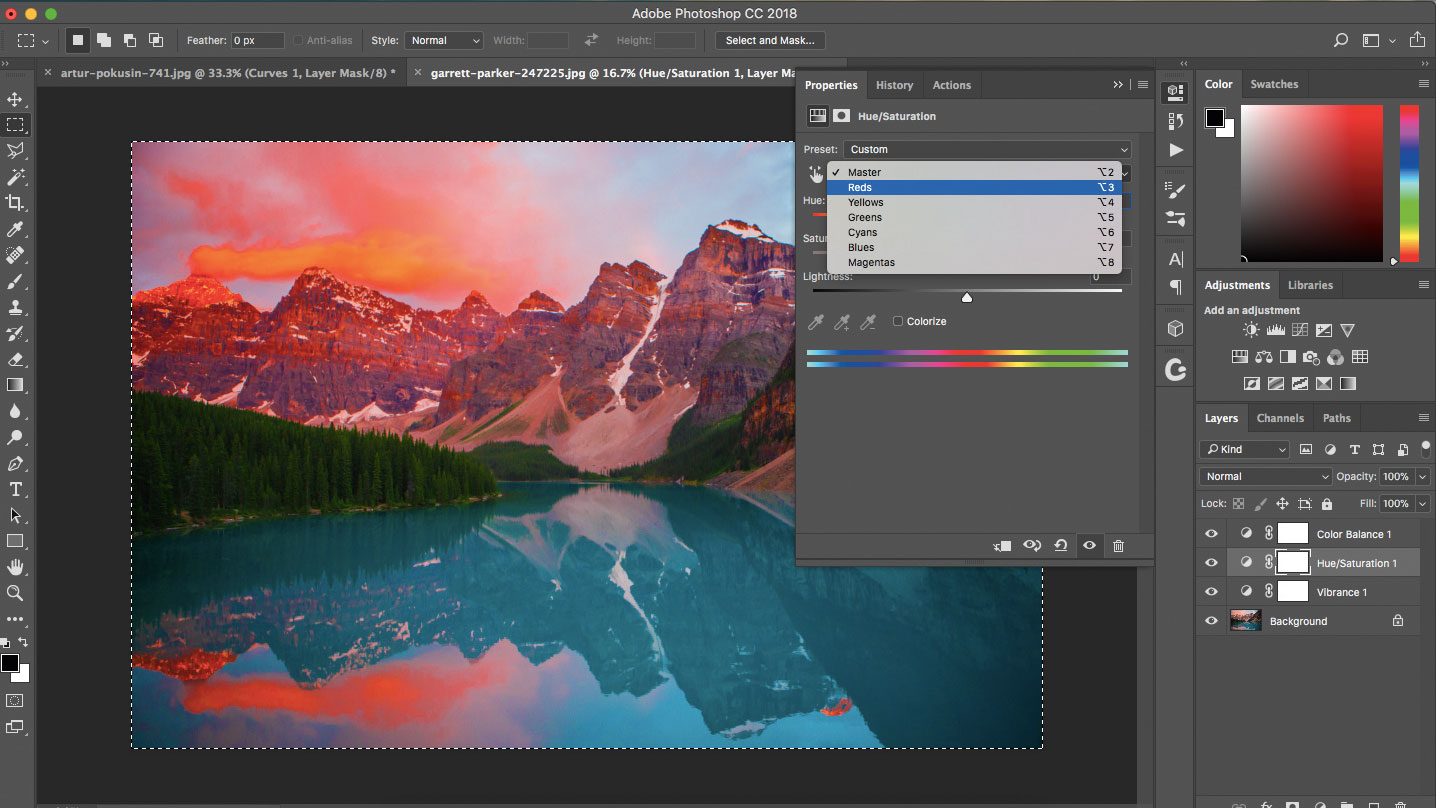
Once you’ve set the tone in your image, it’s time to edit the colour. While Photoshop can’t do anything too drastic with colour without the work looking distorted, it can provide useful edits to your image.
While there are plenty of tools in Photoshop to edit the colours in your images, there are just as many to take these effects even further. Black and White, Photo Filter and Selective Color are all tweaks that offer subtlety in your image, but can be vital for finalising the overall look.
04. Use the Hue/Saturation tool
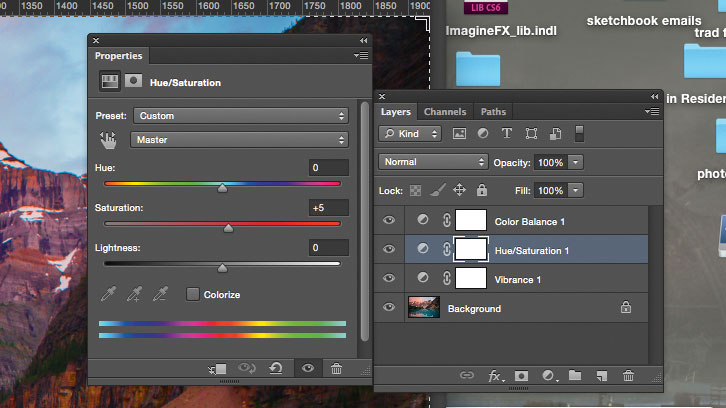
The Color Balance is similar to the Curves tool, only it provides a far more colour-centric edit, rather than one based on the tone of your picture.
The Hue Saturation tool can take individual shades to task with its drop-down menu, and is capable of editing the hue, saturation or lightness of any colour you choose.
05. Adjust the Vibrance in your image
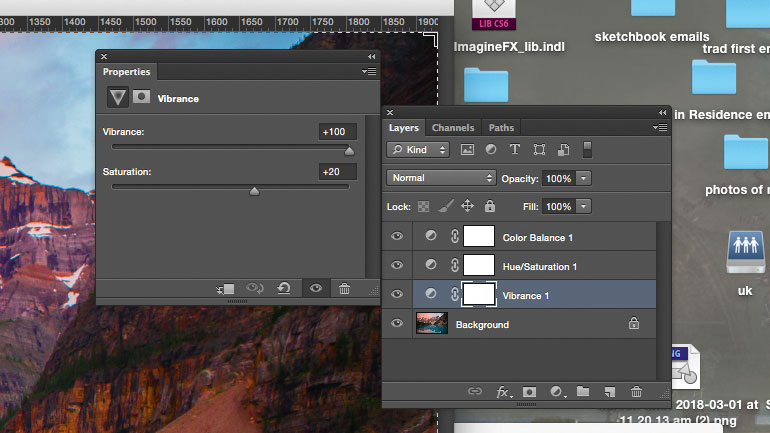
Increase the Vibrance of your image without altering the Saturation with the Vibrance adjustment. This is great as a finishing touch to your artwork, because it can make your colours pop even further.
06. Tweak the shades in your image
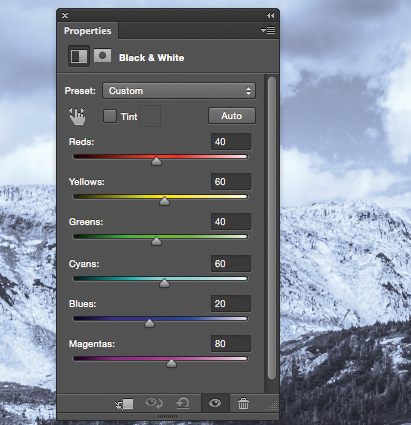
Black and White simply desaturates your image, but the adjustment comes in the form of sliders that offer you the ability to tweak the tones of each shade in your image.
07. Adjust some colours but not others
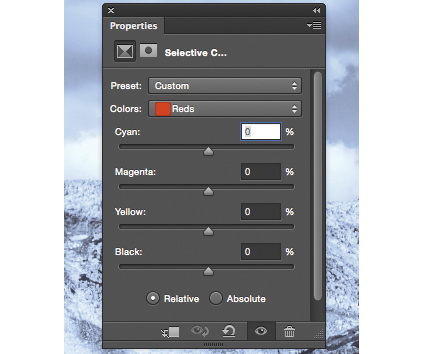
If you wish to make one particularly shade stand out from the rest, then the Selective Color adjustment is perhaps the easiest way to do that. It gives you sliders to adjust, and is simple to use.
08. Create a warming or cooling effect
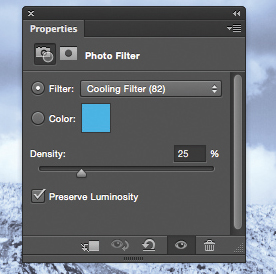
The Photo Filter tool creates a subtle warming or cooling effect, or a tint of a custom colour. This is useful for applying to subjects in a painting, to make them stand out from their backgrounds.
Next page: Create comic book effects and apply filters

Thank you for reading 5 articles this month* Join now for unlimited access
Enjoy your first month for just £1 / $1 / €1
*Read 5 free articles per month without a subscription

Join now for unlimited access
Try first month for just £1 / $1 / €1
Get the Creative Bloq Newsletter
Daily design news, reviews, how-tos and more, as picked by the editors.

Mark is the former techniques editor at Photoshop Creative magazine. He uses Photoshop almost exclusively, and has been using the software for over a decade.
