Supercharge SVG animations with GSAP
Learn how to use GreenSock to create an animated SVG banner.
The era of Flash banners is coming to an end, and it's time for a better replacement. HTML5 animations are the perfect successor, especially considering how modern browsers handle and optimise animations created using JavaScript and CSS.
SVG also makes an excellent tool for creating banners. By animating the content of SVG images, you can create appealing animations that look great on all screen resolutions. In this article we're going to animate an SVG banner using JavaScript.
For a roundup of other helpful web design tools check out our guides to the best website builder and top cloud storage. Creating a complex site? Get your web hosting right.
What is GSAP?
The GreenSock Animation Platform (GSAP) is a suite of tools for creating scripted animations, and it is one of the most powerful JS animation libraries available today. I don't work for GreenSock nor have they paid me to write this article. I just love the library and highly recommend it for the great features it offers. GSAP has been around for a long time and comes with a mature API that covers the vast majority of our animation use cases.
GSAP is created with a huge emphasis on performance and optimisation, making it one of the fastest animation libraries (it's up to 20 times faster than jQuery). Even Google developers recommend GSAP for JavaScript-based animations.
GSAP's also solves browser compatibility issues, so you don't have to fret about browser prefixes, bugs or property inconsistencies. It handles all the cross-browser bits for you under the hood.
The number one strength of GSAP is its animation sequencing capabilities. You can create individual tweens to animate just about any property of an element. You can also chain tweens into a timeline, making it simple to control them as a whole and precisely manage their timing in relation to each other. You can even nest timelines inside other timelines, as deeply as you want.

GSAP comes with core tools, and there are additional plugins that enable you to extend its functionality. You only need to add the plugins required for your particular project, thus maintaining as small a file size as possible.
GSAP's TweenMax is a full-featured tool that handles the animation of any property over time, in addition to providing extra functionality by including some of GSAP's utility plugins by default. The focus is on being full-featured rather than lightweight. TweenMax also includes all the timeline sequencing and controlling capabilities we’ll be using throughout this tutorial.
GSAP can be configured to work with the selector engine of your choice – it will even fall back to document. querySelectorAll() if you prefer vanilla JavaScript. So, unlike many other animation libraries, it has zero dependencies. Now you're (hopefully) sold on GSAP's superpowers, let's put it to practice and see how easy it is to create animated banners with it.
Prepping the assets
For this tutorial, we'll be animating a (modified) banner originally designed by Freepik. The image below shows the four 'screens' of the banner. We'll be animating from one to another in order to create a complex overall animation.

By default, all screens are visible inside the banner, stacked on top of each other. Using GSAP, the elements are hidden, then animated into view and out again so the elements on the following screen can animate in. We will be breaking the animation down into individual tweens, combined into timelines (one for each screen) that are then added into one master timeline for the whole banner.
First, we need to include TweenMax in our page. We can load it from a CDN:
<script src="http://cdnjs.cloudflare.com/ajax/libs/gsap/ 1.17.0/TweenMax.min.js"></script>Next, we set the visibility of the SVG to hidden. This is something you will find yourself doing often. Because the animations will only start after the script is loaded, doing this helps us avoid a short 'flash' of the banner assets before the animation starts.
svg { visibility: hidden; }We will unhide the SVG again at the beginning of the script, right before we run the animations.
GSAP's tweening methods
To create a simple tween you can use one of GSAP's methods: from(), to() or fromTo(). An example of these being used to animate an element might look like this:
TweenMax.from('#element', duration, {property: value})
TweenMax.to('#element', duration, {property: value})
The from() method basically tweens backwards – you define the beginning values (in the tween) and the current values are used as the destination values. This is great for doing things like animating objects onto the screen, because you can set them up the way you want them to look at the end of the tween, and then animate in from elsewhere. This is exactly what we are going to do for our banner screens. The to() method will animate the target element from its current state to the destination values you define. Hopefully, fromTo() is now self-explanatory.
These methods are used to define a single tween (which might be animating multiple properties). These tweens can then be appended to one timeline so they execute sequentially:
var tl = new TimelineMax(); /* create a timeline */
tl.from('#element', duration, {property: value})
.from('#element', duration, {anotherProperty: value, ease: easingFunction})
.to('#anotherElement', duration, {someProperty: value, someOtherProperty: value, delay: value})
You can add as many tweens as you want and those tweens can be applied to one or more elements. The timeline will play these tweens in the order you specify. The more complex your animations, the more scenes they will include. Each scene would be a series of 'micro' animations (the tweens) that happen at some point along the main timeline. It is possible to have tweens overlap and play relative to each other's time.
You can also combine timelines into one master timeline. This is achieved by using TimelineMax's add() method to literally add the timelines into the master timeline. These timelines can then be controlled just like individual tweens can.
For our animated banner, we will create four different timelines (one for each screen), and then these four timelines will be combined into one master timeline:
var master_tl = new TimelineMax();
master_tl.from('svg', .2, {autoAlpha: 0}) /* show the hidden SVG first */
.add(animateScreen1())
.add(animateScreen2())
.add(animateScreen3())
.add(animateScreen4());
Each of the functions inside the add() method will be used to define and return a timeline, which makes this sequencing possible. The autoAlpha property is the same thing as opacity except that when the value hits 0, the visibility property will be set to hidden in order to improve browser rendering performance and prevent clicks or interactivity on the target.
Animating elements into view
We want to animate the screens into view so that they appear as if they were initially off-canvas. We’ll be using GSAP's from() method to define where they will animate from. Let's start by slide-fading in the text from the left.
First, we create and return a timeline inside the animateScreen1() function, then we add to it the tween that will animate the text into view. You need to make sure you give the elements you want to animate proper class names and/or IDs for reference.
function animateScreen1() {
var tl = new TimelineMax();
tl.from('#Banner1-text', .6, {opacity: 0, xPercent: "-100%", ease: Power3.easeOut})
return tl;
}
The text is animated in from a -100% position (which means it is translated to the left, outside the banner's visible area) and opacity value 0. We'll get to the easing function part later.
Instead of translateX and translateY, GSAP uses x, y and xPercent and yPercent to apply a translation to an element. You can learn about the difference between them in this video tutorial from Petr Tichy or this blog post from GreenSock.
Synchronising tweens
We want to fade the world map into view at the same time the text animates in. This is possible by using 'labels' inside the timeline. A label defines a point in time when the animation will start, and can be used in multiple tweens inside the timeline in order to play those tweens at the same time.
tl.from('#Banner1-text', .6, {opacity: 0, xPercent: "-100%", ease: Power3.easeOut}, "first")
.from('#Banner-world-map', 1, {opacity: 0}, "first")
You can call the label anything you like. Here, we've chosen "first" because it's the first point in time, so to speak.
GSAP's labels can also be relative: you can use a label that specifies when to start a tween relative to the preceding tween. For example, you could use a "+=1" label that indicates that the current tween (or timeline) should start animating one second after the preceding one finishes.
Staggering animations
If you want to apply the same animation to multiple elements in sequence, you can leverage GSAP's staggering functions. This saves you from writing multiple instances of the tween for all those different elements.
In the first screen, there are two sets of icons: a monochrome set and a coloured set. Each set is a group (<g>) which in turn contains other groups, one for each icon's contents. We will use the staggerFrom() method to define a tween that will be applied to icons in each group. This method will 'pop' the icons in one after the other:
.staggerFrom("#monochrome-icons > g", .2, {scale: "0", opacity: "0", transformOrigin: "50% 50%"}, 0.1, "second")The numerical value right before the label (here "second") is the stagger value. This indicates the amount of time in seconds by which to stagger the start of each tween.
Specifying easing functions
When the second screen is to be animated into view, the function responsible for that animation first needs to remove the elements of the previous screen. The second animation will be defined in the animateScreen2() function, and will use staggerTo() to animate the first screen's elements out:
function animateScreen2() {
var tl = new TimelineMax();
//start by removing scene 1 elements
tl.staggerTo("#monochrome-icons, #colored-icons > g, #mobile, #tablet, #desktop", 0.3, {x:"+=200", autoAlpha:0, ease:Power2.easeIn}, 0.03)
.staggerTo('#Banner1-manage, #Banner1-projects, #Banner1-text', 0.5, {attr:{x:-200}, autoAlpha:0, ease:Power2.easeIn}, 0.1, "-=0.5")
.to('#Banner-bg', .6, {fill: "#D1F2F8"}, "-=0.2")
//animate the second scene
.add("first", "-=0.6")
....
tl.delay(.5);
return tl;
}
The easing function specified for the ease property (Power2.easeIn) is used to create more elasticity, thus adding to the overall fluid effect. GSAP comes with a big bunch of built-in easing functions. Learn all about them in the docs.
The tl.delay(.5) part is there to delay the execution of the animation. The reason we're delaying it is to give the user some time to read the contents of the first scene before we get to the other. The banner would be useless if the animations stood in the way of the message being read. .add("first", "-=0.6") enables us to create overlap by tightening the time between the previous and following tween.
Specifying SVG transform origins
The code for the third screen looks similar to that of the previous screens, with the exception of a new property that is used to animate the clock's hour and minute hands:
function animateScreen3(){
var tl = new TimelineMax();
tl. ...
.from('#hours', 2.4, {rotation: "360", svgOrigin: "496.5 53.2", ease: Power0.easeNone}, "first")
.from('#minutes', .6, {rotation: "360", svgOrigin: "496.5 53.2", ease: Power0.easeNone, repeat: 3}, "first")
return tl;
}
You can specify the transform origin of an SVG element using either a percentage value (relative to the element's bounding box) or an absolute value (relative to the entire SVG canvas). The latter is specified using the svgOrigin property. Sometimes it can be useful to use svgOrigin instead of transformOrigin.
Since both clock hands were being animated relative to the same point on the canvas, I've specified the coordinates of that point as the transform origin for both of them.
Using Bézier tweens
In the last screen, we have a line of text that is divided into multiple <tspan> elements – one wrapping each word, and a call-to-action. The best we can do here is to animate the visibility of the words.
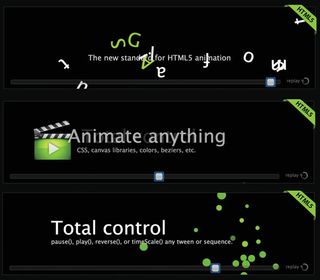
That said, if you are creating an HTML5 banner that animates HTML text, you can create extremely impressive text animations using GSAP's plugins. GSAP's homepage banner (at the bottom of the facing page) is a great example of that. You can check its code out here.
To create a wiggly effect for the call to action button, we want to rotate it to the left and right a few times in a row. Instead of using multiple rotation tweens, we can use the Bézier plugin to move the values through a certain set smoothly, thus avoiding the jerky effect that could result from individual tweens.
.to('#call-to-action', 0.9, {transformOrigin: "50% 200%", bezier:[{rotation:-10},{rotation:8},{rotation:-5},{rotation:3},{rotation:0}], ease:Power2.easeInOut}, "+=0.3")Provide the bezier object with an array of values and it will animate through them smoothly. Could it get any simpler?
Summing up
GSAP's powers really shine when you start creating sequenced, complex animations. All its sequencing and time control features make it an indispensable tool in our animation toolkit today. So go ahead, take GreenSock for a ride and propel your animation powers to the next level.
Here's the finished animated banner on Codepen.
This article was originally published in issue 273 of net magazine.

Do you want to find out more about SVG animations and GSAP? Interactive SVG specialist Chris Gannon will present a deep dive into the GreenSock Animation Platform at Generate London on 21/22 September, a two-day/one-track conference also featuring Anton & Irene, Aaron Gustafson, Léonie Watson, Steve Fisher and many more great speakers. Book your ticket today!
Related articles:

Thank you for reading 5 articles this month* Join now for unlimited access
Enjoy your first month for just £1 / $1 / €1
*Read 5 free articles per month without a subscription

Join now for unlimited access
Try first month for just £1 / $1 / €1
Get the Creative Bloq Newsletter
Daily design news, reviews, how-tos and more, as picked by the editors.
