How to quickly prototype a site and test it online
Using Photoshop CC, Illustrator CC and Muse CC, Chris Kellett shows you how to quickly prototype a site without writing a single line of code.
Adobe Muse CC is a web design and prototyping tool predominately aimed at graphic or print designers who want to quickly design sites or get an idea across to a developer or web designer.
The beauty of Muse is that you don’t have to even know a line of code to get creating for the web. Of course we don’t recommend this - but if you’re strapped for time it can provide a great way to get a site idea online.
Generator technology
Muse CC, of course, integrates perfectly with the likes of Photoshop CC and Illustrator CC, and with the new Generator technology in Photoshop you can easily shift your assets from the image-editing application into Muse with very little effort indeed.
Muse CC has Edge Web Fonts and Typekit integration as well - meaning you can very quickly include stylish web fonts. It’s all part of a Creative Cloud membership.
In this tutorial, we’ll look at a common workflow - from Illustrator to Photoshop to Muse. We’ll also look at how to add simple widgets, such as forms, and use web fonts. Finally, you’ll discover how easy it is to publish using Muse CC and your Creative Cloud membership. Whilst Muse CC won’t be your go-to web design tool all the time, for quick sites and prototypes it provides a neat solution for any designer wanting to get something online sharpish…
01. Build your basic layout in Illustrator
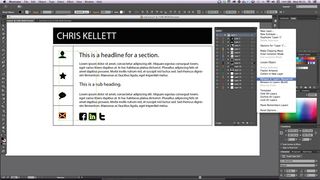
Our starting point for this workflow tutorial will be Adobe Illustrator CC, where we will create our basic layout and icons. Once you have created your layout, select Release to Layers (Sequence) from the Layers drop-down menu. This will help us when we export the designs to Photoshop.
02. Finish the design in Photoshop
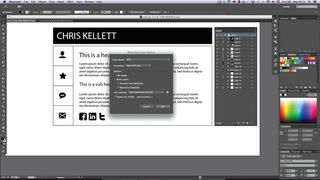
Once you’re happy with the basic style of your layout and icons, we are going to export the design into Photoshop, where we will complete the look and feel. In the first step we converted the Illustrator design into multiple layers, so when we open the file we will have all our layers intact.
Get the Creative Bloq Newsletter
Daily design news, reviews, how-tos and more, as picked by the editors.
03. Name your layers
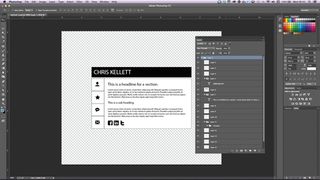
When your design is complete, it’s time to name up your layers correctly so that we can take advantage of the new Generator tool in Photoshop CC. Name the layers or layer groups with the appropriate extension denoting the type of file you wish theme to be. Make sure there are no spaces - use underscores or hyphens instead.
04. Export your assets
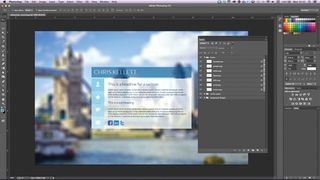
With all layers and layer groups named up, go to File>Generate>Image Assets, and follow the prompts to save the files. Save the PSD file as well. Generator is a new tool released as a free update for Photoshop CC users that can be used to dynamically export assets from your projects as individual image files.
05. Move into Muse
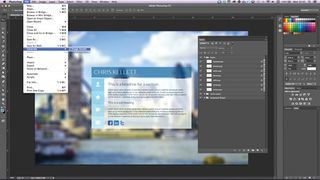
Now that you have prepared your assets, it’s time to go ahead and fire up Adobe Muse CC. In Plan view, open the master page, select the Browser Fill option and choose the PSD file you just saved. Next, select Composite from the options, set the Fill colour to none and switch off any borders.
06. Add the Featured News Composition widget
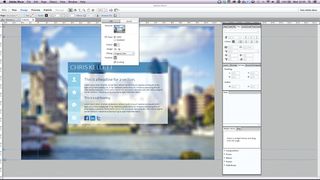
Return back to Plan view and open the homepage. Select the Featured News Composition widget and set it up as displayed - the Options menu opens by default when a widget is added. Note that it’s a good idea to test what you’re doing as you’re going along using Muse CC’s Preview mode.
07. Choose your fonts
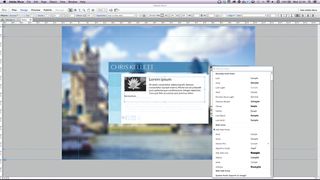
Click on Trigger to activate a target section of the widget. Select the content with the Text tool, then with the Font menu open (found in the Control panel or Text panel), choose Web Fonts and go to Add Fonts. This will open the Typekit panel. Select your font. Change the font in each of the text panels.
08. Add your icons
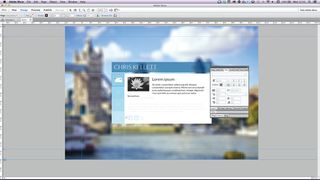
The widget should look like the image pictured here. Let’s now add the icons we designed in step one. Go to File>Place, and select your icons and logo. Next, load the placement gun in the order in which you wish to place the files onto your page. This will help speed things up a little, improving your workflow.
09. Changing states
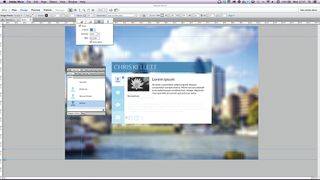
Use the States panel to change the Normal, Rollover and Active states of each of the widget’s triggers. The state of all elements within the trigger area are affected by the trigger area. Change the colour of the PNG icons for each state with the Effects tool.
10. Style the header
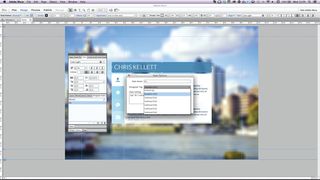
For your header, select the Type tool and draw a rectangle out to the appropriate size that you want your header to be. Now use these settings to style your text. Select the text box, go to the Paragraph Styles panel and click on the new style icon. Select H1 from the list and call the style ‘H1’.
11. Add a Simple Form widget
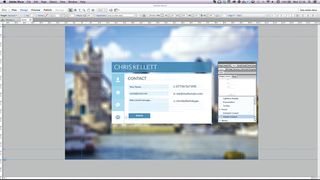
Save your file at this point. Select the Contact “Trigger” and delete the content from the Target panel. Open the Widgets panel and drag a Simple Form widget into place. Using the States panel, select the different parts of the form and style them to look like the image show here.
12. Select your background image
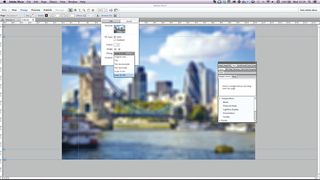
Go back to Plan view and select the page master, then select the Browser Fill and trash the image. While you’re still in the Browser Fill, load the background-fill.jpg layer, centre and scale it to ensure that the background image fills the browser.
13. Making sure it works
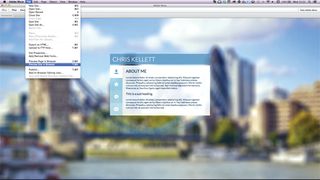
Okay, now it’s time to make sure everything we’ve done works as planned. Muse includes a built-in Preview mode that enables you to do just this. Hit the Preview tab and hopefully everything functions as you intended. Also, it’s a good idea to make sure you test the site in a browser (using the File>Preview Site In Browser command).
14. Publish the site
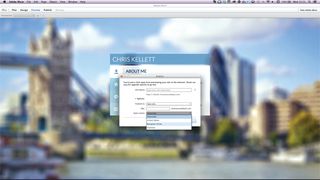
To publish the site using Business Catalyst Services, hit the Publish button. Enter a name for the test website, choose where you want it to be hosted geographically and click the OK button when it’s highlighted. Your website will be uploaded and, once complete, will open in the browser.
15. Online editing
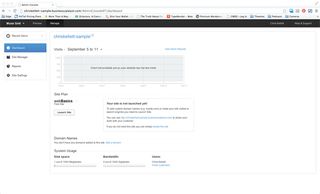
For any alterations, simply make them, hit Publish again and the site will upload only items that have changed. Clicking the Manage button opens up the Business Catalyst Dash where you can take the site live and use the online content editor. (Note that online editing is only available with Adobe Business Catalyst Hosting.)
16. Other hosting options
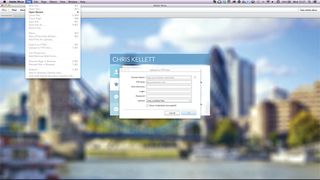
To upload the site to your own domain with hosting other then Business Catalyst you will need your FTP details. Enter the details into the FTP manager found in File> Upload with FTP. Once entered, use this option to republish the site after making any alterations.
17. Using your own FTP app
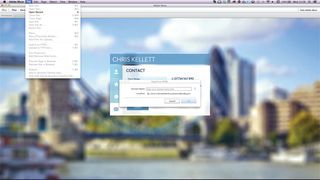
If you want to use your own FTP application to upload your files, then choose the File>Export as HTML option to save the compiled site to your computer. Then connect to your site using your FTP application of choice as normal.
18. Complete!
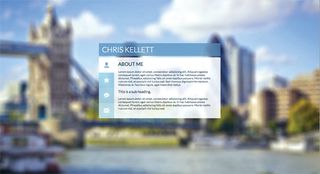
Great - your business card holding page is complete in record time using Adobe Creative Cloud’s Illustrator, Photoshop, Muse, Typekit and Business Catalyst. It really is that simple - and all without having to write a line of code.
This article was originally published in The Ultimate Guide To Adobe Creative Cloud.
Now read these:
- Designers speak out about Adobe's Creative Cloud
- New tools in Adobe Creative Cloud: 12 revealing videos
- Free Photoshop actions to create stunning effects

Thank you for reading 5 articles this month* Join now for unlimited access
Enjoy your first month for just £1 / $1 / €1
*Read 5 free articles per month without a subscription

Join now for unlimited access
Try first month for just £1 / $1 / €1
The Creative Bloq team is made up of a group of design fans, and has changed and evolved since Creative Bloq began back in 2012. The current website team consists of eight full-time members of staff: Editor Georgia Coggan, Deputy Editor Rosie Hilder, Ecommerce Editor Beren Neale, Senior News Editor Daniel Piper, Editor, Digital Art and 3D Ian Dean, Tech Reviews Editor Erlingur Einarsson, Ecommerce Writer Beth Nicholls and Staff Writer Natalie Fear, as well as a roster of freelancers from around the world. The ImagineFX magazine team also pitch in, ensuring that content from leading digital art publication ImagineFX is represented on Creative Bloq.
