How to create website animations
Ray Villalobos explains how to pin elements, create tweens and build scroll-based animations.
One of my favourite trends in web design is for sites to transcend two-dimensional, static layouts by adding transitions and animations. When it's tastefully done, it can enable us to add visual cues that help the viewer focus on areas of interest.
Peripheral vision helps guide our eye movements so the fovea (the part of the eye that perceives the most detail) can land in the appropriate place. It turns out our eyes, and specifically our peripheral vision, are extremely tuned in to anything that moves, and are likely to draw our attention to those movements. So animation isn't just a fancy way of adding noise to designs. It can be a tool to help people focus on what's important, which is what we are trying to accomplish as designers.
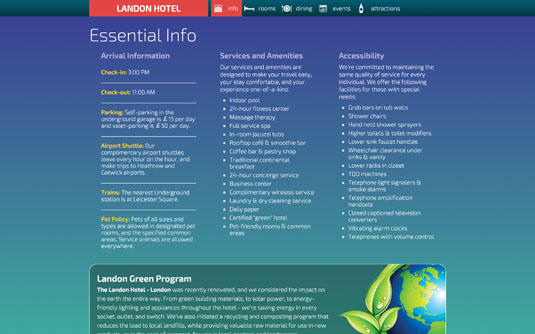
In this tutorial, I'll show you how to add animation effects to a single-page site for a fictitious London hotel called the Landon Hotel. I'll walk through the main design patterns and code you need to master for common single-page animations, including how to pin your navigation, control animations with the mouse scroller, and create tween-based animations. For this, we'll use JavaScript library ScrollMagic.
Animation options
Practically, there are two ways of adding animations to web layouts: we can do it through CSS or through JavaScript. For simple transitions, like the type of things you would do for different buttons or menu states, CSS works really well.
However, for maximum flexibility JavaScript is the best option. JavaScript allows you to do things that CSS just wasn't built for: physics-based motion, animating scroll position and so on. The problem with JavaScript is that it's more complex and harder to learn, which is where animation frameworks come in. They make the job of building animation simple enough for even a new designer to handle.
However, the number of frameworks on offer can be overwhelming. Choices include libraries like Skrollr, Scrollorama, TweenJS and ScrollMagic. Most of these libraries accomplish the same tasks, but some, like Skrollr, like to add instructions to the HTML markup.
<div id="bg1" data-0="background-position:0px 0px;" data-end="background-position:-500px -10000px;"></div>On the one hand, this makes it easier to learn and do animations. However, it also creates a dirtier style of markup. There's nothing wrong with that approach, especially if you're working on simpler, single-page designs that don't require a lot of updating. However, if you'd rather work with cleaner markup, then a library like ScrollMagic might be a better option.
Daily design news, reviews, how-tos and more, as picked by the editors.
Introducing ScrollMagic
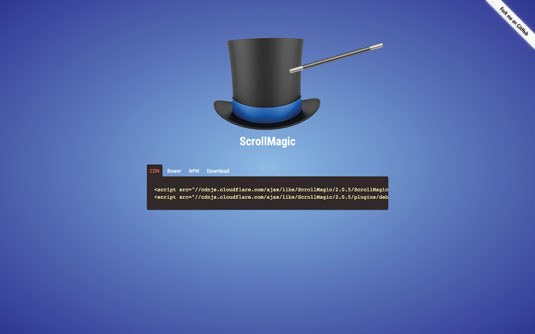
ScrollMagic makes adding scrolling effects and interactions a cinch by creating a consistent language that's easy to learn. With it, you can easily create scroll-based animation, pin elements to the DOM, toggle CSS and tie elements to a visitor's scroll position.
ScrollMagic can use the GreenSock animation platform (GSAP). This gives it a rich library of functions that makes it more capable than regular CSS, means the animations are ultra-fast, and ensures it's compatible with older browsers. It is possible to use GreenSock without ScrollMagic, but as you'll see, ScrollMagic packages the GSAP in a way that makes it easy to use and perfect for scrolling effects.
Although there is the option of using ScrollMagic with other, smaller plugins, such as Velocity.js, it currently doesn't offer all of the functionality available through GSAP. You can even choose to sidestep separate libraries altogether and handle animations simply by toggling CSS classes.
Installing ScrollMagic
Let's start off by adding ScrollMagic and its dependencies, before we go on to create our controller. There are several ways to add ScrollMagic to your documents. Although you can download and install the library manually through GitHub, perhaps the easiest approach is to use CDN (Content Delivery Network) links or install the library through NPM (simply type in npm install ScrollMagic) or Bower (bower install scroll magic).
<script src="//cdnjs.cloudflare.com/ajax/libs/
ScrollMagic/2.0.5/ScrollMagic.min.js"></script>
Once you've installed the main library, you can add extra plugins. At this point, you'll need to decide how you want to handle animations. If you're going to manage them through GSAP, you'll have to download and install that library. Again you can look at the different options on the GreenSock site, or use a handy CDN link.
<script src="http://cdnjs.cloudflare.com/ajax/libs/
gsap/1.17.0/TweenMax.min.js"></script> 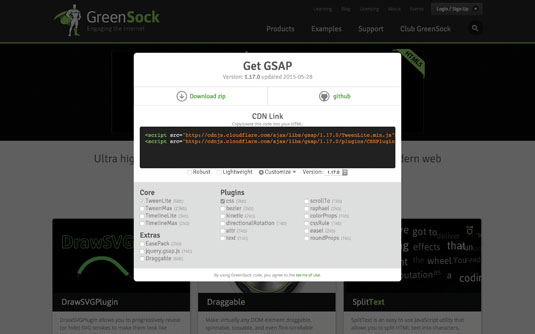
The GSAP library has comes in a few different flavours, the most common of which is the TweenMax library. It's very comprehensive, but also quite big.
Setting up your controller
In order to achieve animations with ScrollMagic, you'll need to create a controller object that will hold all of the scenes for your animation. The most basic way to set up a controller is by creating an instance of the ScrollMagic object, like so:
var controller = new ScrollMagic();There is usually one controller per page, but you can set up different controllers for different scenes if you want. The job of your controller is to establish the default behaviour and act as a container for your scenes. You can pass along an object and set up global options for how the scenes behave in your projects. My controller looks like this:
//set up ScrollMagic

var controller = new ScrollMagic({
  globalSceneOptions: {
    triggerHook: 'onLeave'

  }

});
You can also create parameters such as the container, the scroll mode, refreshInterval and others (see here). Most of the defaults will work fine, but the globalSceneOptions – which I'm using in here – lets you choose the default behaviour of scenes when they are created.
After you set up the default controller, your next job is to create your scenes. For traditional single-page layouts, you'll need to master three essential design patterns: pinning, scrolling and tweens. Most animation effects are the result of a combination of these three techniques.
Pinning an element
The easiest pattern to learn is pinning. When a user scrolls to a certain position on your page, you might want to prevent an item from scrolling for a period of time, or based on a particular trigger element. To accomplish this, you create a ScrollMagic scene and pass along some parameters, set the item you want to pin the scene to, then add it to your controller.
Here's how I pin my navigation, which has an ID of #nav.
//pin the navigation
var pin = new ScrollScene({
 triggerElement: '#nav',

}).setPin('#nav').addTo(controller);
Create the scene (or at the very least specify the element that triggers the effect), set the element you want to control – in this case pin – and then add the animation to the controller we created earlier. This sequence of events will be the same for all other animations. Although there are other options you can pass along, we're passing along just one for now.
triggerElement is the DOM object that defines the start of the scene. If you don't specify one, the animation will play as soon as the page loads. In our case, we want the pinning to start as soon as the #nav ID passes through our scroll.
We also passed another option implicitly, because we had already set it up as a scene default on our controller through an option called globalSceneOptions. The triggerHook determines the position of the trigger in relation to the viewport window.
This can be a number between zero and one, but you can also use some text as constants: onEnter, onCenter (the default) or onLeave. We've chosen to use onLeave, which means the trigger will activate when the element (in this case our navigation) leaves our trigger.
Creating a tween
Next, let's take a look at how to create a simple tween effect. The steps are similar to doing a pin, except that now we're going to add a TweenMax effect. Let's take care of that first.
var attractionstween = TweenMax.

staggerFromTo('#attractions article', 1, { opacity: 0, scale: 0 },

{delay: 1, opacity: 1, scale: 1, ease: Back.easeOut});
We're going to create our animation effect by assigning it to a variable and using TweenMax's staggerFromTo (more here) method. TweenMax has a comprehensive set of methods for animating DOM elements, including from(), fromTo() and staggerFrom().
We've chosen staggerFromTo because it's one of the more comprehensive options available. This method tweens an array of target elements from a common destination. Unlike other methods, it also allows us to stagger the start time of our animations.
This method is ideal for our example, because I want to create an animation that doesn't play right away. I want the viewers to see my London picture for a fraction of a second before they see the animation, otherwise the animation would prevent the viewer from seeing the full image.
The first thing we need to pass along is the item we want to animate: here, an article element inside our section, with an ID of #attractions. Next we pass along a number that specifies how long our animation should take (one second).
Now you need to pass along two animation objects. You can create these separately or pass along an object literal, like we've done here. If you're doing a one-off animation, it might be easier to use an object literal. Otherwise, create the animation separately in a variable and pass it along (you'll see me use that technique when we move on to scroll-based animation).
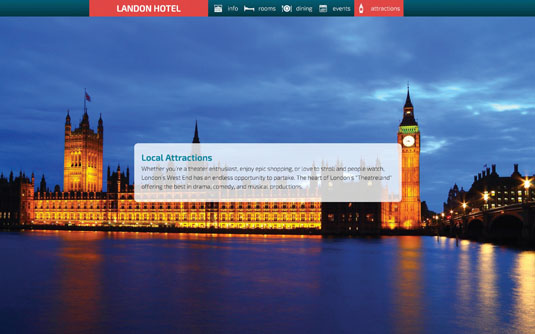
These two objects determine what gets animated between our two states. We're animating the opacity from totally transparent (0) to opaque (1), and the scale from invisible (0) to 100 per cent (1). In the second object, we can also pass along an easing function to use. This is the rate at which we want the animation to play. The rest is the same as what we did for our simple pin.
scene = new ScrollScene({

  triggerElement: '#attractions',

  offset: -topoffset

 }).setTween(attractionstween).addTo(controller);
Once again we create a scene, and pass along options. As we're doing a tween instead of a pin here, we'll use the setTween option. You can pass along a literal, but in this case it's easier to use the attractionstween variable we set up earlier. Then, just like with the pin, we add this scene to our controller.
You might notice I'm using a variable here called topoffset. That's because we've established a navigation element that is 43px tall. We have to pass that offset to our scene as it's defined at the top of our script (var topoffset = 43;), otherwise our tween would start at the wrong position.
Control animations by scrolling
Finally, let's take care of the trickiest of the three animations: controlling an animation using the scroller device on your mouse. The steps are the same, but the animation is going to be applied to different sections of our page.
As a result, it will be easier to create the sequence separately and apply it to multiple tweens. To do this, we'll create two separate variables: one that holds an object for the beginning state of the animation (roomOrigin) and one that holds the sequence for the ending state (roomDest).
var roomOrigin = {

bottom: -700,

opacity: 0,

scale: 0

};

var roomDest = {

repeat: 1,

yoyo: true,

bottom: 0,

opacity: 1,

scale: 1,

ease: Back.easeOut
This is what we did when we created a tween, with the exception that we're using two different attributes here. We're asking our animation to yoyo, which means the animation will play once normally, and then again in reverse. This combined with the repeat value of 1 will give our sequence the look of first appearing and then disappearing in reverse order.
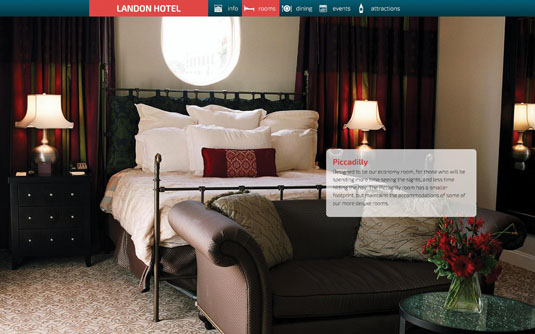
Once we've set up the animation, it's time to apply it to each of our room animations. The sequence is exactly the same for all of them and it's similar to what we did when we created the rest of our animations. However, this time we're using the variables roomOrigin and roomDest instead of object literals to keep things simpler.
First, of course, we need to add our TweenMax animation into a variable, making sure we target the right elements. In this example, I'll add the animation to the item with class of content and an ID of #westminster (one of our rooms).
var roomtween = TweenMax.staggerFromTo(

'#westminster .content',

1, roomOrigin, roomDest);
Then we create the scene so that our animation can play, and add it to our controller.
pin = new ScrollScene({

    triggerElement: '#westminster',

    offset: -topoffset,

    duration: 500

   }).setPin('#westminster')

    .setTween(roomtween)
    .addTo(controller);
You might be wondering what causes this animation to be controlled by the scrolling of your mouse as opposed to the tween, which plays after our trigger passes the top of our browser. The key is in the duration parameter we pass.
By setting the duration of this animation to 500, we're asking ScrollMagic's scene to play this animation over a 500px scroll. The length of this value controls the duration of our animation. If we set it to 0 (as we did in our tween), our animation will play after our trigger (although remember that in that case we also added a delay of one second through TweenMax).
Highlighting our nav
Besides my animation tips, you're going to need some additional code to take care of some utilities.
First, you'll need to be able to highlight your navigation, depending on where you are in your current layout. To do that, I'm going to use jQuery's scroll method to detect when the user has started to scroll the page.
$(window).scroll(function() {

}
Inside that, I want to detect the distance from the top of the page to our current position.
var windowpos = $(window).scrollTop() + topoffset;I'll also want to create a class called active, which gets injected into our navigation elements as the page scrolls through our layout. But first, if there are any other elements that are currently active, I'll want to remove those as I scroll into a new position.
$('nav li a').removeClass('active');

   if (windowpos > $('#hotelinfo').offset().top) {
    $('nav li a').removeClass('active');

    $('a[href$="#hotelinfo"]').addClass('active');

   } //windowpos

}); //window scroll
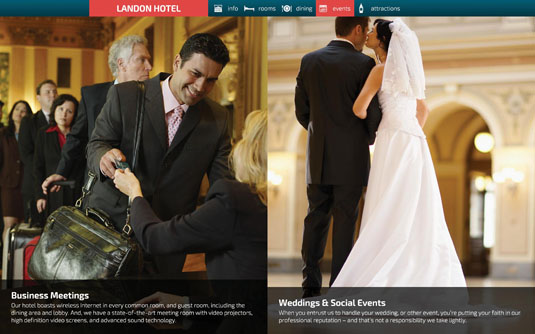
Once the position of the page passes one of our page sections (which I'm identifying with an ID of #hotelinfo in this instance), I want to inject the active class into the current link. I'm using jQuery's $ selector to look for any anchor tag with an ID matching our target.
Conclusion
Once you get the hang of these basic principles you'll be able to achieve just about any animation, scrolling effect, parallax move or anything else you can think of.
The principles remain the same for all different types of animation: set up a controller, set up a scene, establish your animation parameters with TweenMax and add them to a controller. The rest is just spit and polish, and the limit is totally up to you and your imagination.
This article originally appeared in issue 271 of net magazine.
Words: Ray Villalobos
Ray Villalobos is an educator specialising in frontend and full-stack JavaScript design and development.
Liked this? Read these!
- 5 steps for mastering web animation
- Free graphic design software available to you right now!
- Download the best free fonts

The Creative Bloq team is made up of a group of art and design enthusiasts, and has changed and evolved since Creative Bloq began back in 2012. The current website team consists of eight full-time members of staff: Editor Georgia Coggan, Deputy Editor Rosie Hilder, Ecommerce Editor Beren Neale, Senior News Editor Daniel Piper, Editor, Digital Art and 3D Ian Dean, Tech Reviews Editor Erlingur Einarsson, Ecommerce Writer Beth Nicholls and Staff Writer Natalie Fear, as well as a roster of freelancers from around the world. The ImagineFX magazine team also pitch in, ensuring that content from leading digital art publication ImagineFX is represented on Creative Bloq.
