Build a real-time team dashboard app (part 2)
Henrik Joreteg completes his guide to using Node.js and Backbone.js to build a team dashboard app that updates in real time. This time: the client-side work.
The days of having to refresh your browser to get the latest content are ending. As we're already seeing on Facebook, Gmail, GitHub and many other apps, content will update itself in real time.
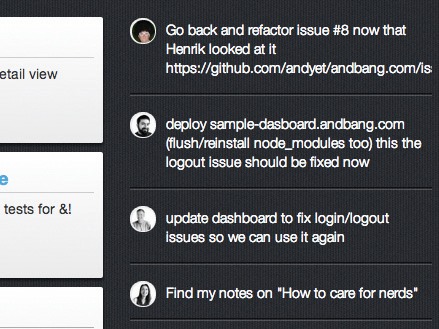
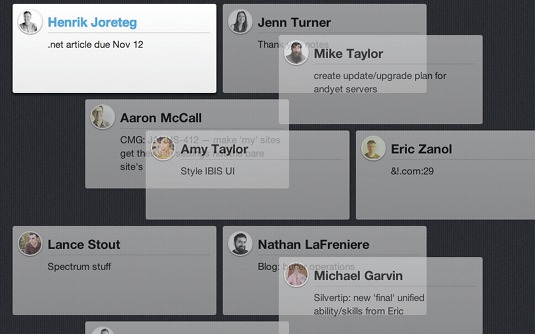
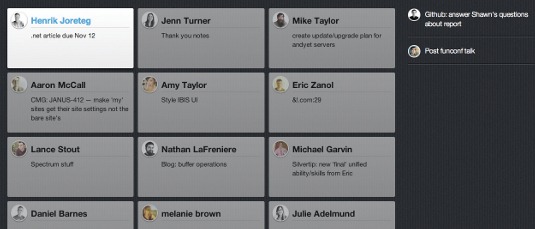
In this tutorial we'll be using the And Bang API to create a real-time team dashboard app, much like the Panic Status Board. The app will display a separate 'card' for each member of the team, showing how many tasks they've 'shipped' that day - all updated live, without the user having to refresh.
In part one I explained the process of setting up the server-side portion of the system. This issue, I'm going to be explaining how to build the client-side app. You can explore the code for this tutorial on GitHub.
Building the main controller
To create the app, we will be making use of Backbone.js. I like to start Backbone apps by creating one main application controller. This doesn't have to be Model: we just create a simple module that we'll atjavascript:void(0);tach to the browser window.
This will be the only global we create. The controller looks something like the following code block:
/*global window app */
var MainView = require('views/main'),
TeamModel = require('models/team'),
logger = require('andlog'),
Backbone = require('backbone'),
cookies = require('cookieReader'),
_ = require('underscore'),
API = require('andbang');
module.exports = {
blastoff: function (spec) {
var self = this;
this.api = new API();
this.team = new TeamModel();
this.view = new MainView({model: this.team});
this.api.on('*', _.bind(this.handleApiEvent, this));
this.token = cookies('accessToken');
this.api.validateToken(self.token);
this.api.once('ready', function (user) {
self.team.set('id', user.teams[0]);
self.team.members.fetch();
self.team.shippedTasks.fetch();
});
return this;
},
};
The blastoff function you see here is our entry point. It will create our data containers and render the main application view.
Get the Creative Bloq Newsletter
Daily design news, reviews, how-tos and more, as picked by the editors.
The launch sequence
Let's break down the code in our blastoff function:
this.api = new API();
this.team = new TeamModel();
this.view = new MainView({model: this.team});
First, we init the api module that we require-ed above. It will automatically establish an (unauthenticated) Socket.IO connection to the API server. Since this takes a bit of time, we want to start this process as soon as possible in our launch sequence.
Next, we create the team object that we'll use as our main container for all of the application data (aka 'state'). The team object is just a Backbone model with a few collections attached. More on that later. In addition, we init our main application view and pass it the team model that becomes its basis for knowing what else to render. The main app view renders itself as soon as the DOM is ready, so we don't need to worry about that here.
Next, we set up a handler for all of our API events. This is how we'll keep our client in sync when we get updates generated by activity in the API. We'll go into this in more detail later.
this.api.on('*', _.bind(this.handleApiEvent, this));
In order to identify ourselves to the API, we need to pass it the access token that we got by doing OAuth on the server. If you recall the server.js file, we passed the token to the client along with the HTML in the form of a token called accessToken. Using a little cookie-reader module we can read it and use it to log into the API:
this.token = cookies('accessToken');
this.api.validateToken(self.token);
When the token is validated, the API object emits a ready event that calls our callback with a user object containing details of who just logged in. This user object looks something like this:
{
firstName: "henrik",
lastName: "joreteg",
teams: ["47"]
}
As you can see, it includes an array of IDs for teams that we're a part of. For the purposes of this app, we'll just pick the first one and fetch our initial members and tasks data.
this.api.once('ready', function (user) {
self.team.set('id', user.teams[0]);
self.team.members.fetch();
self.team.shippedTasks.fetch();
});
It's generally good practice to make each model as self-managing as possible. Arguably, we could just have had the team know that it should fetch its own data as soon as we knew its ID. But doing it this way improves the legibility of the code: it's nice to be able to see that it's at this point we fetch more data.
The team model
Much of the data management is handled by the team model. There isn't space to reproduce the code in full here - so instead, take a look at the Readme file in the source files for this tutorial.
The team model contains two child collections: members, which contains member models for each person on our team, and shippedTasks, which stores models of tasks that have been completed.
The goal is to have our app automatically sort team members visually according to their status. If they're online and working, they should go at the top of the list; if they're online but not working, they come next; and if they're offline, we put them at the bottom.
Any time that order changes, rather than just having the team members' cards jump around, we want them to reposition smoothly in a grid. To accomplish this, we'll position the cards with position: absolute, apply CSS3 transitions, then use JS to calculate and set their top and left values to shuffle them around.
We're not going to try to maintain a certain order within the DOM or within the collection itself. Instead, we'll run an updateOrder function that will calculate what position each member should be in and set that position as the order property of that member. Each member view can listen for changes to its order property and position itself accordingly.
Within this team object, any time presence or activeTaskTitle changes on a member, or we add, remove or reset the collection, we want to re-run the updateOrder function to create a sorted array of members, based on whether they're online or have an active task.
To get the exact order that we want, we assign each member a point value - two points if they're online, plus one if they have an active task - and return that from the sortBy function. By sorting the point values from highest , we always have the members in this order:
- Online with an active task
- Online but no active task
- Offline but with an active task
- Offline with no active task
Then we loop through the array we just created and assign an order value for each. Here's the whole function:
updateOrder: function () {
var sorted = this.members.sortBy(function (member) {
var online = member.get('presence') === 'online' ? 2 : 0,
working = !!member.get('activeTask') ? 1 : 0;
return -(online + working);
});
sorted.forEach(function (member, index) {
member.set('order', index);
});
},
We also want to maintain a count for each member of how many tasks they've shipped that day, so we've also registered an updateShippedTotals handler that calculates that value for each member, each time something new gets added to the shippedTasks collection or the collection gets reset.
In addition, we create a function that gets called at a regular interval: its job is to set a string such as 'thursday' as the day attribute of team.
That way, if it changes, we reset our collection of shipped tasks. For the purposes of this app, we'll consider anything before 4am to be the same day - for many up-at-night coders, midnight is when they start hitting their stride.
The member model
Our member models are pretty straightforward. Again, there isn't room to print the code here in full, but you can see it in the Readme file in the download. We start by establishing a default value for number of things shipped. We also want to maintain a task title for each team member who is currently working on something.
When we initially requested the member data from the API we only got an activeTask attribute as an ID. So we register a handler that fetches the task title each time our activeTask value changes. It then sets it as a property directly on the model itself. This way, we should always be able to just render the activeTaskTitle.
In addition, we have a couple of convenience methods for retrieving a URL that we can use to get the user's avatar and their full name.
The main view
It's the main view's job to render everything in the <body> tag. In our app, we hand it the team model as its root model. Again, refer to the Readme file to see the code in full.
You'll notice that we start by registering some handlers for add and reset events for both shippedTasks and members. Shipped tasks are basically just a log. When we get new ones, we want to render a template for them and add it to the shippedContainer element.
Handling new members is a bit more complex, because we want to be able to store some additional logic in each member view to handle changes to the member objects. So for each of these we actually create a new MemberView and pass it the member object it represents. Then we render that view and append it to its container.
The member view
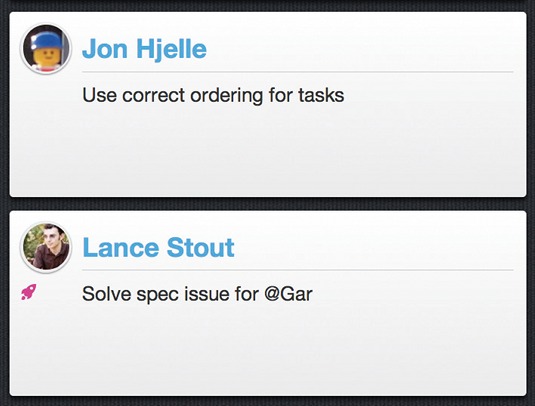
The member view contains a lot of what makes the app fun. It has a few specific tasks it needs to perform:
- Maintain its own physical width and position on the page
- Maintain a class of online or offline based on the user's presence
- Add/remove an active class on its container based on whether a user has an active task or not
- Draw one pink rocket for each shipped item
- Remove itself from the DOM if the member is removed
Once more, you can see the code in full in the Readme file. It starts with two declarative bindings. These are not part of Backbone.js, but if you look at the clientapp/views/base.js file, you'll see what they do: contentBindings keeps the property you enter bound to the selector you provide, and classBindings binds the property you provide as a class on whatever element selector you give it. In this case, an empty string means maintaining a class on this.el itself.
It's in handleChangeOrder that we get fancy. Any time this model's order attribute is set or the window is resized, we recalculate its physical size and position.
This set-up enables us to create an animated responsive layout: handy for an app that could be rendered on anything from the office's 73” LED display to someone's laptop. The code calculates an appropriate number of columns and appropriate cell widths and set the values directly on the element itself. In this way, we can get animation and tweening for free using CSS transitions.
We also bind a destroy method to our model that gets called if a model is removed. It unbinds any handlers and calls Backbone's remove method to remove this element from the DOM.
Wiring in events from the API
We still need to make sure that we properly handle updates we receive from the API. Luckily, this is quite simple. We'll make use of that wildcard event handler we talked about in our controller.
Look at the bottom of that controller and you'll see our handler. It looks like this:
handleApiEvent: function (eventtype, payload) {
if (payload && payload.crud && payload.category === 'team' && payload.
instance === app.team.id) {
payload.crud.forEach(function (item) {
var type = item.type,
model,
collection;
if (type === 'update') {
logger.log('got an update', item);
model = app.findModel(item.object, item.id);
if (model) {
model.set(item.data);
}
if (eventtype === 'shipTask' && item.object === 'task') {
app.team.shippedTasks.add(item.data);
}
} else if (type === 'create' && item.object === 'member') {
logger.log('got a create');
collection = app.findCollection(item.object);
if (collection) {
collection.add(item.data);
}
} else if (type === 'delete') {
logger.log('got a delete');
model = app.findModel(item.object, item.id);
if (model) {
model.collection.remove(model);
}
}
});
}
}
Since each event type that involves a modification of state for the team you're logged in as will include a crud attribute (the term stands for 'Create, Read, Update, Delete'), this is all that's required to keep all of our models in sync with what's going on in the rest of the team.
A typical event will look something like this:
{
"action": {
"when": "1352711565839",
"presence": "offline",
"who": "4"
},
"category": "team",
"instance": "1",
"crud": [
{
"id": "4",
"type": "update",
"object": "member",
"data": {
"presence": "offline"
}
}
],
"eventNumber": 19277
}
There is some metadata here, but for our purposes, the only thing we care about are the CRUD portions of the event. A given action by another member of your team could result in needing to make multiple data changes to keep the app in sync. CRUD events have the following attributes:
- type - for example, create, update or delete.
- object - the type of object being referred to. For example, task, member or team.
- id - the ID of the object being referred to.
- data - in the cases of create and update, the new properties.
For each incoming event, we loop through each item in the crud array and handle it. For create, we use the object type to look up the corresponding Backbone collection and simply add the contents of the data attribute to the collection. Assuming your app is configured properly, this will create a model and add it to the collection.
For delete, we use the object type and ID to look up the model and remove it from its collection. For update, we use the object type and ID to look up the model, then call set on that model with the contents of the data attributes.
Since, by default, you are subscribed to each team that you're on, we do a bit of checking to make sure that payload.category and payload.instance attributes match the team we're trying to update.
Another quirk for this particular use case is that we only care about shipped tasks. But shipping a task is not a create as far as the API is concerned, because the task already existed. So we have a special case inside our update to handle event type shipTask as a create event. With just these 20-odd lines of code, any changes that any other team members make will be reflected in our local model state.
Contact me on Twitter
By now, you should know how to build a simple, but very useful, real-time single-page app in Backbone.js. If you have any questions or feedback, I'm @HenrikJoreteg on Twitter. I'd love to hear from you.
Words: Henrik Joreteg
This article originally appeared in .net magazine issue 238.
Liked this? Read these!
- How to build an app: try these great tutorials
- Check out these top examples of JavaScript
- The best jQuery plugins humanity has to offer
Questions? Ask away in the comments!

Thank you for reading 5 articles this month* Join now for unlimited access
Enjoy your first month for just £1 / $1 / €1
*Read 5 free articles per month without a subscription

Join now for unlimited access
Try first month for just £1 / $1 / €1

The Creative Bloq team is made up of a group of art and design enthusiasts, and has changed and evolved since Creative Bloq began back in 2012. The current website team consists of eight full-time members of staff: Editor Georgia Coggan, Deputy Editor Rosie Hilder, Ecommerce Editor Beren Neale, Senior News Editor Daniel Piper, Editor, Digital Art and 3D Ian Dean, Tech Reviews Editor Erlingur Einarsson, Ecommerce Writer Beth Nicholls and Staff Writer Natalie Fear, as well as a roster of freelancers from around the world. The ImagineFX magazine team also pitch in, ensuring that content from leading digital art publication ImagineFX is represented on Creative Bloq.
