How to create digital destruction
Learn the core techniques to dynamically and realistically destroy a building for a VFX project.

Over the course of this 3d art tutorial, we will explore a part of the cmiVFX course, The Church Destruction Tactics. We'll be working on a high-end VFX scene, using several techniques to apply art-directed effects on a heavy film-quality destruction scenario of a church, with RealFlow 2015, as well as a variety of tools such as FumeFX, Particle Flow particles and 3ds Max.
We will demonstrate RealFlow's strong rigid and soft bodies sim tools, and its multijoint control system, to create high-detailed explosion and destruction scenes. We'll also generate smoke, debris, dust and impact effects.
Powerful simulations
RealFlow 2015 is a unique complete dynamics software, it's known for its powerful liquids simulation tools, but it has one of the best rigid, soft and elastic simulation environments too, and its stability, simplicity and solvers interactivity between each other, make it the best choice when it comes to simulating destruction scenes – as you will see in this tutorial.
The whole course at cmiVFX includes a complete model of the church, and other soft body and particles simulation in RealFlow, but here we'll be using a section of the model (which is enough for you to master these skills), and we've included more than two hours of high-quality video.
RealFlow has one of the best rigid, soft and elastic simulation environments
I'll begin by sharing how to set up a scene in RealFlow; set up the already fractured Church (the part which we will be working on in this tutorial) inside RealFlow, by grouping its parts, setting up pieces' properties, and establishing the right connections between them, as well as other simulation details.
You can download all of the work files, videos and set-up files that accompany this training from 3D World's online Vault. Throughout the tutorial I'll be referencing using these, so have them to hand. Special thanks to 3Quarter.ae, Artware Corp, cmiVFX, Fadi Wahbeh and Chris Maynard for the support and the materials used in this course; I hope you find it as much fun to follow as I did to create!
01. Set up the scene
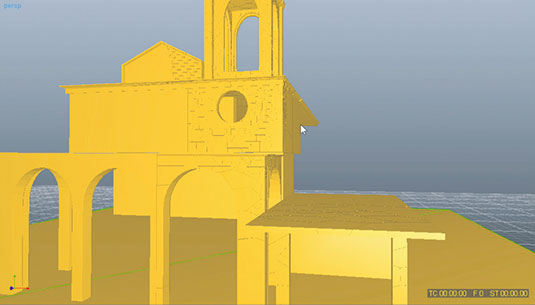
Open an empty scene in RealFlow and create a new project. Call it Church base then import the fractured church objects one by one from the Article Project Files>RealFlow>Objects From 3D folder. Import these as multibodies by right-clicking on the nodes and selecting Dope>Add>Obj>Multibody or import them all by using Import>Multibodies from folder. Also check the Preferences for correct axis and other simulating settings, FPS and steps.
Get the Creative Bloq Newsletter
Daily design news, reviews, how-tos and more, as picked by the editors.
02. Rename the objects
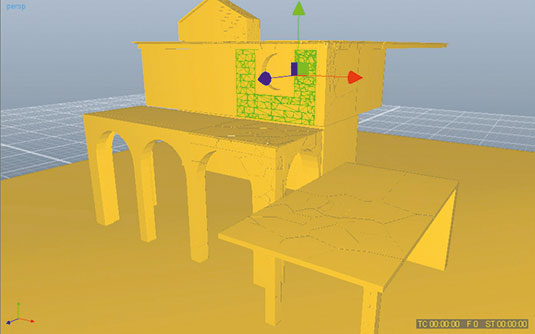
Start renaming the objects and define their nature. Some of those will be passive objects and some will be rigid body objects. You can define this by going Node params>Node>Dynamics. Also, try to put all the passive objects in one group, name it a passive group. The multibody object is a group made up of fractured objects itself and by encapsulating them together you can change their properties to make them easier to deal with later when simulating.
03. Set object properties
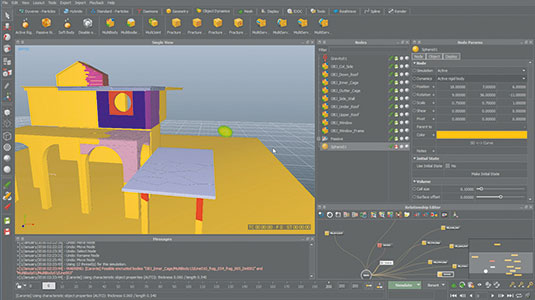
Change your objects' properties by setting up their densities, friction and elasticities. Doing this will determine their behaviours when they collide with other objects, and remember that you will be dealing with various substances and materials, and each has its own values. Create a little moving sphere, which should hit the edge of the church section we are working on here. Make this a rigid body too and give it a suitable initial velocity from Rigid Body>Velocity.
04. Control break points
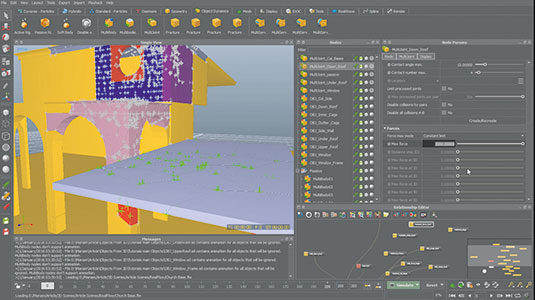
To control objects' break points, collisions and strength – to have the full control over their collapse after getting the impact – you must establish a set of connections and joins between the fractured parts, as well as inside each multibody object. You can set up new multijoints by right-clicking on the nodes, and selecting Dope>Add>Obj>MultiJoint. Choose the objects you will need to join together, adding different settings for each node and connection.
05. Set multijoints
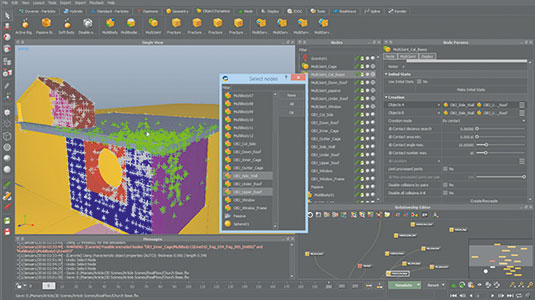
Select the objects you want to connect from Creation>A&B, and set the Contact Distance Search to include all the pieces you'll need to have joints in, change the contact's number to define the joint's number between each part. Define the Force mode to unlimited or constant from Forces to determine its solidity, and finally set the break distance value to make it breakable; if it exceeded this distance during the simulation.
06. Use plasticity
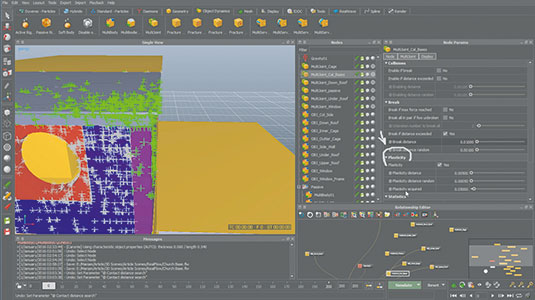
Plasticity is a special property in multijoint that enables displaced chunks (deformed joints links) to keep their deformation permanently or partly, which makes them look real. This is very useful when simulating, for example, the behaviour of iron rods which in reality should be there connecting these pieces. Don't forget that you can always create joints between a multibody and itself, by adding it to both A&B objects, along with other objects.
07. Add a gravity node
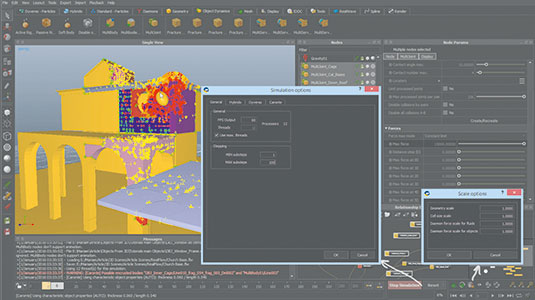
Add a gravity node by right-clicking on the node and selecting Dope>Add/Daemon/Gravity. Ensure that simulation options are set right: here, we increase the frames per second value to 60, to make a slower simulation – remember, the scene and imported object's scale is extremely important as it can change the simulation's final look, speed and even its stability. We work in real-world scale, but you can change the scene scale by going to Scale Options.
08. Import into 3ds Max
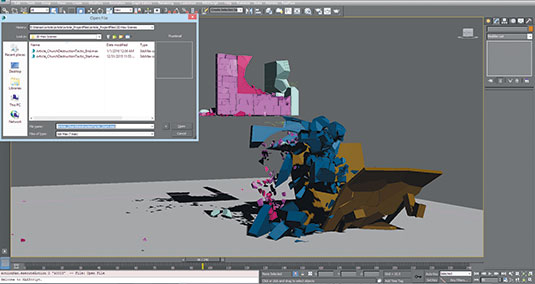
Import the simulation Destroyed Church into 3ds Max, by importing the animation .sd file from the Object folder from the Church base RealFlow scene we set earlier. Make sure that its scale is suitable for FumeFX smoke setup, in this case, I scaled the animation .sd file 100 times to fit with FumeFX, but we will continue this tutorial by opening the file Article project files>3ds Max Scenes/Article_ChurchDestructionTactic_Start.max from the Vault.
09. Set the particle flow
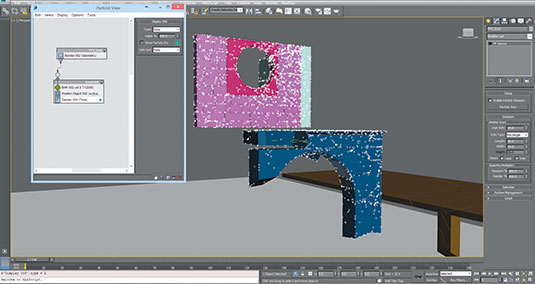
Open the 3D file and from the Creation Menu go to Geometry>Roll Down/Particle Flow and create a Particle Flow (PF) anywhere in your scene. From the Modify Menu press Particle View, then create a PF by right-clicking; change the birth to start from 0 and the number of particles to 800. Now replace the position icon with position object to create the particles from every piece of the church. Pick the pieces from the list and lock the particles to them.
10. Add dust and smoke
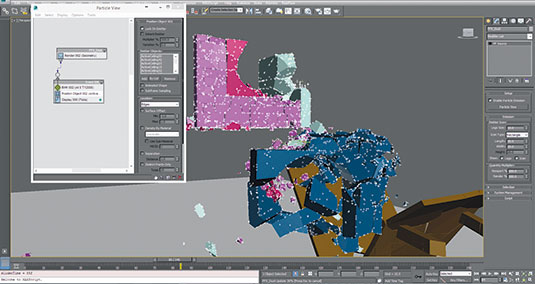
To simulate the dust and smoke later in FumeFX, we are going to create particles from each fallen piece and let the system emit particles when any of those pieces start falling or moving. When creating smoke, we need to tell FumeFX where, when and how fast it should be, this can be done by emitting smoke from each particle on each piece, and then we can control its properties later in FumeFX. Now your primary particle system is ready.
11. Generate particles
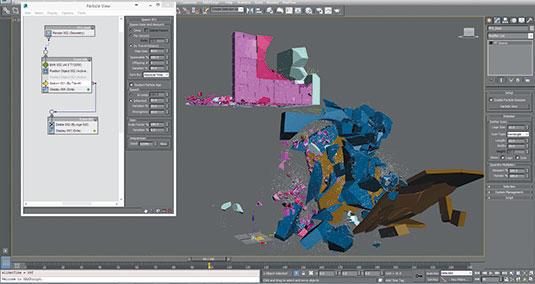
Next, add a Spawn node to generate particles from each particle when it moves. Set the mode to By Travel Distance; Steps to 60; Inheritance to 50, Variation to 25 and Divergence to 10, to make sure that they fall naturally, which will generate the smoke and lead it later. Add a Particle Age node, set the test value to 5 and the variation to 5, to kill the particles as we just need the church pieces' start-up positions and their initial velocity for Fume Smoke.
12. Control the particles
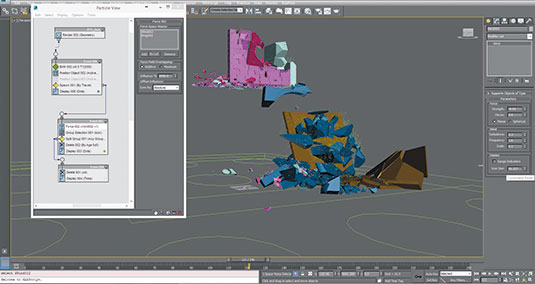
Add a Force node to control the movement of the particles. A wind force with a minus value can simulate both gravity and turbulence, which we need because we are simulating smoke, as well as a Drag Force node with 5, 5, 5 to simulate air resistance; you can delete the particles under the ground plane by adding Particle Group Selection and Group Split then delete all the particles inside the group; and then set the Group Selection to continuous update.
13. Create a container
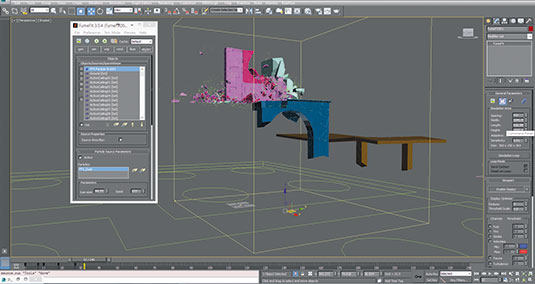
Go to Create>Geometry>FumeFX to create a container. Make sure it includes the objects emitting smoke and set Steps to 4; and create a folder to put your sim files in from the path menus. Set Turbulence to 1.5, scale it to 5 and 5 for details, create a particle Source from Create>Helpers>FumeFX>Particle Src, and pick the particles as its source. In FumeFX Objects, select the Source and all the church objects to let smoke collide with them when generated.
14. Set a graduated growth
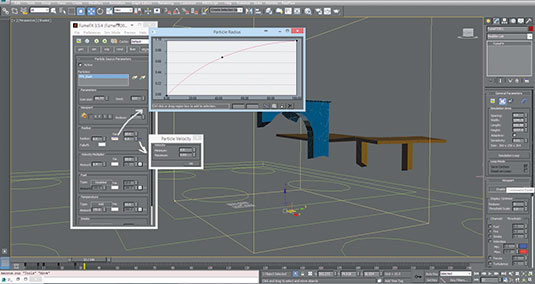
As we don't want FumeFX to emit any smoke before the church starts to fall, we need to set a graduated growth for the smoke radius. Change radius to 0, activate the curve beside it by right-clicking and select Enable; set 6 for the next radius growth, and right-click beside it on PA, change it to Particle Velocity, left-click on it and change the Maximum into 0.05, to ensure the smoke radius for each particle will grow based on its velocity; set Velocity Multiplier 1.4.
15. Final tweaks & simulate
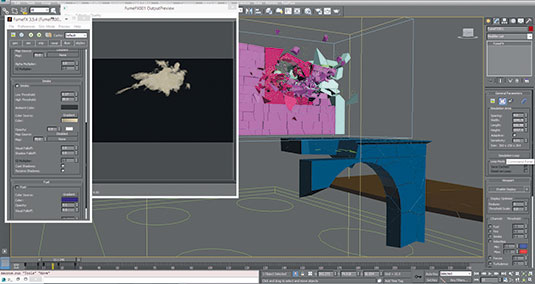
Now, add two lights and raytrace shadows; these can be selected in FumeFX's Illumination tab. Also, change the Rendering tab's setting by adding a gradient colour bar to describe the smoke's look by right-clicking or selecting Color and then Key mode, and playing with its opacity to define its thickness... and then simulate! When you're done, render the sequence with the default rendering setting to see your animation in action.
This article was originally published in 3D World magazine issue 207. Buy it here.

Thank you for reading 5 articles this month* Join now for unlimited access
Enjoy your first month for just £1 / $1 / €1
*Read 5 free articles per month without a subscription

Join now for unlimited access
Try first month for just £1 / $1 / €1
