Simple skin smoothing in Photoshop
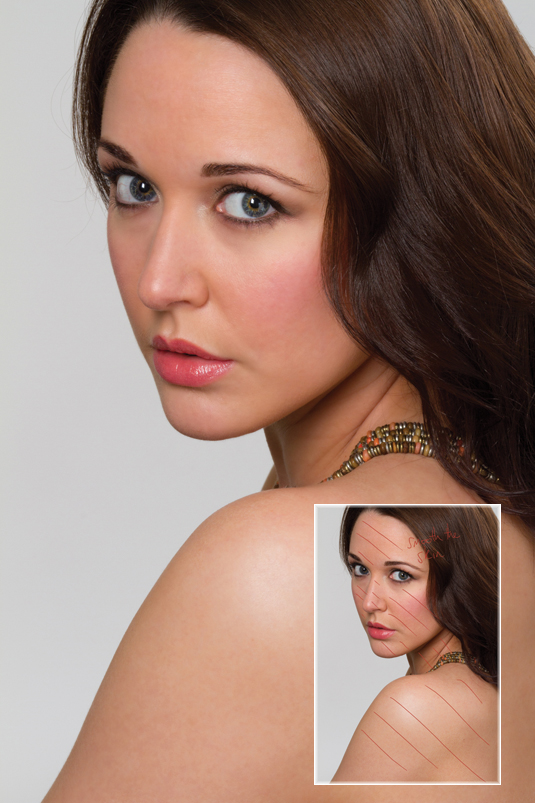
Give your portraits the silky skin effect with Photoshop's High Pass filter by following our quick step-by-step guide.

Pro retouchers will often spend a few hours with Photoshop CS6 working just on a model's skin, painstakingly removing every imperfection with the Clone and Healing tools.
Of course, most of us don't have the time or patience for such work, but luckily there are things we can do to cut corners. One of the best loved - not to mention fastest - skin smoothing techniques is the High Pass method. It gives your subject silky-smooth skin while still retaining some of the detail and texture. Therefore you don't end up with the dreaded 'plastic look' some methods can give. Instead, you get beautifully realistic smoothness.
Here's the quick method below, but if you want greater control over the strength of the smoothing effect, you could try applying a touch of Gaussian Blur (Filter>Blur>Gaussian Blur) between Steps 02 and 03.
As the image is inverted at this stage, the greater the blur radius value, the more subtle the effect. When painting the mask in Step 03, you don't need to be too precise. A few quick strokes with a large, soft-edged brush should do the trick.
Click here to download your start image
01. Copy the layer

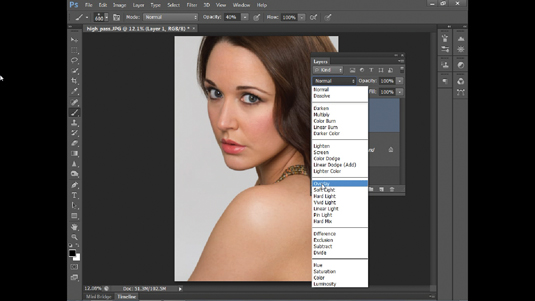
Open 'highpassstart.jpg'. Press Cmd/Ctrl+J to copy the layer. Note: if you’re working with lots of layers, highlight the top layer and press Cmd/Ctrl+Shift+Alt+E to merge a copy. Rename the layer 'High Pass', then click the Blend Mode drop-down and choose Overlay.
02. Overlay and High Pass

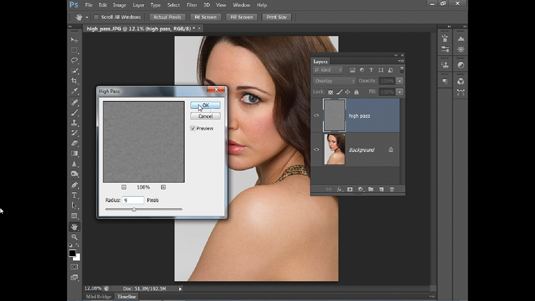
Go to Filter>Other>High Pass. Set Radius to 9px and hit OK. This applies sharpening, but when inverted, it turns into a softening effect, so go to Image>Adjustments>Invert (or press Cmd/Ctrl+I) to invert the colours on the 'High Pass' layer.
03. Smooth the skin

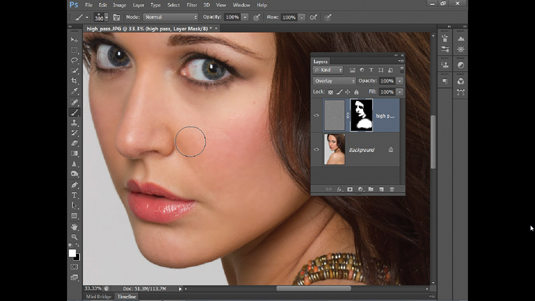
Hold Alt and click the Add Layer Mask icon at the bottom of the Layers Panel to add a full Layer Mask that completely hides the softening. Now grab the Brush tool, choose a soft-edged brush tip and set colour to white, then paint over the skin to reveal the 'High Pass' layer.
Get the Creative Bloq Newsletter
Daily design news, reviews, how-tos and more, as picked by the editors.
Get Practical Photoshop magazine!
This tutorial first appeared in Practical Photoshop magazine, the number one magazine for lovers of photography and image-editing. Whether you're looking for digital darkroom tips, or want to get creative, you should definitely check it out!
Now check out our massive list of 101 Photoshop tutorials!

Thank you for reading 5 articles this month* Join now for unlimited access
Enjoy your first month for just £1 / $1 / €1
*Read 5 free articles per month without a subscription

Join now for unlimited access
Try first month for just £1 / $1 / €1

The Creative Bloq team is made up of a group of art and design enthusiasts, and has changed and evolved since Creative Bloq began back in 2012. The current website team consists of eight full-time members of staff: Editor Georgia Coggan, Deputy Editor Rosie Hilder, Ecommerce Editor Beren Neale, Senior News Editor Daniel Piper, Editor, Digital Art and 3D Ian Dean, Tech Reviews Editor Erlingur Einarsson, Ecommerce Writer Beth Nicholls and Staff Writer Natalie Fear, as well as a roster of freelancers from around the world. The ImagineFX magazine team also pitch in, ensuring that content from leading digital art publication ImagineFX is represented on Creative Bloq.
