Our Verdict
Overall I liked the SketchBook Pro, which was an enjoyable drawing program to use and its power is considerable.
For
- Quick learning curve
- Simplicity
- Good spread of features
Against
- Some issues on tablet
- Not the wealth of talent of Photoshop
Why you can trust Creative Bloq
One of the challenges for a computer artist is finding a pure drawing program. You can draw in many programs such as Photoshop, Painter, and Illustrator but being able to draw in a pure way, where the program is like an actual canvas or piece of paper, can be difficult.
A solution to the problem is Autodesk SketchBook Pro, a professional drawing application designed for the serious artist or technical illustrator. Having used SketchBook in the past, one of its best features is the lack of 'frills'. This allows you to get up-to-speed, quickly.
Depending on your needs you can use SketchBook as a free version, a pro version and a mobile version. It's available for Windows, Mac, iOS, and Android.
Here are some of the features in the Pro version of SketchBook, which is which was used for this article:
- A library of 100+ brushes and the ability to create and customize your own brushes. This includes special effects brushes such as synthetic, smudge, and glow
- You can create canvases up to 64 MPX
- You can build your drawings using layers
- You have use of perspective guides, you can distort drawings, add gradient fills, and make use of French curves
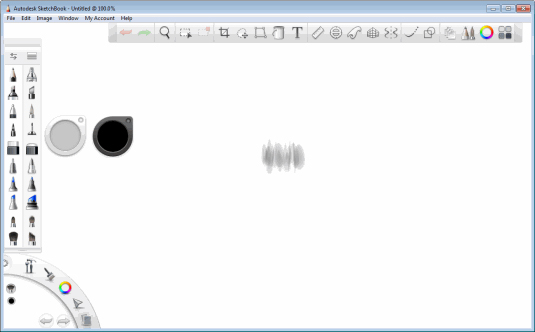
This is the default interface and is comprised of the following sections: Toolbar, Lagoon, Color Puck, Brush Puck, and Brush Palette. Other options are: Layer Editor, Color Editor, and Copic Library.
The Toolbar contains many familiar tools such as Undo/Redo, Zoom, etc, though it also contains some important tools for your drawings, such as Perspective, French Curves, Symmetry and Layers. We will look at some of these later on in this article.
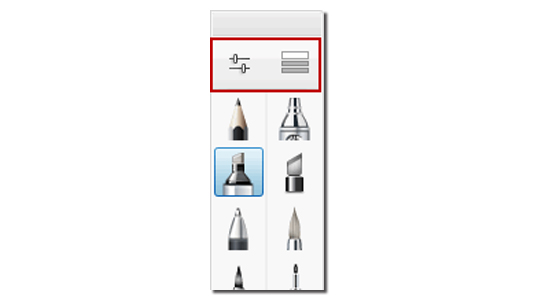
The Brush Library is where you access the brushes for your drawings. At the very top of the Brush Palette are two icons. One is for the Brush Properties; the other is Show Brush Library.
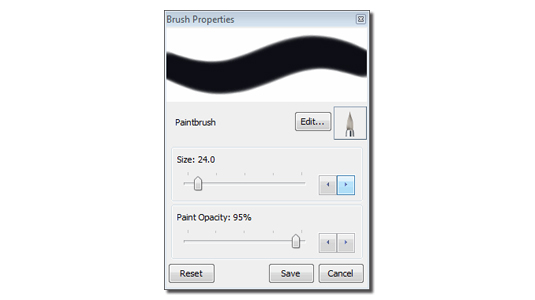
Clicking on the Brush Properties icon brings up the Brush Properties dialog box, where you can adjust the type, size and opacity of the brush.
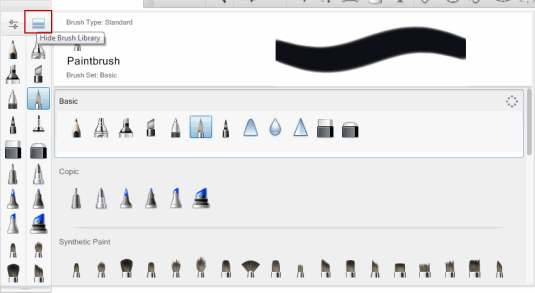
Clicking on the Show Brush Library icon brings up the flyout allowing you to select and preview different brushes.

At the bottom-left of the interface is the 'Lagoon', which gives you access to specific drawing and interface tools, which are: Interface tools, Tools/Views, Brushes, Colors, Edit, and Files. When you move your cursor over any tool and press down, several options appear. To select any option, draw through it, as in the screen shot above.

You can also move the Lagoon from the left side to the right side of your interface, depending on your drawing style. To do so, go to the top (Interface Controls) icon and when the options appear, draw to your right as in the screen shot above. The Lagoon will move to the right of your interface.
The Brush Puck
The Brush Puck gives you access to some controls, quickly. If it's not visible on your interface, go to Windows: Brush Puck.
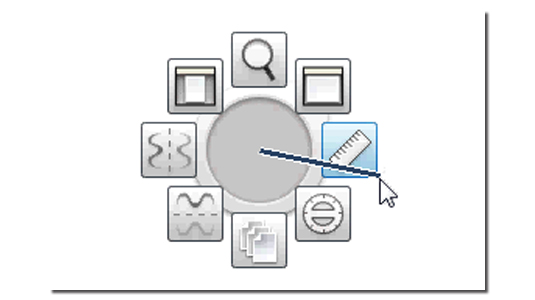
To make it work, move your cursor over the puck and click on the button on your pen. Several controls appear. To select one, draw through it. Your choices are: Ruler, Ellipse, Layers, Symmetry (X), Symmetry (Y), Actual Size, Zoom, and Fit to View.
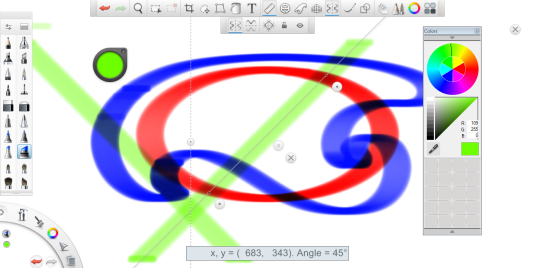
Here's an example of some quick drawing results you can get with the Ellipse, Rulers, Symmetry (Y) and French Curve.
One of the powerful new tools is perspective and you have many options, such as one point, two point, three point and fisheye perspective. These tools help you draw in perspective quickly, easily, and accurately.

The basics of drawing a building in two point perspective using simple lines and the zoom tool to move in and around the drawing.
The Color Puck
The Color Puck allows you to mix and create new colors.
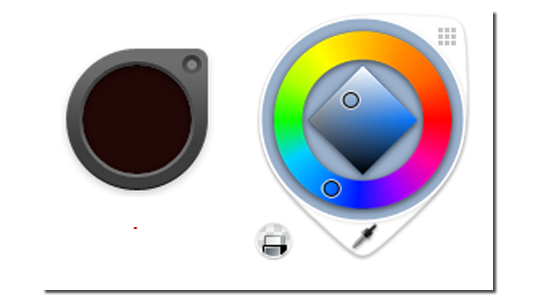
If it's not visible on your interface, go to Windows: Color Puck
Tap the color puck and it will open to the color wheel and color picker. To choose a new color, tap on the color wheel to select the color then close the color wheel. When you see the puck, you can now adjust the saturation or luminance.
To change the saturation, tap in the center of the puck and drag left or right to adjust the saturation. Below the puck you'll see a readout which tells you the percentage of the saturation. To change the luminance, again tap in the center and drag up or down. You will also see a readout of the luminance, too.
Layers
An important aspect of using a drawing program is the use of layers, which allows you to create complex drawings in stages and to see how the various layers perform together. Among other things, layers allow you to test complex sketches and/or design variations.
You can access Layers from the toolbar, the brush and color puck or the Tools/Views icon on the Lagoon.
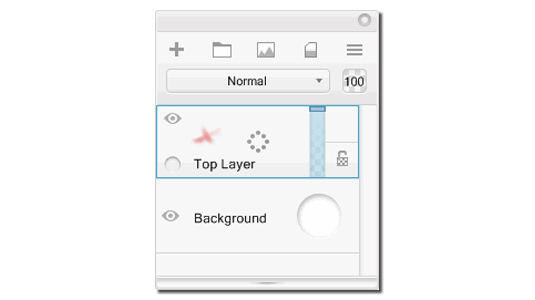
With layers, your options are: Add a layer, Delete a layer, Rename a layer, Merge all layers together, Merge with the layer below, Lock and unlock a layer, Hide or Show a layer, and Make a duplicate layer. Many of these controls are available using the icons at the top of the Layer Editor. You will also notice the Normal drop down, which gives you access to 18 blending modes.
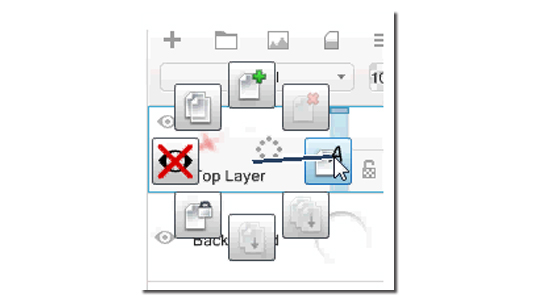
You can also access these options by placing your cursor on a layer and by pressing down. As you can see in the screen shot above, several options appear, which you can quickly select.
And if that's not enough, you can save your files in TIFF or PSD formats, which preserves the layers, meaning you can do further manipulation in Photoshop or other image manipulation programs which support these formats.
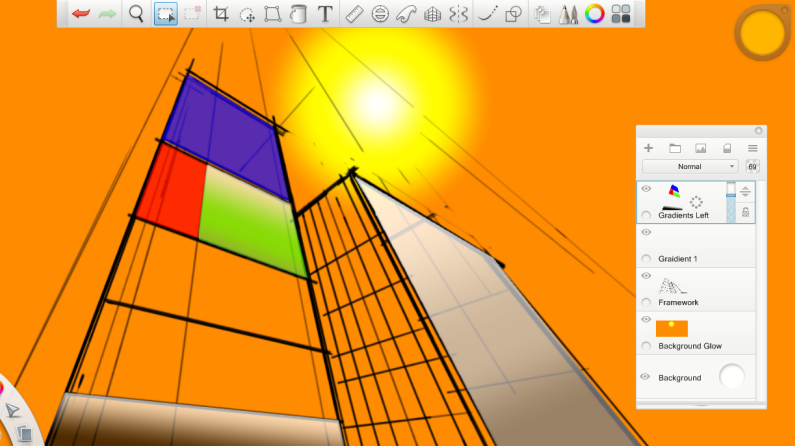
Here's an example of a drawing that uses layers, solid colors, gradients, and transparency in the layers.
Pros and cons
To really get up to speed you would need to spend a fair bit of time with this software. That said, the learning curve will be much faster and easier than with a program like Photoshop.
I did run into some issues with the Brush and Color Puck. Updating my drivers helped, but not enough and I suspected that my tablet wasn't good enough for the software. Unfortunately, I didn't have another tablet to test. To be sure that your tablet will work with SketchBook Pro, contact Autodesk before you buy the software.
Words: Nathan Segal

Thank you for reading 5 articles this month* Join now for unlimited access
Enjoy your first month for just £1 / $1 / €1
*Read 5 free articles per month without a subscription

Join now for unlimited access
Try first month for just £1 / $1 / €1
out of 10
Overall I liked the SketchBook Pro, which was an enjoyable drawing program to use and its power is considerable.

The Creative Bloq team is made up of a group of art and design enthusiasts, and has changed and evolved since Creative Bloq began back in 2012. The current website team consists of eight full-time members of staff: Editor Georgia Coggan, Deputy Editor Rosie Hilder, Ecommerce Editor Beren Neale, Senior News Editor Daniel Piper, Editor, Digital Art and 3D Ian Dean, Tech Reviews Editor Erlingur Einarsson, Ecommerce Writer Beth Nicholls and Staff Writer Natalie Fear, as well as a roster of freelancers from around the world. The ImagineFX magazine team also pitch in, ensuring that content from leading digital art publication ImagineFX is represented on Creative Bloq.
