Our Verdict
AutoModeller Pro lets you use geometry as textures in 3ds Max, speeding up your workflow and giving you yet another reason to keep building that kitbashing library.
For
- Paint geometry onto your mesh
- Supports instances and proxies
- Speed optimised
Against
- No mesh export optimiser function
Why you can trust Creative Bloq
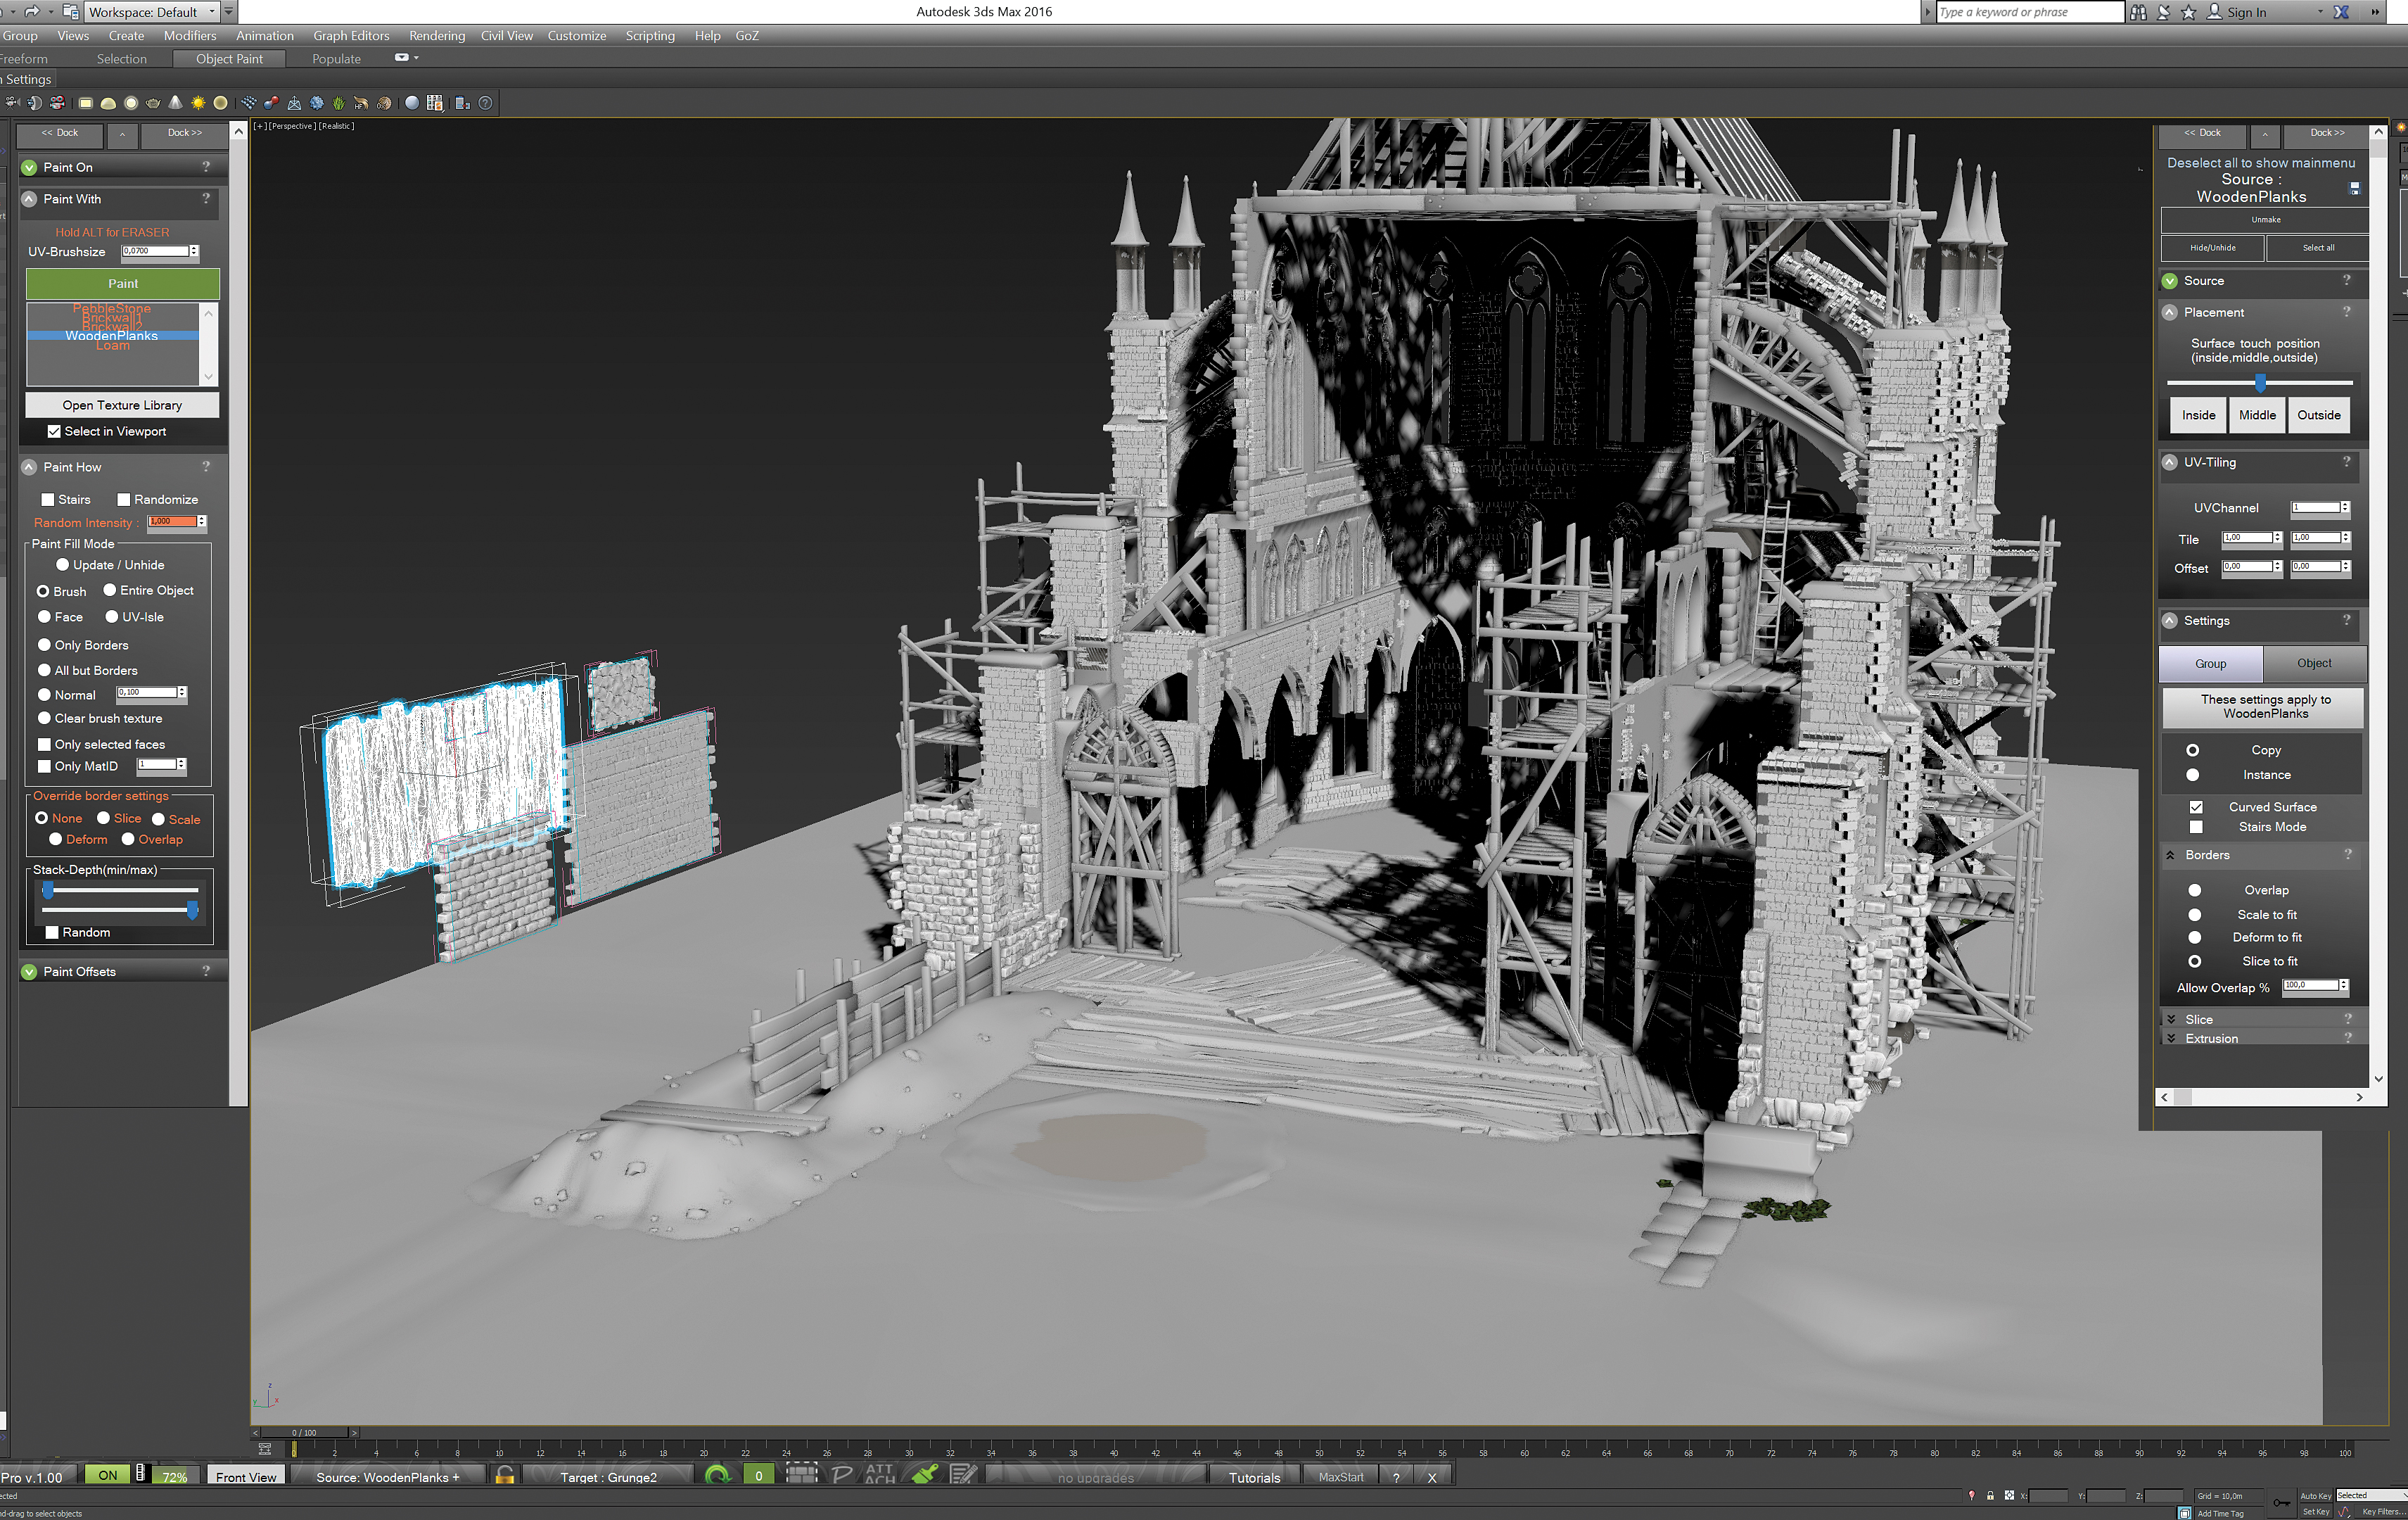
Anyone remember the SciFi Pattern Generator plug-in for 3ds Max 2014? Meet AutoModeller Pro, Code-Artists’ latest foray into the concept they introduced with the SciFi Pattern Generator: texturing with geometry. Similar to displacement mapping, the way it works is that you can apply or paint a group of meshes as a texture onto your scene’s existing geometry; all you do is define your source geometry – be it simple bricks or a set of kitbashing components – and apply it onto your UV mapped target. You then use the UI and UV map to place and tweak the position of the applied mesh texture.
AutoModeller doesn’t make use of any of Max’s native modifiers – instead relying on its own, intuitive UI. It’s non-invasive workflow is feature-rich too; you can combine geometry textures onto your mesh, randomise and erase your paint, and update your source geometry on the fly – your target mesh will autoupdate as you go.
In addition, it’s also solved the obvious edge issue geometry painting could give you by providing automatic mesh border adjustment modes, which rely on your UV island’s edges to fit, deform or overlap when painting. Add to that, instance and proxy support and a hefty preview mode maintaining your workspeed, and, provided your hardware has the muscle for it, you can go to town in the size department.
However, it’s AutoModeller’s unbelievable speed and the paint- options which are the plug-in’s standout features. Similar in function to a clone tool, you can paint your selected geometry on pretty much anything – from spheres to cylinders to hard-edged models.
Versatile, easy to use and stable, Code-Artists have got a lot right
You can do so in various modes, from brush-or mouse-strokes to bucket fills and “Just the normals, please.” Paint in Stairs mode and your geometry- texture will generate stairs on slopes or curves. Paint in Random mode and it will randomise the geometry texture’s output – superhandy for both stone and greebles.
Select faces, and it will paint on your selected faces only. In addition, it’s set up so the geometry you’ve painted onto your base mesh will follow any deformation or modifiers you put onto it, without batting much of an eyelid; it’ll just need a few moments to auto update and adjust to the new shape – straight, bent or curved.
Versatile, easy to use and stable, Code-Artists have got a lot right with AutoModeller. The mesh export could’ve used an optimiser function in addition to Max’s native Optimise, and the incomplete documentation fits the current, annoying climate of “let’s ship, and worry about documentation later,” but that aside, it’s a good plug-in. Not only technically, but also conceptually: it’s one of those rare releases that invites you to just load, explore and get creative. Highly recommended.
This article was originally published in 3D World magazine issue 209. Buy it here.

Thank you for reading 5 articles this month* Join now for unlimited access
Enjoy your first month for just £1 / $1 / €1
*Read 5 free articles per month without a subscription

Join now for unlimited access
Try first month for just £1 / $1 / €1
out of 10
AutoModeller Pro lets you use geometry as textures in 3ds Max, speeding up your workflow and giving you yet another reason to keep building that kitbashing library.

Cirstyn is a freelance CG artist and educator, with over 15 years' experience in 3D. Her clients include AMD and Daz, and she has written for 3D World magazine for a number of years. She is a certified agile (software) project manager, an avid reader and gamer.


