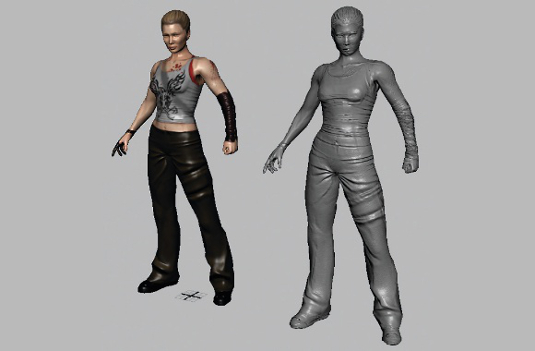
Quickly transfer textures to a new UV layout in Maya
What do you do if someone changes the UV layout after you’ve finished your textures? Antony Ward has a simple solution.
You’ve just spent a week painting and baking detailed textures for your model, and just as you’re about to send it to be approved, the lead artist gingerly approaches you and tells you that alterations to the game engine mean that the UV layout has to change. Your original model with three texture pages now has to use just the one. So you’re in for a few fun days of chopping up the texture pages and trying to fit the textures to the new UVs. Unfortunately, things like this happen all too often in this industry, but there’s a simple solution that should help to ease the transition.
Hidden away in Maya’s Lighting/Shading menu is the Transfer Maps tool (see our Maya 2013 review). This tool enables you to transfer information from one object to another. Traditionally, you would assume that this tool would only be used for generating normal maps, displacement maps or occlusion map extractions, which rely on a high-detail model to transfer information onto a lower resolution iteration. With a bit of ingenuity, the Transfer Maps tool can also transfer information between two models with similar, if not identical topology.
If you open the Transfer Maps tool you’ll be presented with a selection of output maps including normal, displace, diffuse, shaded and many more. If you’re feeling brave, it will also allow you to create your own custom output maps.
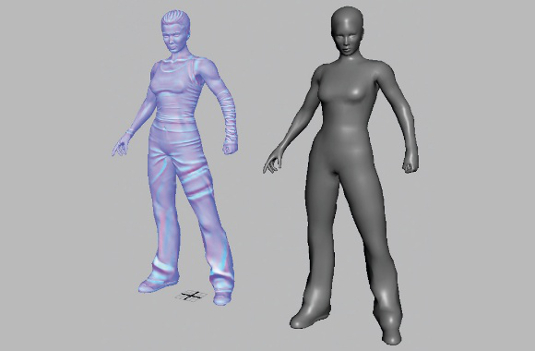
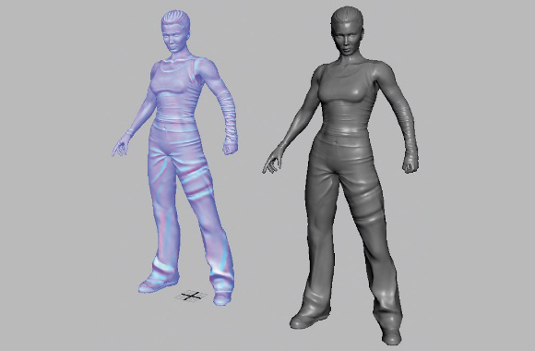
To transfer the texture information from one model to another, simply add your source model – the one with the current textures – into the Source Meshes tab, then place the model with the new UVs into the Target Meshes tab. There’s no need to adjust the Search Envelope for this: you’re looking for a straight poly-to-poly transfer.
Next, select Diffuse as your output map, because you just want the diffuse texture for now, then specify your target location and leave Connect Output Maps at the default setting.
The only other area to adjust is the Maya Common Output options, setting your map sizes, and setting the Sampling Quality to match your needs. A higher quality sample will take longer to generate so it’s always good to generate a preview first. The final item to adjust is to set Fill Texture Seams to 0, so you don’t end up with coloured outlines around your UV shells where the transfer has bled to the surrounding textures. Now click Bake.
Your objects look the same, but Maya will still transfer the colour information between them, taking your texture and baking it, pixel by pixel, onto a fresh set of UVs. This is also a great way to bake out base colours for your textures, just by applying basic coloured shaders to each element. To take it a step further, why not also use it to bake out your substance maps, or 3D texture maps? The uses of the Transfer Maps tool are endless.
Get the Creative Bloq Newsletter
Daily design news, reviews, how-tos and more, as picked by the editors.
Normal map swapping tips
Be aware of mishandled normals

Trying to bake a normal map between models in this way isn’t as easy as transferring a diffuse map, and could give you unpleasant results.
Work on the placement before the height

Try treating your normal map as another diffuse map so that you focus on the colour information, rather than the height.
Ensure the model’s orientation remains the same

This will simply shift your normal map data to the new UVs, but remember that normal maps work on light direction, so your UV shells must retain the original’s orientation.
Antony Ward has been provoking pixels since the early 1990s. He has worked for some of today’s top studios and written three books
Discover 40 free textures to download right now.

Thank you for reading 5 articles this month* Join now for unlimited access
Enjoy your first month for just £1 / $1 / €1
*Read 5 free articles per month without a subscription

Join now for unlimited access
Try first month for just £1 / $1 / €1

The Creative Bloq team is made up of a group of art and design enthusiasts, and has changed and evolved since Creative Bloq began back in 2012. The current website team consists of eight full-time members of staff: Editor Georgia Coggan, Deputy Editor Rosie Hilder, Ecommerce Editor Beren Neale, Senior News Editor Daniel Piper, Editor, Digital Art and 3D Ian Dean, Tech Reviews Editor Erlingur Einarsson, Ecommerce Writer Beth Nicholls and Staff Writer Natalie Fear, as well as a roster of freelancers from around the world. The ImagineFX magazine team also pitch in, ensuring that content from leading digital art publication ImagineFX is represented on Creative Bloq.
