How to design a three-colour Risograph print
Uglylogo explains how to transform your images into charming three-colour prints.
07. Choose your size
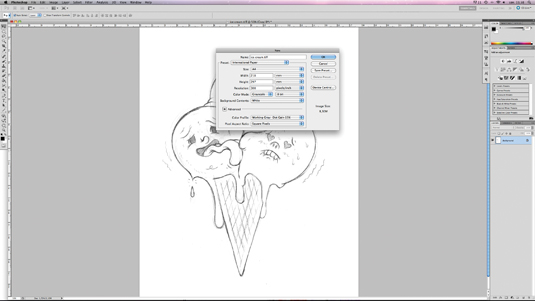
In Photoshop, create a new file. This is where you'll choose the size of your print. It's always cheaper to print in standard sizes, so I've gone for A4 size and 300dpi. Your artwork should be set up as separate greyscale files – one for each colour layer – similar to the way that art is prepared for screenprinting. There's no need to incorporate halftones in artwork files, just use tones of grey and the Risograph printer will create a halftone on the master automatically.
08. Smart Object
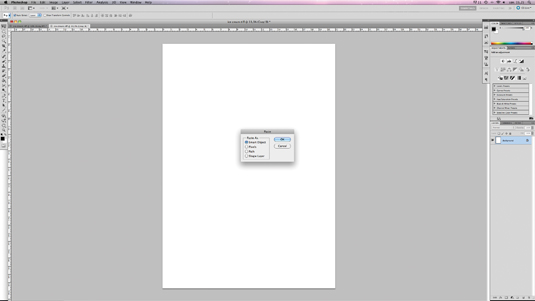
Paste the vector file into your Photoshop document as a Smart Object so that you can adjust the illustration to the paper size. Remember that Risograph duplicators can't print full bleed. Allow for a border of 1cm on A3 or A4 prints.
09. Select a new layer
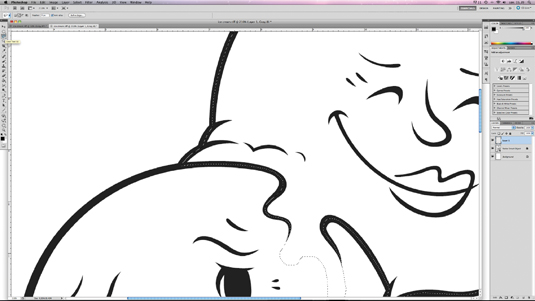
When placed, lock that layer and select a new layer. We will now start colouring the artwork. Choose a new layer for each colour, select the Lasso tool and start creating shapes for your colours.
10. Lasso
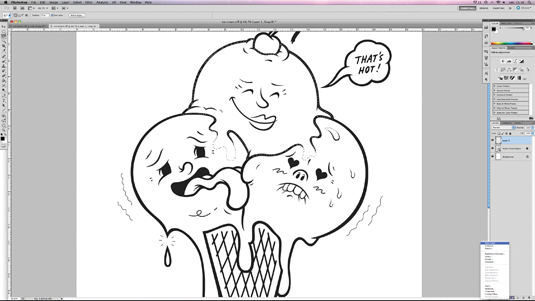
I used the Lasso tool in Photoshop to create multiple shapes that I then filled with the colour of my choice. When making artwork that has a line or stroke around some solid colour on another layer, don't leave any white gaps in the lower layers, because these will show through if it's somehow misregistered – make the shape in the centre of the strokes.
11. Add colours
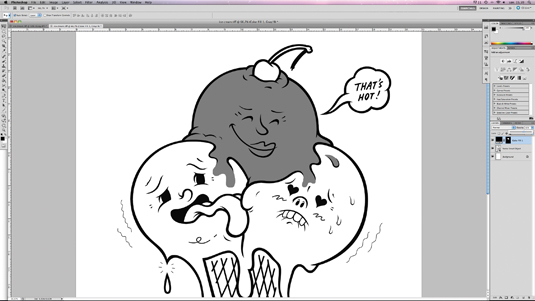
Fill the shape with colour and choose 100% black. Do the same for each colour layer. If you decrease the opacity on that layer, you will see the artwork, but all layers should be 100% black when they're sent to print. Tones of grey should be created, using registration as a spot colour and by varying the tone with the colour slider accordingly. When colours are overprinted, new colours will appear – in this case, yellow and blue will create green.
12. Save the files
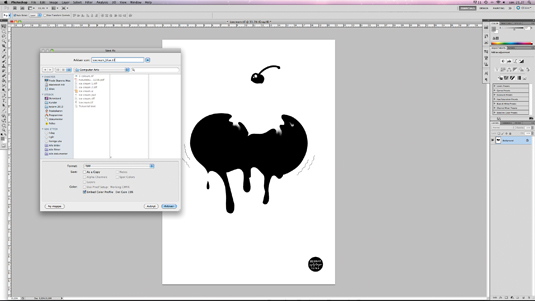
Save the file as three separate documents – one for each colour – setting them as greyscale, 300dpi and in TIFF format. You'll have to deselect the eye icon on all layers other than the colour chosen, and flatten the image. This image shows the blue colour file.
13. Add any extras
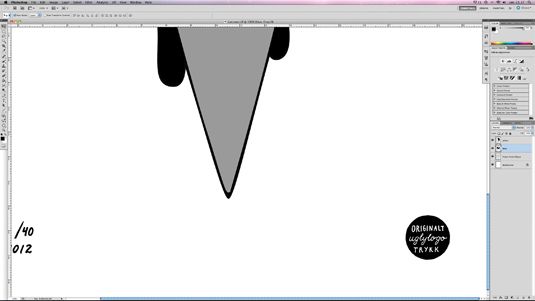
All three files are now saved separately and registration shouldn't be a problem. If you want, you could add your signature or the date – I've opted for an Uglylogo 'badge' in the blue layer. Now all you need to do is send the files to the printers and wait for the prints to arrive. Your first glance at the finished artwork and its colours is priceless.
Get the Creative Bloq Newsletter
Daily design news, reviews, how-tos and more, as picked by the editors.
Words: Uglylogo
Frode Skaren works under the name Uglylogo. Since receiving his degree in visual communication in 2009, the graphic designer, illustrator and artist has created character-based illustrations for clients worldwide.
Like this? Read these!
- Photoshop tips, tricks and fixes to try today
- Illustrator tutorials: amazing ideas to try today!
- The ultimate guide to logo design

Thank you for reading 5 articles this month* Join now for unlimited access
Enjoy your first month for just £1 / $1 / €1
*Read 5 free articles per month without a subscription

Join now for unlimited access
Try first month for just £1 / $1 / €1
The Creative Bloq team is made up of a group of design fans, and has changed and evolved since Creative Bloq began back in 2012. The current website team consists of eight full-time members of staff: Editor Georgia Coggan, Deputy Editor Rosie Hilder, Ecommerce Editor Beren Neale, Senior News Editor Daniel Piper, Editor, Digital Art and 3D Ian Dean, Tech Reviews Editor Erlingur Einarsson, Ecommerce Writer Beth Nicholls and Staff Writer Natalie Fear, as well as a roster of freelancers from around the world. The ImagineFX magazine team also pitch in, ensuring that content from leading digital art publication ImagineFX is represented on Creative Bloq.
