How to design a book in InDesign
Follow these top tips to create and lay out a book using InDesign.

To us at The Book Designers, the layout of the pages inside a book is just as important as its cover design. After all, the pages are what people experience as they read the book. This tutorial provides a basic step-by-step process for designing and laying out a book that's driven by its text.
Over the following steps we'll show you how to design a simple text-focused book using InDesign, which is part of Adobe's Creative Cloud software. However, this process can also be applied to more dynamic layouts, as it covers the basics of flowing in and formatting text for a book layout. Looking for type inspiration before you start? Take a look at our roundup of perfect font pairings.
01. Plan the layout
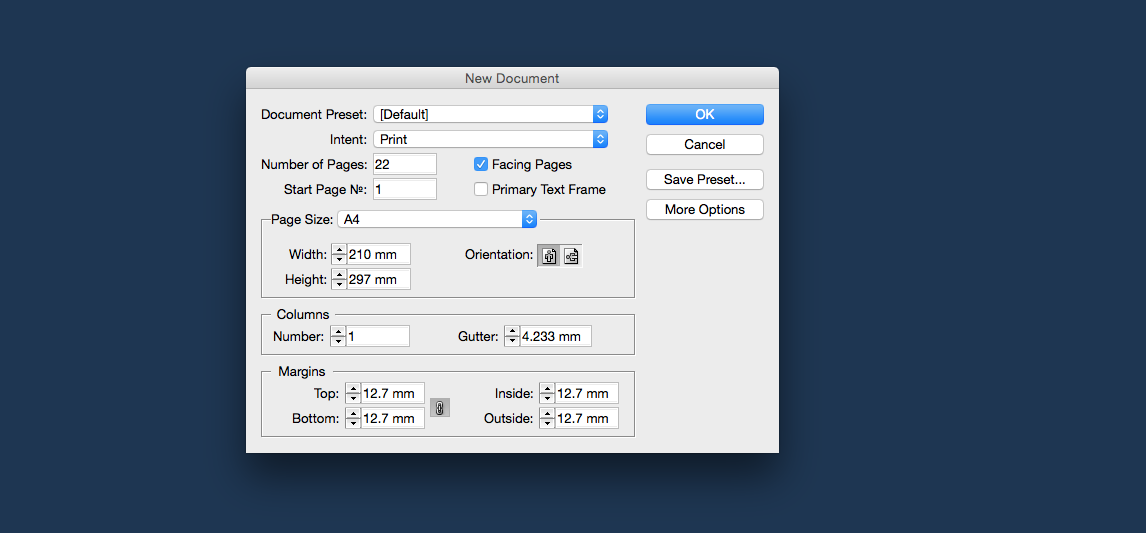
Plan your book layout first. Where are the table of contents, copyright page, introductions, preface, forewords and so on going to be located? If you're uncertain, ask your client or refer to books already in print to see what the standard is.
Make sure the text you receive is supplied without hard formatting, otherwise you might spend a lot of time stripping out italics, bold and so on – over-formatted text distracts readers. Now open InDesign and go to 'File > New Document'.
02. Set properties
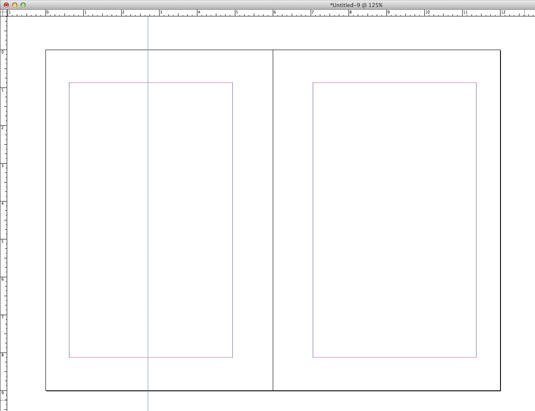
Set your document properties. Choose Facing Pages, set the trim size and margins, and set the columns to one. Pay attention to the inside margin as when your book is bound at the spine it will take in some of this paper. We suggest inside margins of at least one inch.
We're working in inches – ctrl+right-click on the ruler to change the units you work in. Deselect the lock icon in your margin settings so you can set each – top, bottom, inside and outside – individually.
03. Drag guides
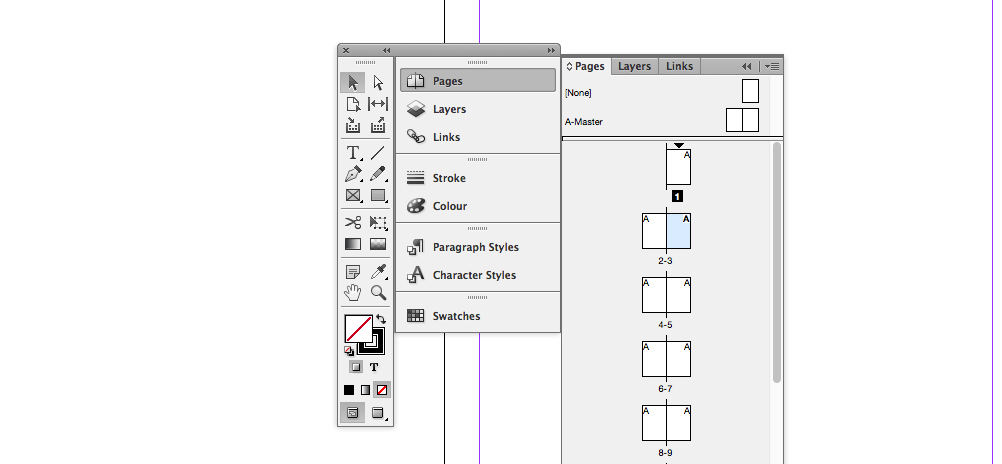
You can drag guides for your layout off the rulers, just click and pull down or across. Use the Pages panel to see your layout in thumbnails and to access and apply master page items. To do this, click on the A-Master icon at the top of the Pages panel.
Get the Creative Bloq Newsletter
Daily design news, reviews, how-tos and more, as picked by the editors.
04. Create text boxes
Once you access your master page, you can create text boxes to fit your margins as well as set up any page elements like page numbers and folio items. Whatever you do on your master pages will be applied throughout the rest of the document.
Create two text boxes using your Type tool and position them within your margins.
05. Link pages
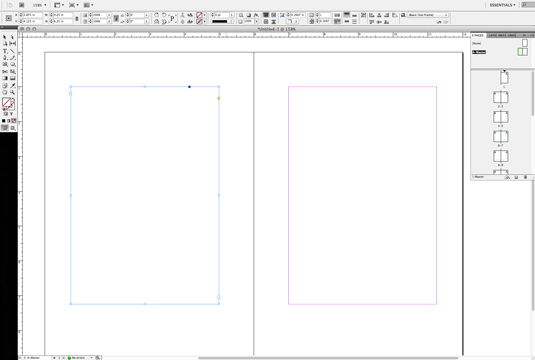
Next, using your Direct Selection tool, select the text box on the left and locate the small square on the lower-right corner. Click this and you will see your cursor change to a text flow icon.
With this text flow cursor icon, click on the right-hand text box and see the cursor change to a link cursor icon. This enables your document pages to link from page to page as you flow your text in.
Next page: page numbers, flowing in text and more

Thank you for reading 5 articles this month* Join now for unlimited access
Enjoy your first month for just £1 / $1 / €1
*Read 5 free articles per month without a subscription

Join now for unlimited access
Try first month for just £1 / $1 / €1
