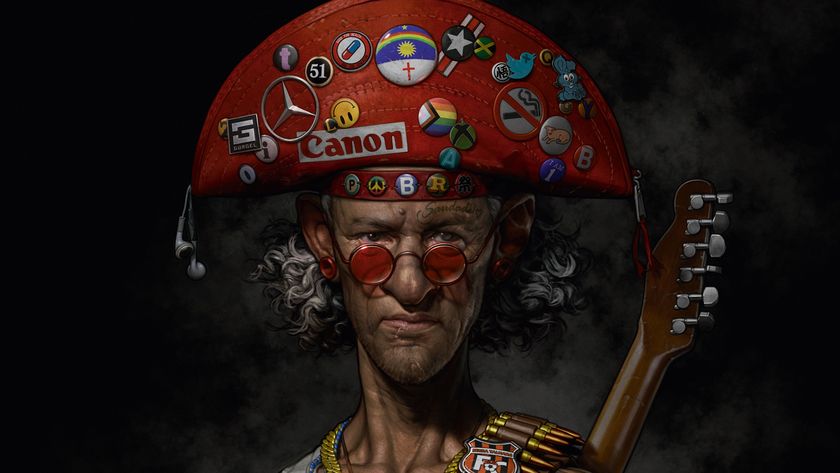
Add detail-enhancing effects to your images
Want to add HDR-style detail-enhancing effects to your images? Ben Secret shows you how.
- Software: Photoshop CS3 or later
- Project time: 5 minutes
- Skills: Balance colours with curves and selective colours, apply local and spot colour corrections, use layer management to keep things tidy
In this tutorial I’ll go through three very common ways to make local colour and tone adjustments. Some of these adjustments are simply correcting things I’ve inadvertently made wrong. For example, this image of Louise Thompson, by photographer Ruth Rose, has been styled with a colour process that adds cold greens and blues to the shadows. This works with the backdrop and adds an interesting film-like colouring to the skin tones, but unfortunately the hair wasn’t so lucky, and has been turned a bit blue.
I’d also brought up the mid-tones, as it was quite a dark image, but this has had a bleaching effect on the jeans. So sometimes I’ll style things one way, then use local adjustments to fix all the problems I’ve created in doing so.
Step 01

With a critical eye, one of the first things we should notice about this image is that the torso region seems a little cold and off-colour. So we’re going to select the Lasso tool, set the Feather to 15px, then roughly draw around the stomach region. Now add a Curves adjustment layer, and you should find it’s automatically masked the torso for you.
Step 02
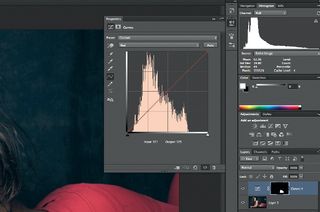
Now we need to figure out what we have to do to our curves to push the colour more towards the natural skin colour of the rest of the image. There’s a slight greyness to the mid-tones, so selecting the Red channel in Curves, just bring the mid-point up a small way to add some warmth. Do the same with the Blue channel, but bring it up slightly less.
Step 03
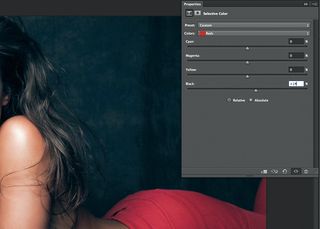
These faded-looking jeans should be a little easier. As they’re red, we can use a Selective Color layer to localise the effect. The only problem is it will interfere with the skin too. So as before, use the Lasso to isolate the jeans, add a Selective Color adjustment layer, and with the Red channel selected, just bring the Black slider up a bit.
Step 04
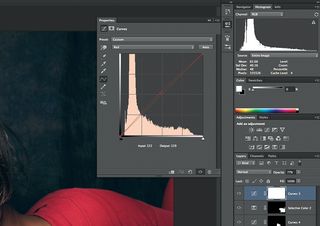
There are still some regions that could do with warming up – particularly that blue-ish hair. For this, we’re going to first create a nice, natural warmth effect for the whole image. Add a Curves adjustment layer and, as with step 02, bring the Red curve’s mid-point up a bit, and bring the Blue curve’s mid-point down slightly.
Step 05
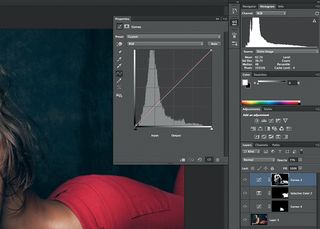
Now, ensuring we’ve got the Curves layer’s mask highlighted in the Layers panel, we should be able to flip this into a hide-all mask with Cmd/Ctrl+I. Next, select a medium-sized, soft white paint brush – I use a flow of about 20% – and we can simply start painting over anything we want to warm up, mainly the hair and shadows.
Words: Ben Secret
Get the Creative Bloq Newsletter
Daily design news, reviews, how-tos and more, as picked by the editors.
London-based Ben is a designer and retoucher. He started out young enough to remember making computer graphics with graph paper and binary, and is inspired by Swedish cinema, the 1950s, early science fiction and futurism.
Liked this? Read these!
- Adobe Photoshop CS6 hands-on review
- Free Photoshop brushes
- Free Photoshop actions to create stunning effects
- The best Photoshop plugins
- Useful and inspiring flyer templates

Thank you for reading 5 articles this month* Join now for unlimited access
Enjoy your first month for just £1 / $1 / €1
*Read 5 free articles per month without a subscription

Join now for unlimited access
Try first month for just £1 / $1 / €1
The Creative Bloq team is made up of a group of design fans, and has changed and evolved since Creative Bloq began back in 2012. The current website team consists of eight full-time members of staff: Editor Georgia Coggan, Deputy Editor Rosie Hilder, Ecommerce Editor Beren Neale, Senior News Editor Daniel Piper, Editor, Digital Art and 3D Ian Dean, Tech Reviews Editor Erlingur Einarsson and Ecommerce Writer Beth Nicholls and Staff Writer Natalie Fear, as well as a roster of freelancers from around the world. The 3D World and ImagineFX magazine teams also pitch in, ensuring that content from 3D World and ImagineFX is represented on Creative Bloq.

