Add a bokeh effect to your images
Create out-of-focus highlights from scratch with a little help from Photoshop CS6’s new time-saving shortcuts, in this easy to follow, four-step tutorial.
Bokeh is a Japanese word that translates as blur or haze. In photography it is used to refer to the quality of the area beyond your depth of field that is out of focus.
The look of the bokeh effect is down to a number of factors, including the lens you’re using, your chosen aperture and how far your subject is from the background. In this tutorial, we explain how to use the time-saving shortcuts in Photoshop CS6 to create out-of-focus highlights in four easy steps.
Also read:
- Master studio portrait photography
- 101 Photoshop tutorials
- 30 free Photoshop actions

01. Make a circle
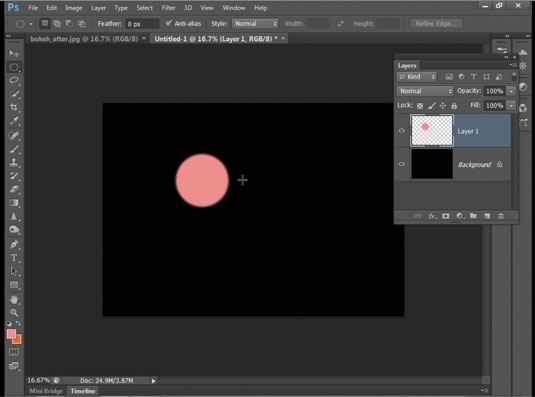
Make a new document (File>New) and fill it with black. Create a new layer, then grab the Elliptical Marquee tool, hold down Shift and drag a circular selection. Go to Select>Modify> Feather. Set Radius 10px and then hit OK. Choose a bright foreground colour then hit Alt+Backspace to fill the circle.
02. Make quick copies
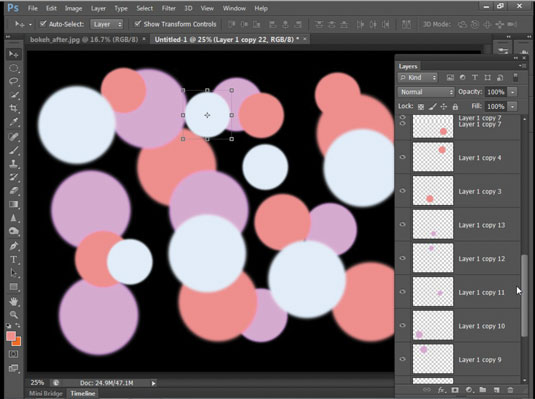
Grab the Move tool and check ‘Show Transform Controls’. Hold Alt and drag the circle to make a copy. Repeatedly Alt-drag the circles around to make more copies while varying colour and size. Press Cmd/Ctrl+U and adjust the Hue slider to change colours. Hold Shift and drag the corner of the bounding box to resize.
03. Add variety
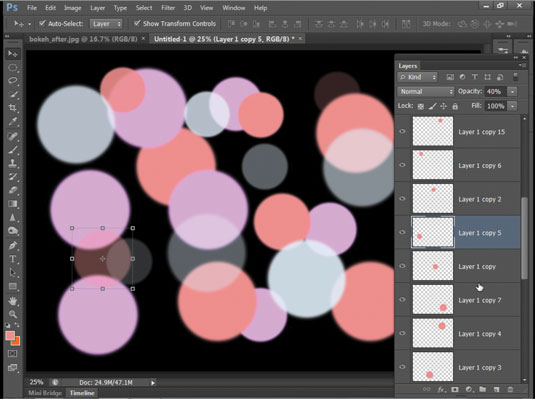
For more variation, highlight different layers and hit 1-9 to quickly set a layer Opacity between 10-90%. Also, go to Filter>Blur>Gaussian Blur, set Radius 10px and hit OK. Hit Cmd/Ctrl+F to repeat the blur effect on other circles.
04. Group and dupe
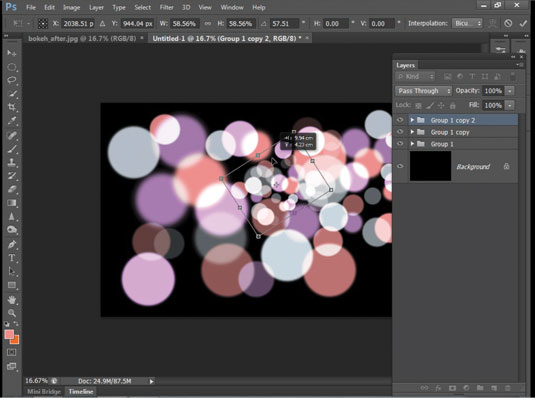
Shift-click from top to bottom to highlight all the circle layers then choose Blend Mode: Linear Dodge (Add). Press Cmd/Ctrl+G to group the layers together, then hit Cmd/Ctrl+J to duplicate the group. Grab the Move tool, click the bounding box, then position and resize the new group. You can make further copies to build up the effect.
Get Practical Photoshop magazine!
This tutorial first appeared in Practical Photoshop magazine, the number one magazine for lovers of photography and image-editing. Whether you're looking for digital darkroom tips, or want to get creative, you should definitely check it out!
Get the Creative Bloq Newsletter
Daily design news, reviews, how-tos and more, as picked by the editors.
Now check out our massive list of 101 Photoshop tutorials!

Thank you for reading 5 articles this month* Join now for unlimited access
Enjoy your first month for just £1 / $1 / €1
*Read 5 free articles per month without a subscription

Join now for unlimited access
Try first month for just £1 / $1 / €1

The Creative Bloq team is made up of a group of art and design enthusiasts, and has changed and evolved since Creative Bloq began back in 2012. The current website team consists of eight full-time members of staff: Editor Georgia Coggan, Deputy Editor Rosie Hilder, Ecommerce Editor Beren Neale, Senior News Editor Daniel Piper, Editor, Digital Art and 3D Ian Dean, Tech Reviews Editor Erlingur Einarsson, Ecommerce Writer Beth Nicholls and Staff Writer Natalie Fear, as well as a roster of freelancers from around the world. The ImagineFX magazine team also pitch in, ensuring that content from leading digital art publication ImagineFX is represented on Creative Bloq.
