Create a kaleidoscope effect in Photoshop
Amber Grayson reveals how to combine handmade and digital elements to create a kaleidoscope effect in Photoshop.
There are plenty of collage maker tools out there, but none are quite as satisfying as creating your own collage using Photoshop CC or similar software. The kaleidoscope effect above was discovered when trying to combine photography and collage elements, and here we'll take it a step further. You can apply this method to any existing imagery, turning it into an abstract, intriguing pattern.
Over the following steps, I'll show you how to create a complex-looking image: we'll experiment with a variety of imagery, marks and photos – or whatever elements you already have – to build up a digital collage with a handmade feel. And unlike when you're creating purely handmade work, the possibilities to experiment are endless because you can always click Undo. Once created, you can take your image and turn it into a fascinating pattern, background or wallpaper.
- Software: Photoshop CS4 or later
- Project time: 2-3 hours
- Skills: Combine handmade and digital elements, use Layer Styles, create patterns
- Download the support file here
01. Create a hexagon
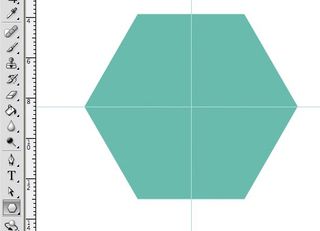
First, open Photoshop and create a hexagon in an A4 document. This is the basic shape that your kaleidoscope will follow. For a more intricate, abstract appearance, create a shape with more sides. Using the Polygon tool, make a fairly large hexagon, then drag rulers from the top and side to find the centre of the shape - they will snap to the middle.
02. Create a triangle
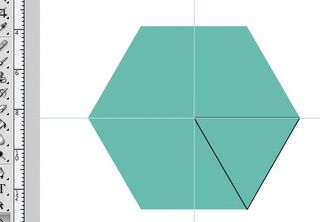
Using a different colour to the hexagon, select the Line tool with a 5px weight. Draw three lines to create a triangle from the centre point out to one of the straight sides, then merge these three layers together. This triangle will be a guide for the shapes and the size of the image you create.
03. Import your image
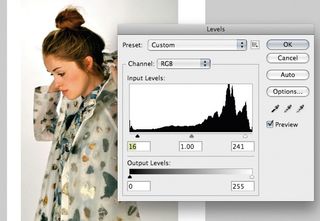
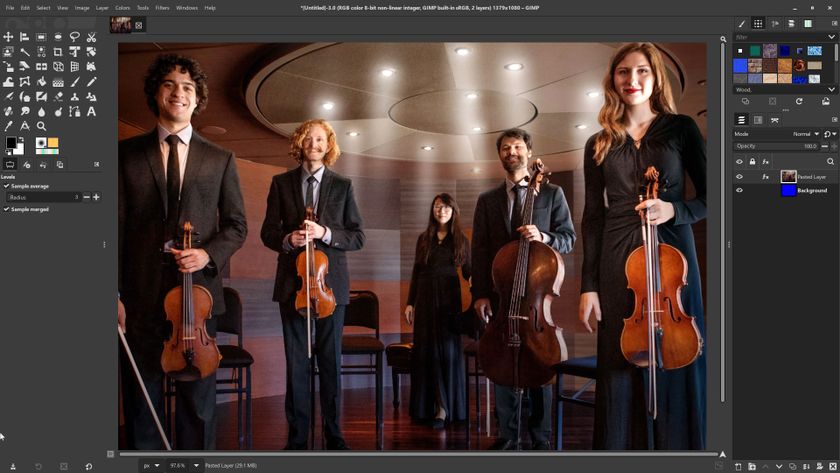
Open a new A4 document and place a photo of a figure (I've supplied one, but feel free to use your own) in the centre. Use Levels (Cmd/Ctrl+L) to brighten up the image, slightly increasing the black and decreasing the white levels. At this stage you could edit out the background completely if you wish, to make a cleaner image.
04. Drag over the triangle
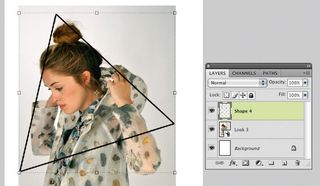
Return to your first hexagon document and drag the triangle over to the document with the placed photo in it. This will be used as a guide for creating the collage on top of the photo. You can change the size of the triangle and move it around until you decide which part of the photo that you wish to use.
05. Create some funky patterns
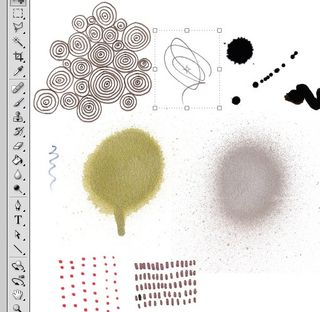
It's time to step away from the screen and create some handmade marks, patterns and shapes using materials such as ink and spray paint. The marks I've chosen are fairly organic to contrast with the structured nature of the kaleidoscope. When you're done, scan in the materials (or use the ones included).
Get the Creative Bloq Newsletter
Daily design news, reviews, how-tos and more, as picked by the editors.
06. Tidy up your marks
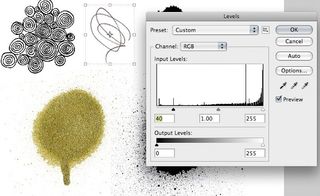
Open the marks in Photoshop and decide which ones you want to use. With the Rectangular Marquee tool, select each mark, and copy and paste each one into a new layer so that they can be edited individually. Now delete the background layer of your initial marks. Using levels again, greatly increase the black and reduce the white to make the marks more solid.
07. Add a mark
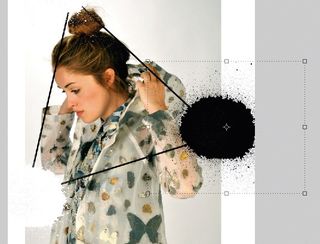
Choose the black spray paint mark supplied, and drag it over to your photograph document. Using the Magic Wand tool, select the white space around the mark and delete it. Invert the colour of the mark (Cmd/Ctrl+I) to make it white, and place it in one corner of the triangle. Using the Hand tool, hold down Opt/Alt and drag the mark to duplicate it and place it in another corner. Repeat again for the last corner.
Next page: the remaining steps

Thank you for reading 5 articles this month* Join now for unlimited access
Enjoy your first month for just £1 / $1 / €1
*Read 5 free articles per month without a subscription

Join now for unlimited access
Try first month for just £1 / $1 / €1
The Creative Bloq team is made up of a group of design fans, and has changed and evolved since Creative Bloq began back in 2012. The current website team consists of eight full-time members of staff: Editor Georgia Coggan, Deputy Editor Rosie Hilder, Ecommerce Editor Beren Neale, Senior News Editor Daniel Piper, Editor, Digital Art and 3D Ian Dean, Tech Reviews Editor Erlingur Einarsson and Ecommerce Writer Beth Nicholls and Staff Writer Natalie Fear, as well as a roster of freelancers from around the world. The 3D World and ImagineFX magazine teams also pitch in, ensuring that content from 3D World and ImagineFX is represented on Creative Bloq.
