Erase unwanted backgrounds in Photoshop
Use the Eraser tools to select and delete unwanted backgrounds – or even just parts of them. We show you how in our walkthrough.

When faced with the common challenge of selecting and replacing an unwanted background we’re spoilt for choice thanks to Photoshop CS6’s comprehensive collection of tools.
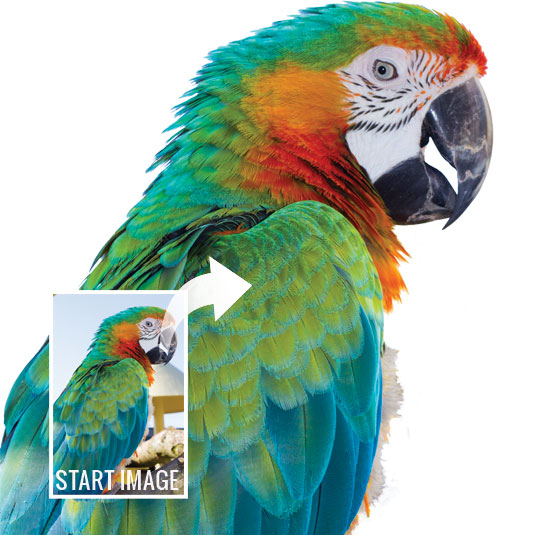
Indeed, if you gave three Photoshop users the task of removing the clutter in our opening image’s background then you might see three different approaches to the task. To remove the sky, Photoshop user number one might reach for the old Magic Wand and tick Contiguous so that it will avoid selecting some of the parrot’s similarly coloured feathers. They’d then click to sample the sky pixels and then Shift-click to add other background details to the selection, and use Edit>Cut to replace the selection marquee with transparent pixels.
Quick selection
Due to the complexity and variety of some of the background’s details, Photoshop user number two might decide to select the parrot instead of the background, using the Quick Selection tool. A few swipes of this brush-based tool would select most of the parrot, although some of the bird’s feathered edges would elude the initial selection.
They’d need to use the Refine Edge command and its Refine Radius tool to add finer feathers to the selection, then invert the selection and choose Edit>Cut to delete the parrot’s unwanted background.
The Eraser tool
If Photoshop user number three moved his cursor over the Eraser compartment it might raise a few eyebrows. He might feel that the Eraser is fine for pounding unwanted pixels into oblivion, but it’s hardly up to the task of removing the busy background while preserving the parrot’s fine feathery details. However, the Eraser tool is capable of more precise compositing tasks than you’d expect, as we'll demonstrate in this quick walkthrough...
Click here to download your start image
01. First strike

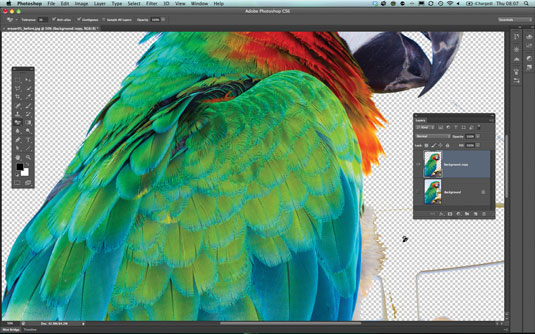
Hold the cursor down on the Eraser tool compartment and grab the Magic Eraser. Set Tolerance to 34 and tick Contiguous. Click to delete the blue sky. Reduce Tolerance to 24 and click to delete the cream and yellow background while preserving the similarly coloured white feathers.
02. Erase the edges

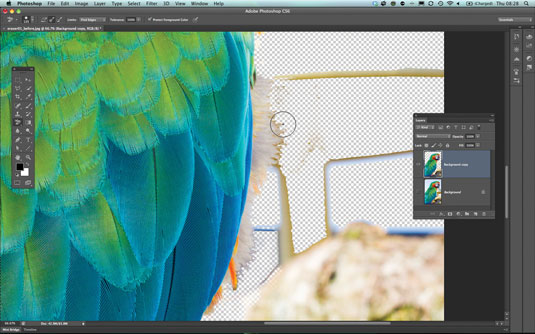
Grab the Background Eraser. In the Brush Preset picker, choose a soft tip with a Size of 125. Tick the Sampling: Once option. Set Limits to Find Edges. Click to sample and erase background pixels adjacent to the white feathers. To erase less delicate edges, set Limits to Discontiguous.
Get the Creative Bloq Newsletter
Daily design news, reviews, how-tos and more, as picked by the editors.
03. Get more control

Grab the Eraser tool. Remove any pixels that aren’t immediately adjacent to the parrot’s delicate edges. To erase background pixels running alongside the perch, hold down Shift and click to place a point. Click the cursor on another point and you’ll erase in a straight line.
- This article first appeared in Practical Photoshop magazine, the number one magazine for lovers of photography and image-editing.
Liked this? Read these!
- Master studio portrait photography
- 101 Photoshop tutorials
- 30 free Photoshop actions

Thank you for reading 5 articles this month* Join now for unlimited access
Enjoy your first month for just £1 / $1 / €1
*Read 5 free articles per month without a subscription

Join now for unlimited access
Try first month for just £1 / $1 / €1

The Creative Bloq team is made up of a group of art and design enthusiasts, and has changed and evolved since Creative Bloq began back in 2012. The current website team consists of eight full-time members of staff: Editor Georgia Coggan, Deputy Editor Rosie Hilder, Ecommerce Editor Beren Neale, Senior News Editor Daniel Piper, Editor, Digital Art and 3D Ian Dean, Tech Reviews Editor Erlingur Einarsson, Ecommerce Writer Beth Nicholls and Staff Writer Natalie Fear, as well as a roster of freelancers from around the world. The ImagineFX magazine team also pitch in, ensuring that content from leading digital art publication ImagineFX is represented on Creative Bloq.
