Create a sinister fantasy backdrop in Photoshop
Use selections, Layer Masks and Transform commands to create a foreboding scene.
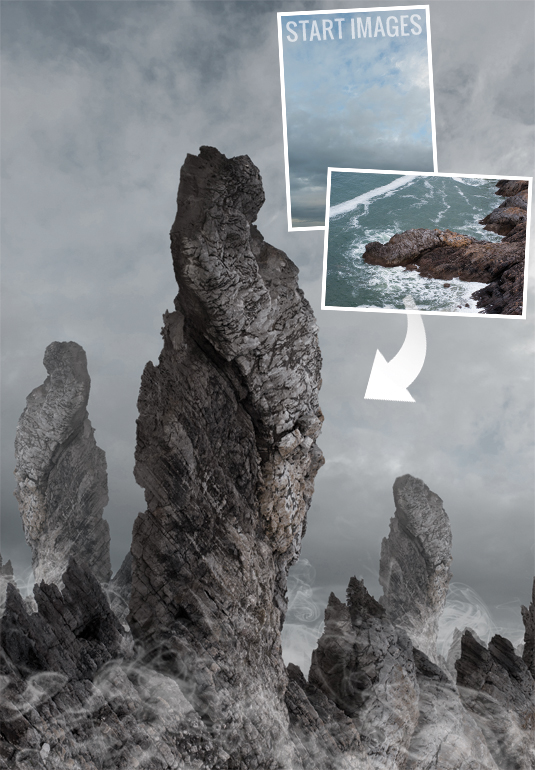
From The Lord of the Rings to Game of Thrones, the fantasy genre often features a dramatic mountainous landscape for its heroes to conquer. These dramatic locations with their towering peaks, mysterious mists and foreboding cloudy skies can inspire our own creativity.
Fortunately, we don’t need to be masters of the paintbrush to create the fantasy look. We can use real geological structures as source images for our project to create a convincing set of menacing mountains. We can conjure up foreboding towers of rock without having to travel to exotic mountainous locations to shoot the source material. Around the coast there are plenty of rock formations jutting out into the ocean that will give us the shapes and textures we need for our fantasy landscape. We’ll show you how to select, rotate and flip these using Photoshop CS6 so that they stand vertically, terraforming them into a mountainous range that looks fit for a dragon to inhabit.
Disappearing oceans
We'll demonstrate how to use Layer Masks to tidy the edges of your selection to remove any traces of ocean, and then use the Clone Stamp tool to hide unwanted rock pools clinging to the rocky surface. You'll also learn how to add mood and atmosphere to the scene by creating layers of swirling mist with the help of custom brush tips.
So, dive in - we've supplied a pair of images to get you started...
Click here to download image 1
Click here to download image 2
01. Make a selection
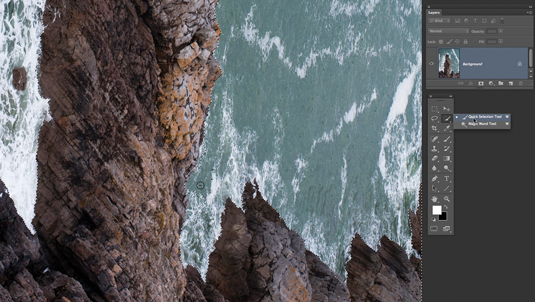
Open 'mountain_before01.jpg' from our project files. Go to Image>Image Rotation>90 degrees CW. This rotates the image so that the horizontal rock surface stands vertically. Grab the Quick Selection tool and then tick Auto-Enhance. Spray over the rock to select it. Use the Subtract from selection option to remove bits of ocean clinging to the edges.
02. Add the sky
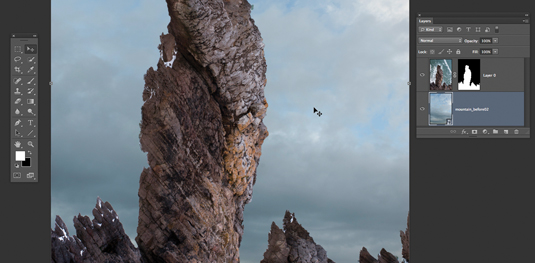
Click the Layers Panel's Add a layer mask icon. The selected areas remain visible while the ocean is hidden. Go to File>Place and browse to 'mountain_before02.jpg'. Click Place and hit Enter. Drag the new sky layer below the rock layer in the Layer Stack. Use the Move tool to make the sky fill the frame.
03. Tidy up the mask
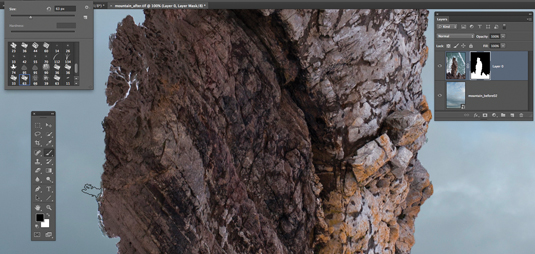
Grab the Brush tool. In the Brush Preset Picker, choose an Oil Pastel Large tip. Click the rock layer's mask. Set the foreground colour to black and spray over any fringes of ocean clinging to rock's edge. Use the Clone Stamp tool to sample and spray rock over any white rock pools within the rock's outline.
Get the Creative Bloq Newsletter
Daily design news, reviews, how-tos and more, as picked by the editors.
04. Scale and flip
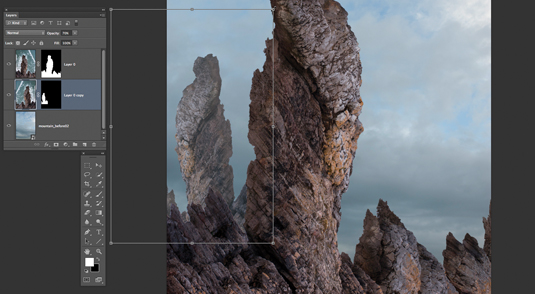
Press Ctrl/Cmd+J to duplicate the rock. Choose Edit>Transform>Scale. Hold down Shift and drag the corner handles to scale the rock down to 50%. Go to Edit>Transform>Flip Horizontal. Drag to re-position the rock and press Enter. Drag the duplicate layer below the original. Reduce the Opacity to 70%. Repeat this step to create a third mountain.
05. Make the mist
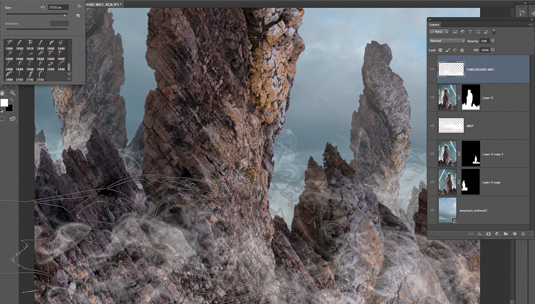
Grab the Brush tool and click the Brush Preset Picker's fly-out icon. Choose Load Brushes. Browse to the 'smoke_brush_set.abr' file in this month's project files and click Open. Click to spray smoke on a new layer. Reduce the Opacity to 35%. Add smoke layers in front and behind the main mountain.
06. Create moody colours
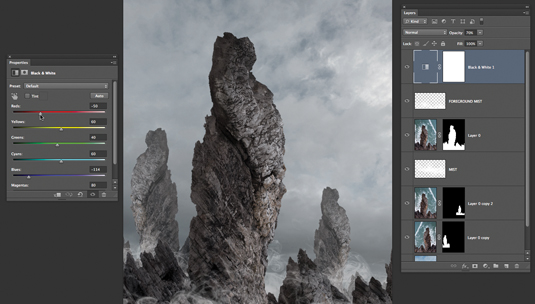
Click the top layer's thumbnail. Go to Layer>New Adjustment Layer>Black & White. Drag the Blues slider down to darken the sky and reveal more contrasting cloud detail. Drag Reds down to -50 for more foreboding rock shapes. Reduce the Opacity of the Adjustment Layer to 70% to let a little colour bleed through.
Get Practical Photoshop magazine!
This tutorial first appeared in Practical Photoshop magazine, the number one magazine for lovers of photography and image-editing. If you want extra 'genius tips' for tutorials like this one, you'd better get hold of the mag!
Now check out our massive list of 101 Photoshop tutorials!

Thank you for reading 5 articles this month* Join now for unlimited access
Enjoy your first month for just £1 / $1 / €1
*Read 5 free articles per month without a subscription

Join now for unlimited access
Try first month for just £1 / $1 / €1

The Creative Bloq team is made up of a group of art and design enthusiasts, and has changed and evolved since Creative Bloq began back in 2012. The current website team consists of eight full-time members of staff: Editor Georgia Coggan, Deputy Editor Rosie Hilder, Ecommerce Editor Beren Neale, Senior News Editor Daniel Piper, Editor, Digital Art and 3D Ian Dean, Tech Reviews Editor Erlingur Einarsson, Ecommerce Writer Beth Nicholls and Staff Writer Natalie Fear, as well as a roster of freelancers from around the world. The ImagineFX magazine team also pitch in, ensuring that content from leading digital art publication ImagineFX is represented on Creative Bloq.
