Apply a quick vintage look in Photoshop
Use Photoshop CS6’s Color Lookup feature to change colours within an image, in four simple steps.
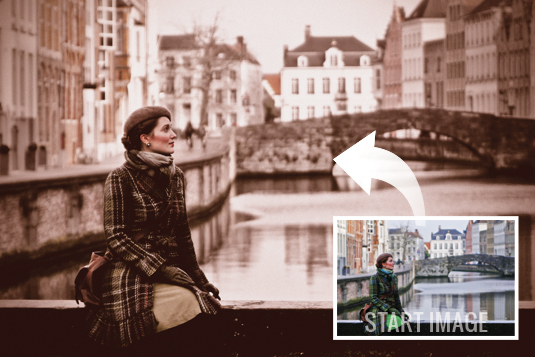
Photoshop CS6 has many useful features which save time and increase productivity (see our free Photoshop actions for more information), helping you create amazing images and special effects with ease. One of these is the Color Lookup feature, which can be utilised to create a beautiful vintage look of a far higher quality and depth than those available on photo filter apps.
Here's how to achieve the effect in four simple steps, and below you'll find an image for you to use with our guide.
Click here to download image
01. Add Color Lookup layer
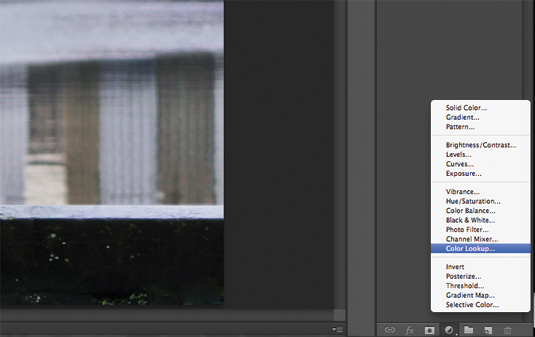
Open the 'color_lookup_before.jpg' start image via File>Open. Next, click on the Adjustment layer icon and select Color Lookup in the drop-down menu. All the options to adjust the colours in the image will appear in a separate properties dialog box below.
02. Change the colours
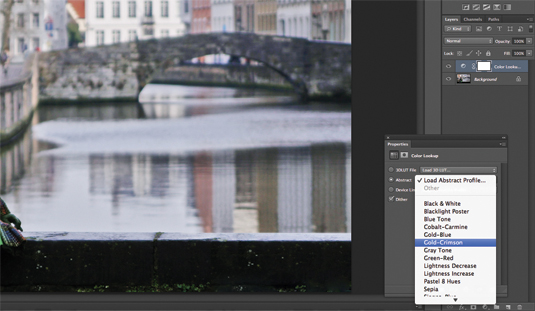
There are three different tabs from which you can select the alternative colour effects. To give the image a vintage look, switch to the Abstract tab. Then, from the drop-down menu, select Gold-Crimson. You can experiment with alternative effects depending on how you want your final image to appear.
03. Add a vignette
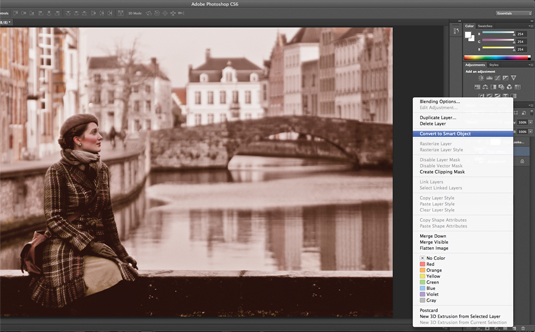
Next, duplicate the Background Layer and label it 'Filter effects'. Right-click the Filter effects layer and select Convert to Smart Object. This means that you can add multiple filter effects in a non-destructive way. To add a vignette, go to Filter>Lens Correction and switch to the Custom tab. Under Vignette, change Amount to -60 and Midpoint to +40. Click OK.
04. Add some grain
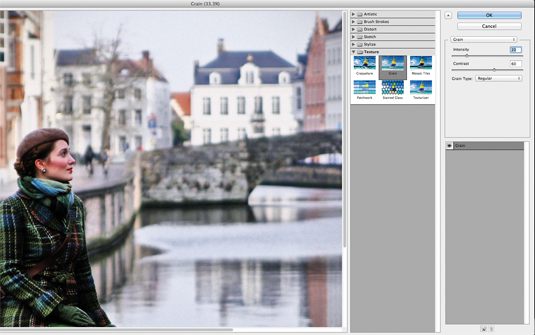
Finally, to add some grain, go to Filter>Filter Gallery and under the Textures menu, select Grain. Increase Intensity to 20 and Contrast to 60. Keep Grain Type on Regular. Click OK to apply the effect, then save the image as a PSD file to keep the layers intact.
Get Practical Photoshop magazine!
This tutorial first appeared in Practical Photoshop magazine, the number one magazine for lovers of photography and image-editing. If you want extra 'genius tips' for tutorials like this one, you'd better get hold of the mag!
Daily design news, reviews, how-tos and more, as picked by the editors.
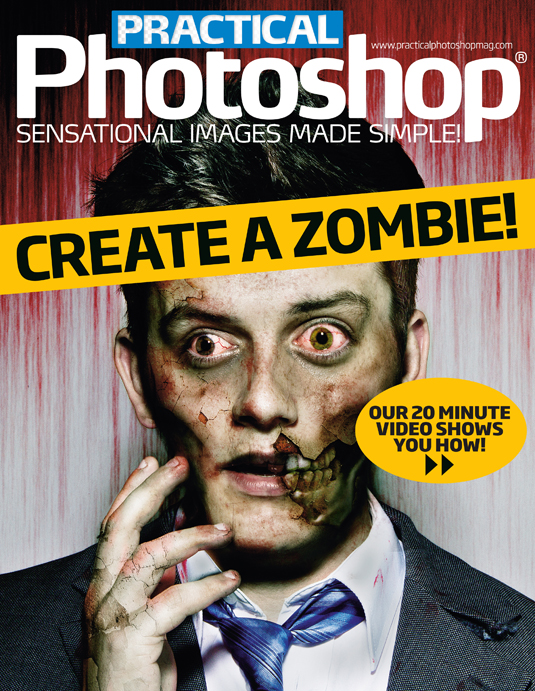
And FREE for iPhone and iPad just in time for Halloween and the new season of The Walking Dead, Practical Photoshop has released a 'Create a Zombie!' special.
Featuring a 20 minute tutorial video and full step-by-step walkthrough, it'll show you how to turn your nearest and dearest into gruesome, undead, flesh-eaters quicker than you can say "Braaaiins..." Stagger here to get it!
Now read:
- 101 Photoshop tutorials
- 20 best Photoshop plugins
- 30 free Photoshop actions to create stunning effects

The Creative Bloq team is made up of a group of art and design enthusiasts, and has changed and evolved since Creative Bloq began back in 2012. The current website team consists of eight full-time members of staff: Editor Georgia Coggan, Deputy Editor Rosie Hilder, Ecommerce Editor Beren Neale, Senior News Editor Daniel Piper, Editor, Digital Art and 3D Ian Dean, Tech Reviews Editor Erlingur Einarsson, Ecommerce Writer Beth Nicholls and Staff Writer Natalie Fear, as well as a roster of freelancers from around the world. The ImagineFX magazine team also pitch in, ensuring that content from leading digital art publication ImagineFX is represented on Creative Bloq.
