Whiten eyes and teeth with Photoshop
Digitally remove stains and even tooth colour from a photograph to create a winning smile! We walk you through the process in three simple steps.

Real teeth can have a wide range of colours, from grey to yellowy-white and beyond, and it’s usual for a person’s teeth to vary quite widely in colour. We’re conditioned to expect a flawless, uniform look these days, though, so we’ll show you how to create a smile fit for a Hollywood star. We’ll show you how to use Photoshop CS6 (or earlier versions of Photoshop, including Photoshop Elements) to whiten teeth with a quick scrub of the Sponge tool.
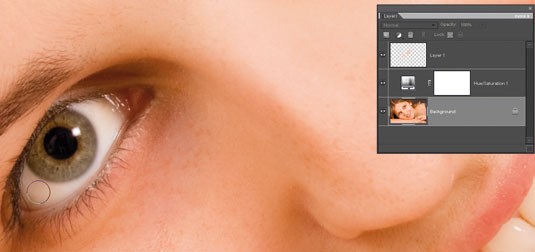
Teeth aren’t usually the focus of a portrait, though – the eyes are the first thing most people look at in a portrait, so they too can benefit from a little enhancement. We’ll show you how to use the Dodge tool to lighten the whites of the eyes to give them extra impact.
When retouching the eyes, though, it’s important not to go over the top and make the eyes look like they are glowing. Whenever you’re retouching, think ‘less is more’ so that you don’t create an unrealistic result. If your enhancements are subtle enough, the subject won’t even be able to say why the shot looks better.
Click here to download your start image
01. The eyes have it!

Take the Dodge tool (O) and, for this shot, set it to a Size of about 65 pixels. Set Range to Highlights so the tool doesn’t tinker with the eye’s shadows or midtones.
Set Exposure to 20% for a subtler edit. Brush with smooth strokes over the white of each eye to increase the intensity of the whites gently.
02. Tackle the teeth

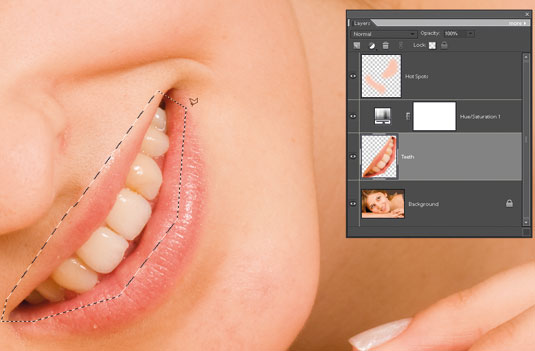
Grab the Polygonal Lasso and use it to draw a rough selection around the teeth, then press Ctrl+J to float the selection to a new layer and label this new layer ‘Teeth’.
Now switch to the Sponge tool, and set its Mode to Desaturate. A size of about 70 pixels will do the trick in this case.
Get the Creative Bloq Newsletter
Daily design news, reviews, how-tos and more, as picked by the editors.
03. Desaturate the yellow

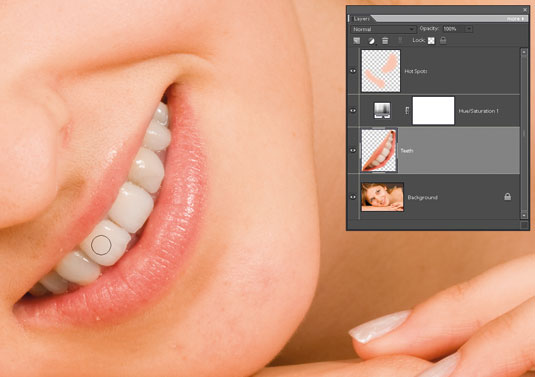
Brush carefully in short strokes over the yellow teeth to whiten them. It won’t matter if you stray over the gums, but if you inadvertently desaturate the lips, simply undo the last stroke (that’s why it’s worth using short strokes).
Toggle the layer visibility on and off to assess the effect.
Now check out our massive list of 101 Photoshop tutorials!

Thank you for reading 5 articles this month* Join now for unlimited access
Enjoy your first month for just £1 / $1 / €1
*Read 5 free articles per month without a subscription

Join now for unlimited access
Try first month for just £1 / $1 / €1

The Creative Bloq team is made up of a group of art and design enthusiasts, and has changed and evolved since Creative Bloq began back in 2012. The current website team consists of eight full-time members of staff: Editor Georgia Coggan, Deputy Editor Rosie Hilder, Ecommerce Editor Beren Neale, Senior News Editor Daniel Piper, Editor, Digital Art and 3D Ian Dean, Tech Reviews Editor Erlingur Einarsson, Ecommerce Writer Beth Nicholls and Staff Writer Natalie Fear, as well as a roster of freelancers from around the world. The ImagineFX magazine team also pitch in, ensuring that content from leading digital art publication ImagineFX is represented on Creative Bloq.
