10 expert tips for improving your packaging design skills
How to design great packaging, from using features in Illustrator to the best plug-ins you can buy to improve your workflow.
There are few things more rewarding than seeing your packaging designs appear on supermarket shelves across the country. But there's more to packaging design than just a great creative vision. Put simply, if your idea isn't executed well, it will probably never make it to the finished product. Here we offer 10 expert tips to help make your workflow more efficient and successful – and hopefully make your packaging dreams a reality...
01. Use approved cutter guides
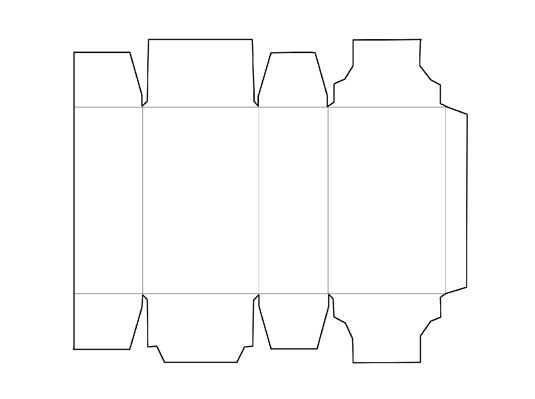
Make sure your client or printer has given you the right specs – never start a packaging job without the right details. So you should have the cutter guide (or die-line) that is the right size, has all folds, trim and bleed specified and clearly states any glue or seal areas as well as well as where the barcode will be printed.
Making sure everything is right from the offset will prevent any problems at a later date. Tip: on your doc put cutter guides in one colour and folds in another for clarity.
02. Or get it approved...
If you're making the cutter guide yourself on the client's specifications, don't only get it approved by the client but also involve the printer from the beginning. Make sure it's feasible and make sure you don't start any creative work until it's all approved (and you have a detailed print spec). The last thing you want to be doing is recreating your artwork due to a cutter guide discrepancy.
03. Use 3D Revolve
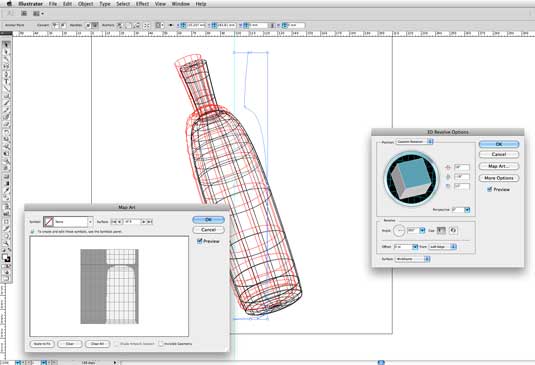
Here's a great tip for visualising your packaging designs: use Illustrator's 3D Revolve tool. First, using the Bezier Pen tool, create a profile of your shape – perhaps a bottle. Next, select it and then go to Effect>3D>Revolve. Tick the Preview box and you'll see that Illustrator creates a 3D object.
You can choose the shading, using the dropdown in the dialog. And to get your shape right it's probably best to use Wireframe as it's less of a resource hog.
04. Use Symbols wisely
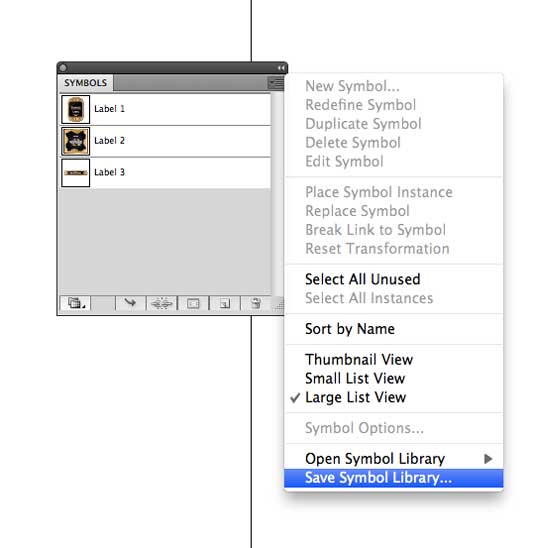
The Symbols functionality of Illustrator is great for packaging designers. Essentially, Symbols are self-contained instances of elements of your artwork, that you can quickly and easily re-use without having to copy all paths and duplicate and so on.
Delete all the Symbols in the Symbols panel, then to create a Symbol instance, select your design and then drag it into the Symbols panel (Window>Symbols). Add as many symbols (maybe logo designs or individual elements to be used across different packaging) and then go to the flyout menu in the Symbols panel and choose Save Symbol Library. You can then share that library with other designers or load it up whenever you fancy.
05. Map symbols to 3D objects
And also (and this is brilliant), you can use the excellent Map Symbols to further give you an idea of what your final package design will look like. First, turn your label into a symbol (as detailed in tip 4). Now, go back to your 3D object – by selecting it and going to Effect>3D>Revolve (the 3D effect remains live) and hit the Map Art button.
Now, select a surface to map your symbol on using the arrows at the top of the dialog, select your symbol and hit preview. Position and scale your symbol using the handles. This is a very neat way of quickly previewing (or presenting to clients) your label design, but can be applied to other packaging designs, too.
06. FoldUP! 3D
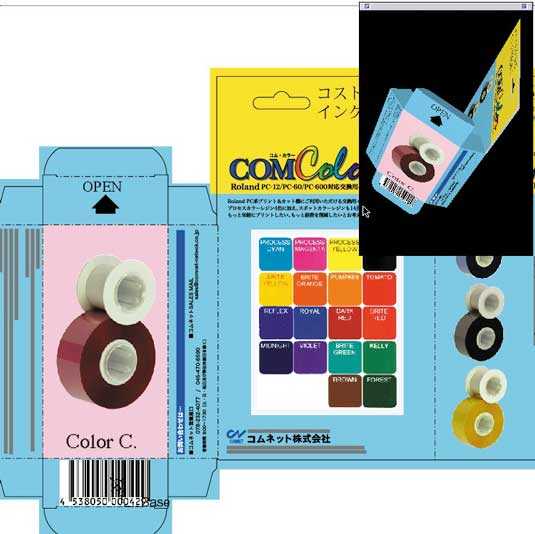
A really cool packaging plug-in for Illustrator is Comnet's FoldUp! 3D. This quite expensive plug-in ($379/£267 – but with 25 per cent off for students) is great for visualising all sorts of packaging. You simply specify the cut and fold lines, add your artwork and then you get an interactive 3D representation of your design which you can fold and unfold as well as rotate.
It's a quick way of getting a mock-up of your design without a hard proof or venturing into a 3D package. But it will cost you. For more on the FoldUp! 3D workflow, check out this walkthrough.
07. Effective use of artboards
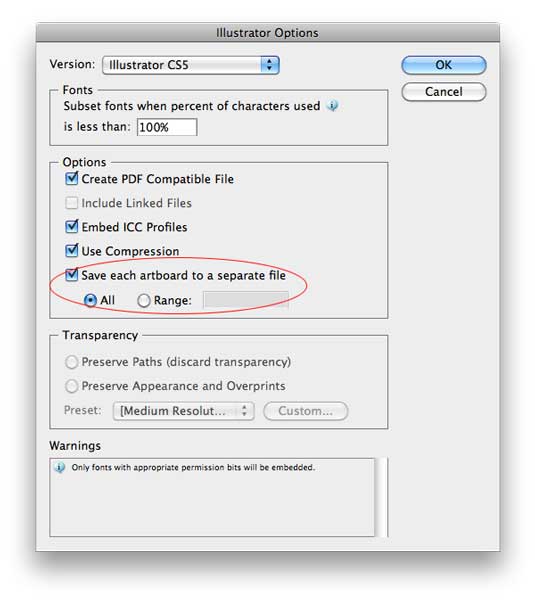
Artboards are also a great feature of Illustrator for packaging designers. Essentially this feature enables you to create several cutter guides for different types of packaging and then use your Illustrator artwork (perhaps using Symbols) to retain consistency across all designs. It saves you creating different docs for each design – and when it comes to sending your files to the printer, you can easily export each artboard by using the Save each artboard to a separate file option in the Save As dialog.
08. EskoArtwork utilities
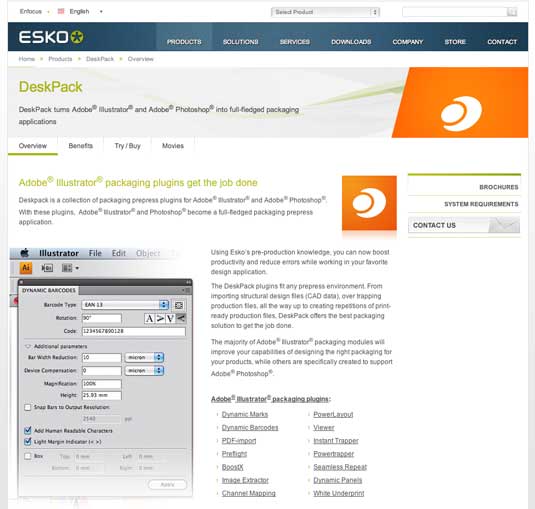
Esko is a plug-in manufacturer that specialises in packaging plug-ins – and DeskPack is a great collection of tools for any Illustrator user creating packaging designs.
Dynamic Marks enables you to generate proofing marks, print marks and registration marks. Preflight enables you to prepare your files for print quickly and easily. And White Underprint adds a white underprint to your artwork in just a few clicks.
This is just a selection of the plug-ins on offer in DeskPack – see the whole lot here. Each plug-in is available separately (you can't buy the whole lot online through the site) and some are very very expensive so are mainly for packaging companies, but it's worth looking at the trials.
09. Use Offset Path for bleed
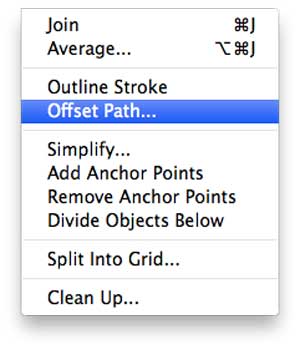
Creating bleed is a necessity and in Illustrator a very quick way to do this is use the Offset Path feature. The problem is, when you're faced with tricky shapes it can take a while to add the bleed.
The Offset Path feature simplifies this. Just select your packaging design (or net) and then go to Object>Path>Offset Path. Specify a bleed amount in the Offset field (usually 3mm is good enough but if you're unsure refer to your print specs or double-check with your printer) and you're done.
10. Use Package in Illustrator
Available in Illustrator CS6 and CC, the Package command (just like in InDesign) is invaluable for sending your files to the printers. It enables you to quickly pull together all the linked images and fonts used in your document so nothing is missing when you send your files to press. If you're using CS5 or below, try Scoop. There's also some other handy plug-ins on the Worker 72a site so it's well worth a look.
Have you got any tips for creating packaging designs that we've missed? Let us know in the comments!

Thank you for reading 5 articles this month* Join now for unlimited access
Enjoy your first month for just £1 / $1 / €1
*Read 5 free articles per month without a subscription

Join now for unlimited access
Try first month for just £1 / $1 / €1
Get the Creative Bloq Newsletter
Daily design news, reviews, how-tos and more, as picked by the editors.

Rob is editorial, graphic design and publishing lead at Transport for London. He previously worked at Future Publishing over the course of several years, where he launched digital art magazine, ImagineFX; and edited graphic design magazine Computer Arts, as well as the Computer Arts Projects series, and was also editor of technology magazine, T3.
