Add amazing effects to your photography with Luminar 4
Use powerful Look and Layer tools to transform your photos.
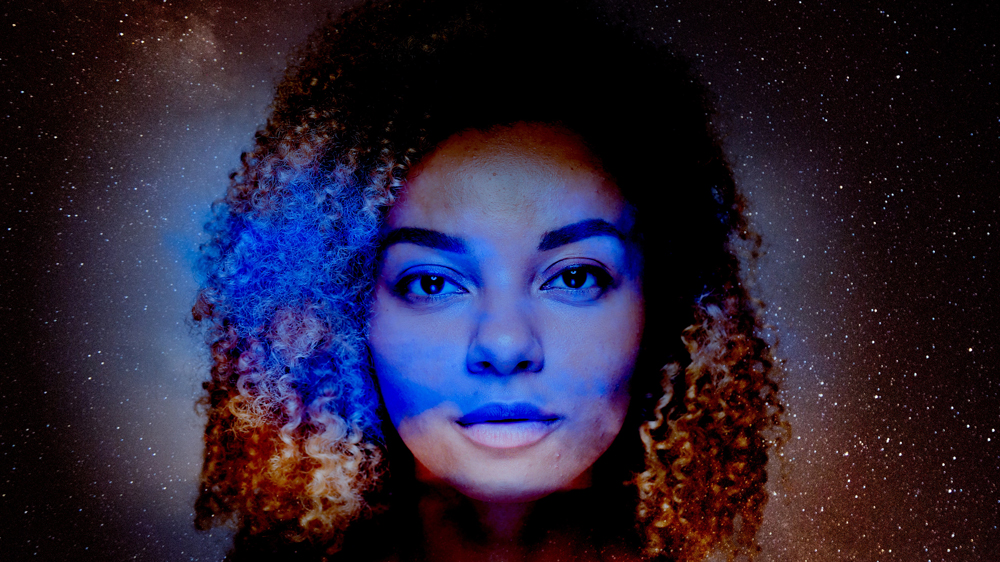
Powerful photo editor Luminar 4 comes packed full of features and pre-designed Looks that can transform your photos with a single click. Combining individual filters that can be customised to suit, the creative possibilities Luminar 4 offers photographers are endless.
But that’s not all, Luminar 4 also supports Layers – both adjustment layers and image layers – to combine effects, create multiple exposure and composite images.
And that’s not the best part. Luminar 4’s Looks and Layers are as powerful working together as they are on their own, with Looks offering filters that can then be further tweaked and adjusted with Layers, using either a Blend Mode, changing the opacity or using a Mask.
Let’s take a closer look at how Luminar 4’s Layers and Looks work together in practise...
Luminar 4: Looks and Layers explained
Luminar 4’s Looks are a read-made set of image filters, which can be edited individually, or can be modified even further by applying an adjustment layer. So rather than stick with a bog-standard filter, you can make your images really stand out by combining more than one Look. Here’s how…
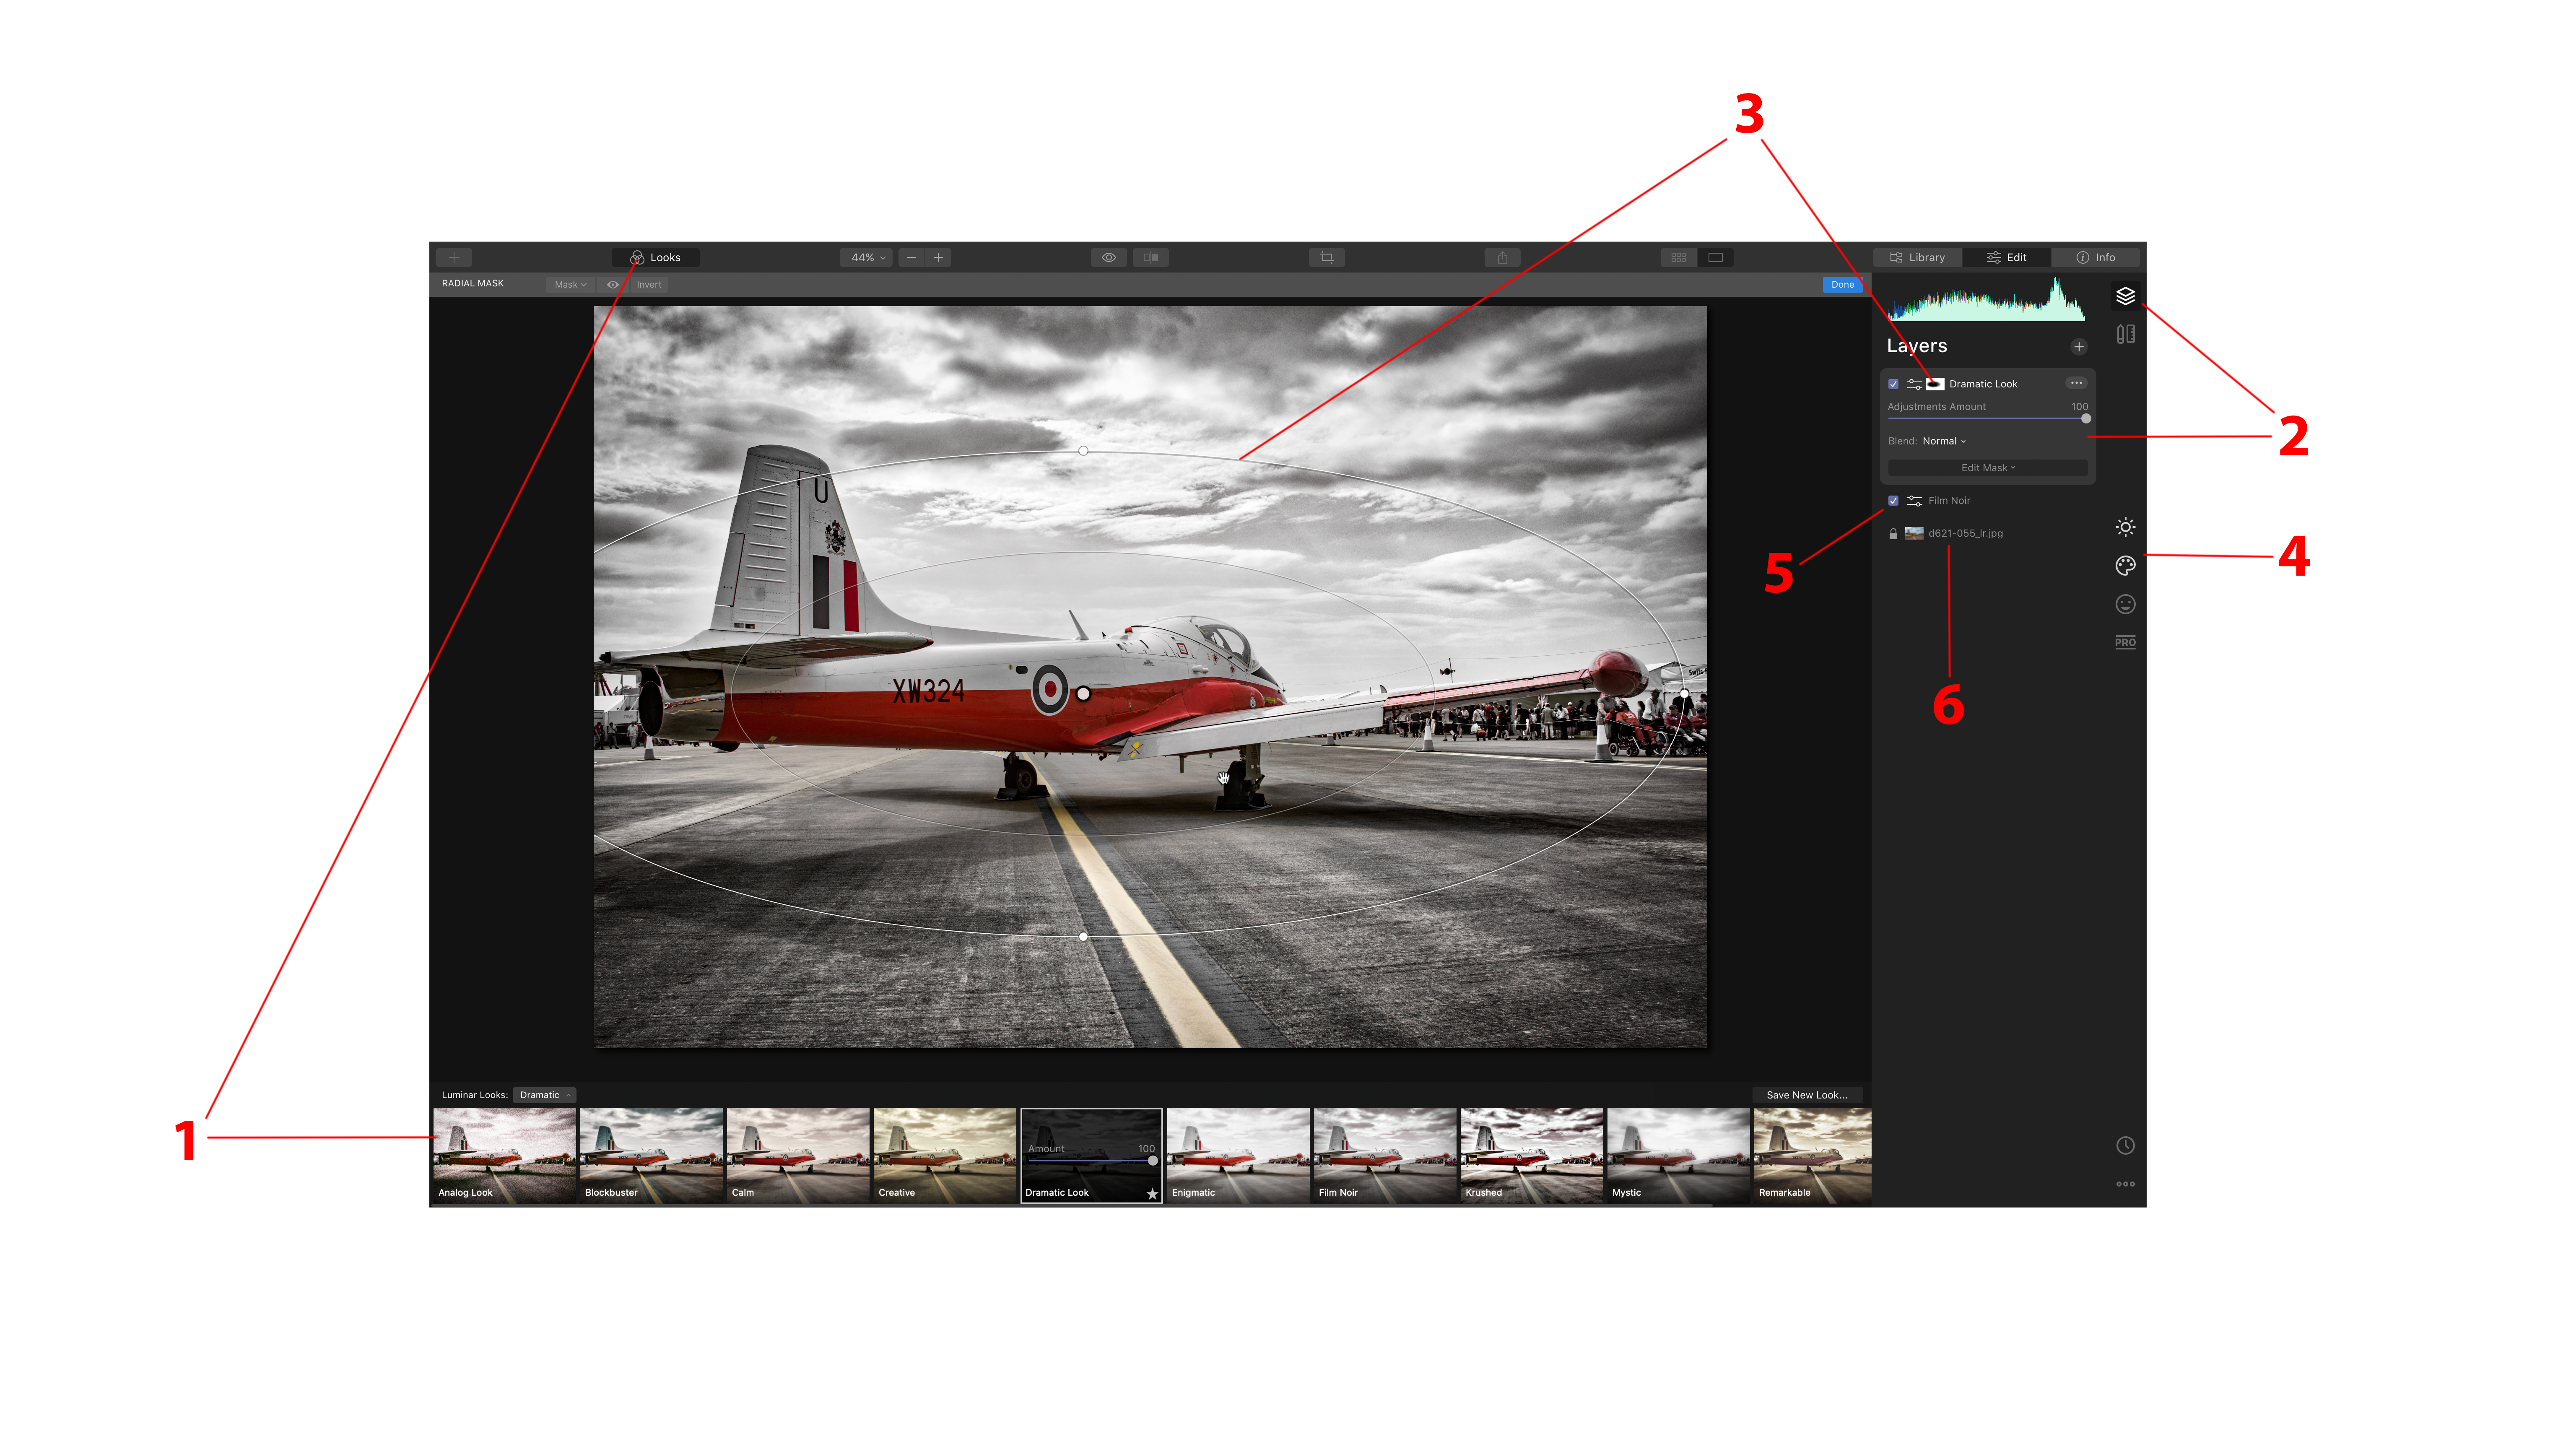
01. Select a Look
Luminar’s Looks are organised into easy-to-navigate categories, which you can simply click on to apply to your image.
02. Open the Layers panel
In the above image, a Look has been applied to an adjustment layer in order to increase control and options over the final effect. Click the Layers button on the top right to show the Layers panel
03. Add a Mask
Now you have added a Look to an Adjustment Layer, the blending and masking options are there to help you achieve the desired effect. In the above image, a Radial Mask has been applied to tone down the Dramatic Look Layer in the centre of the image
04. Tweak and adjust
Adding a Look as an Adjustment Layer means you can edit all the filters and settings as much as you like to get the look your after.
05. Use multiple Looks
The above image uses two Looks stacked on top of each other as two individual Adjustment Layers, which can be renamed in order to help organisation and workflow.
06. Untouched original
The base layer in this example is the original photo, which can also be edited by applying Looks directly to it, or adding Adjustment Layers for a greater level of control.
5 easy ways to make the most of Looks and Layers
While Luminar’s powerful Looks and Layers functions offer endless creative possibilities, getting started with such comprehensive tools might feel a little daunting. With that in mind, here are five quick tips to help you get started and make the most of what these powerful features have to offer.
01. Reveal Masks
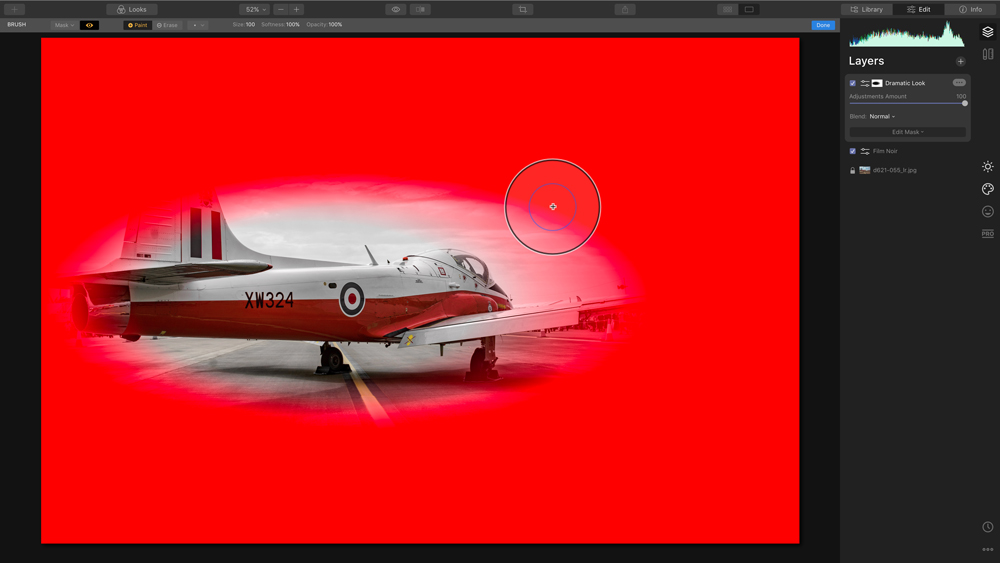
When editing masks, use the eye icon in the top toolbar to display your Mask as a red overlay to help spot any areas that need work but might have gone unnoticed.
02. Blending modes
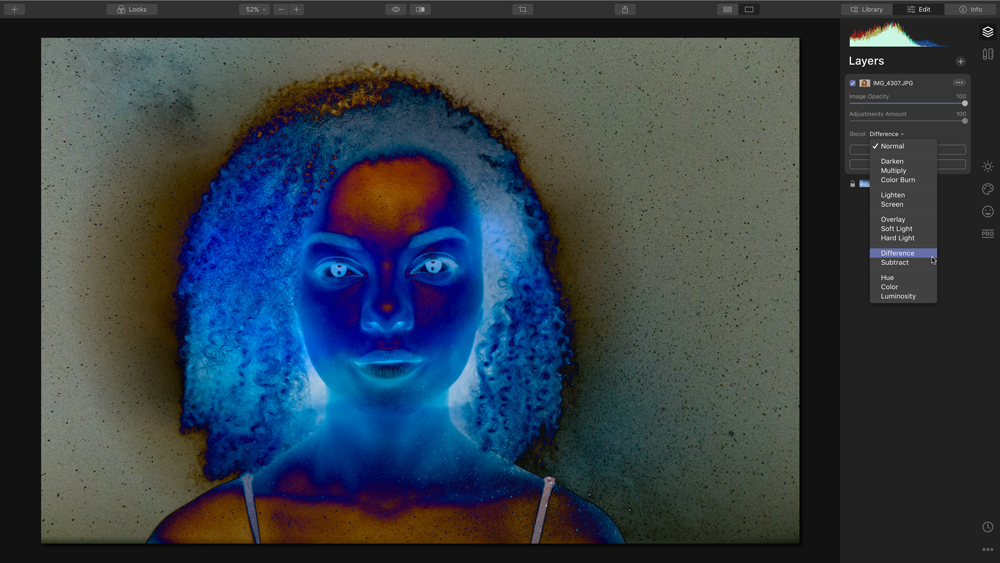
Blending modes offer a lot of creative options, and while with some you know exactly what the outcome will be, others are slightly more dramatic. Difference and Subtract, for example, add striking effects to images, which might seem a little much at first, but they can always be toned down with Masks or by adjusting the Layer’s opacity settings.
03. Editable Layers
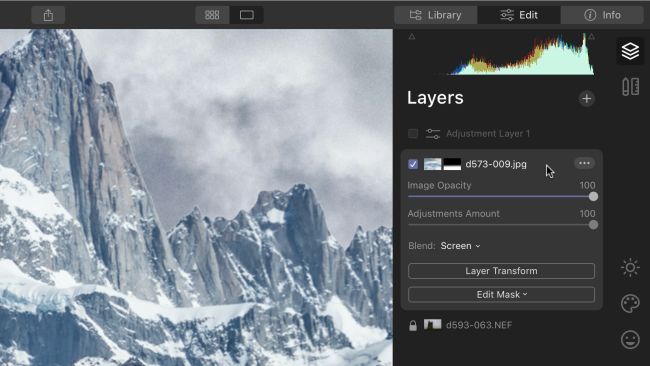
Every Layer in Luminar is editable, even the ones right at the bottom of the stack. Simply selecting these will disable any Layers above while you work, which you can simple re-enable once you’re finished.
04. Layer menu
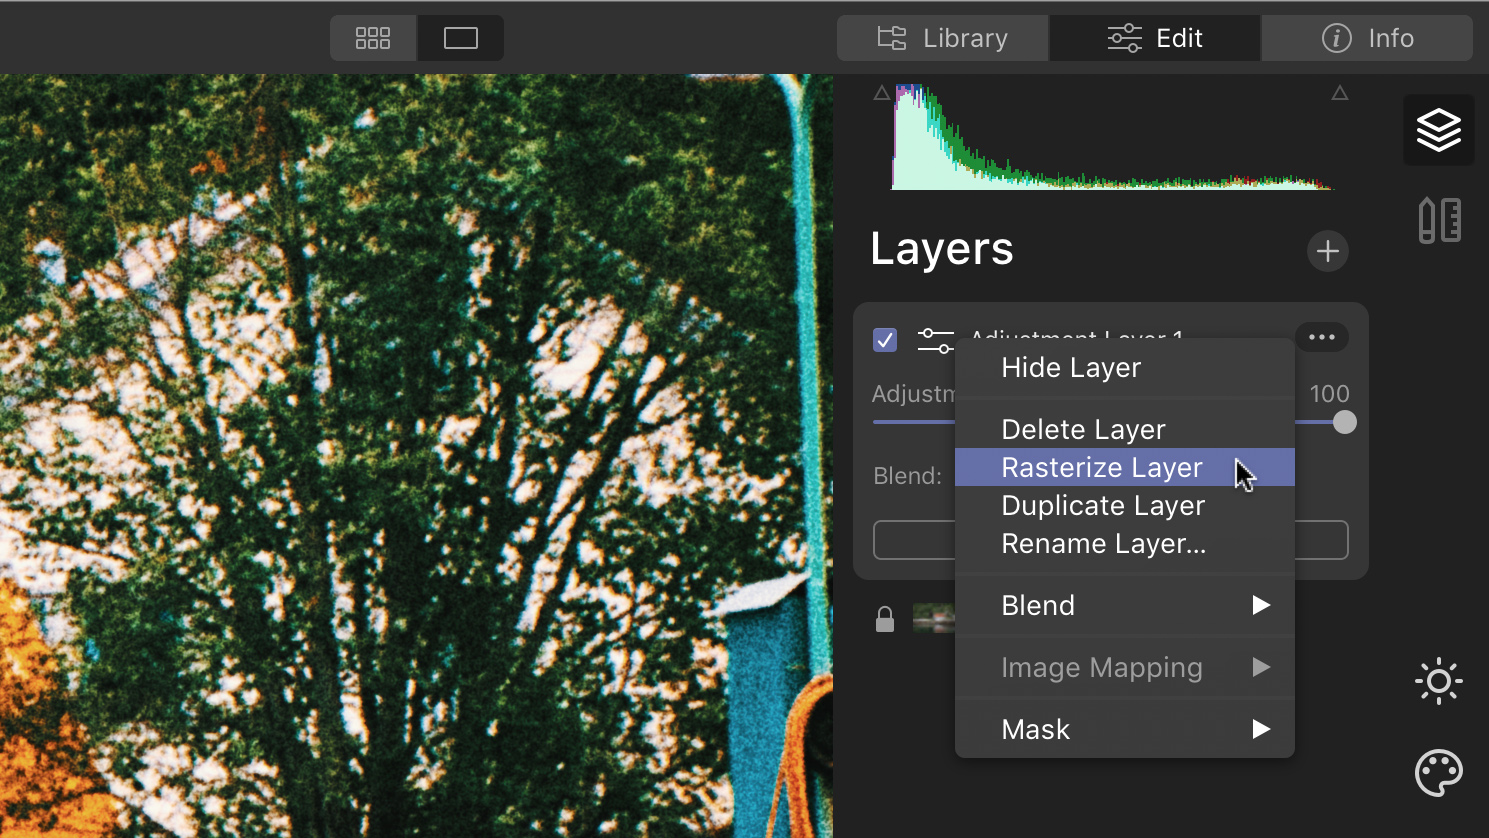
Speaking of Layers, the three-dot menu button (to the right of every Layer) has some handy options, which includes duplicating an Image Layer to add further adjustments and Blending Modes.
05. Mask Brush settings
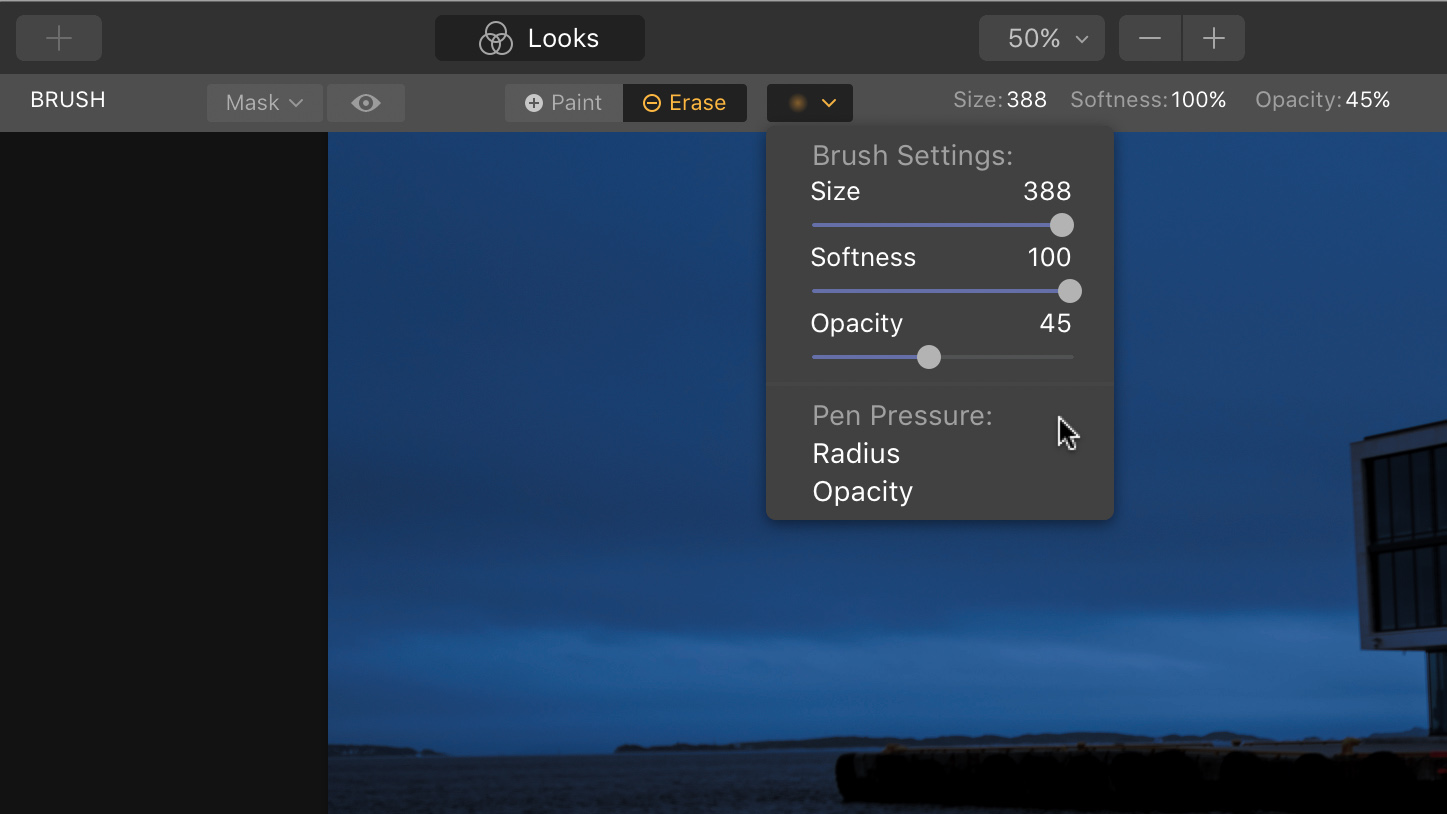
For manual blending use Luminar’s Mask Brush, the size, softness and opacity of which you can access via this drop-down menu in the masking mode.
Get a copy of Skylum Luminar 4 today
Want to give Luminar 4’s powerful tools a try? Right now you can download a free seven-day trial via the Skylum website. Available for both macOS and Windows, the trial version is fully functional and there’s no obligation to buy. But if you do decide to purchase, use exclusive discount code CB to save $10/£10 on the retail price.

Thank you for reading 5 articles this month* Join now for unlimited access
Enjoy your first month for just £1 / $1 / €1
*Read 5 free articles per month without a subscription

Join now for unlimited access
Try first month for just £1 / $1 / €1
Get the Creative Bloq Newsletter
Daily design news, reviews, how-tos and more, as picked by the editors.

The Creative Bloq team is made up of a group of art and design enthusiasts, and has changed and evolved since Creative Bloq began back in 2012. The current website team consists of eight full-time members of staff: Editor Georgia Coggan, Deputy Editor Rosie Hilder, Ecommerce Editor Beren Neale, Senior News Editor Daniel Piper, Editor, Digital Art and 3D Ian Dean, Tech Reviews Editor Erlingur Einarsson, Ecommerce Writer Beth Nicholls and Staff Writer Natalie Fear, as well as a roster of freelancers from around the world. The ImagineFX magazine team also pitch in, ensuring that content from leading digital art publication ImagineFX is represented on Creative Bloq.
