How to create a video game character in ZBrush
Learn to create a stylised character with attitude, using ZBrush, 3ds Max and GoZ.
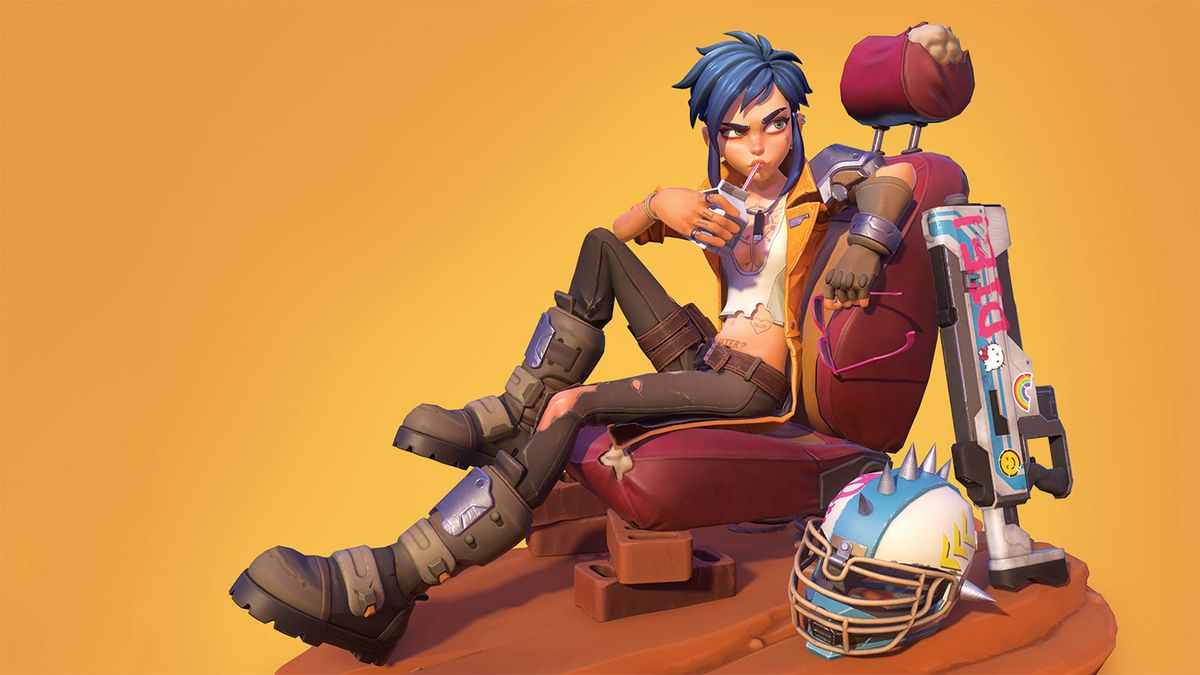
Here I'll be talking about the process of creating ReY, a character that I made for the Beyond Human challenge on ArtStation. I decided to develop my own video game character design, and here I will take us from concept art to final render. Eventually I even did a few animations for ReY; she's a character for a game, after all, so she has to be 'alive'.
I really like characters designed by Anna Cattish and Jamie Hewlett, so I took these as a kind of base for my own design – which won the challenge. I was also focused on the Overwatch style in my workflow, and I strongly recommend you guys take a look at it.
I used mostly ZBrush, aside from some hard-surface parts. Here I switched to 3ds Max instead, because it's more comfortable for me. I also did retopology and the character's pose sketch in 3ds Max, and GoZ was a great help here.
Download the files for this tutorial.
01. Block in proportions
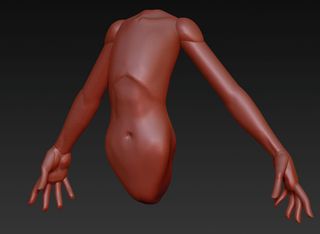
Usually, in the very beginning, I use spheres and cylinders. Then with the Transpose tool and Move brush I build primary masses and proportions of the character. It's beneficial here to think about famous Disney movies, and you can also find tons of references on the ArtStation website.
02. Sculpt the head and body
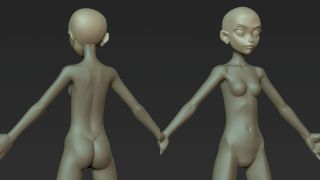
You should always remember anatomy. Keep in mind where bones and muscles should be, and how it all works. This is important even when you are creating a cartoonish stylised character. All main shapes and proportions are based on real anatomy, and when you do it right, you can then move on and play with proportions. For example, you can increase the character's head and eye size, or make their legs longer.
03. Add uncomplicated clothes
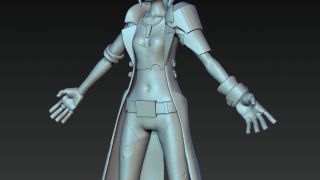
Here I keep using primitives to create stuff like clothes, accessories, hair and so on. At this point, it would be a good idea to decide how many details you'd like to use in your design – as a stylised character it doesn't have to be 'noisy' or too complex.
Get the Creative Bloq Newsletter
Daily design news, reviews, how-tos and more, as picked by the editors.
04. Use polygroups and DynaMesh
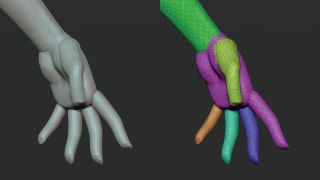
You can create a hand as a single object and add fingers to it using CurveTube or cylinders. Then you can use DynaMesh to combine all of that with Polygroups (just activate Groups in the DynaMesh settings). Different Polygroups will be helpful later on when creating a pose for your character.
05. Call on useful brushes
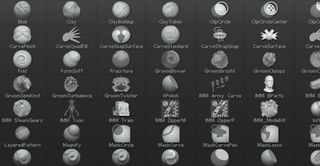
I often use standard brushes like ClayBuildup, Move, Dam_Standard and hPolish. Very rarely I use Standard, Clay, TrimDynamic, Inflate, Move Topological, Pinch, Layer or CurveTube. Also, I would recommend you to download Orb brushes. For polypaint I use Pen A or create my own brushes – it depends on the purpose.
06. Create the hair
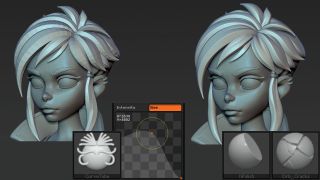
There are several methods when it comes to making the hair. You can create hair using generators in Maya and 3ds Max (see our post on Maya tutorials for Maya tips) or use FiberMesh in ZBrush. Also, you can bake or just draw hair on a plain surface with an alpha channel. Personally, I prefer to create hair using CurveTube, and when the first shape is finished, I use hPolish to give it some smoothness and to adjust the shape.
07. Adjust clothes
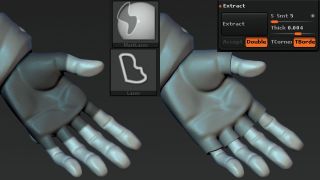
Here I use Mask Lasso and Extract. You can adjust shapes using the Move brush. At this point, I use ZRemesher to make edges lie correctly on the form. Sometimes I begin with creating some folds or use guides to make a mesh.
08. Create folds
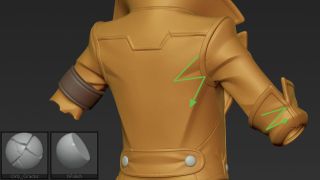
You can use Marvelous Designer as a starting point, but I prefer to use Orb_Cracks, to make the folds exactly how I want them. Remember, our character is stylised, so don't make it too realistic by adding too many folds.
09. Make hard surfaces
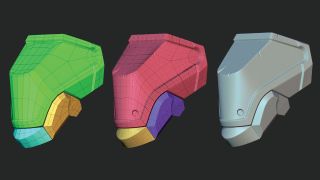
I did base meshes in 3ds Max and finalised them in ZBrush. Bumps, cracks, scratches – but you have to know when to stop. I also used ZModeler to crease edges.
10. Add textures
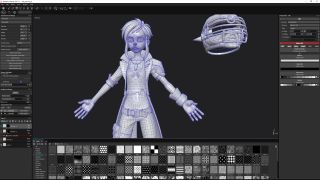
When retopology and UVs are done, we can finally take care of textures. I love Substance Painter for its simplicity and massive number of instruments. I prefer a Spec/Gloss workflow because it gives more options for working with materials.
11. Time to bake
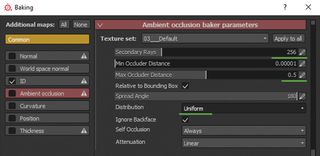
For baking, I usually use the following settings. Antialiasing 8x8 only for Normal, W_normal, Curvature and Position maps. Antialiasing for AO and Thickness – none, because calculating will take too much time. For the AO settings, I increase the number of Rays to 256. I prefer Uniform Distribution with a Max Occluded Distance value from 0.5 to 0.8.
Firstly I bake each piece of geometry separately and then bake them all together to create an additional AO map. As a result of this, I have local AO and global AO so that I can combine them in Photoshop.
12. Design colour schemes
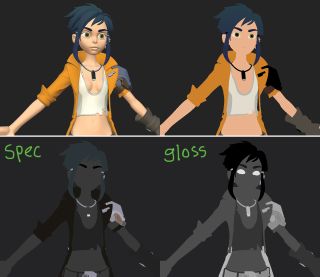
At the very beginning I just fill everything with a flat colour, and then I try to find more interesting colours for my character. There is tons of information about palettes and colour theory on the internet. You can then find a picture that looks good and simply pick some colours directly from it.
Keep in mind that Substance Painter works in sRGB colour space, and that the colour you have chosen may be not as bright. After that I adjust Specular and Glossiness for each piece. I try to keep my materials list organised and straightforward.
13. Throw in a little noise
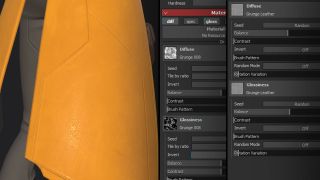
You can add a little noise to solid colours by using Procedural maps. Set the Overlay or Multiply blending mode with 3-10% opacity. It will give a nice effect of non-uniform colour. You can also use this method for Glossiness.
14. Use a Gradient Mask for secondary colours
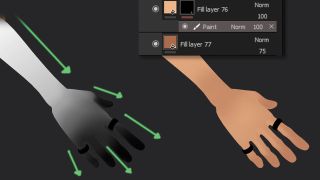
Gradients help with adding some secondary colours to your main ones. Create a solid layer with a secondary colour through a gradient mask which you can draw by hand or use projection.
15. Include scratches, edges and dirt
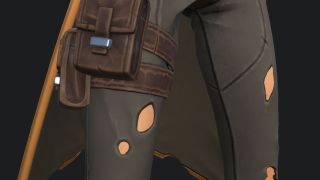
Here I add a worn effect to the clothes. By using the Curvature map, I create shabby borders and add some dirt to the seams. There are a lot of cool Mask Generators in Substance Painter. For example, you can add some warp distortion to make the seams look more exciting and then drop a Grunge mask with multiple on top of it.
16. Paint the skin
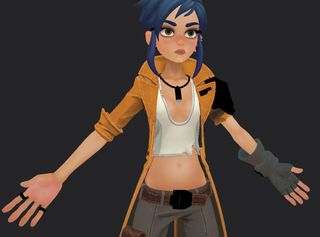
There are tons of colours on the human body and skin. In the skin tone I'm using there's orange tan, pink hands, darker elbows, yellowish bones that you can sometimes see through the skin, bluish areas under the eyes, rosy cheeks, and red lips and nose. So, you have to keep all that in mind. Tip: I use a red Emissive map with a very low opacity to fake some kind of SSS effect.
17. Bake some lighting
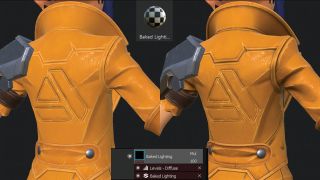
I like the Baked Lighting filter. By using it, you can adjust basic lights and shadows just like in hand-painted textures! You can play with the filter settings, such as the colours of the light sources and blend mode variations.
18. Add final details
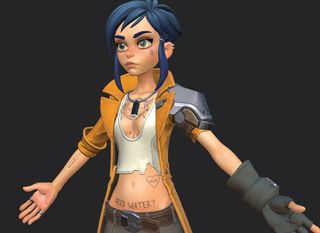
To finalise my character, I added some tattoos on her skin. It's a mixture of sci-fi and stick n' poke. At some point, I was going to add more dirt, so I even created a custom brush alpha. But in the end, it all turned out too noisy, and I used it only with a low opacity level.
19. Give them cool hair
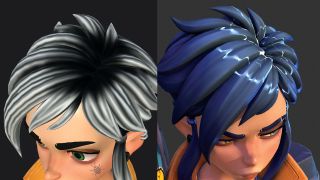
I like how hair looks in Overwatch, so I tried to create something similar. Anisotropy works well for the highlights on hair. To use it you need to create a Position map, and also a good Glossiness map to make highlights less solid.
20. Perfect the metal
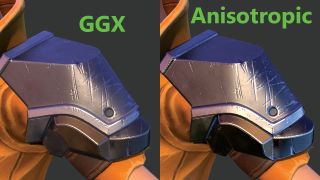
For metallic parts I also use Anisotropy. But here it's much easier: just activate Anisotropy in material in Marmoset Toolbag and play with the settings.
21. Rig and skin
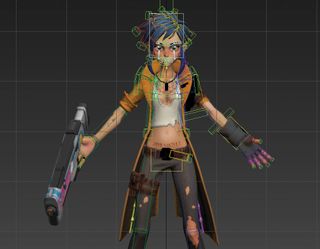
I rigged in 3ds Max using Biped and I created some additional bones for the hair and clothes. The weapons also had their own bones. I don't want to offend anyone who uses 3ds Max, but this was my last rig and last animation made in this program. I have now switched over to Maya.
22. Animate your character
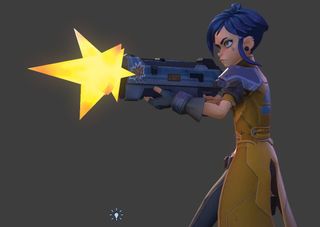
Usually I will fix the final character's pose in ZBrush, but this wasn't the case with ReY because I was planning to create a few short animations in order to make my character more alive. I eventually created a set of standard animations such as Idle, Attack and Run.
23. Adjust materials in Marmoset Toolbag
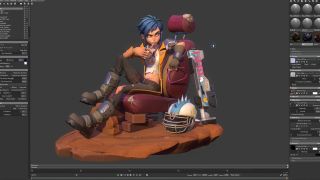
Well, we're almost at the end! Now you can open your model in Marmoset Toolbag and adjust materials and light. There's nothing tricky, but you have to remember that Marmoset Viewer does have some limitations.
This article was originally published in 3D World, the world's best-selling magazine for CG artists. Subscribe to 3D World here.
Related articles:

Thank you for reading 5 articles this month* Join now for unlimited access
Enjoy your first month for just £1 / $1 / €1
*Read 5 free articles per month without a subscription

Join now for unlimited access
Try first month for just £1 / $1 / €1
