Animate characters with CrazyTalk Animator
Bring your characters to life quickly and easily.

Four years ago I taught myself to create vector art in Adobe Illustrator, and became a vector contributor for micro-stock agencies like Shutterstock, Adobe Stock, 123RF and Vectorstock.
Recently, I discovered CrazyTalk Animator 3, and even though I don't have a background in animation, I found it easy to use to animate my characters. You can start with a PSD design, make a few quick modifications so it fits the CTA format, and bring it to life quickly and easily. The results look professional and it saves loads of time compared to other animation methods.
Photoshop Creative ranked the tool 8 out of 10, commenting: ”Overall CTA3 is a very good tool to create nice, smooth two dimensional animations…”
In five hours, I can create a whole family of characters based on one initial character. In this tutorial, I'll show you how to animate a character with CrazyTalk Animator 3. I like creating 2D characters in a traditional flat design as it gives me more leeway for quick changes, but these techniques can be adjusted and applied to any style of character. Let's get started!
01. Customise your characters

20-25 minutes
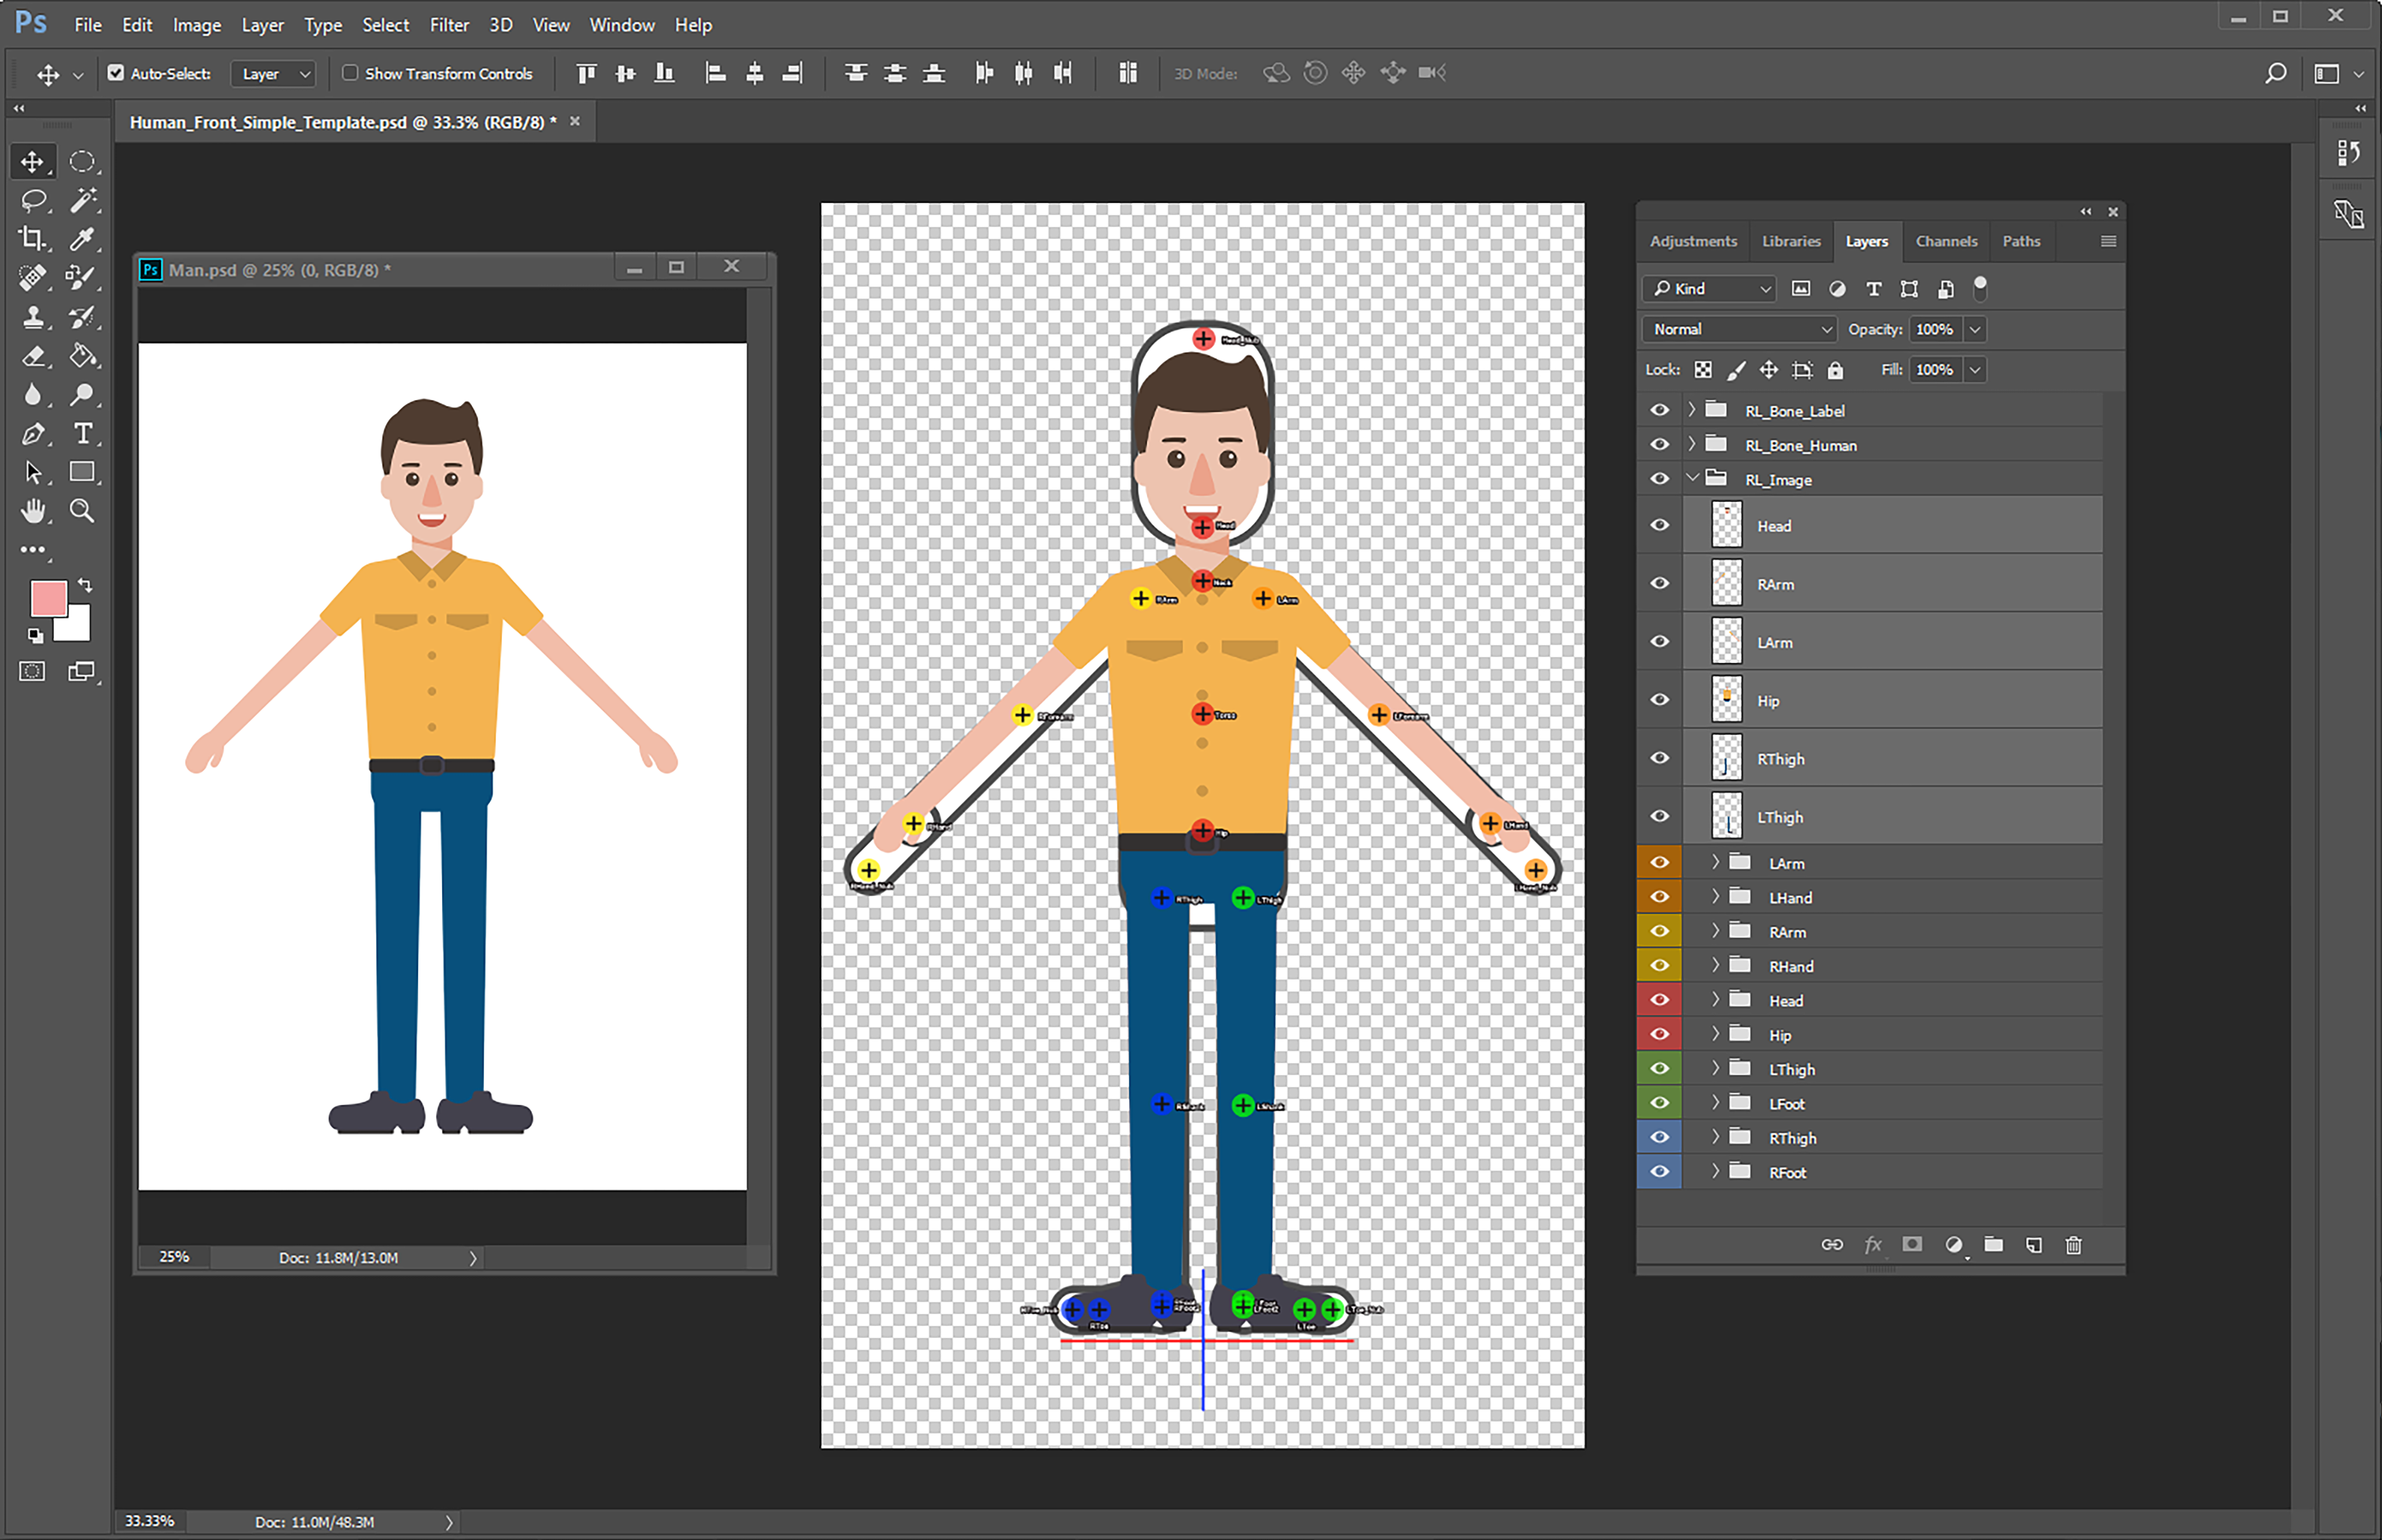
The first step is to modify your character designs so they'll work with the CTA3 format. My original character – which comes from Shutterstock – has six body parts. We need him to have 10 parts to work in CTA3, so I edited the design as shown in the image above. I tend to use Adobe Illustrator for tasks like these.
02. Adjust the character layers

2-5 minutes
In order to animate the character, we need to locate all the bone joints. This is simple to do if you follow the PSD template provided for CrazyTalk Animator 3 Pipeline. You can download the template here.
Make sure your character's hips are located in the same position as the dummy hip. Carefully place body parts into the right template folder. Then delete the dummy and rearrange layers by relocating the hand and feet folders on top of the arm and thigh folders, respectively.
03. Edit your joints

Around 5 minutes
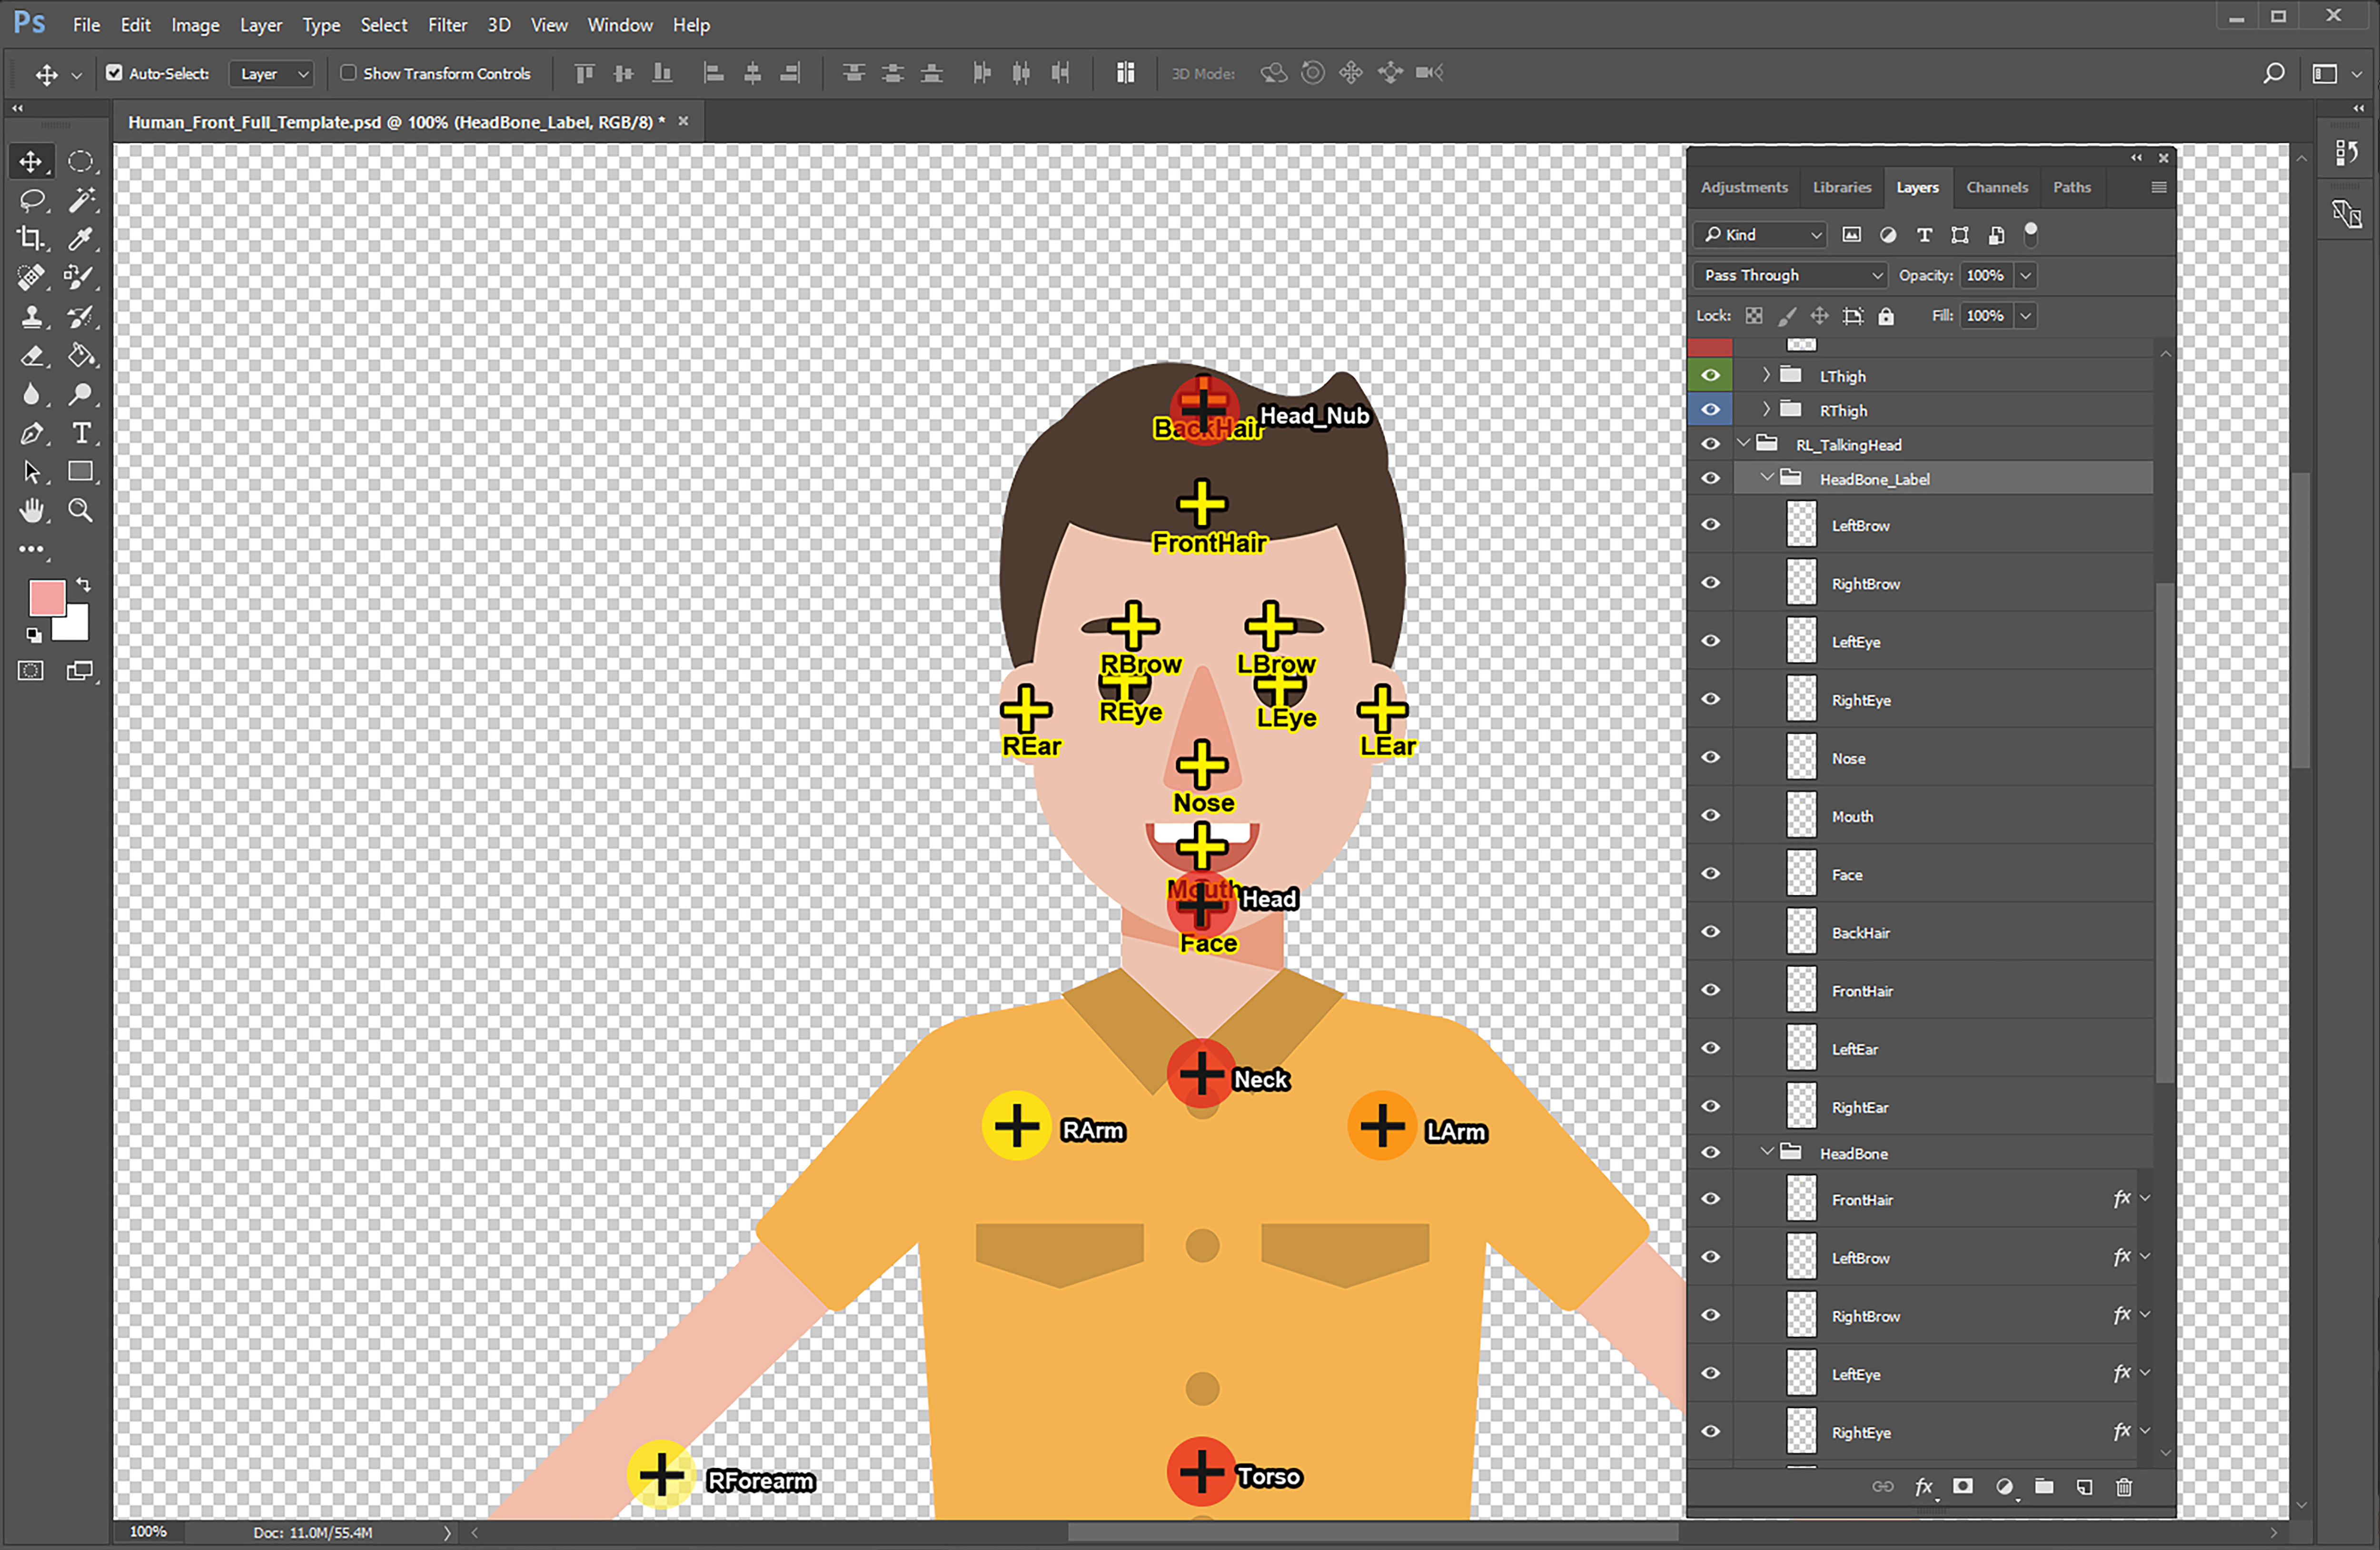
Focusing on the head part, and again following the CTA3 template, relocate the labels and joints into the right positions. Move the baselines (shown here in red and blue) close to feet, and at this point hide the hips and hand so you can focus on the arm and leg parts. Make sure the all end joints are close to the end of the image sprites.
Then move on to finish relocating the rest of the joints on torso and hand parts. All done! Now you can save the character's PSD file.
04. Bring the PSD character to life

20-30 minutes
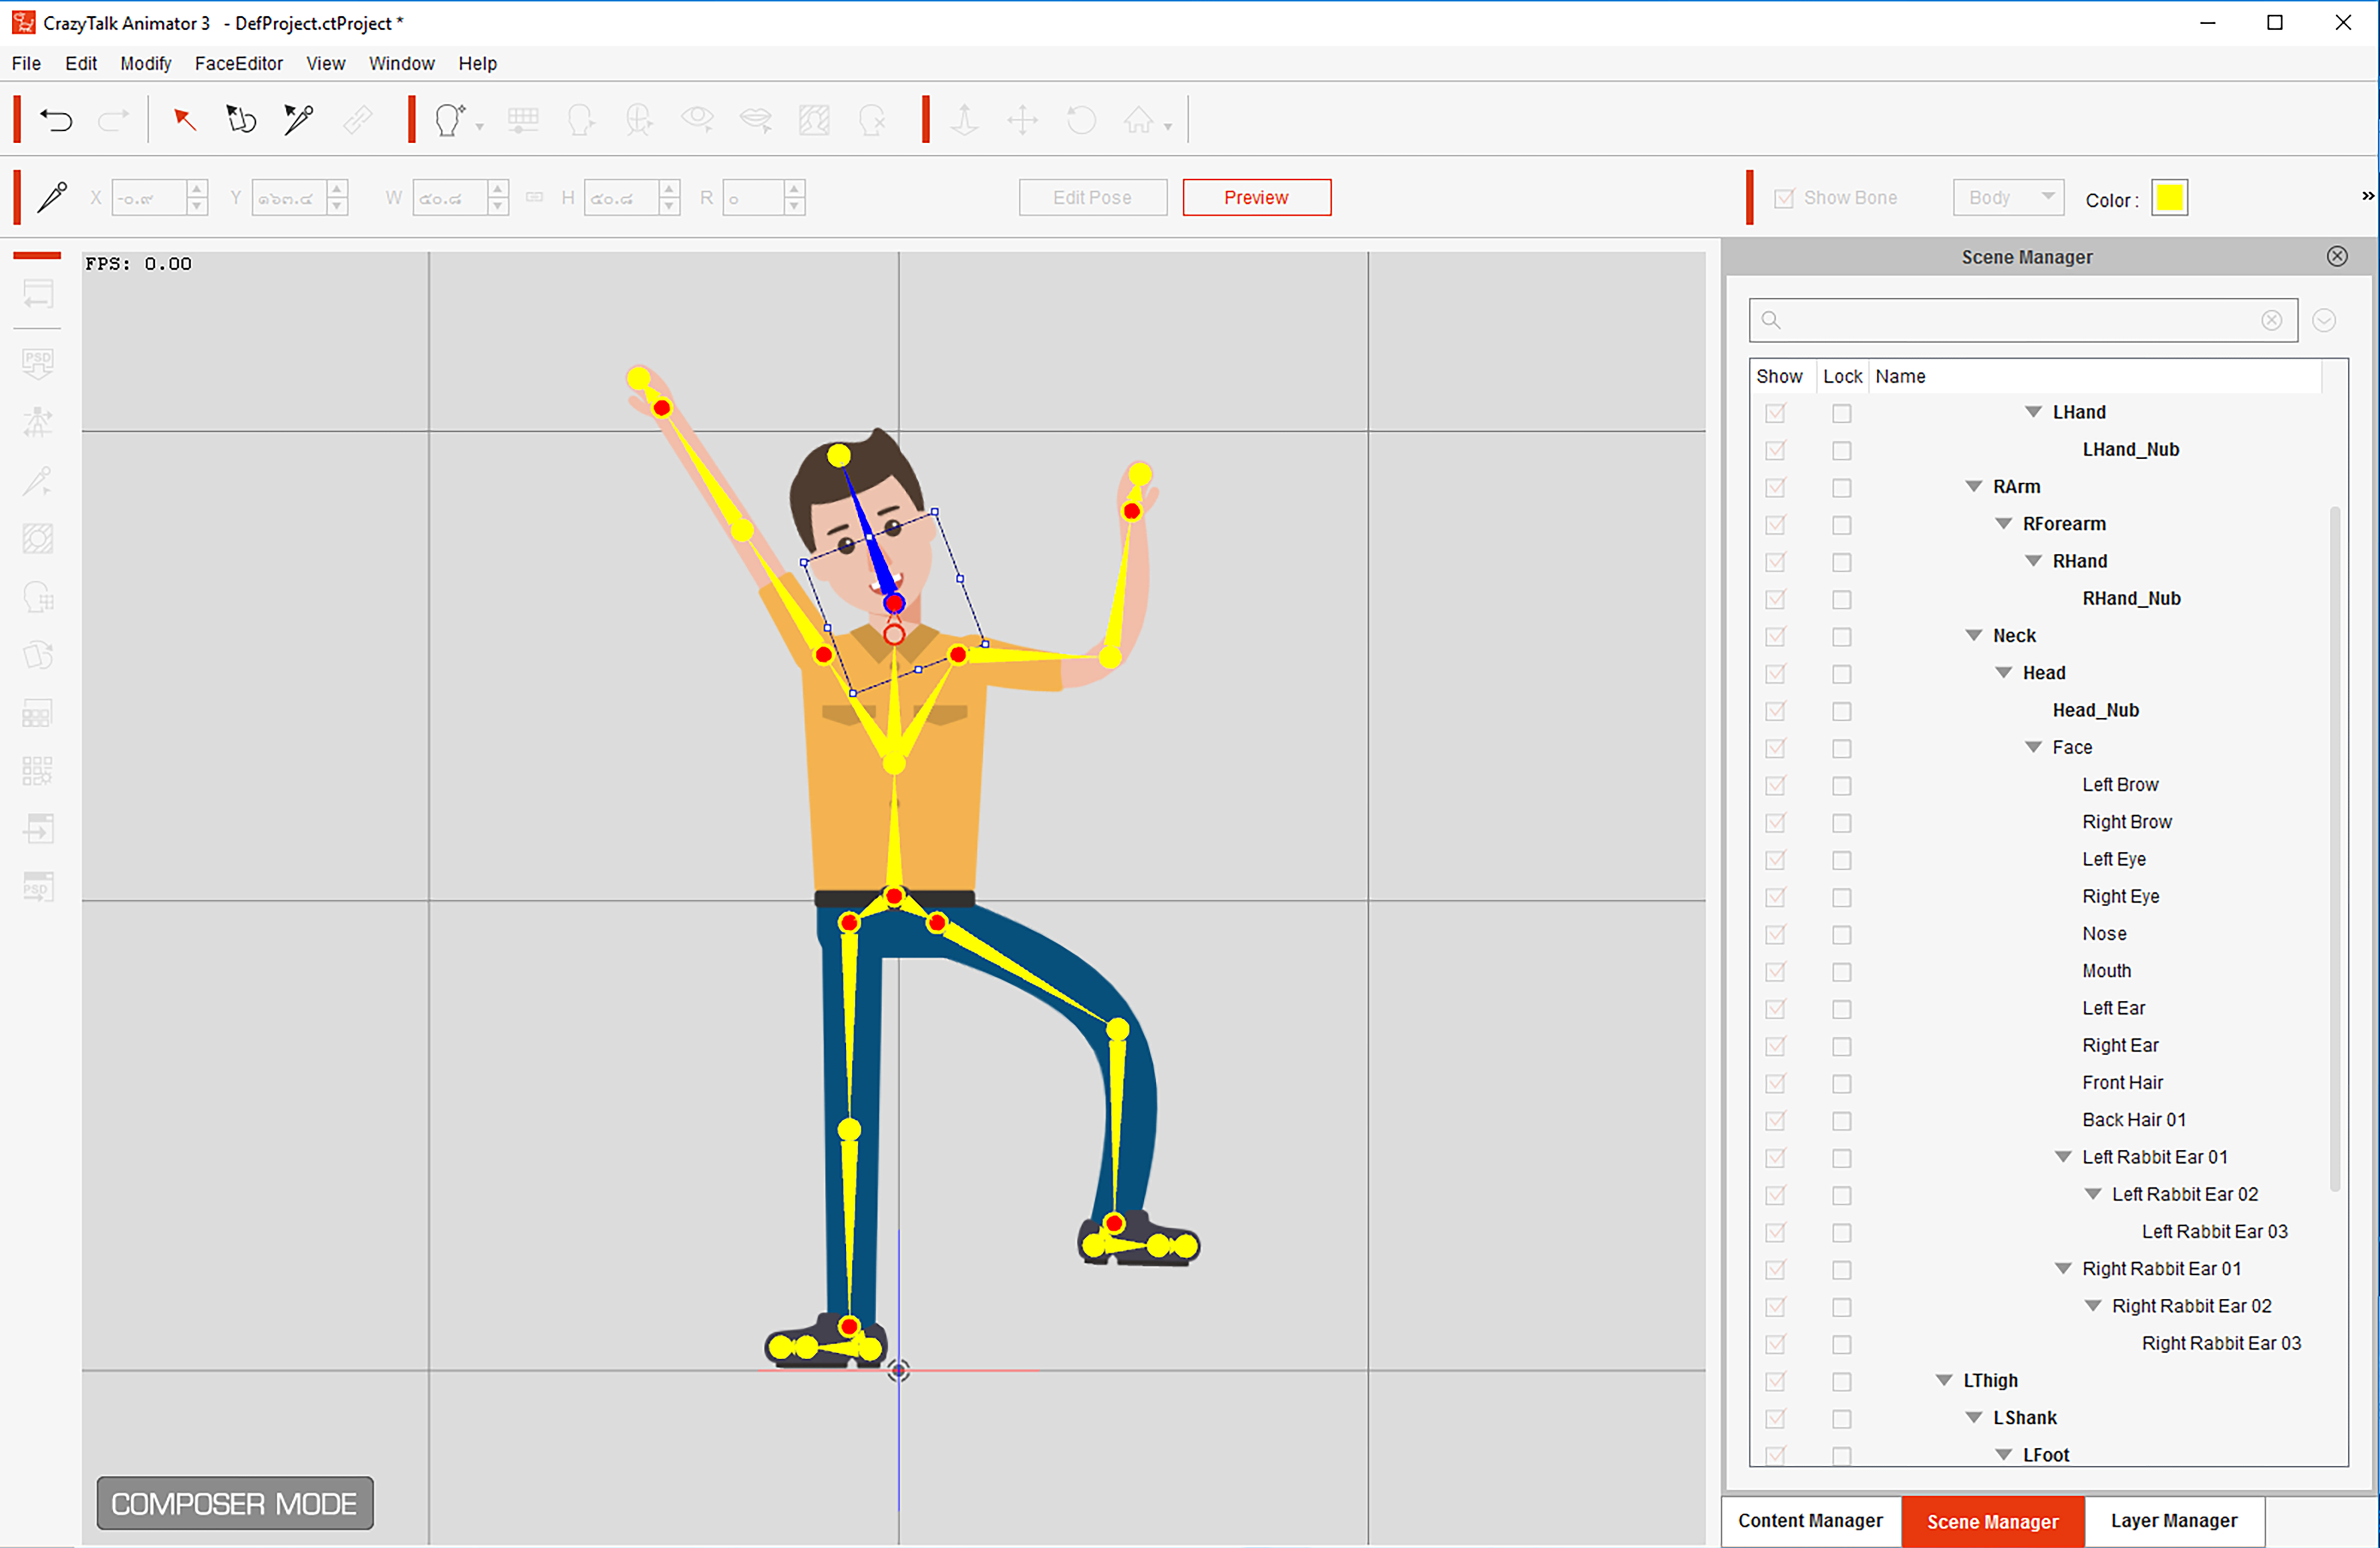
Open CTA3 and click on the 'Create G3 Free Bone Actor' button. The character will appear in the Composer Mode, as shown in the image above. Now we can play around with our animated character by using the preview mode and clicking on the bones to move or rotate different parts.
Let's go back into the Stage Mode, and apply some motion effects from the motion library. Save and rename the actor, then get your G3 character ready to animate.
As you can see, from start to finish this process took around 40 minutes. In order to animate a group of six to eight characters it will take approximately four to six hours or less, as I can work quicker for the later characters.

Thank you for reading 5 articles this month* Join now for unlimited access
Enjoy your first month for just £1 / $1 / €1
*Read 5 free articles per month without a subscription

Join now for unlimited access
Try first month for just £1 / $1 / €1
Get the Creative Bloq Newsletter
Daily design news, reviews, how-tos and more, as picked by the editors.
