Scaling on the cloud (part 3)
In part 3 of our cloud series, Dan Frost of 3EV (3ev.com) explores your options when it comes to scaling, and how to choose a cloud hosting provider. In his example he's going to use Scalr, a tool for managing cloud scaling either on a single cloud or across clouds
This article first appeared in issue 221 of .net magazine - the world's best-selling magazine for web designers and developers.
So far we’ve talked about some of the fundamentals of good cloud hosting. You have to decouple. You have to automate. But the fun isn’t there – it’s when the cloud starts scaling for you and doing stuff without you asking it.
This time around we’re going to look at how scaling is possible in the cloud. We’re going to use Scalr, a good entry-level tool for managing cloud scaling either on a single cloud or across clouds.
We’re also going to look at the closely related question of how to choose a cloud hosting provider. We’ll give you an idea of the kind of services that are on offer, and the sort of questions you should be asking when you approach a company offering cloud hosting.
Right, on with the learning...
Manage scaling
Most serious cloud setups involve multiple servers of each type: multiple database, web and proxy servers. Often there are a few worker instances somewhere chugging through some data.
This can be managed with cloud management tools like Scalr and RightScale. These allow you to set the roles, behaviours and scaling rules of your server farm through a web- based GUI.
This isn’t for everybody, but it’s a good way to understand how cloud architectures can be built up from images, script and configuration. Sign up for a dev account on scalr.net and then get your API keys from your cloud provider. (I’m using Rackspace for this example but other providers are available, as we’ll discover later...).
Get the Creative Bloq Newsletter
Daily design news, reviews, how-tos and more, as picked by the editors.

The API keys can be found in the AI access section. In Scalr, navigate to Settings, then Manage Environments. Click to add a new Environment, select the correct timezone and then enter your username and API key from your cloud provider’s console. Now let’s make a farm.
Setting up the roles
Cloud farms in Scalr are based on roles, which are like a template for instances. When an instance starts up, it’s based on an image just like in any other cloud environment.
On top of the basic images, Scalr adds common operating system customisations and applications such as MySQL and Apache.
Then, with the basic role running the common applications you can add things specific to your farm using scripts that run as the instance starts. This means that the first time you set up a farm you need to create the basic role, but from then on you can concentrate on the farm. Start by going to Roles and then Role builder in the top navigation. Select your cloud provider again and then choose the operating system.
In the settings option give your role a name and select the behaviours. A fairly common combination would be Apache and MySQL but you go for whatever your application needs.
Finally, click Create, which launches an instance, installs the behaviours you selected on it and creates a new image. While it’s launching and bundling the instance you can log in to the console and see an obscurely named instance –
1ff6c86c-a765-4833-ac5d-568f563b7286”.Once this instance has gone you are ready to build the farm itself.
Making a farm
Navigate to the Server Farms option in the top nav and then Build new. Give the farm a name a jump to the roles tab where you can get down to business building the details of the farm.
A farm consists of roles, like the one you just made. Clicking the green plus will bring up a list of the available farm types with yours inside the mixed group. Open up the group and click add. It will then appear in the row at the top of the page.
Now down to the real work. Everything we’ve done so far is just getting the canvas ready for your cloud. On the first screen you’ll see options for minimum and maximum instances, which determine how small and how big your cloud can grow. This is common to all cloud management platforms, allowing you to decide how much money you want to spend on your app when traffic is high. Down at the bottom of the screen is the second interesting option: what is scaling based on? Let’s do it on the time of day.
Suppose that your app simply isn’t used out of office hours. It’s a bug tracker or some internal app that you don’t want your team using when they should be enjoying themselves.
Start by setting the minimum instances to zero and then add a scaling option based on date and time. Set the start time to 8am and end to 7pm and then days to Monday through to Friday. Set the number of instances to two. Finally, we’ll pretend your app is in Git so click on Scripting and then select Git clone from the first dropdown.
We want this to run when the instance first exists and can be used — that is, on HostUp – so select this option from the second dropdown. Click the green plus. A panel appears on the right to configure the script further. We want the script to run only on the instance that has just started so select this from the first option.
Finally, add your git repo to the parameters and with this very basic farm configured, all you need to do now is click save and launch the farm.
Once the farm has saved, go to Server Farms and then on your farm click Manage in the top menu bar. On the right side of the screen you’ll see an Options dropdown. Select Launch.
These are the basics of setting up multi-cloud setups. You take the vanilla images and build customisations on top of them with scripts and manage it either with home-spun scripts or a management tool such as Scalr.
Choosing a provider
Next we’re going to look at how you choose a cloud hosting provider that makes sense for your app or your company. The first thing to consider is deciding how you want to manage your cloud. In other words, do you want to manage IaaS (Infrastructure as a Service), using a tool like Scalr or RightScale, or lose the control in favour of PAAS (Platform as a Service), which will give you more time to focus on your app?
Many companies prefer to ask someone who’s done it before, or who specialise in migrating to the cloud not just because they have the experience but because they can prototype quickly.
The good news is that cloud computing makes it cheap to fail, so you have the opportunity to fail on a few clouds before you settle on the one that works best for your app.
Legacy apps
If you have legacy apps that require lots of customisation of the operating system then one of the IaaS providers (which include AWS, Rackspace, GoGrid and OVH’s miniCloud) is probably your best bet. This way you can launch an virtual machine, create a perfect environment for it which looks just like the old physical machine it used to run on, and away you go.
Working practices
It isn’t just old apps that are hard to change. Old habits in dev teams are hard to change as well, so if you have lots of developers who work in a particular way, migrating to IaaS can be quicker because their working practices don’t have to change. This is the preference of several of our clients, simply because they don’t have time within their tight deadlines to retrain their team.
But Platform as a Service starts making sense when you give up a little control and change the way you work. Most providers will both have command-line tools that make deploying the app pretty simple, so if you can work around this you gain a lot of cloud computing power without having to learn anything.
Variations on a theme
We’ve looked at a handful of the cloud services available, and got an idea of how each varies slightly. However, be aware that the cloud hosting market is still moving along, with new features released each week.
So while it’s certainly worth moving to the cloud now, find out which provider makes sense for your app before settling
Rise of the machines
There are two ways of scaling: make the machine bigger or have more machines.
Many providers, such Amazon Web Services, offer the ability to resize a machine, which means you take an existing running instance and resize it as-is. This is far easier if you’re new to multi- server setups.
I prefer this kind of scaling for development and testing. It’s really good for finding out how much oomph your app really needs by starting small and scaling up by resizing to the point that the app has enough CPU and memory.
Payment
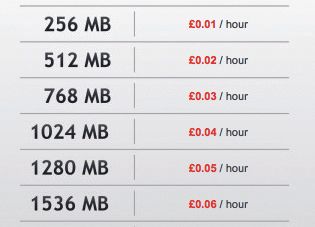
One of the main attractions of cloud hosting is the pricing, which is generally low and flexible. Most providers will offer a pure pay-as-you-go model, but there are variations.

For example, by paying a little up-front with GoGrid, you can get a discount on the monthly price of your instances as much as $50 a month. This is similar to Amazon Web Services’ reserved instances program.
Another attractive feature of GoGrid is that you can treat it like a bare metal cloud. Unlike most people’s preconception of cloud hosting, it gives you the option to provide, on demand, an entire server. This can be hugely useful for the security conscious and those that must adhere to strict data protection rules.
Instead of buying huge servers that chug through your data, you can lease them a month at a time, knowing that the physical machine is doing nothing else apart from your work.
Technical support
As with any software-as-a-service provider, when choosing a cloud provider, it’s important to check what sort of technical support is available.
For instance, is there a telephone number or is it online only? Is online support in real time or will you have to wait for a response?
Not all cloud hosting support is the same, and the kind of support you need depends on what you’re willing to take on yourself.
Platform as a service
PaaS – platform as a service – is a very different beast to IaaS.
Instead of exposing you to an entire virtual machine, you access to a platform, a special environment built for creating apps. PaaS hosting providers include Heroku, Google App Engine and OVH’s DevCloud service.
The advantage of PaaS over IaaS is that you don’t have to worry about the scaling architecture underneath, such as the load balancers, backups, nasty failures and the like.
When something goes wrong in the levels below your app, it’s dealt with for you, leaving you to concentrate on the application layer.
This can be attractive to some developers, but the flipside is that you don’t have the same environment you’re used to, so moving over to it requires changing the way you work and possibly even your code.
While this is fine for small or new projects, it means that legacy projects can be harder to port to the platform.
Getting started
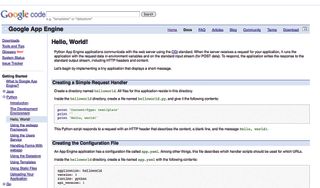
Like many platforms, Google App Engine works from a manifest that tells it where to start executing code.
In the “Hello, World” example you can see how the app.yaml file points to a very simple helloworld.py file. Anything beyond a simple “Hi” requires a little more structure. App Engine bundles a simple MVC framework called webapp, which allows you to structure your application well.

One of the main things to consider when choosing a PaaS provider is language support. App Engine, for example, supports Python and Java, though there are clever ways of getting languages such as Ruby in there as well.
Virtually speaking
With PAAS hosting, you don’t have access to a physical machine, you have access to the platform (to hammer home the point, Heruko has the phase “Forget Servers” on its homepage).
This turns things on its head quite a bit and if you’ve invested some time in an existing environment it might not make sense.
But then you see the things you don’t have to worry about. Pushing more computing power at the app is handled for you and you can bolt on features from dedicated database servers to cloud-friendly scheduled tasks and have them managed as well. For example, with Heroku, Redis – the key-value store which is a popular choice for many highly scalable apps – can be added on for free for the basic version, scaling up to a hefty $4k a month for the 50G option.
Deploying is as simple as:
git push origin masterAnd the extensive command line tool for managing your app once it sits in the cloud makes deploying and managing your app much easier. Following logs can be done with the line:
heruko logs --tailsThis gives you access to the live server logs from your local terminal. The add-ons include SMS, video encoding, logging, document databases, mobile support, emailing and a lot more.
Cloud market
A notable application running on App Engine is spotcloud.com. SpotCloud is like a big market place for hosting companies to resell their excess capacity as cloud instances. You use an existing image or upload your own using their tool, and choose a provider based on price, size, location and other criteria. Then you launch and run as you would on any other.

We haven’t used this yet, but it’s very high up my list of things to try. Instead of going with one provider, you can pick and chose moving between them using SpotCloud’s UI or their API.
Ways to scale
We’ve looked at two ways of scaling: horizontally across multiple machines and vertically by resizing a single machine.
There is more than one reason to scale, and there is more than one way to do it.
Scaling based on the load on servers is a very common first step. As the load on the servers increases, extra servers are brought online to keep things in order. A problem shared is a problem halved.
The example with Scalr is based on time of day. This is useful for internal and routinely used systems such as time sheet systems, ticket sites or even back- office processes, which chew up a server but only for a couple of hours each night.
Scaling can also be based on bandwidth, which may be a more useful indicator that things are looking busy.
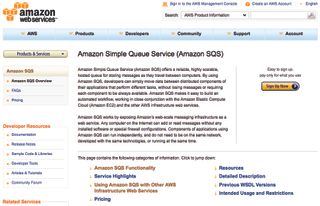
Scaling can also be based on particular features offered by your cloud provider – for example, the length of an SQS (Simple Queue Service) queue on AWS. SQS is one of Amazon’s services providing a simple queue for tasks to be handled by servers.

Next month we'll look at how to move onto the cloud and get the right tools for your application.
Proud sponsors of our special cloud series

Why choose OVH?
Immediately accessible resources, full hardware availability, flexible infrastructures... With cloud computing, OVH has created the future of internet hosting. Companies get secure and reliable solutions at their fingertips that are closely aligned to their economic and structural needs. In minutes, you can now have the use of a real datacentre or benefit from flexible hosting. Reliability is second to none, with an availability rate of 99.99%.
To guarantee these results, OVH hasn’t had to compromise its infrastructure – in fact, all physical resources are doubled, whether they’re servers, storage spaces or network hardware. Nor has it affected prices, which are some of the lowest on the market. Visit ovh.co.uk or call 020 7357 6616 for details.

Thank you for reading 5 articles this month* Join now for unlimited access
Enjoy your first month for just £1 / $1 / €1
*Read 5 free articles per month without a subscription

Join now for unlimited access
Try first month for just £1 / $1 / €1
The Creative Bloq team is made up of a group of design fans, and has changed and evolved since Creative Bloq began back in 2012. The current website team consists of eight full-time members of staff: Editor Georgia Coggan, Deputy Editor Rosie Hilder, Ecommerce Editor Beren Neale, Senior News Editor Daniel Piper, Editor, Digital Art and 3D Ian Dean, Tech Reviews Editor Erlingur Einarsson, Ecommerce Writer Beth Nicholls and Staff Writer Natalie Fear, as well as a roster of freelancers from around the world. The ImagineFX magazine team also pitch in, ensuring that content from leading digital art publication ImagineFX is represented on Creative Bloq.
