Run a WordPress site on the cloud (part 2)
After part one’s introduction to cloud hosting, it’s time to step things up a notch. Now Dan Frost of 3EV (3ev.com) explains how to set up and run a WordPress site on the cloud, and looks at some advanced features to help improve your site’s performance
This article first appeared in issue 220 of .net magazine - the world's best-selling magazine for web designers and developers.
In part one, I introduced the cloud computing environment and explained how to get started with instance launching, cloud control and configuration management. Now, in part two, I’ll show you how to get a basic WordPress site up and running on the cloud, and explore some of the more advanced features cloud computing offers.
Again, we’ll be using AWS, although as the saying goes, other platforms are available. Because there’s a free usage tier it’s a good way for us to dip our toes in the water and start playing around with the cloud. However, more and more hosting companies are getting on board with cloud hosting, so it’s by no means the only option. We’ll look at the range of
services on offer and how to choose between them, in part three.
Setting up a basic WordPress site
Right, to business. We’ll be basing our experiment on this five-line script from last month:
sudo apt-get install wordpress php5-gd sudo ln -s /usr/share/wordpress /var/www/wordpress sudo bash /usr/share/doc/wordpress/examples/setup-mysql -n wordpress localhost sudo bash /usr/share/doc/wordpress/examples/setup-mysql -n wordpress wordpress.mydomain.org sudo /etc/init.d/apache2 restartWe’ll set up a basic WordPress site, but with two key differences: we’ll use the relational database service (RDS) instead of the local database, and use EC2 command line tools
rather than launch instances via the GUI. There’s more than one way to run a cloud.
Admittedly, we’re just moving from the AWS GUI to AWS on the command line, but there are some neat tools here that can be automated.
Remember, if you do it more than once, write a script. That’s easier to do if you know the CLI tools. For example, to list all the instances, input the following:
Get the Creative Bloq Newsletter
Daily design news, reviews, how-tos and more, as picked by the editors.
$ ec2-describe-instancesRESERVATION r-7fd77810894012917938defaultINSTANCE i-f1952f90ami- 06ad526f stoppeddan2011 0 t1.micro ....First, you should make sure the CLI (command line interface) tools are installed. While GUIs are good, the CLI aids are a reliable way of checking the status of your cloud. Also, you can often do more with them than you can with the GUIs.
To install the CLI tools, simply download them from aws.amazon.com/developertools/351 and then add them to your path. For example:
export PATH=$PATH:/path/to/ec2-tools/binYou’ll then need to set up a few other environment variables:
export EC2_HOME=/path/to/ec2-tools/export PATH=$PATH:$EC2_HOME/binexport EC2_PRIVATE_KEY=`ls -C $EC2_HOME/pk-*.pem`export EC2_CERT=`ls -C $EC2_HOME/cert-*.pem`You might remember that, last time, we generated a key pair via the AWS GUI, which creates a public/private pair and enables you to download the private key. When an instance is launched, the public key is passed to the new instance, allowing you to log in to it.
If you aren’t familiar with public/private key authentication, you could read up on it on Wikipedia, or just follow the steps listed here. I’ve known people who’ve struggled for years to understand the concept, but are guided by tutorials and get along just fine.
Let’s start off by generating an SSH key locally. To do this on an OS X or Linux system, you need to generate a public/private key pair:
ssh-keygenFollow the instructions, but don’t enter a passphrase. Then check that a couple of files have been made in your home directory:
.ssh/id_rsa .ssh/id_rsa.pubThe second is the public key, the first the private one. Make sure that you don’t share the private key – there’s a reason for its name.
The next step is to upload the public key by running the following code:
ec2-import-keypair new-key --public-key-file /.ssh/id_rsa.pubThen, see the key listed with any others you’ve created by running:
$ ec2-describe-keypairsKEYPAIR my-key aa:bb:cc:dd:aa:bb:cc:dd:aa:bb:cc:dd:aa:3 9:0f:66:fcNow we’ll launch an instance to run WordPress, using the vanilla Ubuntu image for 10.04 (Lucid Lynx) with long-term support. This means that upgrading should be less of an issue. If you’re wondering what images or AMIs are, see ‘What are images?’, below left.
Which image you choose depends on whether your system is a 32- or 64-bit one, and also on which zone you’re in. The full list can be viewed at uec-images.ubuntu.com/releases/10.04/release, but for the purposes of this tutorial, let’s go with ami-5c417128, a 64-bit image that can be used with the micro instance, which is free for the first one you run.
Start this with:
ec2-run-instances ami-5c417128 --instance-type t1.micro --region eu-west-1 --key new-keyAfter this, run ec2-describe-instances to see what’s happening. Run this command a few times until the status changes from ‘pending’ to ‘running’, at which point you’ll see the IP address appear.
INSTANCE i-abc123abami-379ea943 ec2-11-22-33-44.eu-west-1.compute.amazonaws.com ...The part that begins with ec2- is the domain name you use for accessing the server over SSH or in a browser. Each instance has a different domain and IP address, but you can use ec2-describe-instances to see a list of all the domains for all your running instances.
Stop for a second to think: one line of bash script launched the new instance. If you need to get a class of students up and running to learn Python, or wanted 20 instances to demo your new app at a trade fair, you could run this line repeatedly until you have enough instances. Knowing the CLI tools is a quick way of getting a lot more out of cloud services.
Now you can SSH onto the instance. Because we used your locally generated SSH keys, we can do this without the usual -i path/to/key.pem option.
Instead, just put your instances domain name into the line:
ssh ubuntu@copy-your-public-ip-hereNow that you’re happily on your new instance, it’s time to install stuff. Let’s run the WordPress script we played with in part one (which we reprinted at the beginning of this feature).
With this task done, it’s time to log in to WordPress and blog a little. Point your browser to http://your-public-ip-here/wp-admin, configure your installation, do a little blogging and generally make a bit of internet noise.
Once you have something to show for your efforts, it’s time to improve the architecture and do some basic decoupling.
Dealing with decoupling
Decoupling is essential to scaling any site, but what do we mean by it? Systems that are tightly coupled make changing one part – even scaling it up or down – hard or impossible. Many systems CMSes, blog platforms and widely used apps are have very tight coupling between the web servers, database and local files. As you move to the cloud, learning about decoupling will come up time and again. A classic example is to move any background scripts you run to a worker instance dedicated to the task. This drops the load on your web servers hugely, speeding up your pages.
Being tightly coupled to the file system is also a sin. The file system, that place where you’re used to storing images and documents, isn’t shared between web servers and shouldn’t be. The less you couple servers to shared resources, the bigger you can go.
In just the same way as you host your files on S3 or Cloud Files, you should pull the database away from the web server. Eventually, even your cron jobs or scheduled tasks should run separately.
It’s common to run the database on a separate server or instance, but with AWS you can run it on an instance that’s specifically designed for the task. More excitingly, you can scale the database independently and run it across physical locations for extra redundancy. Here are some other things that should be decoupled and separated from the poor web server, which is the common dumping ground for all and sundry code:
1. Background tasks. Got some cron jobs that import from Twitter or send off confirmation emails? Instead of running these on the web server, a better architecture is to push messages onto a queue (such as SQS, which we’ll explore later in the series), with a separate instance grabbing and sending the messages. This small change makes a huge difference, reducing loads on servers by up to 90 per cent for bigger scripts.
2. Run different parts of the app on different instances. Instead of chewing up the main site web servers, run the forum on a different set of instances. Often, the dynamic parts of the site will need to scale more than the static ones, such as the homepage and news sections, so it makes sense to confine the scaling problem to those areas that need it.
3. Static files. Yes, if you haven’t already, just install the S3 or Cloud Files extension for your blog, ecommerce site or CMS, and it will decrease the load on the web servers hugely. Web servers are clever things, and shouldn’t have to spit out your CSS and JavaScript files. Install the W3 plug-in for WordPress today.
So, on with our decoupling ...
Databases you don’t manage
MySQL is easy to install and manage. Most of the time. So why would you pay a little more for your host to manage it for you?
The relational database service (RDS) provides a database as an instance, giving the advantage of backups, maintenance, scaling and resilience managed for you at a cost of a few cents an hour.
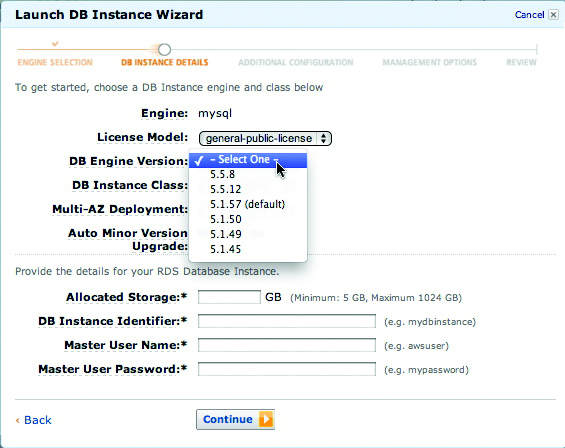
To fire up an RDS instance, log in to the AWS console, navigate to the RDS tab and select Launch Instance. Take a look at the screengrabs below to see some of the options you get.


Once the instance is running, you treat it in the same way you would MySQL that’s running on any other server or instance. Connect to it and create a new database.
Let’s create a new database and user for WordPress, connecting either on the command line or a GUI such as SequelPro:
create database wordpress_site; grant all on wordpress_site.* to 'wordpress_site'@'%' identified by 'secret'; flush privileges;With this run, it’s a matter of getting your existing database in there. To do that, log on to the EC2 instance we created earlier and simply dump out the database:
mysqldump -u your-user -pyour-passwordwordpress_site > wordpress_site.sqlPushing that SQL file into the RDS database should take a couple of seconds. Put the RDS hostname in place of [hostname]:
mysql -u wordpress_site -psecret -h[hostname] <wordpress_site.sqlFinally, edit your wp-config.php, setting the username, password and database as we did above, and the hostname to the hostname of the RDS instance.
You’re now running on a scalable MySQL server, which can be replicated by simply checking a box. Go back to the AWS console and find the RDS in the list of database instances. Right-click it, choose create read replica and follow the instructions. That’s it ... You’ll have a continuous copy of your live database.
Alternatively, you can select Multi AZ when setting up the RDS instance, to have not one but two database instances running. If one dies, there won’t be a problem; you have another to pick up the work. That’s worth a few cents an hour.
CloudFormation
That lot is pretty fiddly to do every time you need a new blog. Imagine you launch a WordPress site every month, or even every hour. You don’t want to do this manually each time; you want to script it. So what can you do?
There’s a rule of thumb in the cloud: script it; make it automatic. You can do this yourself using the commands above, or use a Ruby gem such as fog (github.com/geemus/fog). However, another good solution option is CloudFormation.

With any cloud configuration, you need to encapsulate and store it somewhere so that changes to the cloud are for software rather than hardware. This is key to getting more out of the cloud. You need to fully describe your infrastructure stack in configuration and software, and avoid anything being described and stored in hardware or servers that ‘just work’.
CloudFormation is JSON format introduced by AWS, and describes an entire stack of cloud services and their configurations. The templates get complex quite quickly, so it’s worth checking out a few of the examples before diving in. In that vein, we’re going to use the WordPress template to do everything we just did, but faster.
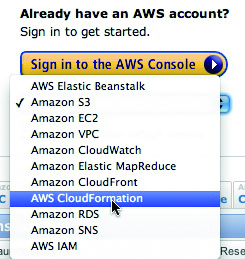
Point your browser to aws.amazon.com/cloudformation/aws-cloudformation-templates and scroll down to the WordPress template. Click Launch Stack and you’ll be taken back to the AWS console and asked for some configuration details, which should make sense now – WordPress username and password ... All the usual stuff.

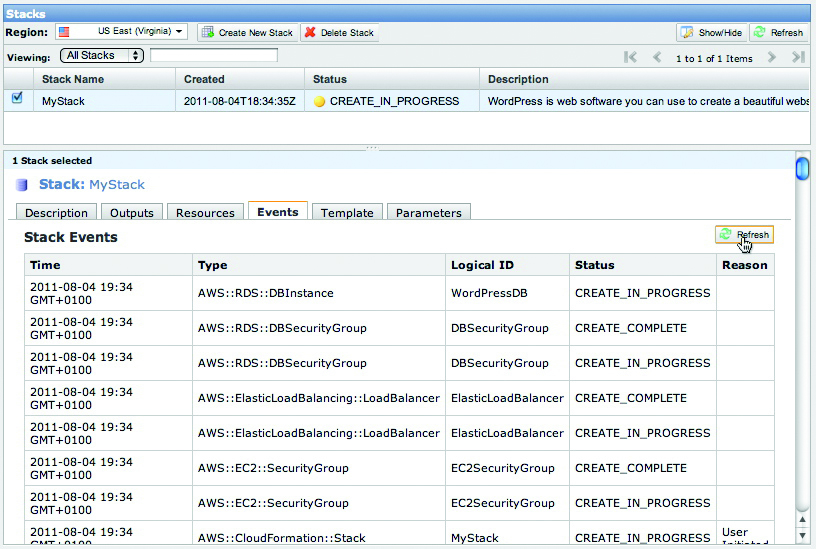
Click Launch Stack on the final screen and you’ll see the ‘pending’ stack appear on the list of CloudFormation stacks. This launches the database, sets the scaling rules and creates the web heads, which are load balanced.
The JSON is a static description of the cloud resources used – that is, the instances, databases, load balancers and the like. It also describes the inputs required to launch the cloud stack, such as the database name, domain name and the SSH key you intend to use.
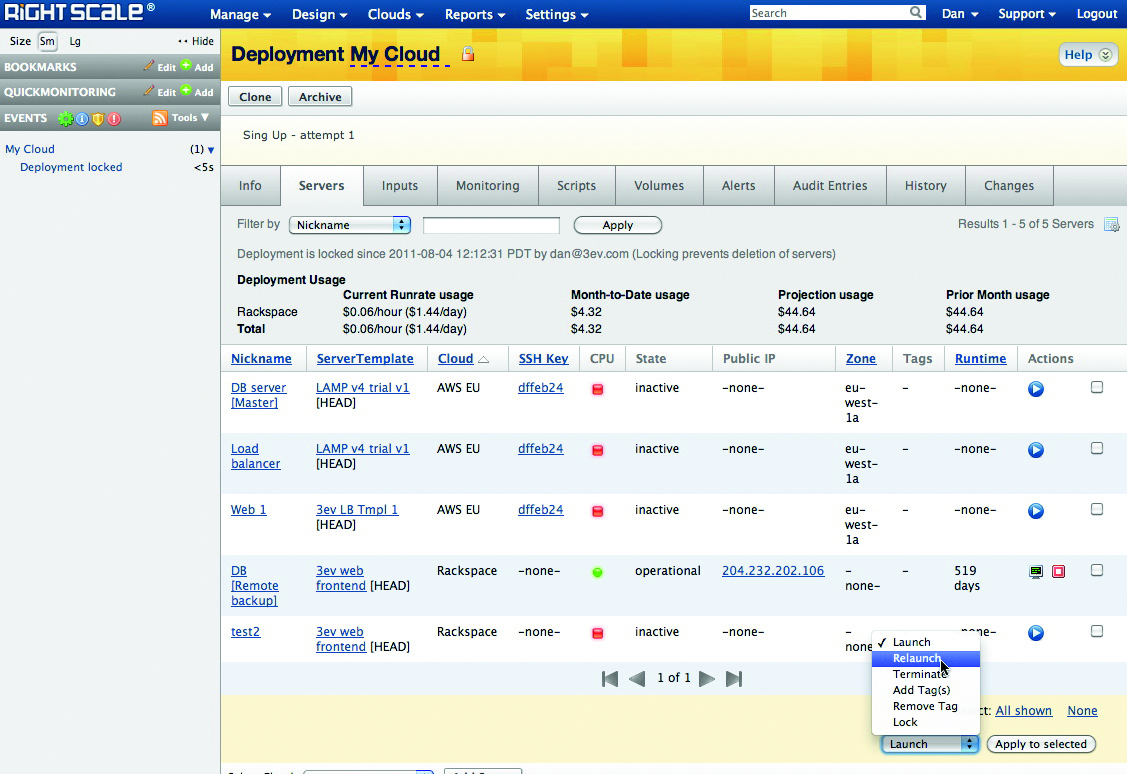
Because this neatly summarises the cloud configuration, it’s worth translating any manually created instances, load balancers and so on into a CloudFormation template before you start production. Imagine the scene: everything crashes at 4.45pm on a hot summer’s Friday and you can’t remember how it was set up. With CloudFormation or tools such as RightScale, you can fire up the entire stack from scratch and just wait for it to self-configure.

Keep the cloud under control
As you try cloud services, keep in mind the need to automate things. It isn’t enough to launch, configure and hope it will be there tomorrow. CloudFormation is worth using for even the simplest configurations. If you plan to use more than one provider, though, you might be better off using RightScale or building your own scripts.
In part three, we’ll look at the wide range of cloud hosting providers out there, what they offer, and how to choose one that’s right for you.
Proud sponsors of our special cloud series

Why choose OVH?
Immediately accessible resources, full hardware availability, flexible infrastructures... With cloud computing, OVH has created the future of internet hosting. Companies get secure and reliable solutions at their fingertips that are closely aligned to their economic and structural needs. In minutes, you can now have the use of a real datacentre or benefit from flexible hosting. Reliability is second to none, with an availability rate of 99.99%.
To guarantee these results, OVH hasn’t had to compromise its infrastructure – in fact, all physical resources are doubled, whether they’re servers, storage spaces or network hardware. Nor has it affected prices, which are some of the lowest on the market. Visit ovh.co.uk or call 020 7357 6616 for details.

Thank you for reading 5 articles this month* Join now for unlimited access
Enjoy your first month for just £1 / $1 / €1
*Read 5 free articles per month without a subscription

Join now for unlimited access
Try first month for just £1 / $1 / €1
The Creative Bloq team is made up of a group of design fans, and has changed and evolved since Creative Bloq began back in 2012. The current website team consists of eight full-time members of staff: Editor Georgia Coggan, Deputy Editor Rosie Hilder, Ecommerce Editor Beren Neale, Senior News Editor Daniel Piper, Editor, Digital Art and 3D Ian Dean, Tech Reviews Editor Erlingur Einarsson, Ecommerce Writer Beth Nicholls and Staff Writer Natalie Fear, as well as a roster of freelancers from around the world. The ImagineFX magazine team also pitch in, ensuring that content from leading digital art publication ImagineFX is represented on Creative Bloq.
