How to create web fonts using code
With Processing library Fontastic you can craft fonts from code. Andreas Koller explains how glyph shapes can be based on data for text visualisation and abstract font faces.
Generative typography has become a popular field for graphic experiments. Designers combined their knowledge in typography with creative coding, and the possibility to use algorithms to change the shape of glyphs opened up many possibilities. The outcome is new, innovative ways of looking at typefaces, not necessarily in terms of legibility, but to explore and push the boundaries of what a typeface can be.
I've conducted various experiments around how to manipulate typefaces with algorithms. The outcome of this would be rendered on screen, but a crucial part was missing: the result wasn't reusable as an actual typeface.
I needed the potential to integrate the outcome into my workflow and wanted to use the font in Illustrator CC, Photoshop CC and InDesign CC, and ultimately as web fonts on websites. The motivation to write the Fontastic library came from here.

With Fontastic, you can define the shapes of each character, add typographic parameters such as advance width and baseline, and save it as a TrueType Font (TTF) and the Web Open Font Format (WOFF) file.
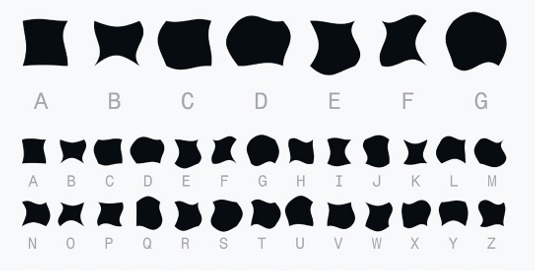
For example, you can create an abstract illustration for each letter of the alphabet, resulting in a non-legible text, visualisation, pattern or artwork when you render a text in this typeface. Or you could use sensor data to change an existing font based on real-time data (like the current weather or your location).
This step-by-step tutorial shows how to define a font with your own glyphs and include it within a website.
01. Download and install the library
First, you'll need to download and install Processing. You can either use the simple IDE that comes with it, or any Java IDE – Eclipse, for example. Then, head here and download the Zip file containing the library.
Daily design news, reviews, how-tos and more, as picked by the editors.
It contains a folder called Fontastic. Copy this to your libraries folder inside your Processing sketch folder, usually found under Documents/Processing.

02. Create a new font
Open a new sketch in Processing and import the Fontastic library. You can do this via Sketch > Import library > Fontastic, which you should find under the contributed libraries. If not, go back to step 1 and ensure the Fontastic folder is inside your libraries folder. Restart Processing to register any new libraries that you copy there. Importing the library will add the following line to your sketch:
import fontastic.*;Now, you can make a new Fontastic object, which will provide you with all the functionalities. For this example, we'll name it f:
Fontastic f = new Fontastic(this, "ExampleFont");This also sets the font name, which will also be used as the TTF filename. Next, you'll want to make some settings for your font, for example the author or the spacing between characters. The default advance width is set to 512.
f.setAuthor("Andreas Koller"); f.setAdvanceWidth(250);The advance width can also be set individually for each character. Next, let's define a shape for the character A. For this, we need to create a PVector array with as many points as you want. In this example, we will define a shape made out of four points. The coordinate system originates in the bottom left corner, the Y values go from bottom to top (unlike the 2D renderer in Processing) and the default size for a glyph is 512x1024 units.
PVector[] points = new PVector[4]; points[0] = new PVector(0, 0); points[1] = new PVector(random(512), 0); points[2] = new PVector(random(512), random(1024)); points[3] = new PVector(0, random(1024)); f.addGlyph('A'). addContour(points);To generate the font files from the given glyph definitions, call buildFont(). An optional cleanup afterwards deletes the files that have been generated by the underlying font engine, DoubleType.
f.buildFont(); f.cleanup();After running this sketch by pressing the play button or Cmd/Ctrl+R, you'll find a TTF and WOFF file, as well as an HTML site showing all glyphs of the web font in the directory data/ExampleFont/bin. The HTML file uses the CSS rule @font-face to include the web font:
@font-face { font-family: "ExampleFont"; src: url("ExampleFont.woff")
format(‘woff’);} div { font-family: ExampleFont;
}
03. Add more complexity
For now, we only added one contour per glyph. Defining more complex glyphs can be done by retrieving the glyph with getGlyph and passing another PVector array containing the contour vertices.
f.getGlyph('A').addContour(points);Alternatively, you could use the variable type FGlyph to store the glyph. If you create more than one contour, intersecting contours in TrueType format are solved using a non-zero winding fill algorithm.

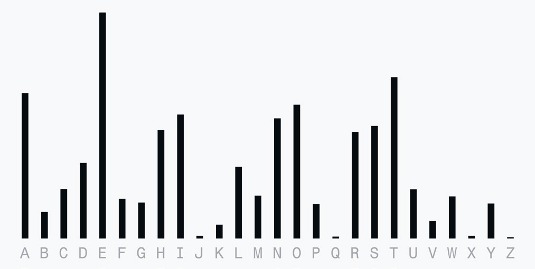
Now we're ready to have some fun. We can define any shapes for any character, so making a font for text visualisation is easy. For example, the FrequencyFont sketch that comes with the library shows how to use the frequency of letters in the English language to draw bars of different heights. If you set a text in this font in Illustrator, it will generate a bar chart visualisation.
You can also use bezier curves to define a glyph: you'll need an FPoint array defining the coordinates of the points and the two control points for the bezier curve. The WaveFont example shows the simplest way of doing this and offers a function to preview the glyphs.
FPoint[] points = new FPoint[3]; points[0] = new FPoint(0, 0); points[0].
setControlPoint2(200,200); points[1] = new FPoint(512, 0); points[1].
setControlPoint1(312,200); points[2] = new FPoint(256,1024); f.addGlyph('A').
addContour(points);
04. Manipulate existing fonts
Finally, you can use an existing font as a starting point, manipulate its shape and create a new one. I'd recommend using the Geomerative library by Ricard Marxer.

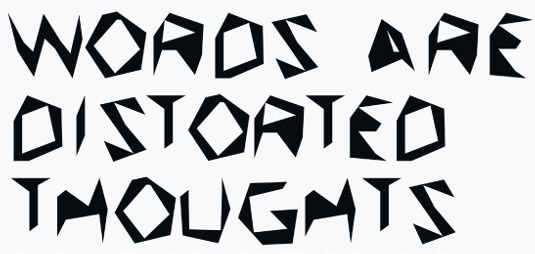
Fontastic comes with two examples demonstrating this technique: the ConfettiFont places circles around its outline, with a random offset. The DistortFont takes the outline and adds noise, creating jagged letterforms. These should get you started in creating your own font manipulation based on algorithms or data, such as reading weather, wind and temperature data from the web to generate a font representing the weather situation; or a font that changes according to stock market or Twitter trends.
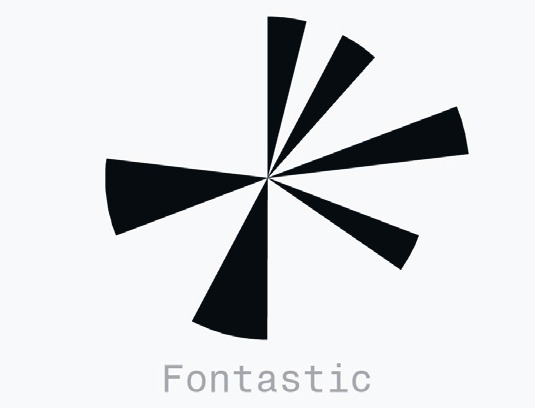
Fonts as data visualisation also offer a wide range of possibilities, as the example PieChartFont shows. This abstract font contains a pie shape for each letter, and if you set a text in this font it will be rendered as pie charts representing the words.
Happy font creating!
Words: Andreas Koller
This article originally appeared in net magazine issue 242.
Liked this? Read these!
- Download the best free fonts
- The designer's guide to special characters
- How to make an app: try these great tutorials
Got a question? Ask away in the comments!

The Creative Bloq team is made up of a group of art and design enthusiasts, and has changed and evolved since Creative Bloq began back in 2012. The current website team consists of eight full-time members of staff: Editor Georgia Coggan, Deputy Editor Rosie Hilder, Ecommerce Editor Beren Neale, Senior News Editor Daniel Piper, Editor, Digital Art and 3D Ian Dean, Tech Reviews Editor Erlingur Einarsson, Ecommerce Writer Beth Nicholls and Staff Writer Natalie Fear, as well as a roster of freelancers from around the world. The ImagineFX magazine team also pitch in, ensuring that content from leading digital art publication ImagineFX is represented on Creative Bloq.
