Customise the WordPress admin area
Tailor the Administration Screens in WordPress to match your client's branding with Thomas Hardy's guide to customising the popular CMS
Unless you have been living under a rock for the past nine years, you will know that WordPress is a very powerful Content Management System (CMS), enabling you to offer your clients the ability to edit and create new content with relative ease.
While WordPress' admin area works well, if you’re using it on a client’s website, you may want to customise it to give a more personalised feel by styling it using either yours or your client’s branding. In this tutorial, we will explore how to do just that.
Creating a custom stylesheet for the login page
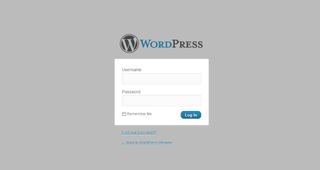
The standard WordPress login page is very simplistic, and once you've seen it a few times, you will remember it forever. Luckily, you can easily load in your own stylesheet, enabling you to customise the look by adding the snippet of code below to your theme’s function file.
function login_stylesheet() { wp_enqueue_style( 'login_stylesheet', get_template_directory_uri() . '/css/login.css' );}add_action('login_head', 'login_stylesheet');By using the login_head hook, we call a function which then uses the wp_enqueue_style function to load in our own stylesheet allowing use to style the login page.

Changing the login logo
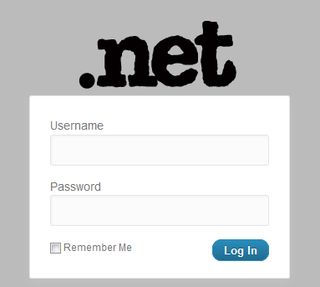
While the WordPress logo is very nice, you may want to change it to your own or your client's logo. To do this, you simply add the following line of CSS to the stylesheet you loaded into the login page in the previous example.
h1 a { background-image:url(path/to/custom-login-logo.png) !important; }This overwrites the default logo pulled in by the WordPress stylesheet and loads your own.

Changing the login logo link
By default, the logo on the login page links back to the WordPress.org website. While this may be fine for someone who is familiar with WordPress, it may confuse your user if they click on it.
WordPress has a brilliant filter which enables you to call a function to set your own URL, simply by editing the snippet below to include your URL and adding it to the functions file.
function login_logo_url($url) { return 'http://www.yoursite.com';}add_filter( 'login_headerurl', 'login_logo_url' );This simple function uses the login_headerurl filter – which, as the name suggests, enables you to filter the URL and define your own.
Get the Creative Bloq Newsletter
Daily design news, reviews, how-tos and more, as picked by the editors.
Changing the login URL
The standard WordPress login page is http://www.yoursite.com/wp-login.php. Even though this is already short and easy to remember, you may want to change it to something even shorter and easier. To do this, you can simply add the following line of code to the top of the .htaccess file in the root of the site, which is normally created automatically by WordPress when you set up a custom permalink structure.
RewriteRule ^login$ http://www.yoursite.com/wp-login.php [NC,L]Yes, wp-login.php is easy to remember, but I once had a client who forgot the URL included the wp- at the beginning. If I'd had this line of code in place, it wouldn’t have mattered.
Adding a custom stylesheet for admin area
Adding your own styling to the admin area is just as simple as it was with the login page. You simply add the following function to your functions file.
function admin_css() { wp_enqueue_style( 'admin_css', get_template_directory_uri() . '/css/admin.css' );}add_action('admin_head', 'admin_css' );The admin_head hook used above is identical to the login_head hook used to add the stylesheet to the login page, except that, unsurprisingly, it runs when in the admin area.
Adding a custom stylesheet for the Visual Editor
The WordPress Visual Editor is a great tool, enabling you to provide your client with an easy-to-use WYSIWYG editor. A great way to offer your client an improved experience within the editor is to load in your own stylesheet. To do so is as simple as adding the line of code below to your theme's functions file.
add_editor_style('editor.css');The add_editor_style() function enables us to load in a stylesheet from our theme's directory, enabling us to customise the styling of the content within the Visual Editor.
Removing Admin Menu items
WordPress is a powerful system, but sometimes it can be too powerful. It could be that the website you're building doesn’t have a need for comments or a section specifically for links, and leaving them in could potentially confuse your client. Fortunately, you can easily remove any of the pages from the admin area with the simple function below.
function remove_menu_pages() { remove_menu_page('link-manager.php'); remove_menu_page('edit-comments.php'); }add_action( 'admin_init', 'remove_menu_pages' );By using the admin_init hook, we can run our own functions before any other hook is run. We then run the remove_menu_page function, which enables us to remove top-level menus from the navigation.

Changing the order of the Admin Menu
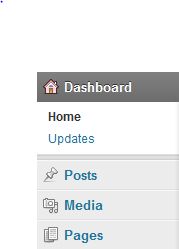
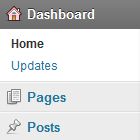
The default order of the WordPress menu is normally fine, but there may come a time when you want to reorder it. By adding the following snippet to your theme's functions file, you can set your own custom order.
function custom_menu_order($menu_order) { if (!$menu_order) return true; return array( 'index.php', 'edit.php?post_type=page', 'edit.php' );}add_filter('custom_menu_order', 'custom_menu_order');add_filter('menu_order', 'custom_menu_order');By using the custom_menu_order filter, we can specify our own order for the menu. To define the order, you simply create an array and then add the page URLs in the order you want those pages to appear in the menu.

Changing the ‘Enter title here’ placeholder
The default placeholder text on the title box for pages and posts is ‘Enter title here’. This is pretty self-explanatory, and in the majority of cases, would be perfectly fine. But if you do want to change it, WordPress has a filter for that.
function change_title($title){ $title = 'My New Title'; return $title;}add_filter( 'enter_title_here', 'change_title' );By using the enter_title_here filter, you can define your own placeholder text.

Changing the footer content
The default WordPress footer is ‘Thank you for creating with WordPress’. While this is a perfectly sensible message for WordPress to add, you may want to use the footer as a way to direct your client to you if they require any support. Fortunately, you can do this by adding a simple filter to your theme's functions file.
function change_footer_content() { echo 'Thank you for using our system. If you need support, please contact us.';}add_filter('admin_footer_text', 'change_footer_content');By using the admin_footer_text filter, we can change the content to whatever we need.

As this article will hopefully have shown you, WordPress is not just a CMS that enables you to provide your clients with the ability to manage their own content: it also gives you the power to customise the admin area as much as you need through the use of hooks, filters and functions.

Thank you for reading 5 articles this month* Join now for unlimited access
Enjoy your first month for just £1 / $1 / €1
*Read 5 free articles per month without a subscription

Join now for unlimited access
Try first month for just £1 / $1 / €1
The Creative Bloq team is made up of a group of design fans, and has changed and evolved since Creative Bloq began back in 2012. The current website team consists of eight full-time members of staff: Editor Georgia Coggan, Deputy Editor Rosie Hilder, Ecommerce Editor Beren Neale, Senior News Editor Daniel Piper, Editor, Digital Art and 3D Ian Dean, Tech Reviews Editor Erlingur Einarsson and Ecommerce Writer Beth Nicholls and Staff Writer Natalie Fear, as well as a roster of freelancers from around the world. The 3D World and ImagineFX magazine teams also pitch in, ensuring that content from 3D World and ImagineFX is represented on Creative Bloq.
