Create high quality cinemagraphs with CSS3 and jQuery
Create high quality cinemagraphs that offer a richer range of colours and a larger set of dimensions than the usual animated GIF options, by using JPEG sprites with CSS3 and jQuery.
Daily design news, reviews, how-tos and more, as picked by the editors.
You are now subscribed
Your newsletter sign-up was successful
Want to add more newsletters?

Five times a week
CreativeBloq
Your daily dose of creative inspiration: unmissable art, design and tech news, reviews, expert commentary and buying advice.

Once a week
By Design
The design newsletter from Creative Bloq, bringing you the latest news and inspiration from the worlds of graphic design, branding, typography and more.

Once a week
State of the Art
Our digital art newsletter is your go-to source for the latest news, trends, and inspiration from the worlds of art, illustration, 3D modelling, game design, animation, and beyond.

Seasonal (around events)
Brand Impact Awards
Make an impression. Sign up to learn more about this prestigious award scheme, which celebrates the best of branding.
Cinemagraphs are great fun - a surprising blend between a static photograph and a video. They engage website visitors explicity because they initially appear to be a regular photograph, but then they catch the viewer by surprise by moving subtly, and for a moment your visitor is fully engaged with your page.
There are many great tutorials on creating “traditional” cinemagraphs on the web (and one of the best is right here on .net) but there are a few fundamental limitations to the regular cinemagraph approach.
First and foremost, cinemagraphs use the animated GIF format to capture the frames within the animation. This is a simple, portable and flexible way to create an animation, but as GIFs are strictly 8bit, the palette that can be reproduced is extremely limited. This, of course, is as much of an opportunity as a limitation, forcing the artist to consider every element of their craft, but it does mean that beautiful, rich and saturated cinemagraphs don’t tend to be practical.
The second limitation is one of size - to make an animated GIF sufficiently portable, it needs to be rendered at in relatively small dimensions. As such, the opportunity to immerse the visitor in that moment of surprise and delight is limited by the scale of the final piece, and the place it takes on the page. Again, there are noticeable exceptions, although the quality of the final result tends to take a hit when the rules are broken.
In this tutorial we’ll show you how to create a full screen-capable cinemagraph using a different technique. Instead of rendering our animation using GIF, we’ll create a sprite using JPG as the format, allowing us to scale up our artwork to practically any size, and render a full spectrum of colour. You’ll learn how to break video into individual frames, arrange the frames into a single sprite that loads efficiently in the browser, and use CSS3 (with jQuery as a backup) to flip between the frames, creating a rich, high-quality cinemagraph.
1. Film your subject
As with any cinemagraph, the first stage is to identify and film your subject. Aim for something where the movement is subtle and limited in scope - such as a model’s eyes moving, or water dripping from a pipe. Although this technique is more flexible in the amount of information you can convey, the art of a successful cinemagraph is that it first appears to be a static image, so keep that in mind when choosing your subject, and make sure your footage is stable!
2. Import into Photoshop
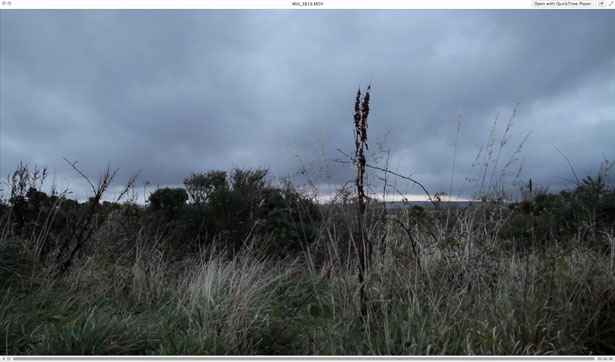
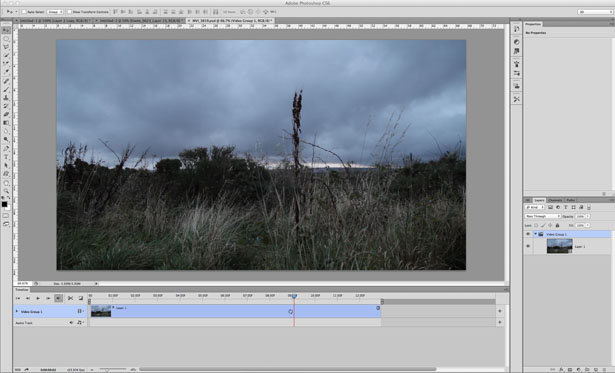
Convert your footage to a suitable format that you can open in Photoshop, and make sure you’ve set your workspace to the Motion preset. You can select this by choosing Window > Workspace > Motion. Scrub through your video and locate a section no more than a second long to work as your animation. Keep in mind that to work as a continuous animation, the final piece will need to have an identical first and last frame.
3. Select your section
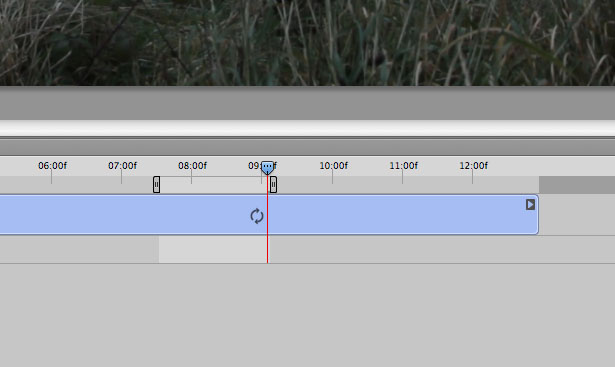
Once you’ve identified the bit of video you’d like to use, drag in the work-area handles on the timeline to mark the area you’re going to make your cinemagraph from. Work your way through each frame of your selection, looking for the best still shot - you’ll use this to limit the motion shown in the final piece and make sure everything starts and ends in the same position. Once you’ve found the right still, select the entire canvas (Ctrl/Cmd+A), copy (Ctrl/Cmd+C) and paste (Ctrl/Cmd+V) onto a new layer.
4. Mask your still
Add a layer mask to your still layer, and use black paint on the mask to remove the areas of the image you want to move as part of the animation. As you do this, it’s worth stopping each time you mask some of the image out, to make sure the underlying video sits comfortably within the gap left in the still frame.
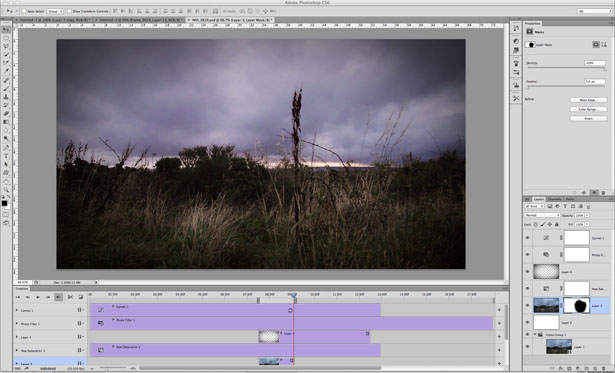
5. Render your video
When you’re happy you’ve got a clean result, with the movement limited to a section of your image, choose File > Export > Render Movie to save your work as a new video file. Reduce the frame rate to between 12 and 15 frames per second; this helps to reduce the number of frames we need to render out in the final sprite, dramatically reducing file size and making the piece more web friendly.
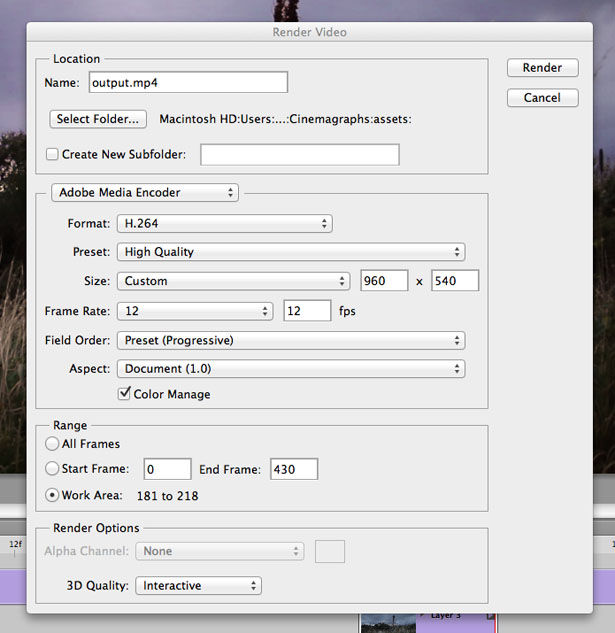
6. Load your video
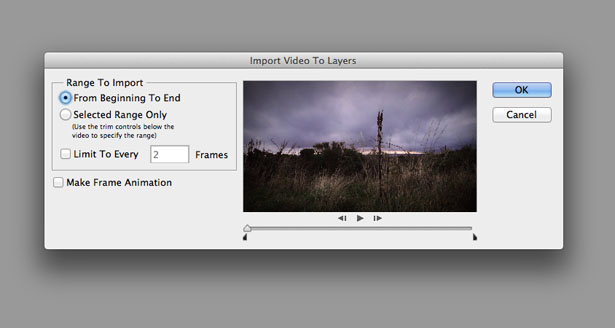
Now you’ve rendered the video, open it straight up again inside Photoshop by choosing File > Import > Video Frames to Layers. This option allows you to render each frame on a new layer, making it easy to output as a series of JPEG files. Do not tick the Make Frame Animation option in the import dialogue.
Daily design news, reviews, how-tos and more, as picked by the editors.
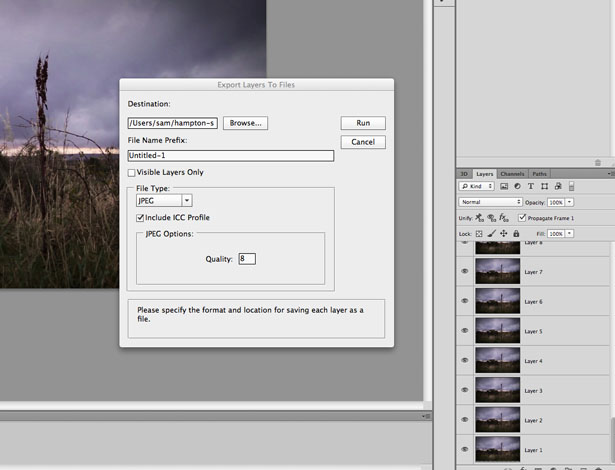
7. Output as JPGs
For each layer we need to save a high quality JPEG file. You can automate this by choosing File > Scripts > Export Layers to Files. If you want to reverse your animation to ensure it loops perfectly, copy your reversed frames and arrange them in the correct order inside the layers panel before exporting so you have a seamless loop.
8. Arrange as a sprite & colour correct
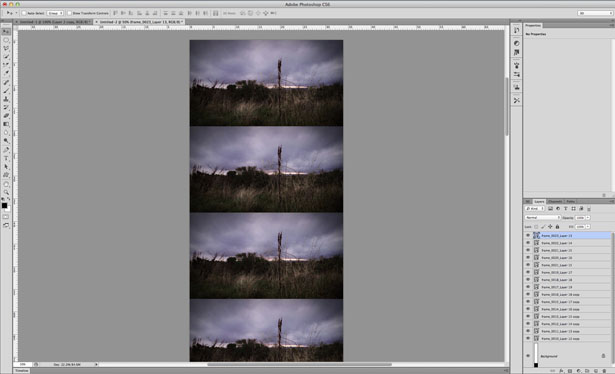
Create a new document in Photoshop the same width as your frame, and as many frames tall as you have frames in your animation. Position each frame in the composition, one beneath the other to create a single sprite. Add any sharpening or overall colour correction you want to apply, so the final effect is uniform.
9. Create the container
Because we’ve got a single image sprite, rather than a series of individual files, we need to ensure that only the first frame is visible while it loads. We can do this by loading the image as a background image to a <div> element that’s set to the size of our frame. The first frame of our animation will fill the area, and the remainder of the sprite will load out of sight.
<div class=‘cinemagraph’ id=‘mycinemagraph’></div> Caption: We’ve given our <div> 
10. Add the CSS
At its simplest, we just need to apply the image as a background. Add the CSS shown to position it to fill the <div>, setting the dimensions of the <div> to a single frame’s width and height. Note that we’re using absolute image positioning - as we animate our background image positioned we’ll move the background in whole-frame increments to create a flipbook effect, and a smooth animation.
#mycinemagraph { position: relative; margin: auto; width: 960px; height: 540px; border: 20px solid #fff; box-shadow: 0px 0px 10px #000; background: transparent url(cinemagraph.jpg) no-repeat 0px 0px; -moz-animation: flipframes 3s infinite; -webkit-animation: flipframes 3s infinite; animation: flipframes 3s infinite;} 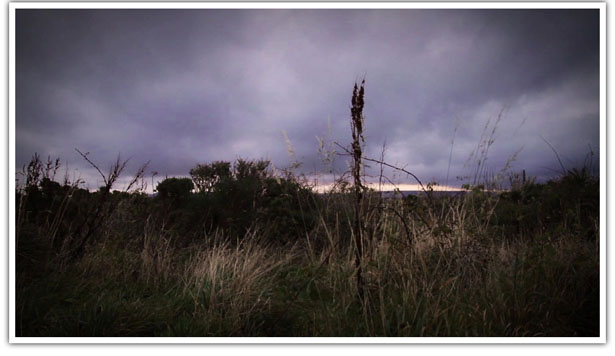
11. Use CSS animations
We’re going to use CSS animations to complete the effect as it allows us to let the browser worry about rendering the animation. Create the preset:
@keyframes flipframes { 0% { background-position: 0px 0px; } 6.999% { background-position: 0px 0px; } 7% { background-position: 0px -540px; } 13.999% { background-position: 0px -540px; } 14% { background-position: 0px -1080px; } 20.999% { background-position: 0px -1080px; } 21% { background-position: 0px -1620px; } 27.999% { background-position: 0px -1620px; } 28% { background-position: 0px -2160px; } 34.999% { background-position: 0px -2160px; } 35% { background-position: 0px -2700px; } 41.999% { background-position: 0px -2700px; } 42% { background-position: 0px -3240px; } 48.999% { background-position: 0px -3240px; } 49% { background-position: 0px -3780px; } 54.999% { background-position: 0px -3780px; } 55% { background-position: 0px -4320px; } 61.999% { background-position: 0px -4320px; } 62% { background-position: 0px -4860px; } 68.999% { background-position: 0px -4860px; } 69% { background-position: 0px -5400px; } 75.999% { background-position: 0px -5400px; } 76% { background-position: 0px -5940px; } 82.999% { background-position: 0px -5940px; } 83% { background-position: 0px -6480px; } 89.999% { background-position: 0px -6480px; } 90% { background-position: 0px -7020px; } 94.999% { background-position: 0px -7020px; } 95% { background-position: 0px -7560px; } 99.999% { background-position: 0px -7560px; } 100% { background-position: 0px 0px; } } 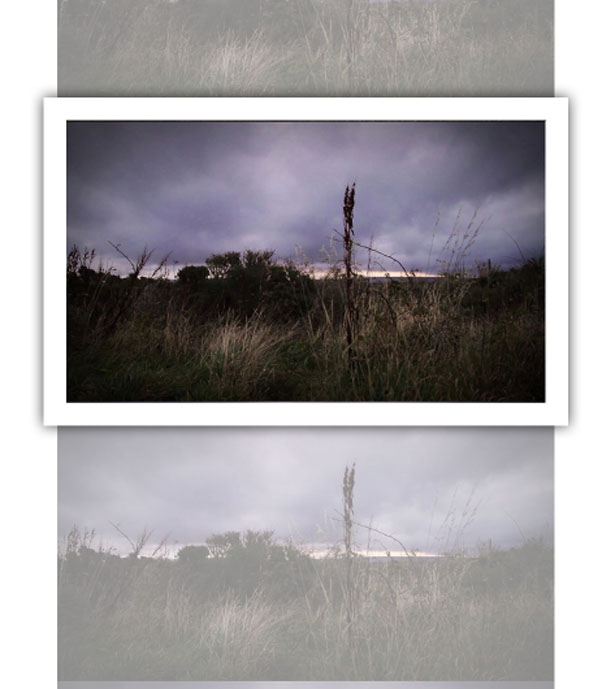
12. Modernizr for older browsers
Not every browser is compatible with CSS3 yet, so for older browsers we’ve got a choice: either leave them with a static image (and no moment of surprise as a consequence) or fall back on script. Add the Modernizr JavaScript plugin, and use it to create a jQuery flipbook effect by looking for support of HTML5 elements. The animation itself is simply a case of running a loop and positioning the background image up one frame each iteration. Check out our code to see this in action.
i=0; // counter to indicate which frame we're showing frameheight = 540; // height of the frame numframes = 15 // total number of frames in sprite $(document).ready(function(){ // Only apply the fallback to non-capable browsers $(".no-cssanimations").each(function(){ var t = setInterval("changeframe()",200); // aim for around 10fps }); }); function changeframe() { i = i + 1; if (i>(numframes-1)) { i=0; } newposition = 0 - (i*frameheight); $("#mycinemagraph").css({backgroundPosition:"0px "+newposition+"px"}); } 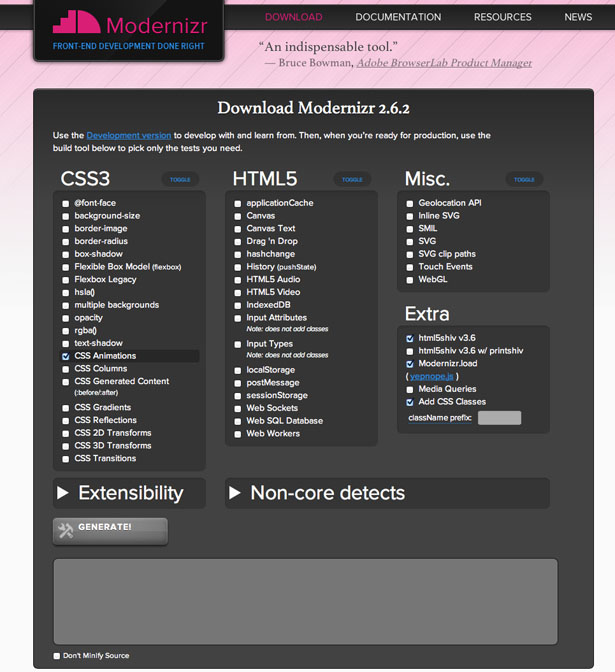
The download link at the top of this article will give you the source files and JPEG used to create this cinemagraph. If you would like the original video and PSD files, you can download them here. This download is 82MB in size.

The Creative Bloq team is made up of a group of art and design enthusiasts, and has changed and evolved since Creative Bloq began back in 2012. The current website team consists of eight full-time members of staff: Editor Georgia Coggan, Deputy Editor Rosie Hilder, Ecommerce Editor Beren Neale, Senior News Editor Daniel Piper, Editor, Digital Art and 3D Ian Dean, Tech Reviews Editor Erlingur Einarsson, Ecommerce Writer Beth Nicholls and Staff Writer Natalie Fear, as well as a roster of freelancers from around the world. The ImagineFX magazine team also pitch in, ensuring that content from leading digital art publication ImagineFX is represented on Creative Bloq.
