Build your own blog theme for Ghost
Steven Wu explains how to get started and build your own theme for the popular new open source blogging platform Ghost.
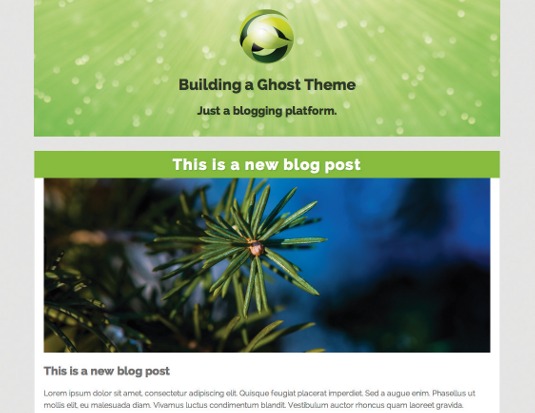
Ghost is a new and free open source blogging platform. Successfully funded through Kickstarter, it surpassed its original request of only £25,000 achieving over £196,000 in funding from the community in May 2013. Started by John O'Nolan, Ghost has a unique purpose in providing bloggers with a simple interface that allows them to write and publish their content without the hassle or distraction by the sheer complexity of development from traditional platforms.
Watch an exclusive screencast of this tutorial:
Ghost has been beautifully designed from the ground up. Its clean and simplified UI allows you to quickly browse through the archive so you may spend less time managing your blog and more time blogging. It has a smart writing screen using Markdown with a real-time preview on the right-hand screen and simple drag and drop functionality to add images into place.
Ghost has three main core principles: it's developed for users rather than developers like many blogging and CMS platforms out there; the platform has a MIT licence so you can do what you like with this platform with few limitations; finally it's made for love. Ghost is a non-profit organisation; its motivations are to support bloggers rather than satisfying investors. In this tutorial I will guide you how to install and set up Ghost locally and build your first Ghost theme.
Download the support files for this tutorial.
To begin building our Ghost theme, start within the Ghost installation folder. Under Content > Themes create a new theme called mytheme. Make sure this is in lowercase without any spaces (hyphens are acceptable). This will be the directory that houses our theme codebase. Within this directory, create the following files and folders:
- /assets/
  — /css/
    — normalize.css
    — screen.css
  — /images/
  — /js/
  — /fonts/
- /partials/
    — header.hbs
- default.hbs
- index.hbs
- post.hbs
Both index.hbs and post.hbs are the only files required to be a valid theme. Without any of these you will receive an error.
Get the Creative Bloq Newsletter
Daily design news, reviews, how-tos and more, as picked by the editors.
Activate the new theme
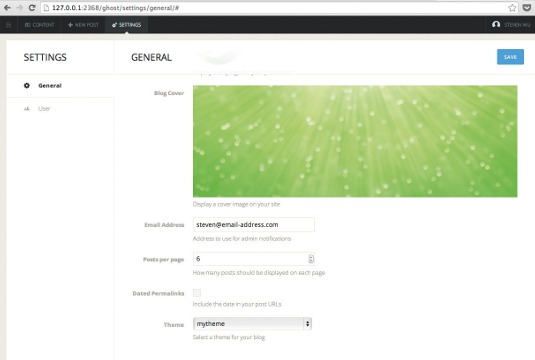
Now in the Ghost dashboard, navigate to Settings > General. Under Theme, select the new theme you just created called mytheme. If it's missing, you'll need to go to the terminal and restart Ghost. Click Save to activate this theme. You won't see anything in the frontend yet. This is because we have yet to add any markup in our theme.
Using Handlebars
Ghost makes use of a templating language called Handlebars.js. Predefined Handlebars expressions make it simple to build and maintain Ghost themes.
Handlebars separates the templates from the raw HTML for you. Bear in mind that, with Handlebars, you can't write functions or hold variables. Handlebars is developed simply to display content where the expressions are outputted.
Handlebars expressions are wrapped with curly brackets and look like this: {{author.name}}. This basically looks up the author.name property and outputs it.
Default.hbs
Let's get our hands dirty and start creating our theme. Open up the default.hbs in your favourite text editor. This is the base template and includes all the basic <html>, <head>, <body> tags used throughout your website.
In this template we input our HTML doctype, basic meta tags and head and body tags. (See default.hbs in tutorial files.) You'll notice expression tags: {{! Responsive Meta Tags }}. Any expressions proceeded with an exclamation point within the curly brackets are comments and will not be printed in the final source code.

The {{ghost_head}} helper is used to output any system scripts, styles and meta tags. The {{ghost_foot}} helper is used to output scripts at the bottom of the document. The Handlebars expression {{{body}}} is an important one. This is where all your content will be displayed, which extends the default template. The following {{body_class}} is used to automatically generate CSS class names for targeting specific pages:
<body class="{{body_class}}">
  <div class="mytheme_page">
    {{{body}}}
  </div>
{{ghost_foot}}
</body>

index.hbs
Now in our index.hbs (see this source code in the project files), we use the Handlebars expression {{!< default}} at the very head of this document to reference to our previous base template. This template will be used for our homepage. We will want to style each blog post within the foreach helper. By using the opening {{#foreach posts}} and closing {{/foreach}} loop, anything inside this will display each post with the markup.
To display the content of each blog post we use a Handlebars expressions {{content}}. We can also limit the word count by using the parameter words="100".
Class and ID naming conventions
You'll notice all of the class names are proceeded with mytheme_. This is a recommended practice when building a Ghost theme. Ghost will automatically assign particular class names and more specifically IDs to certain elements in your theme. You'll want to prevent clashes and consider your scope of class names.
Partials
Typically we can insert our header markup just below the {{!< default}}, but the advantage of Handlebars templates are hierarchical support, whereby one template can extend another. This includes the use of partials. This helps to eliminate repetition of code and encourage reusability. We can separate our header into a partial template.
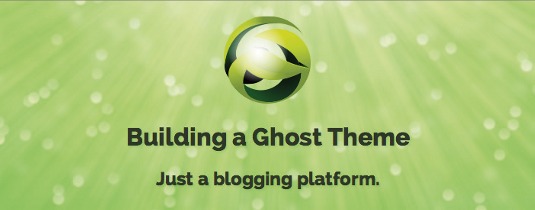
Within the partials directory open up the header.hbs. In Ghost dashboard Settings, you can upload your own blog logo and blog cover image. We'll use an if statement to check whether a blog cover image exists. If so, we'll output it as a background image:
{{#if @blog.cover}}style="background-image: url({{@blog.cover}})"{{/if}}This time, we'll check if a blog logo is available.
{{#if @blog.logo}}
    <a class="blog-logo" href="{{@blog.url}}">
      <img src="{{@blog.logo}}" alt="Blog Logo" />
    </a>
{{/if}}
The @blog global data accessor has access to global settings in Ghost we can output in our theme. Now let's dive into the fun part of styling our theme. In our theme, we've linked to normalize.css for our HTML5-ready CSS reset. Within the screen.css is where we'll input all our custom theme styles. We'll then add some global styles, followed by styling our header and set a max-width to prevent our layout from expanding over certain pixel size:
.mytheme_page {
  max-width: 980px;
  margin: 0 auto;
}
.mytheme_header {
  padding:20px 0;
  text-shadow: 2px 2px 2px rgba(26, 26, 26, 0.1);
  text-align: center;
  color: #2f3727;
}
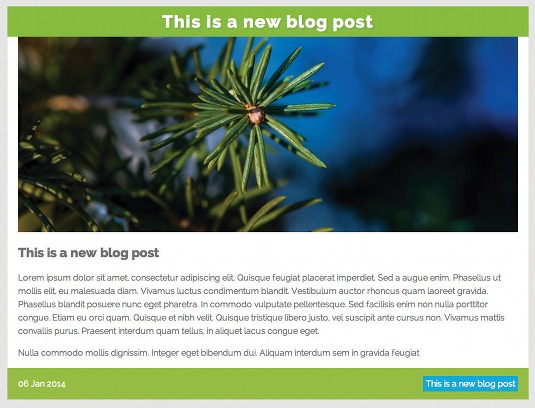
Now style each blog post within its article container:
main article {
  margin: 30px 0;
  borderz-left:1px solid #DBDBDB;
  border-right:1px solid #DBDBDB;
  background-color: #FFFFFF;
}
.mytheme_post_content {
  padding: 0 20px;
}
.mytheme_post_title {
  margin: 0 0 20px 0;
  padding: 10px;
  font-size: 2em;
  letter-spacing: 2px;
  text-align: center;
  text-shadow: 2px 2px 2px rgba(26, 26, 26, 0.2);
  color: #FFFFFF;
  background-color: #8ACD36;
}
.mytheme_post_title a {
  text-decoration: none;
  color: #FFFFFF;
}
.mytheme_main_img img {
  width: 100%;
  max-width: 100%;
  border: 0;
}
Place the date on the left-hand side and the Read more button opposite. Give this link the presentation of a button:
.mytheme_post_info {
  overflow: auto;
  padding: 0 20px;
  background-color: #98C148;
}
.mytheme_date {
  float: left;
  padding-top: 20px;
  color: #FFFFFF;
}
.button {
  float: right;
  padding: 20px 0;
}
.button a {
  padding: 5px;
  transition: ease .3s;
  text-decoration: none;
  color: #FFFFFF;
  background-color: #39A9DA;
}
.button a:hover {
  background-color: #199ED9;
}
We touched upon the key aspects of developing a Ghost theme. Hopefully this insight has opened up possibilities to creating your own personalised theme. You'll see that building a Ghost theme is very simple to pick up with the pre-defined Handlebars expressions.
Don't forget to download the tutorial's accompanying files. Also check out the Ghost documentation for more information to help you build and customise your own theme.
Words: Steven Wu
This article originally appeared in net magazine issue 252.

Thank you for reading 5 articles this month* Join now for unlimited access
Enjoy your first month for just £1 / $1 / €1
*Read 5 free articles per month without a subscription

Join now for unlimited access
Try first month for just £1 / $1 / €1

The Creative Bloq team is made up of a group of art and design enthusiasts, and has changed and evolved since Creative Bloq began back in 2012. The current website team consists of eight full-time members of staff: Editor Georgia Coggan, Deputy Editor Rosie Hilder, Ecommerce Editor Beren Neale, Senior News Editor Daniel Piper, Editor, Digital Art and 3D Ian Dean, Tech Reviews Editor Erlingur Einarsson, Ecommerce Writer Beth Nicholls and Staff Writer Natalie Fear, as well as a roster of freelancers from around the world. The ImagineFX magazine team also pitch in, ensuring that content from leading digital art publication ImagineFX is represented on Creative Bloq.
