Merge vectors with photographic imagery
Neil Stevens shows you how to take a more abstract approach to creating an illustration
- Software Photoshop and Illustrator CS3 or later
- Time needed 1-2 hours
- Skills-Creating 3D vector shapes-Work with layers and shadows-Merge vectors with photographic imagery
At certain times in your career you'll be handed a brief that gives you the chance to take a more abstract approach to creating an image. In this tutorial I'll show how you can merge a few found images, and mix them in with vector shapes to create a unique editorial illustration.
For the purposes of this tutorial, let's say we've been given a brief to create an illustration for a magazine article on the tricks and techniques that a designer or illustrator can have in their arsenal of skills. In this case, we'll use a small 'box of tricks' placed on the palm of a hand. With a few Photoshop and Illustrator skills, you can create the effect of the blocks of colour bursting out of the box, all on a backdrop of an abstract ray of light.
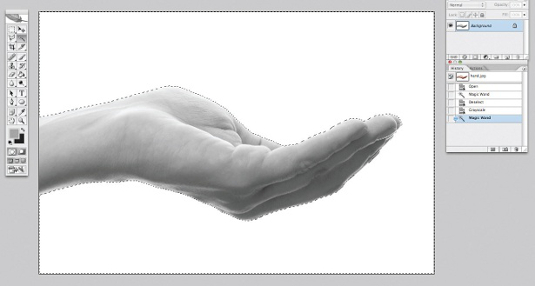
01 In Photoshop, open hand.jpeg on your DVD and convert it to grayscale by going to Image>Mode>Grayscale. Select the white space with the Magic Wand tool and invert the selection. Make sure the Magic Wand tolerance is set low – 5 should be ok. Copy it and paste it into the main blank canvas, which is set at 222x300 mm. At this point, place it towards the bottom of the image and name the layer 'Hand'.
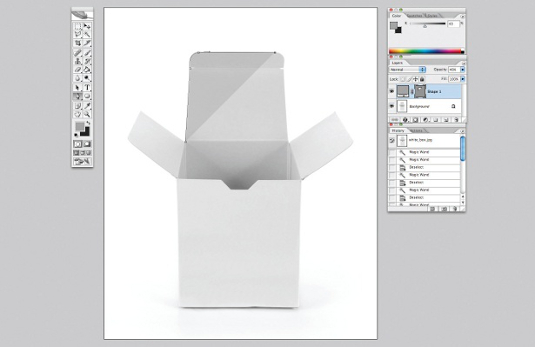
02 The white_box image on your disc has a bit more shadow around it, so selecting it with the Magic Wand would be tricky. Use the Pen tool to trace around the shape. Once traced, open the Paths panel, select the path you just created and convert it to a selection. Then, simply copy and paste the selection into the main image, along with the hand, and name the layer 'Box'.
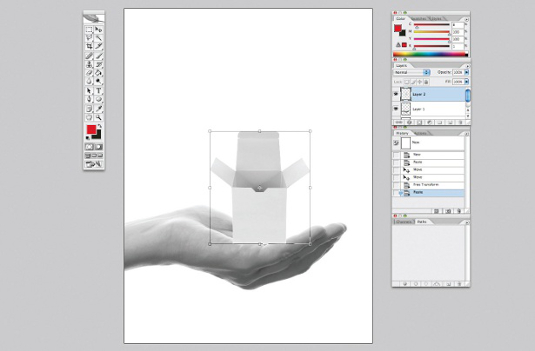
03 Place the box just over the hand where you would like it to sit. You can play around with the scale, but for this image I made it quite small so that we can fit more of the illustration above it later.
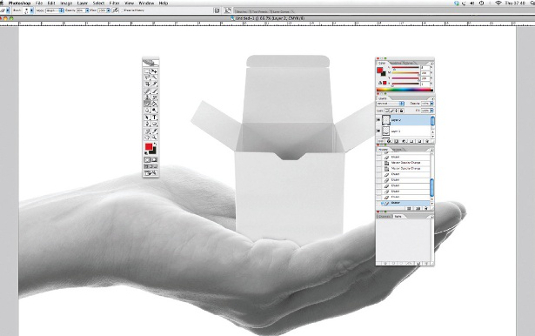
04 Once the box layer is hovering over the hand, set the layer's opacity to 50 per cent so that you can see the hand through it. Then, using the Eraser tool, simply delete the areas of the box that you wouldn't see. I often use a soft-edge eraser for this and chip away at the part I want to delete.
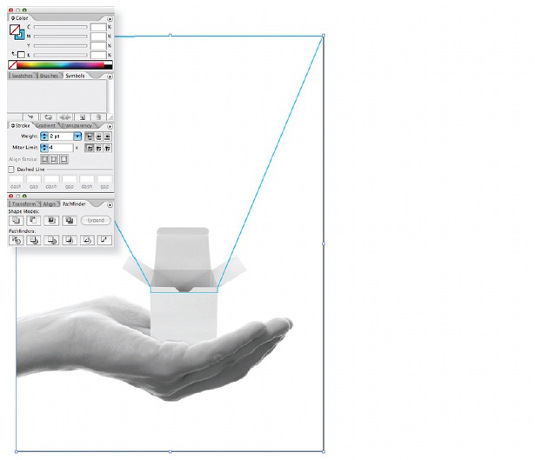
05 We now have the basis of our illustration and all the photographic images have been used. It's now time to add the vectors. Save your current image as a JPEG, naming it 'placement.jpg' and open it in Illustrator in a file the same size as your main image (222x300mm). Here, you can create the outline for the ray of light that will be coming out of the box. Simply use the Pen tool to do this, then delete the image of the hands so you are left with just your outline shape. Print this onto an A4 sheet of paper.
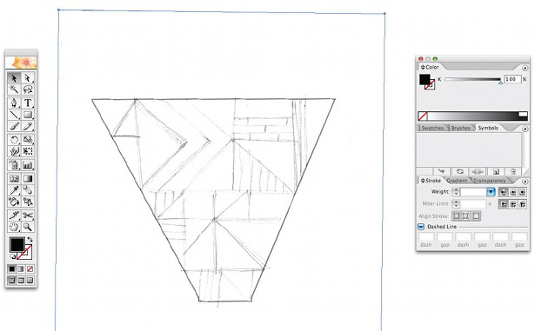
06 Using the printout, roughly sketch the abstract shapes and lines within your ray of light. You can be very rough with this, as you can then scan it in and create the outlines in Illustrator using the Pen tool. Drag guides in from both the top and bottom margin so that it all becomes neater and straighter.
Get the Creative Bloq Newsletter
Daily design news, reviews, how-tos and more, as picked by the editors.
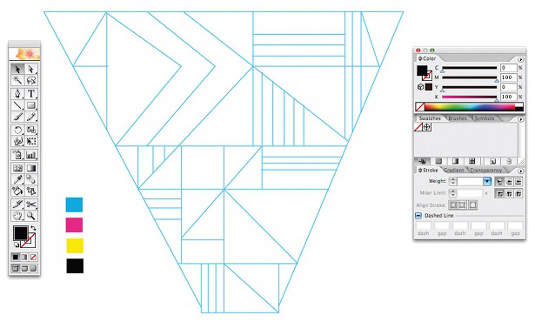
07 Once you have neatened up and connected the lines with one another, select the whole shape and go to Object>Live Paint>Make, to convert the lined image into a live painting object. This means that we can select the Paint Bucket tool and, when it hovers over shapes in the image, they will become highlighted and you can fill them with your desired colour.

Thank you for reading 5 articles this month* Join now for unlimited access
Enjoy your first month for just £1 / $1 / €1
*Read 5 free articles per month without a subscription

Join now for unlimited access
Try first month for just £1 / $1 / €1

The Creative Bloq team is made up of a group of art and design enthusiasts, and has changed and evolved since Creative Bloq began back in 2012. The current website team consists of eight full-time members of staff: Editor Georgia Coggan, Deputy Editor Rosie Hilder, Ecommerce Editor Beren Neale, Senior News Editor Daniel Piper, Editor, Digital Art and 3D Ian Dean, Tech Reviews Editor Erlingur Einarsson, Ecommerce Writer Beth Nicholls and Staff Writer Natalie Fear, as well as a roster of freelancers from around the world. The ImagineFX magazine team also pitch in, ensuring that content from leading digital art publication ImagineFX is represented on Creative Bloq.
