Create a rich and detailed still life in 3D
Harness the power of XGen and Arnold to create a 3D South American market scene.
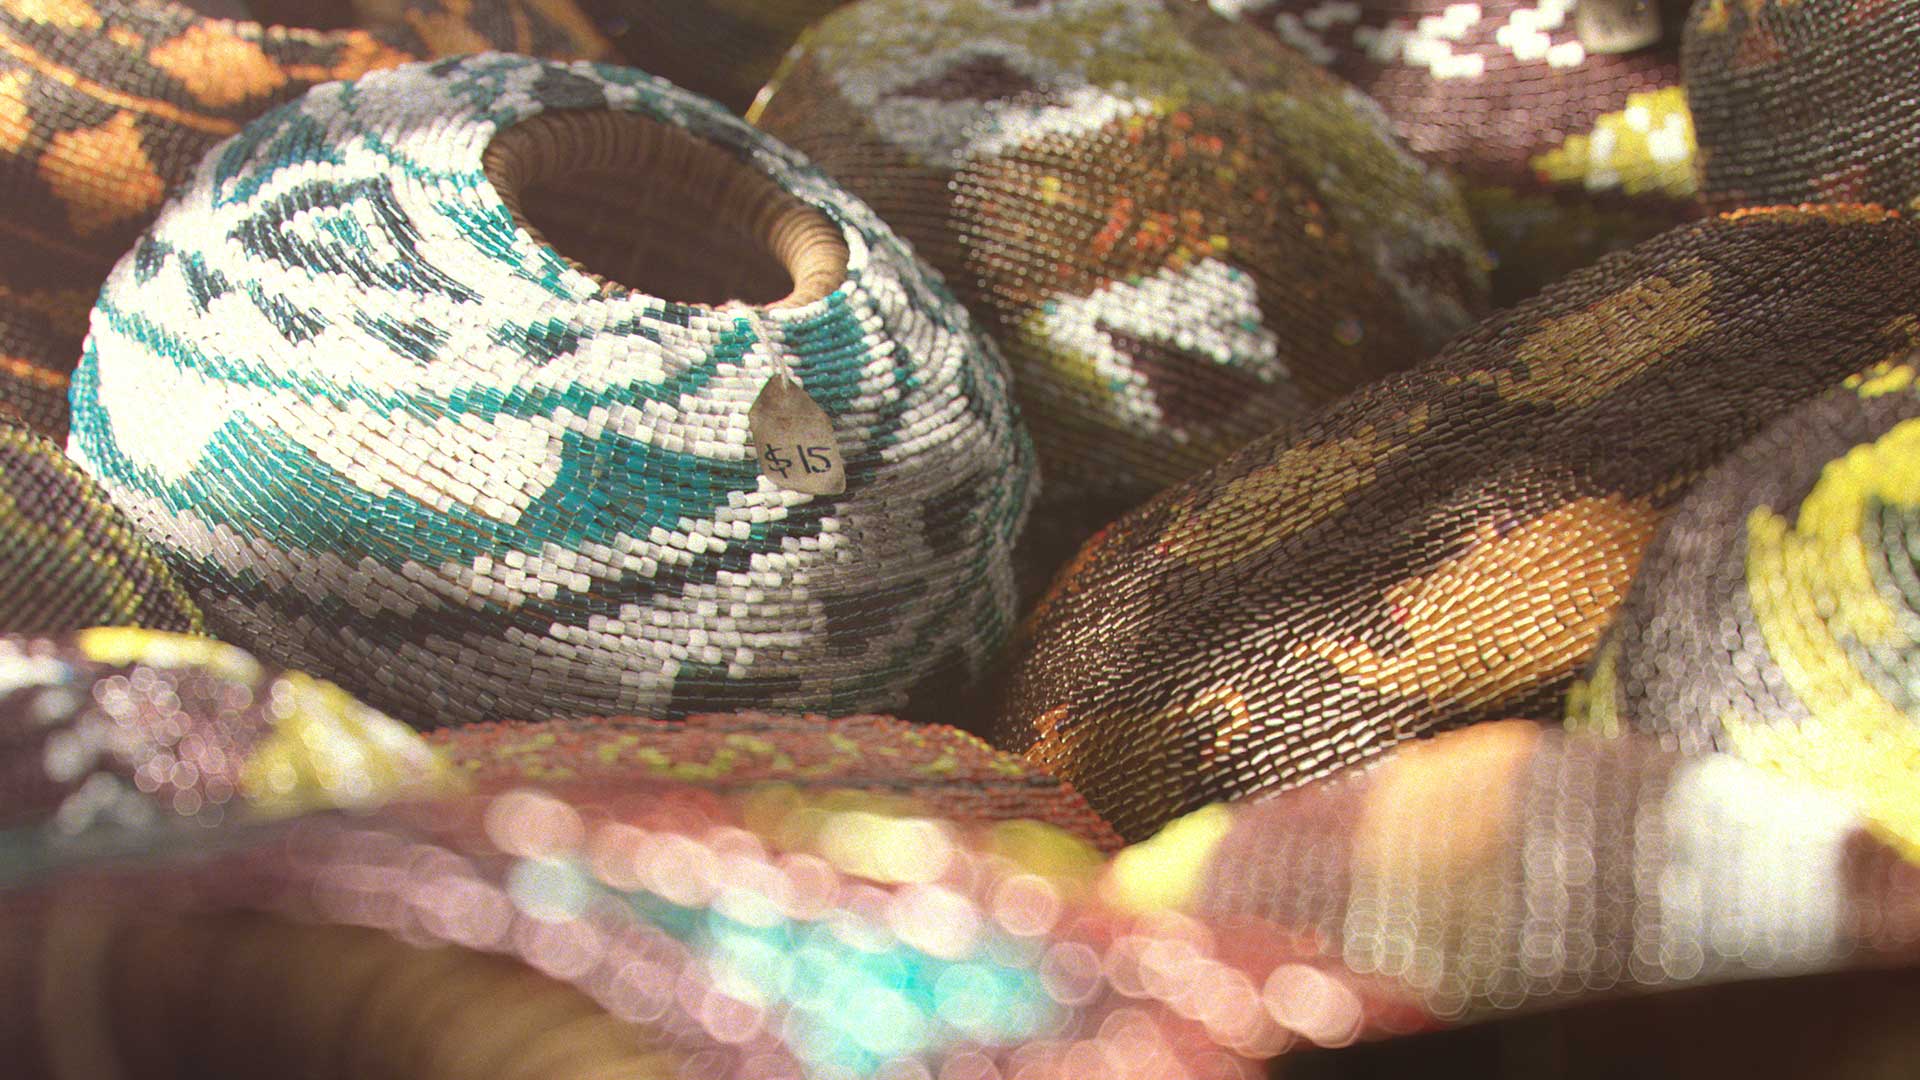
The inspiration for this 3D art sprouted from the incredible amount of wanderlust I've been having lately. This world has so much beauty to offer and I want to see it all!
Knowing my scene will be scattered with pots which have many beads scattered on them, it's really important to try to nail the appearance of a single bead to the smallest possible level. I start by using some curve-based modelling techniques to make the pots, then shade them using the alShader library and instance thousands of beads on the pots using XGen. After that I will explain how I approach lighting a scene and describe some noteworthy techniques to consider when compositing.
Once I am at the point where I know exactly what I want to create, it is time to do some research. I really feel like this might be the single most important part of the whole process and therefore I always try to push myself that extra bit. I'm itching to get started, but I've found that the longer I research my subject, the more believable the image I make will be. For example, while researching what beads actually look like I discovered that the metallic appearance of them comes from the thin metal inner structure inside the hole. Details like these make a big impact on the final look of the image.
- Download the files you'll need for this tutorial – and an accompanying video – here.
01. Plan the modelling
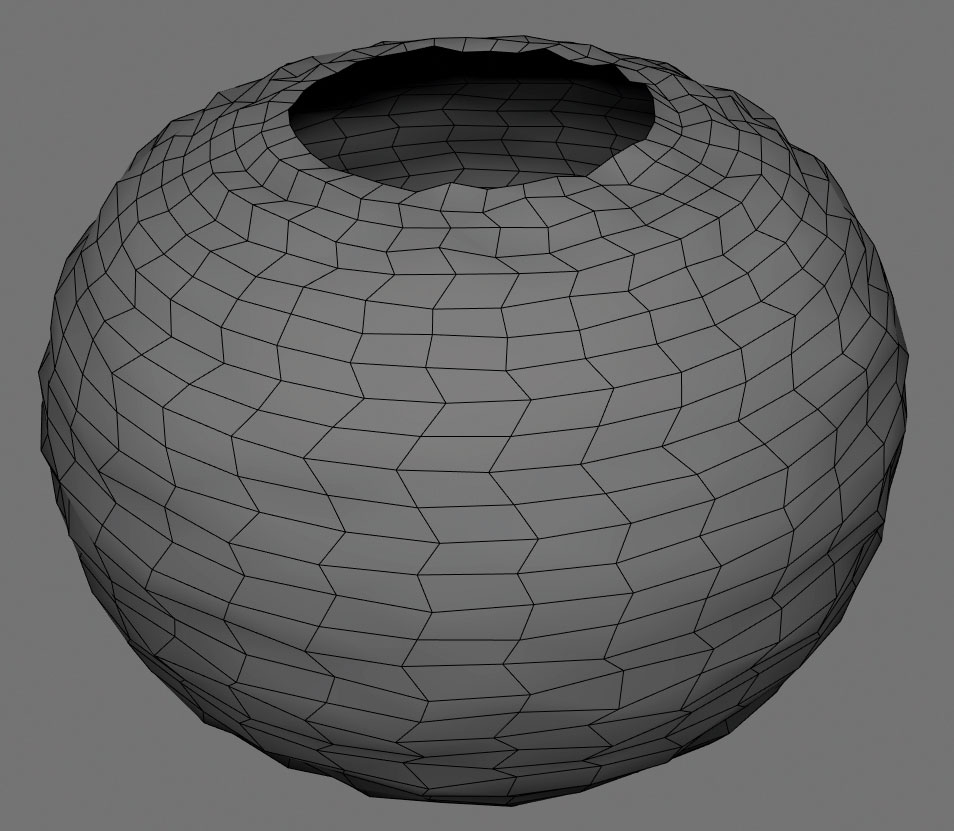
Whenever I begin a project I try to keep the end in mind. So when thinking how to approach the modelling of the pots, I also think about how XGen will eventually scatter the instances across a surface. The best way to scatter them will be in a uniform manner, which means that the quads of our pot should represent the shape of the beads as much as possible – ensuring a tight fit for all beads. This geometry will be used both for my XGen base and the creation of the wooden elements.
02. Modelling the wood
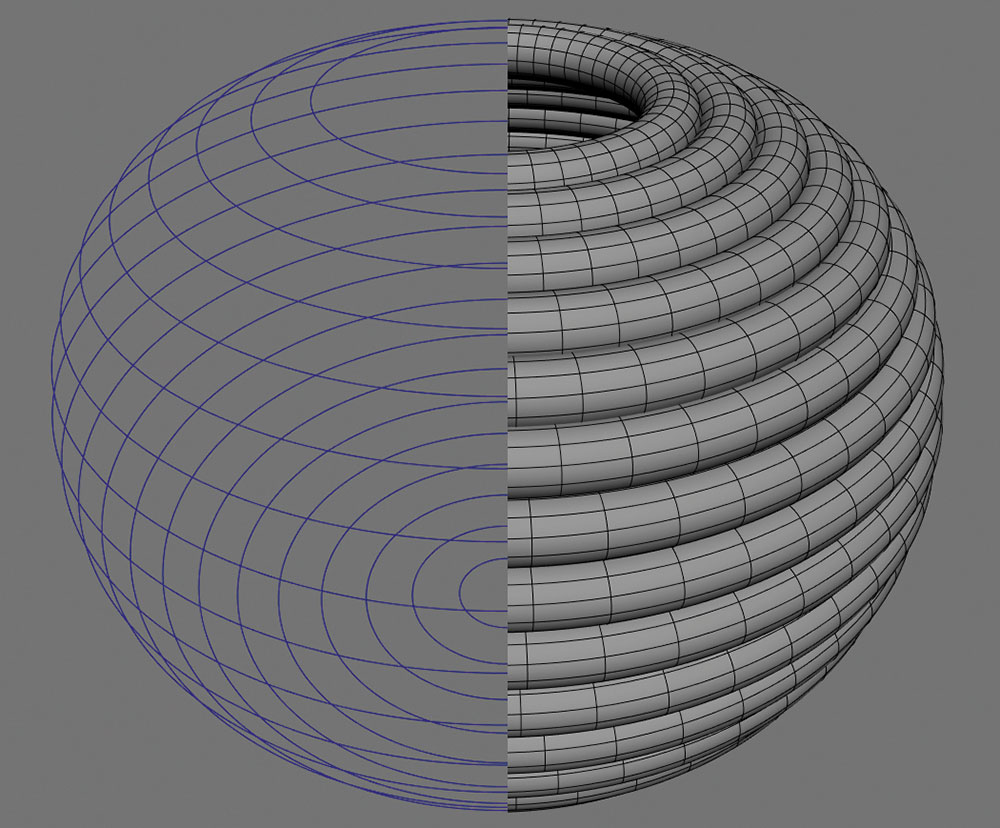
I select all the horizontal edge loops and convert them to curves. Go to Modify>Convert>Polygon Edges to Curves. I do the same for a single vertical one. Using Janos Hunyadi's primGen plug-in for Maya, I use the curves to easily create cylinders. I can do the same by creating an extrusion along the curve, but using Janos's plug-in is much faster. It also lays out the UVs properly – always a winner!
03. Modelling woven wood
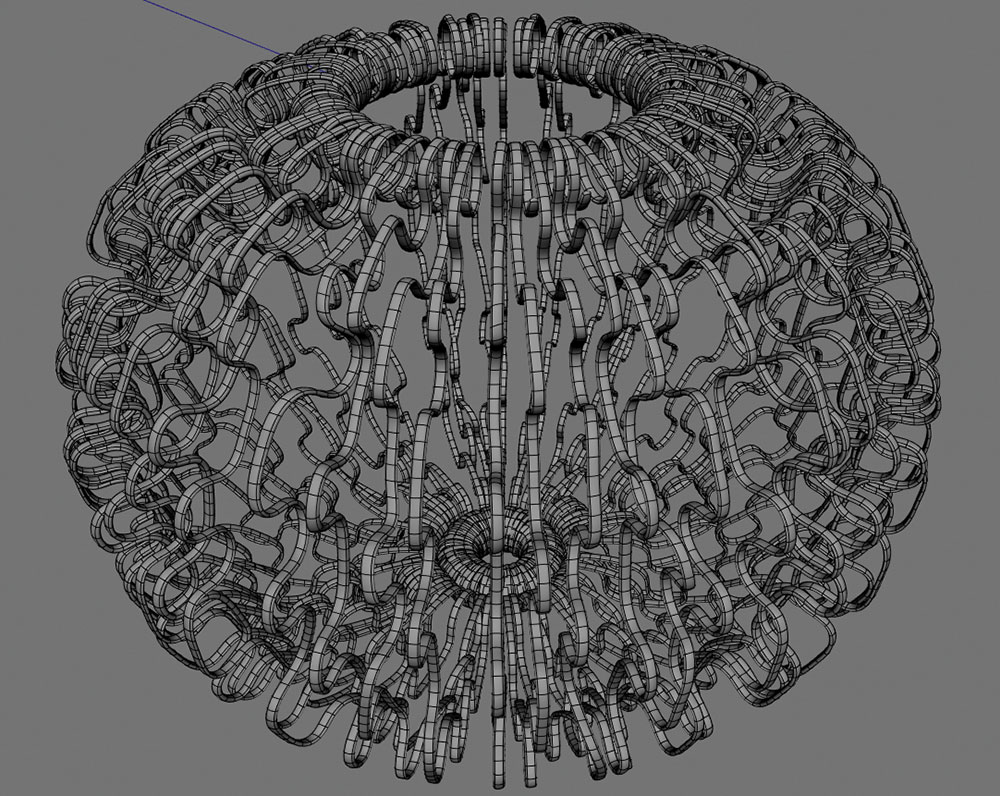
For the straps of wood holding the horizontal ones together I use the vertical extracted curve, apply primGen and adjust the curve to weave the cylinder in between the horizontal pieces. Four variations should be enough. I lay out the UVs, change the pivot of the objects to the scene origin and duplicate as many times as needed. A crucial last step is to add small, individual variations. This is needed to create a believable handmade object.
04. Modelling the beads
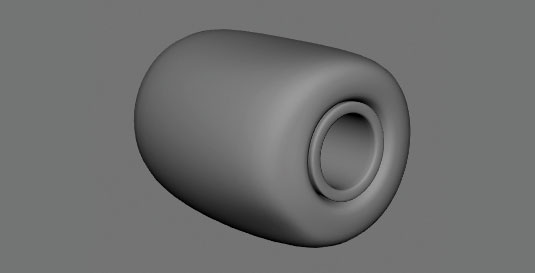
The beads themselves are super simple; a thin metal cylinder inside of a bigger plastic cylinder. The key here is to not have intersections between the two parts, as that would affect how the refraction looks. The beads I am interested in for this image aren't perfect, and this is something we need to take care of; with the Sculpt tool in Maya 2016 I pull, pinch and inflate parts. Subtle imperfections are very important! I also keep the polycount as low as possible.
05. Shading the beads
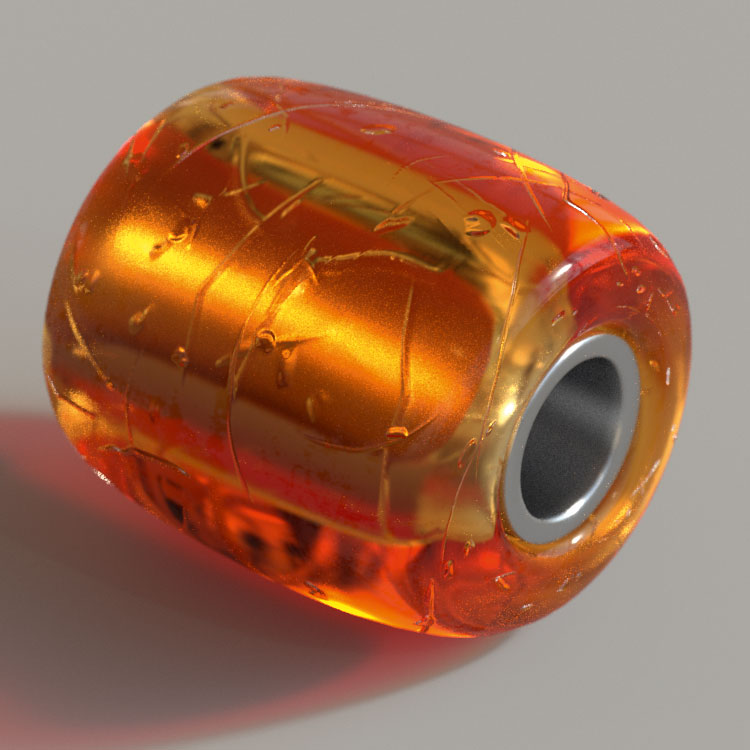
I've been using Anders Langlands' shader library for Arnold; alShaders. It's a great collection of shaders and utility nodes. Shading should start with research to find references for a visual library.
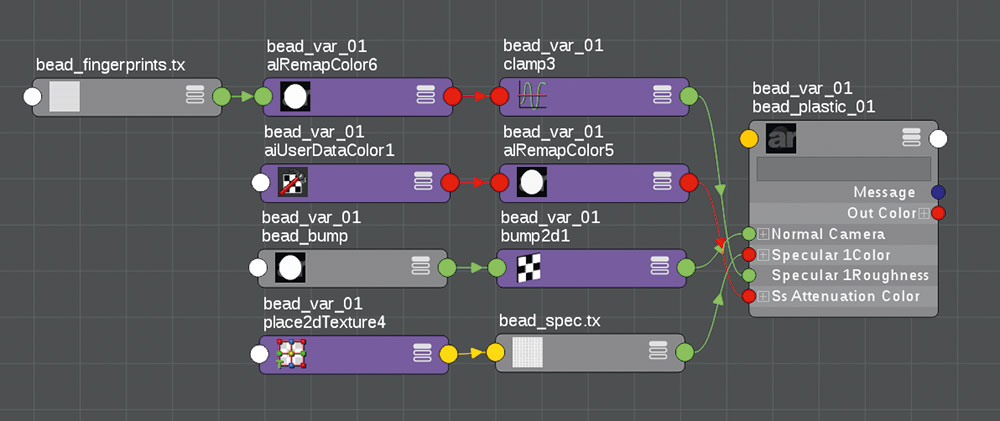
The bead shader isn't complex: a tileable scratch texture plugged into the bump slot, a fingerprints texture controlling the specular roughness, another breakup map to control specularity levels and a node controlling transmission attenuation colour, which will get past Ptex colour data from XGen.
06. Shading the wood
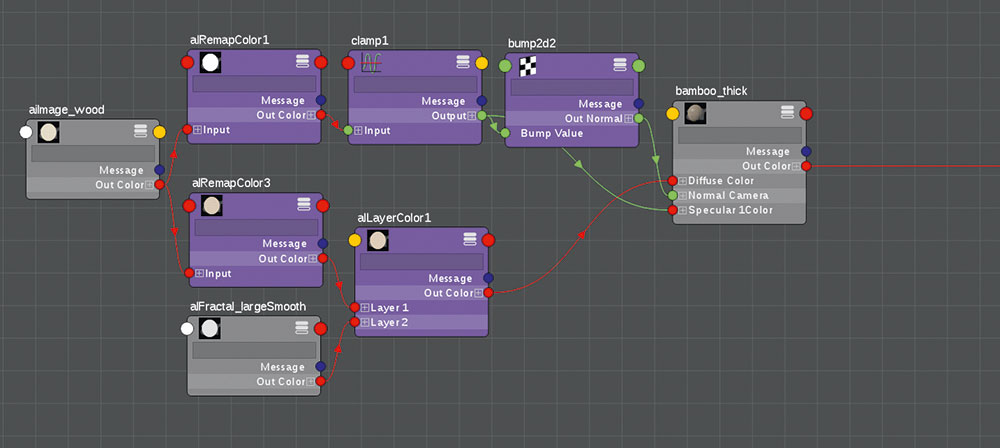
At the base of the wood shader is a single wood texture which is being used as the Diffuse, Specular and Bump. For the Diffuse component more variation is needed, so I mix a Fractal texture on top. For the Specular and Bump map I only increase the contrast and desaturate the image. One of the reasons I love using the alShader library is being able to do all of this in Maya with a couple of straightforward utility nodes.
07. Instancing with XGen
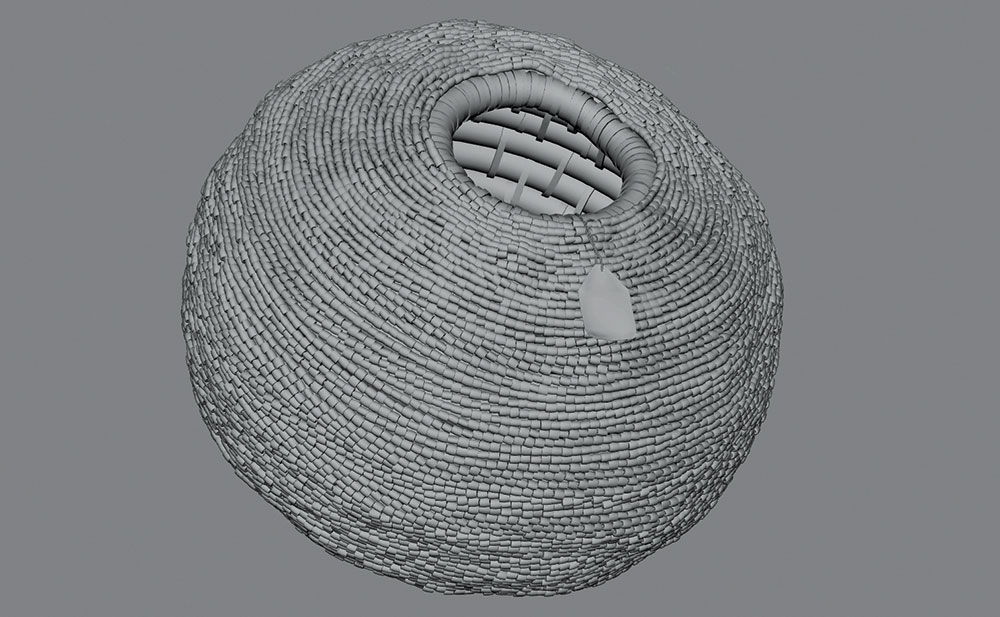
Time to instance some geometry! I export the beads as an XGen archive and load them in. It makes most sense to instance them in a uniform manner. To break up the perfect CG appearance of uniformly scattered beads I use a couple of Rand() expressions on parameters like width, length, depth and twist.
08. Custom shader parameter
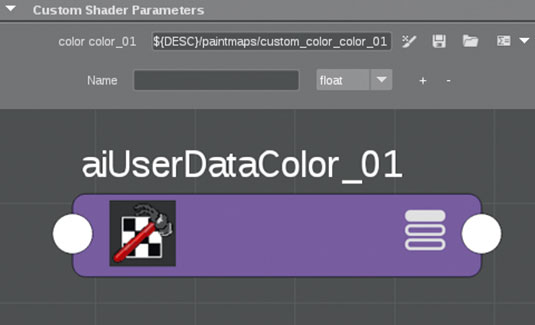
To colour the individual beads with a Texture map I need to pass this shading data through a custom shader parameter to XGen with the help of an aiUserDataColor node and convert it to a Ptex file. XGen only reads Ptex data, but makes it as easy as the click of a button to convert it.
09. Lighting considerations
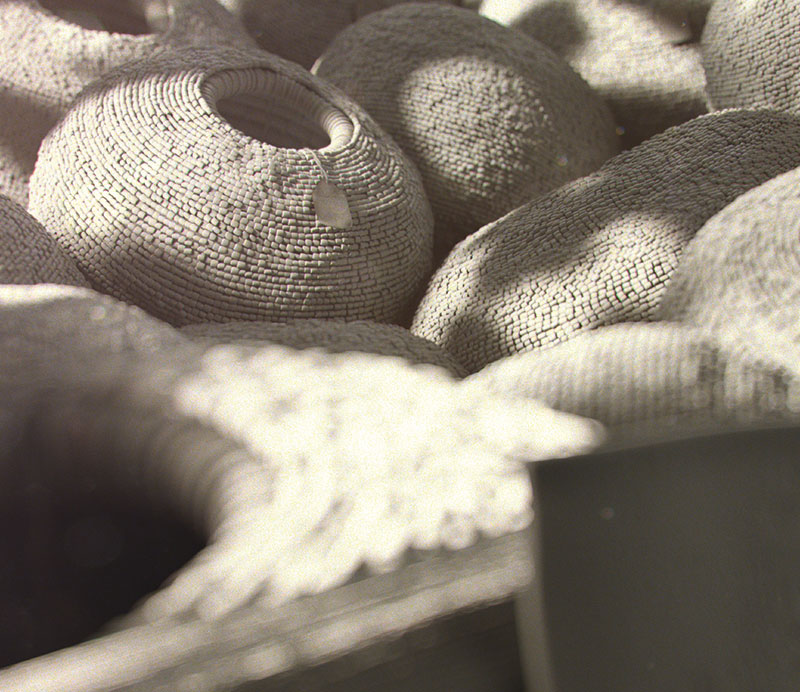
Lighting is one of my favourite parts of the pipeline. With only a few adjustments I can change the whole feeling of the scene. This is why this step needs a lot of thought. The main questions I ask myself beforehand are ‘How can the lighting help tell my story?' and ‘What do I want the viewer to feel?' The lighting needs to support the emotional moment of a scene; it needs to be believable and needs to guide the viewer's eye to the story I am telling.
10. Light setup
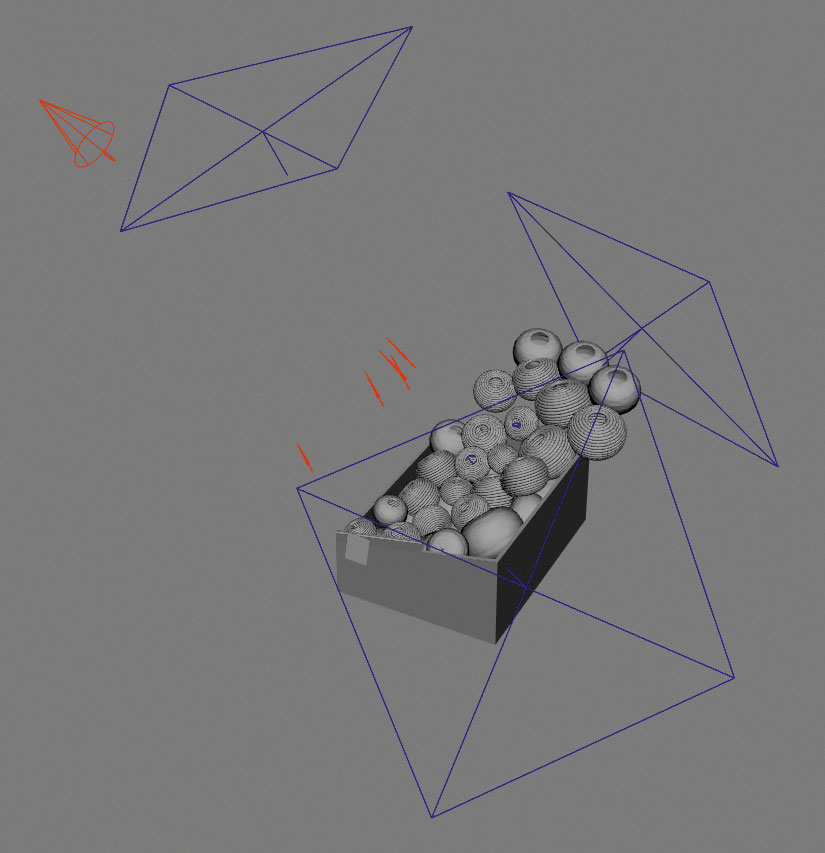
For this scene I want to create the look and feel of a South American marketplace. It has to feel inviting and easy to look at. For this scene I use a three-point light setup. One spotlight with a gobo as my keylight (the sun), a big soft rim light and a big soft fill light. Because it is hard to art direct the gobo, I use a couple of Spotlights to help light certain parts of the pots.
11. Camera imperfections
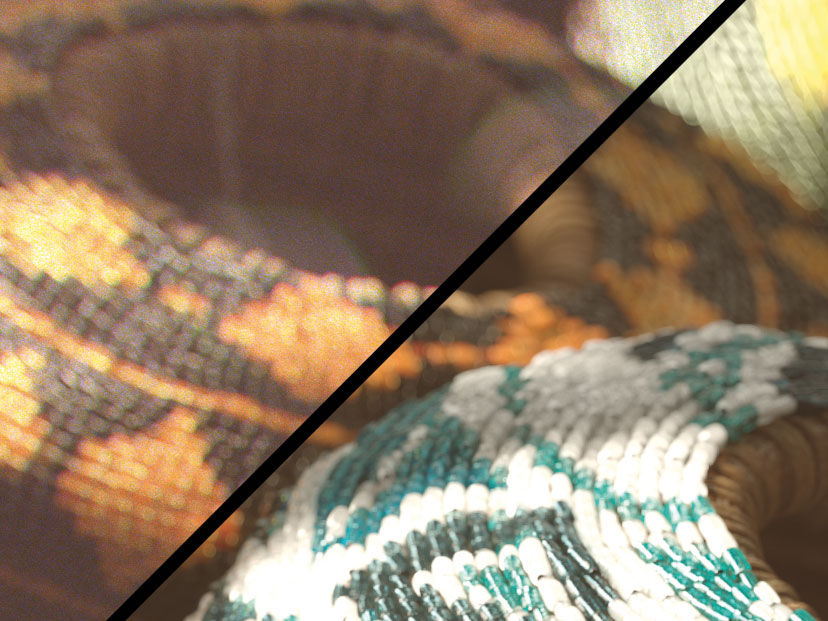
Avoid pure blacks while lighting a scene. These almost never appear in photography and can therefore make the scene look CG. I try to avoid this by adding a small amount of volume scattering in my scene. Since I'm aiming for photorealism, it's important to take lens and camera imperfections into account. Film grain, custom bokeh kernels, lens vignetting and chromatic aberration help to trick the viewer into thinking your image is a photograph.
12. Custom gamma curve
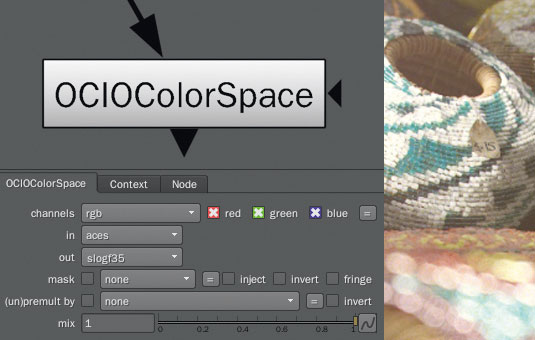
Instead of applying the default 1/2.2 gamma curve to my scene linear image, I use a custom one. In Nuke one way to do this is by switching your OCIO Config to ACES, and pick a curve with the OCIOColorSpace node. Here I will use Sony's SLog35. To view and export the image properly I need to switch my colour space in my viewer from SRGB to None, and tick the Raw Data tickbox in the Write node. For more information on this topic, check out Cinematic Color!
This tutorial originally appeared in issue 207 of 3D World. Buy it here!

Thank you for reading 5 articles this month* Join now for unlimited access
Enjoy your first month for just £1 / $1 / €1
*Read 5 free articles per month without a subscription

Join now for unlimited access
Try first month for just £1 / $1 / €1
Daily design news, reviews, how-tos and more, as picked by the editors.
