Build an animated AngularJS website
Learn how to create a simple AngularJS website and add motion using the animation API.

This tutorial was originally published in 2014. Some details may have changed.
AngularJS was born out of the need to find a better way to create enterprise web applications and it has succeeded in grand fashion. However, for a long time I felt like there was a vast expanse of possibilities that AngularJS had not ventured into. That all changed when the AngularJS team introduced the animations API in AngularJS.
Now we can create an engaging user experience through animations. For the sake of time and space, I'm going to focus on the AngularJS parts specifically and not dig into the HTML and CSS structure. With that said, I encourage everyone to download the repository and explore the parts I don't get into in this article.
Download the files you'll need for this tutorial.
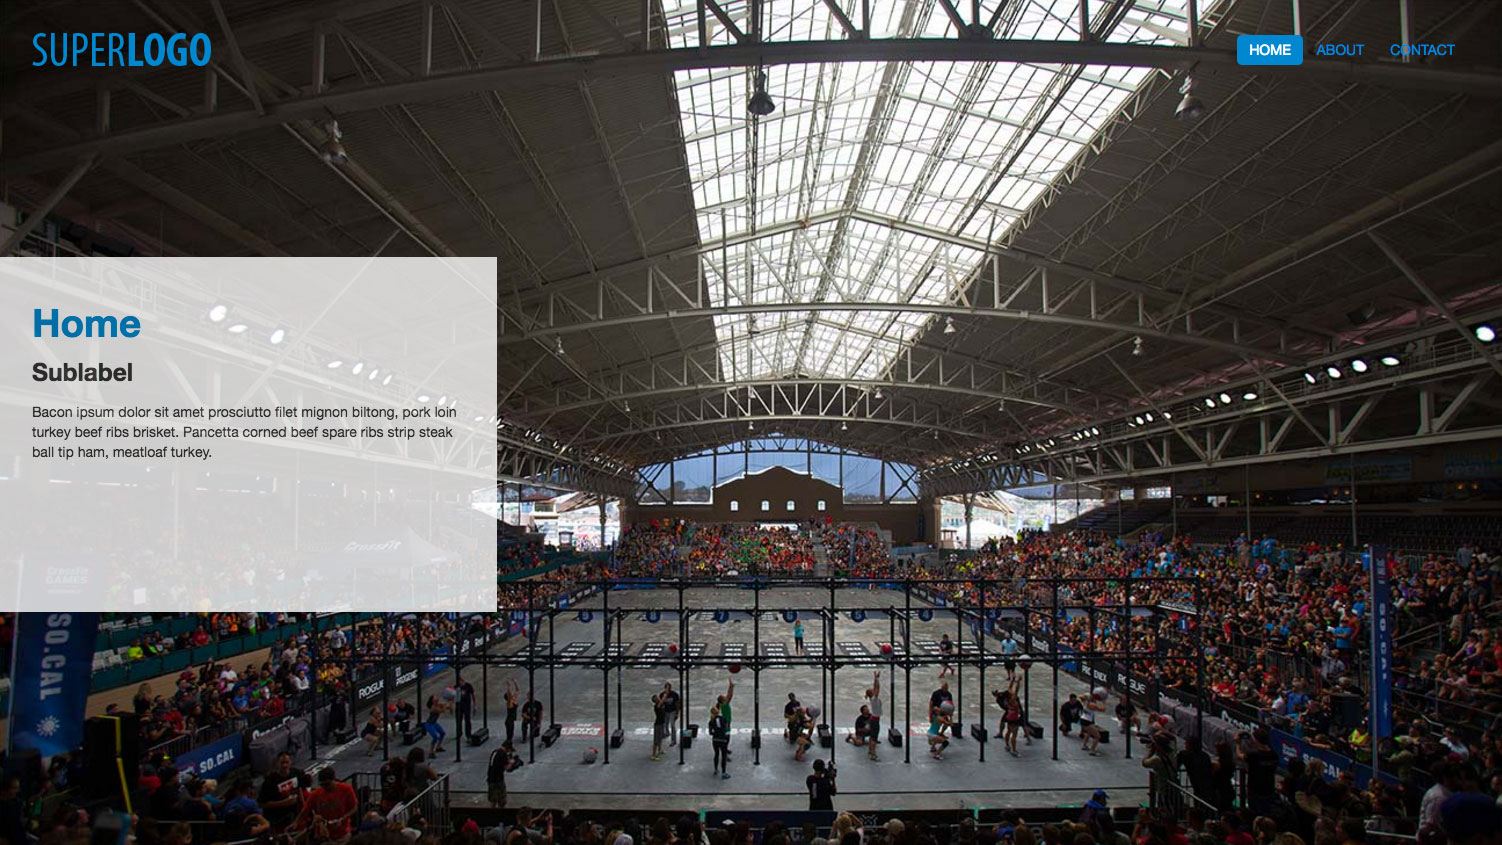
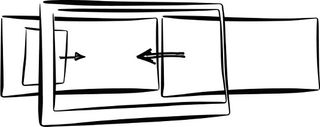
We're are going to start with a simple, static AngularJS website and animate it using AngularJS and TweenMax from the Greensock Animation Platform. The site has a full-sized background image for each page that slides from right to left when a new page is selected and a content panel that slides from left to right to show the content for that page. Visit the GitHub repository here, and see a demo here.
Set up your files
The main two files for this project are index.html and js/app.js, which serve as the starting point. Starting with these files, we'll add in the code necessary to animate the changing background and content panel on the left. For reference, index.finish.html and js/app.finish.js contain the completed code for the animations.
I'm assuming a basic knowledge of AngularJS but please refer to the documentation if you have any questions about a particular piece of AngularJS code.
Get the Creative Bloq Newsletter
Daily design news, reviews, how-tos and more, as picked by the editors.
Add your functionality
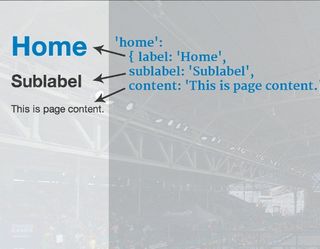
The underlying data structure for the website is going to be pages, so here's how to define those in our JavaScript:
.controller('MainCtrl', function ($scope) {
  $scope.pages = {
    'home': { label: 'Home', sublabel: 'Sublabel', content: 'This is page content.' },
    'about': { label: 'About', sublabel: 'Sublabel', content: 'This is page content.' },
    'contact': { label: 'Contact', sublabel: 'Sublabel', content: 'This is page content.' }
  };
  $scope.currentPage = 'home';
  $scope.page = $scope.pages['home'];

  $scope.isCurrentPage = function (page) {
    return $scope.currentPage === page;
  };
})
In our controller, we're defining a pages object on $scope, which is going to define our content for the site. This is essentially a key-value map that we'll use to get and set the current page as well as display the content in the HTML. We're keeping track of the current page we're on by defining $scope.currentPage and initially setting it to home.
We're also setting a page property on $scope to hold the actual content of the page we are on. We're also defining a convenience function $scope.isCurrentPage that returns true or false based on the value of the page parameter and the page we're currently on.
Enable animations
Rather than in the core, animations in AngularJS are included as a separate JavaScript file called angular-animate.min.js, so that the ngAnimate module is available to our application. Keep in mind that we're using AngularJS 1.2-RC.3 (or the official 1.2 version). Now that we've added the source file for ngAnimate, we need to inject it into our website module by changing angular.module('website', ['']) to angular.module('website', ['ngAnimate']).
Add animations
Technically, we're starting with a fully functioning website but things are a bit underwhelming at the moment. Now that we've enabled animations, it's time to turn the tide against the boring and add in some animations. We're going to animate the background images first and then animate the content panel after.
JavaScript animations in AngularJS are created by calling the module.animation() factory method with the name of the animation you wish to build, and a function that will define the animation's behaviour.
myModule.animation('.bg-animation', function ($window) {
  return {
    enter: function (element, done) {
      someAnimation(element, done);
      return function(cancelled) {
        //this function is called when the animation is done
      }
    },
    leave: function (element, done) { }
  };
})
The AngularJS animation naming convention is CSS class-based. That's why we've named our animation .bg-animation and not bg-animation. AngularJS animations are actually a set of event hooks used to delegate to whatever you are actually using to do your animations whether it be CSS transitions, CSS keyframe animations or JavaScript animations. By delegating the actual animation portion, AngularJS gives you endless opportunities to handle the animations as you see fit whether it be by hand or using a third party library.
In our case, we're listening for the enter and leave event which is triggered when ng-if adds or removes an element to the DOM. Both event handlers take an element as well a done parameter. The element parameter is the element that the animation event was triggered on and the done parameter is a callback that needs to be called when the animation is complete so AngularJS knows that it can safely move on.
If you return a function within the animation, then that function will be fired when the animation completes or when it is cancelled. This is optional. However, it proves useful if you need to clean up any animation-related properties on the element after the animation has closed. Now that we have the basic structure in place for both animation events, it's time to add the actual animations.
.animation('.bg-animation', function ($window) {
  return {
    enter: function (element, done) {
      TweenMax.fromTo(element, 0.5,
        { left: $window.innerWidth},
        {left: 0, onComplete: done});
      },
      leave: function (element, done) {
        TweenMax.to(element, 0.5,
          {left: -$window.innerWidth, onComplete: done});
      }
    };
})
When a background image is added to the DOM, we want it to start at the far right of the window and move to far left.
TweenMax.fromTo(element, 0.5, { left: $window.innerWidth}, {left: 0, onComplete: done});We accomplish this with TweenMax.fromTo and by telling it to animate the element for 0.5 seconds. At the start of animation the left style property is set to $window.innerWidth pixels and the animation itself will animate that left property to 0 pixels. Notice in the to animation object we define an onComplete event handler and set it to done.
It's also worth mentioning before we go any further that we are using the $window service, which is basically an AngularJS wrapper around the native window object. This service isn't extended or wrapped in any way so the $window service acts just like the regular window element.
The animation for when a background image is being removed from the DOM is slightly simpler.
TweenMax.to(element, 0.5, {left: -$window.innerWidth, onComplete: done});Because the element is already in place, we can get away by just using TweenMax.to and setting the left property to a negative $window.innerWidth. This will cause the image to slide off the screen to the left. And now that we have our .bg-animation defined, how do we actually hook it up so that it works? Remember that animations follow a CSS class-based naming convention. Here are the background images without the animation.
<img bg class="fullBg" ng-if="isCurrentPage('home')" src="images/bg00.jpg">
<img bg class="fullBg" ng-if="isCurrentPage('about')" src="images/bg01.jpg">
<img bg class="fullBg" ng-if="isCurrentPage('contact')" src="images/bg02.jpg">
And here are the background images with the animation enabled.
<img bg class="fullBg bg-animation" ngif=" isCurrentPage('home')" src="images/bg00.jpg">
<img bg class="fullBg bg-animation" ngif=" isCurrentPage('about')" src="images/bg01.jpg">
<img bg class="fullBg bg-animation" ngif=" isCurrentPage('contact')" src="images/bg02.jpg"> ya
And that is it! You simply have to add the animation to your element as if it were a CSS class. This is starting to look a lot like a class-based directive isn't it? Really powerful stuff!
Size images correctly
You may have noticed the bg attribute on our background images. This attribute represents a directive that I wrote to make the images correctly size to the full width and height of the screen. I did this by converting the awesome jQuery.fullBG plugin from @bavotasan. You can check out the directive in the source files and read about the original plugin here.

Animate the content panel
We're almost done with our website. The only piece missing is to animate the content panel. We're going to handle this a little differently by toggling its visibility binding ng-hide to a property called isInTransit on $scope.
We're defining isInTransit on $scope and then setting it to false since we want the content panel to be visible initially.
.controller('MainCtrl', function ($scope) {
  // Code omitted
  $scope.isInTransit = false;

  $scope.setCurrentPage = function (page) {
    if ($scope.currentPage !== page) {
      $scope.page = $scope.pages[page];
      $scope.currentPage = page;
      $scope.isInTransit = true;
    }
  };

  $scope.$on('bgTransitionComplete', function(){
      $scope.isInTransit = false;
  });
})
We're setting isInTransit to true when a new page is set which will cause the content panel to hide itself. We're also setting isInTransit to false when the bgTransitionComplete event is triggered. Make a mental note of that event because we will get to where it gets fired in just a moment.
Now that isInTransit is defined and we have a way to set it to true or false, it's time to wire it up to the HTML.
<div class="panel panel-animation" ng-hide="isInTransit" >
<!-- Code omitted -->
</div>
In the previous code, we are toggling visibility of the content panel based on the value of isInTransit with the code ng-hide="isInTransit". We have also added the class panel-animation, which we're going to define as an AngularJS animation next.
.animation('.panel-animation', function () {
  return {
    addClass: function (element, className, done) {
      if (className == 'ng-hide') { }
      else { done(); }
    },
    removeClass: function (element, className, done) {
    if (className == 'ng-hide') { }
      else { done(); }
    }
  };
});
The underlying functionality of the ng-hide directive is accomplished by adding and removing a class called ng-hide, which explains why the events for this animation are addClass and removeClass. In this case we only want to perform an animation if the class being added or removed is ng-hide, which is why we are checking the className parameter.
If the className is ng-hide, then we will perform the animation and, if not, then we simply call the done callback (which basically skips the animation). And now that the structure is in place, it is time to add in the TweenMax animations.
.animation('.panel-animation', function () {
  return {
    addClass: function (element, className, done) {
      if (className == 'ng-hide') {
        TweenMax.to(element, 0.2, { opacity: 0, onComplete: done });
      }
      else {
             done();
           }
      },
      removeClass: function (element, className, done) {
        if (className == 'ng-hide') {
          element.removeClass('ng-hide');
          TweenMax.fromTo(element, 0.5,
            { opacity: 0, left: -element.width() },
            { opacity: 0.8, left: 0, onComplete: done });
          }
          else {
                 done();
          }
        }
      };
})
When ng-hide is added, we want to animate the content panel off the stage.
TweenMax.to(element, 0.2, { opacity: 0, onComplete: done });We're going to do this by setting opacity to 0 over the course of 0.2 seconds. And when ng-hide is removed, we are going to slide the content panel in from the left and fade it back in.
element.removeClass('ng-hide');
TweenMax.fromTo(element, 0.5,
  { opacity: 0, left: -element.width() },
  { opacity: 0.8, left: 0, onComplete: done });
We're going to use TweenMax.fromTo to start with (the panel to the left of the screen) and an opacity of 0 with the from object { opacity: 0, left: -element. width() } . We're then going to fade it in by setting opacity to 0.8 or 80% and left to 0.
Because we cannot set !important programmatically with JavaScript, we are simply removing the ng-hide class manually with element.removeClass('nghide'). This is just the unfortunate reality of doing animations in this manner, but it's only a small hoop to jump through.
Remember when I said to make a note of the bgTransitionComplete event we were listening for in the controller? Well, as it stands, we have a way to set isInTransit to true that will hide the content panel, but we aren't setting it to false to bring the content panel back.
We want the content panel to slide in after the background image has finished animating so that's where we're going to fire that event. So, for example, see following code:
.animation('.bg-animation', function ($window, $rootScope) {
  return {
    enter: function (element, done) {
      TweenMax.fromTo(element, 0.5,
        { left: $window.innerWidth},
        {left: 0, onComplete: function () {
        $rootScope.$apply(function(){
          $rootScope.$broadcast('bgTransitionComplete');
        });
        done();
      }});
    },
    // Code omitted
  };
})
The first thing we need to do is inject $rootScope into .bg-animation, so that we can use it to broadcast events on. Then we're going to define an actual function to be called when onComplete fires. In that function handler we're going to put this bit of code.
$rootScope.$apply(function(){
  $rootScope.$broadcast('bgTransitionComplete');
});
done();
Because the onComplete callback is happening as a part of a TweenMax operation, we need to inform AngularJS that something has happened that it needs to know about. That is why we are calling $rootScope.$apply and calling $rootScope.$broadcast('bgTransitionComplete') ; in the closure. And last but not least, we are calling done() to finish off the animation and give control back to AngularJS.
Conclusion
We have a completely functional website built on AngularJS and Greensock! The most impressive part for me is that once the functionality is in place, setting up the animations is fairly easy. I recommend checking out the Year of Moo blog by Matias Niemelä. He wrote ngAnimate, so is very qualified to talk about it, and has provided some resources on learning how to use the new API.
This article originally appeared in net magazine issue 249.
Related articles:

Thank you for reading 5 articles this month* Join now for unlimited access
Enjoy your first month for just £1 / $1 / €1
*Read 5 free articles per month without a subscription

Join now for unlimited access
Try first month for just £1 / $1 / €1


