Create a retro T-shirt design in 10 easy steps using Illustrator
Design a T-shirt featuring retro graphics by creating simple vectors and textures in Adobe Illustrator, by following our step-by-step guide.
- Software: Illustrator CS4 or later
- Project time: 1-2 hours
- Skills: Use the Pathfinder panel to knock out and combine shapes, Apply vector textures to shapes
- Download the support file here
In this tutorial, I'll explain how to create a T-shirt design by creating some cool retro graphics just a few simple steps. Using Illustrator, we'll form some simple vector shapes with the Pen tool and then add textures for a retro aesthetic.
We'll also use the Pathfinder panel extensively, particularly the 'Add to shape area' and 'Subtract from shape area' commands. I'll then walk through how to add interest with a limited colour panel.
Step 01
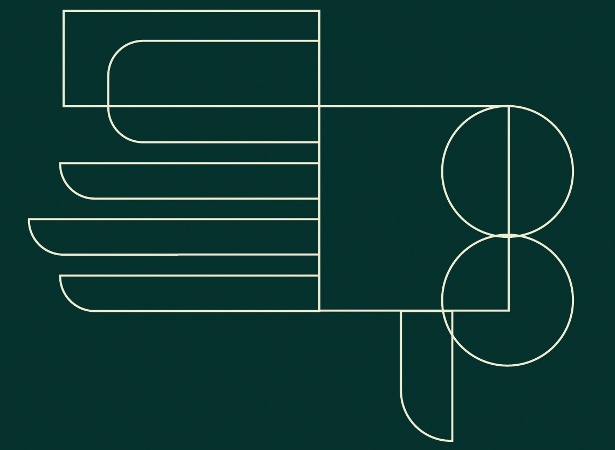
First of all, open T-shirt.ai from the support files: this will act as the background for your design. Build some geometric hand shapes in Illustrator using the Ellipse and Rounded Rectangle tools. The fingers are rounded rectangles that have been cut in half using the 'Subtract from shape area' command on the Pathfinder panel. The top shape will always subtract from the one below. When you're happy, hit 'Add to shape area' on the Pathfinder panel to make the hand one big shape. Make sure that you select 'Make Compound Shape' after you subtract or add, and then hit Expand.
Step 02
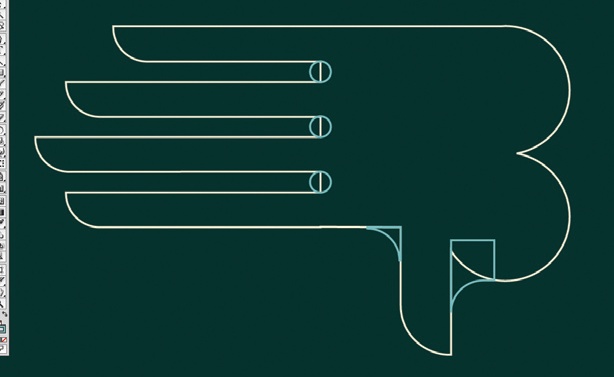
Round off the areas where the digits join the hand by creating some curved shapes and hitting 'Subtract from shape area'. Next, duplicate the hand so that there's another one below. Rotate it 180deg to make a rectangle area: this is where we'll place the camera, as seen in the final image.
Step 03
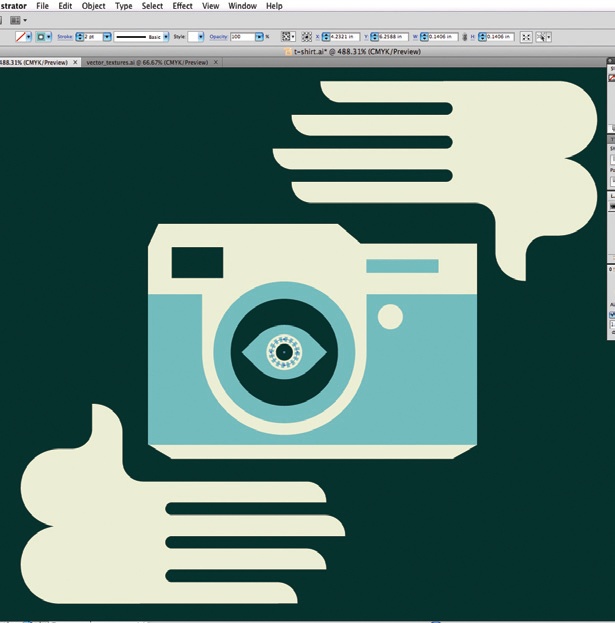
Using the Pen, Rectangle and Ellipse tools, create a range of geometric shapes. Then combine them to build up the image of a camera (or whatever you like). When you're happy, fill in the shapes with colour. Notice how you can use the dark blue in the background as a third colour for some in-laid shapes.
Step 04
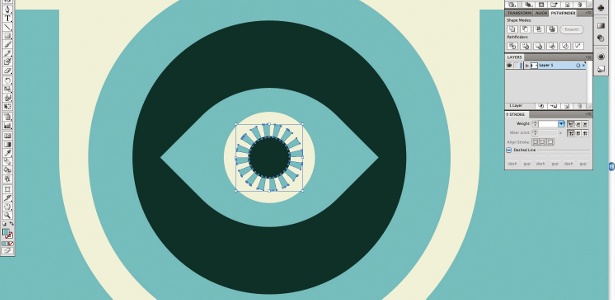
Let's add some detail to the eye using a dashed stroke. Select the Ellipse tool and create a circle just larger than the pupil. Click the dashed line option on the Stroke panel, and adjust the weight and dash values to form thin segments that go around the circle evenly. In the Stroke panel, change 'Align Stroke to Centre' to 'Align Stroke to Inside'. Next, select the shape and go to Object>Expand Appearance to change the selection from a dashed stroke to a shape. Use the 'Add to shape area' command to join it together. Do this again to make the 'click-wheel' shape at the top of the camera.
Step 05
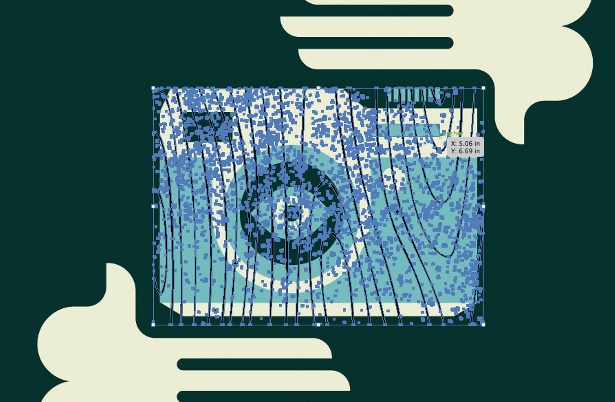
Open the vector_textures.ai file. Copy and paste the woodgrain texture over your T-shirt file, and scale and position it so that it fits over the camera appropriately. Now select both the wood grain and the shape you wish to subtract from.
Get the Creative Bloq Newsletter
Daily design news, reviews, how-tos and more, as picked by the editors.
Step 06
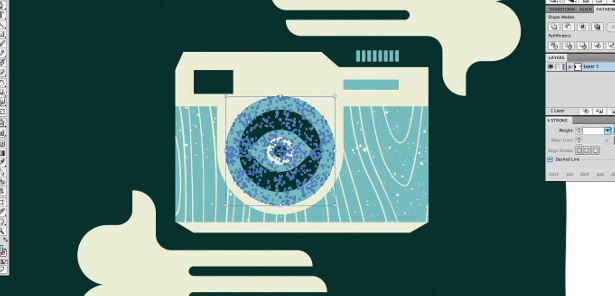
Use the 'Subtract from shape area' command, select Make Compound Shape and hit Expand. Now we have a retro woodgrain panel on our camera. Head back to the vector_textures.ai file. Copy and paste the splatter shape over to your T-shirt file. Scale and position it over the camera, and select both the splatter and some of the circles that make up the lens shape. Go to 'Subtract from shape area', select Make Compound Shape and hit Expand to knock out some splatter. Go to Object>Arrange to keep the shapes in order once the splatter has been subtracted.
Step 07
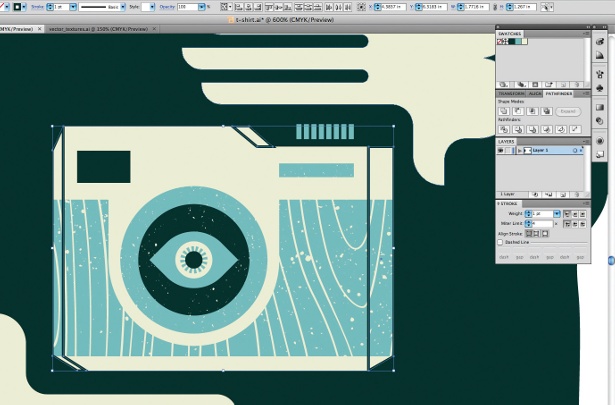
Let's add some dimension to the camera without using a third colour, gradients or anything that will complicate the T-shirt printing process. Select the Pen tool and draw some shapes around the camera. Combine these using the 'Add to shape area' command (don't forget to select Make Compound Shape and hit Expand).
Step 08
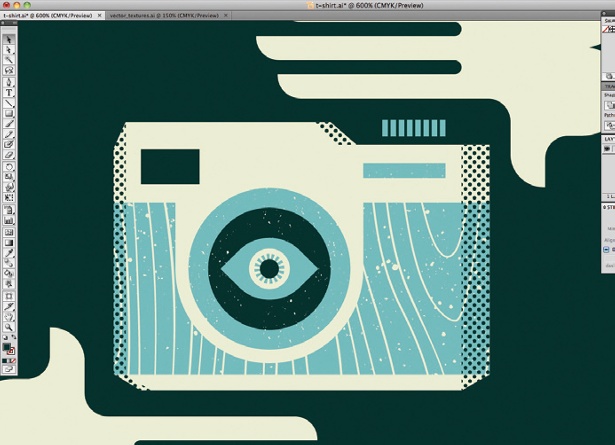
Copy and paste the vector_textures.ai file over to your T-shirt and place it in the areas underneath the camera shape using Object>Arrange (paste it multiple times if needed). Combine your halftone shapes using the addition function. Now use the 'Intersect shape areas' command in the Pathfinder panel to cut what you want from the halftones. Select both the camera dimension shape and the halftone shape, hit 'Intersect shape areas', choose Make Compound Shape, then Expand. Make it the colour of the shirt.
Step 09
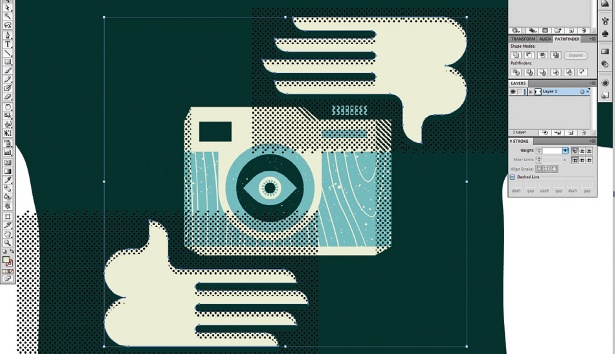
We need to add some texture to the hands. Combine both hands with the 'Add to shape area' command. Duplicate them and move the copies so that they offset the original hands. Paste and arrange the halftones so that they're under the offset hands. Combine the halftone shapes and use the subtract tool to knock out the halftones with the duplicated hands. Now copy and paste the original hands in place. Arrange them so that they're above the dots. Select the new hands and the remaining dots, and use the 'Intersect shape areas' command to reveal a shadow on the hands. Make the dots light blue.
Step 10
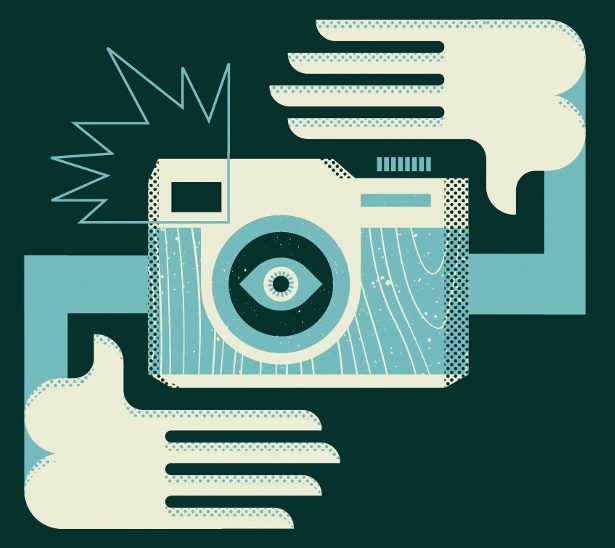
Draw some rectangles for 'arms' and arrange them so they're behind the camera. Now use the Pen tool to draw a shape that looks like a flash burst. Paste the halftone dots under the shape and use the 'Intersect shape areas' command to reveal a halftone flash burst. Lastly, delete some of the dots on the palm of the bottom hand and draw a rectangle to close the rounded parts of the hand. Use the 'Add to shape area' command to combine the hand and the rectangle. This hand now looks like the backside is facing forward. And you're done.
This tutorial first appeared in Computer Arts magazine.
Liked this? Read these!
- The best free script fonts
- The best collage maker tools - and most are free!
- Free graphic design software available to you right now!

Thank you for reading 5 articles this month* Join now for unlimited access
Enjoy your first month for just £1 / $1 / €1
*Read 5 free articles per month without a subscription

Join now for unlimited access
Try first month for just £1 / $1 / €1

The Creative Bloq team is made up of a group of art and design enthusiasts, and has changed and evolved since Creative Bloq began back in 2012. The current website team consists of eight full-time members of staff: Editor Georgia Coggan, Deputy Editor Rosie Hilder, Ecommerce Editor Beren Neale, Senior News Editor Daniel Piper, Editor, Digital Art and 3D Ian Dean, Tech Reviews Editor Erlingur Einarsson, Ecommerce Writer Beth Nicholls and Staff Writer Natalie Fear, as well as a roster of freelancers from around the world. The ImagineFX magazine team also pitch in, ensuring that content from leading digital art publication ImagineFX is represented on Creative Bloq.
