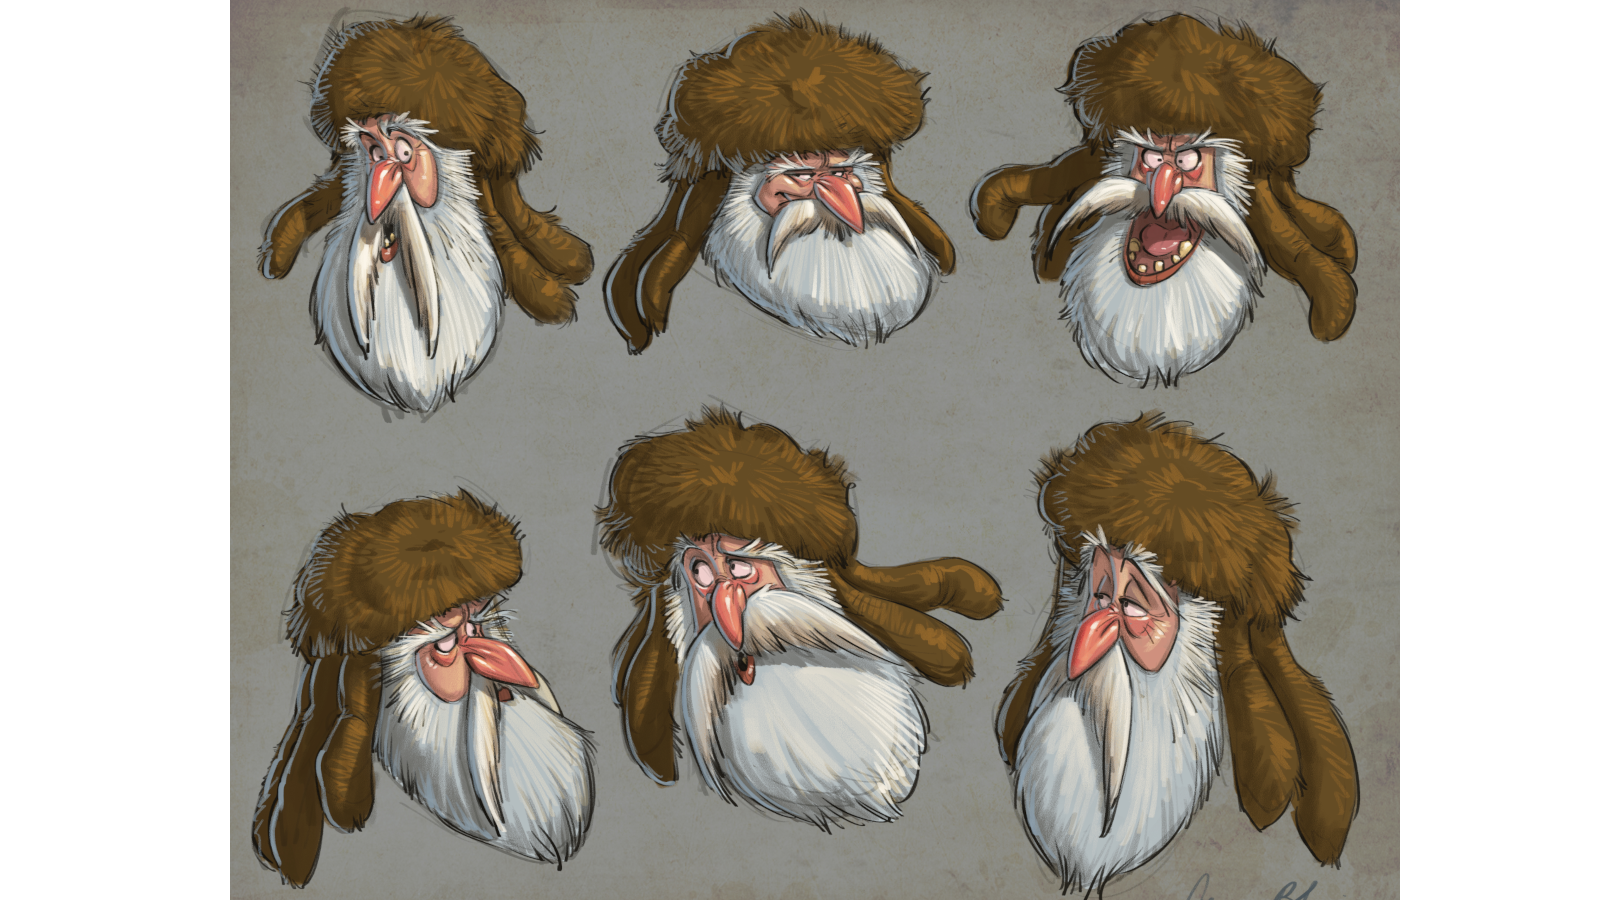
How to draw a character in Illustrator CC
10 easy steps to create a simple character using the Pathfinder and Image Trace palettes in Illustrator CC.
To create this character I have contrasted sharp edged geometric shapes with more gestural hand painted shapes originally painted in my sketchbook. The Pathfinder and Image Trace palettes in Illustrator CC are ideal tools to enable this effective combination. In this tutorial I will explain, step by step, how I have used both palettes create this illustration.
Step 01

To make the moustache basic shape, draw an ellipse using the Elipse Tool in the top menu bar on the left hand side of the pasteboard. Using the Selection Tool click on the shape and click Alt to duplicate, press Shift and drag the duplicated shape to the right (this will keep it in line). Overlap the two ellipses slightly.
Step 02

Highlight the two new shapes using the Selection Tool press Alt and drag above and press Shift to keep it in line and bring to the front (Object Arrange>Bring to front). You are going to use this shape to crop the objects underneath to make the basic moustache shape.
Step 03
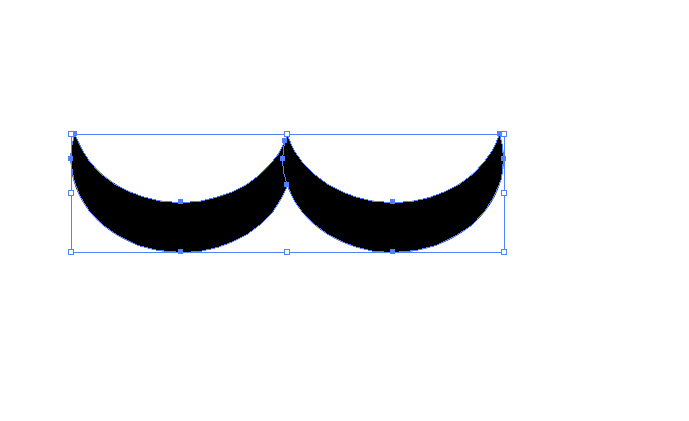
Once you are happy with the moustache shape, select all the the shapes you have drawn using the Selection Tool. Go to Window>Pathfinder to bring up the Pathfinder Window. Click Crop then ungroup Cmd+Shift+G. Delete the white shapes to reveal the moustache shape.

You will notice that where the two ellipses have overlapped have split the shape. Highlight the entire shape again and press Merge in the Pathfinder Window, this will join the shape again.
Step 04

I now want to add a pattern to the moustache to give it texture. The pattern is made from the moustache shape that has been made much smaller and repeated. Highlight the moustache shape, press Shift and drag inwards to make it smaller, now highlight and press Alt+Shift to duplicate and keep in line. You can use these commands to keep repeating the little moustache shape.
Step 05
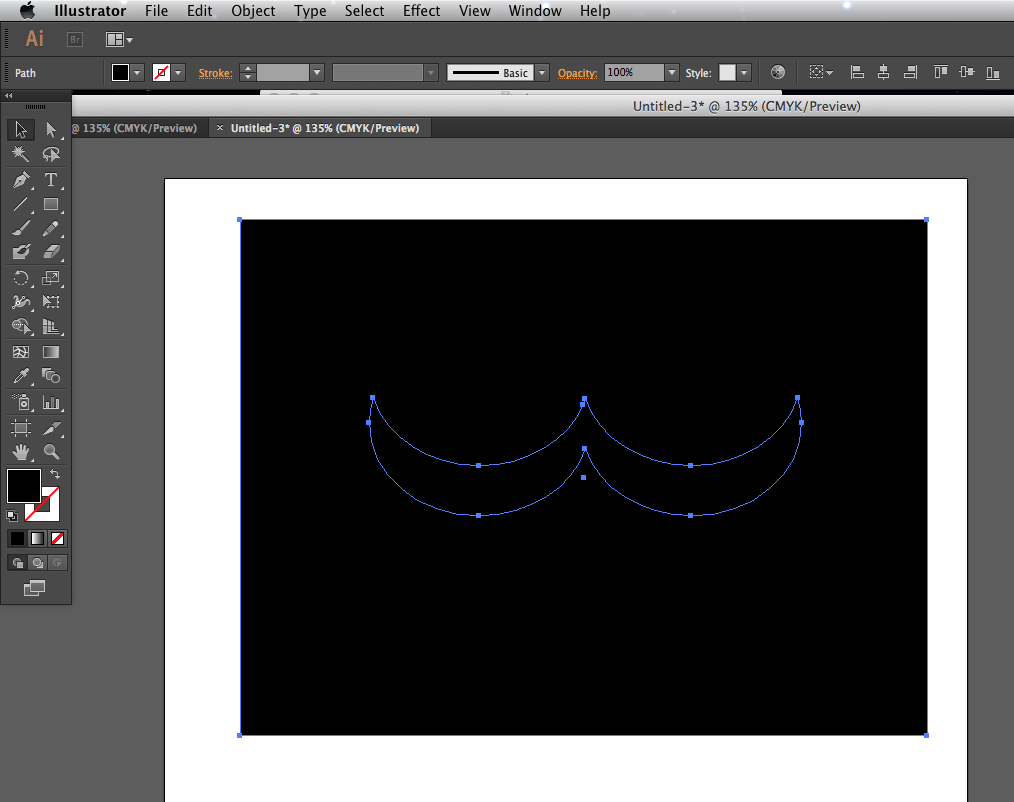
We now need to make a template in order to punch out the pattern shape in illustrator. Elsewhere on the pasteboard, draw a large square behind the moustache, press Divide on the Pathfinder Palette, then Cmd+Shift+G to ungroup. Click the inner moustache shape and delete.
Get the Creative Bloq Newsletter
Daily design news, reviews, how-tos and more, as picked by the editors.
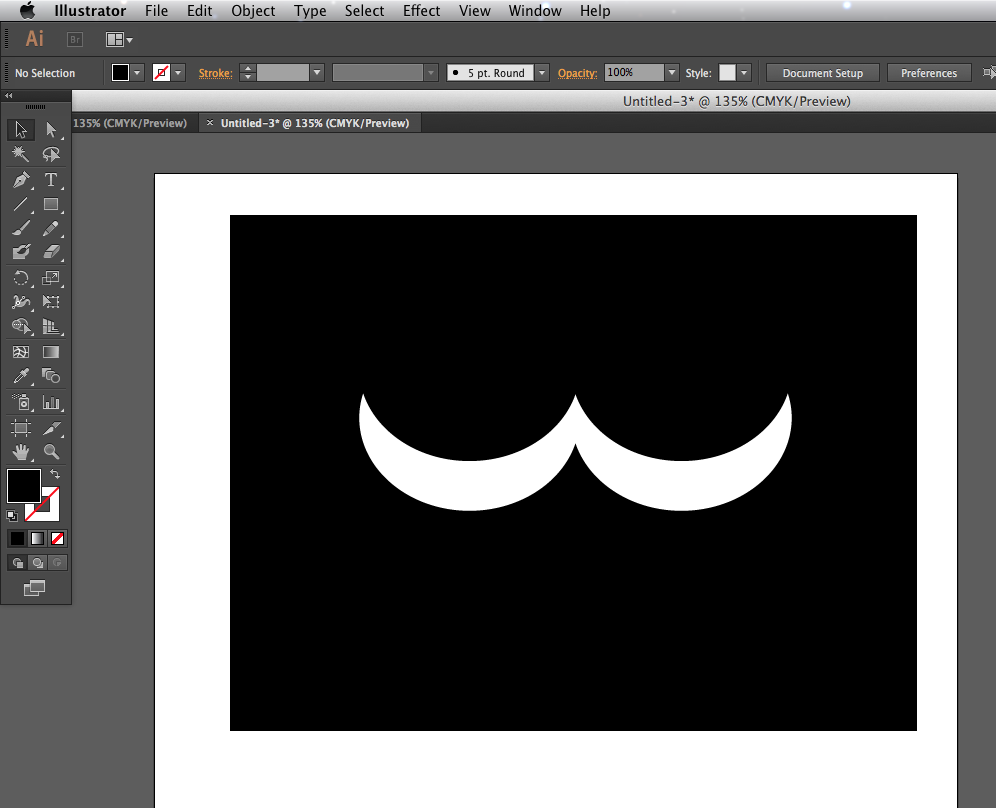
Step 06
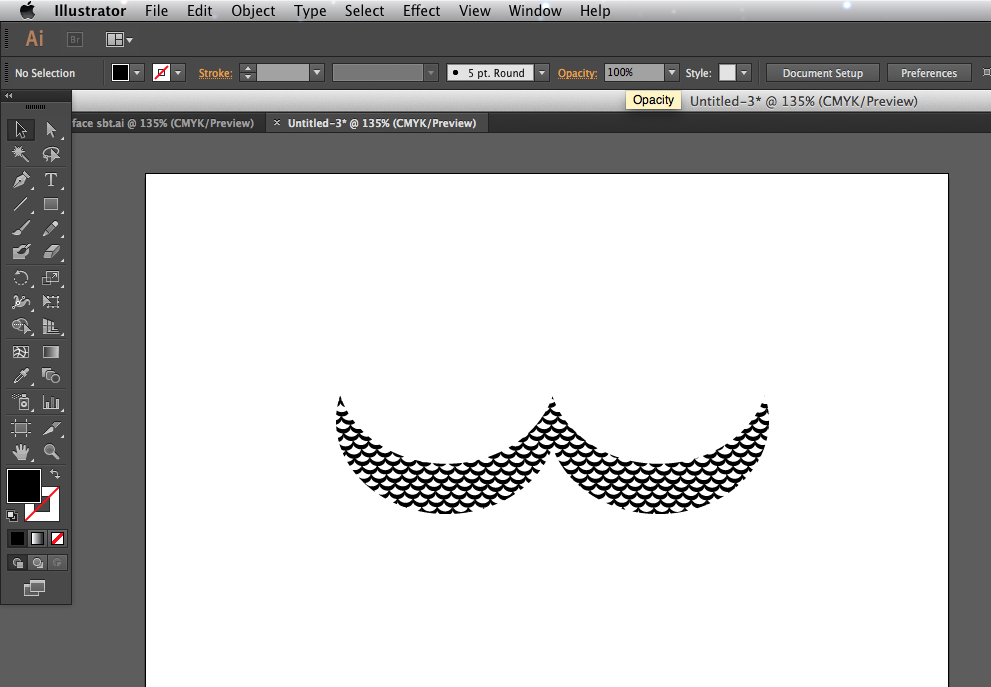
Now overlap the rectangle with moustache shaped punched out over the repeating pattern you have created, highlight the entire thing with Selection Tool. Now press Trim in the Pathfinder Palette, ungroup and delete the black rectangle. It is helpful now to group the image.
Step 07
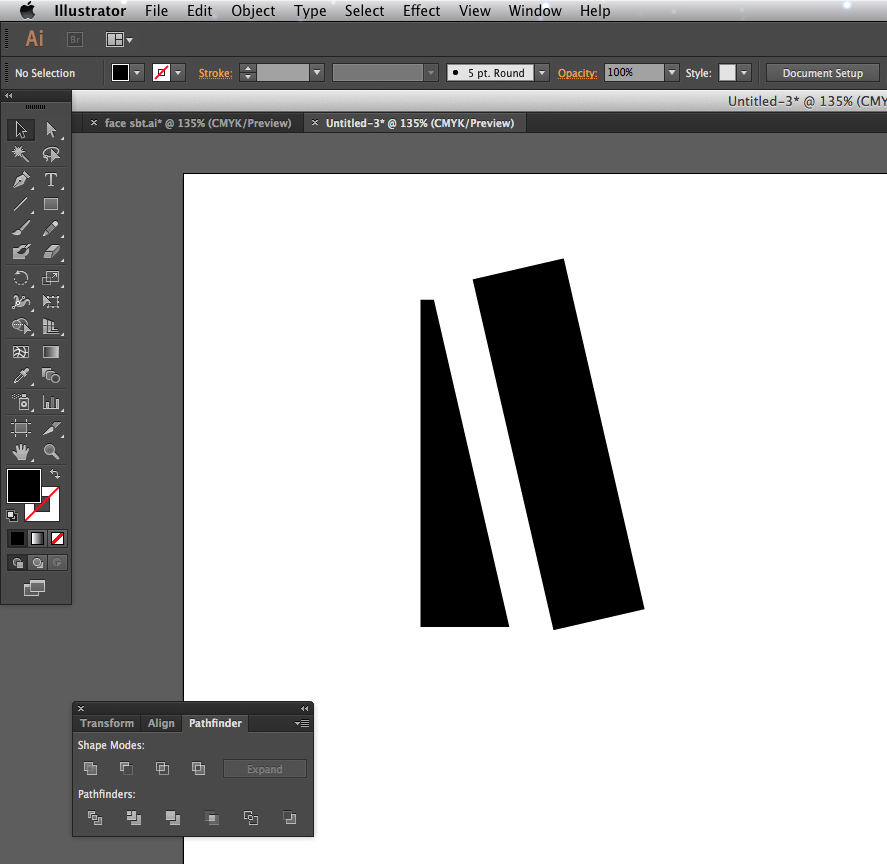
The nose is simply a rectangle, clipped by using the same duplicated shape and turned at an angle, then using Trim in the Pathfinder Palette. The eyes are created using the Circle Tool in the tool palette.
Step 08

The cheeks and the eyebrows started life in my sketchbook using a brush and black ink. Scan the ink drawings and drag and drop into the Illustrator document.
Step 09
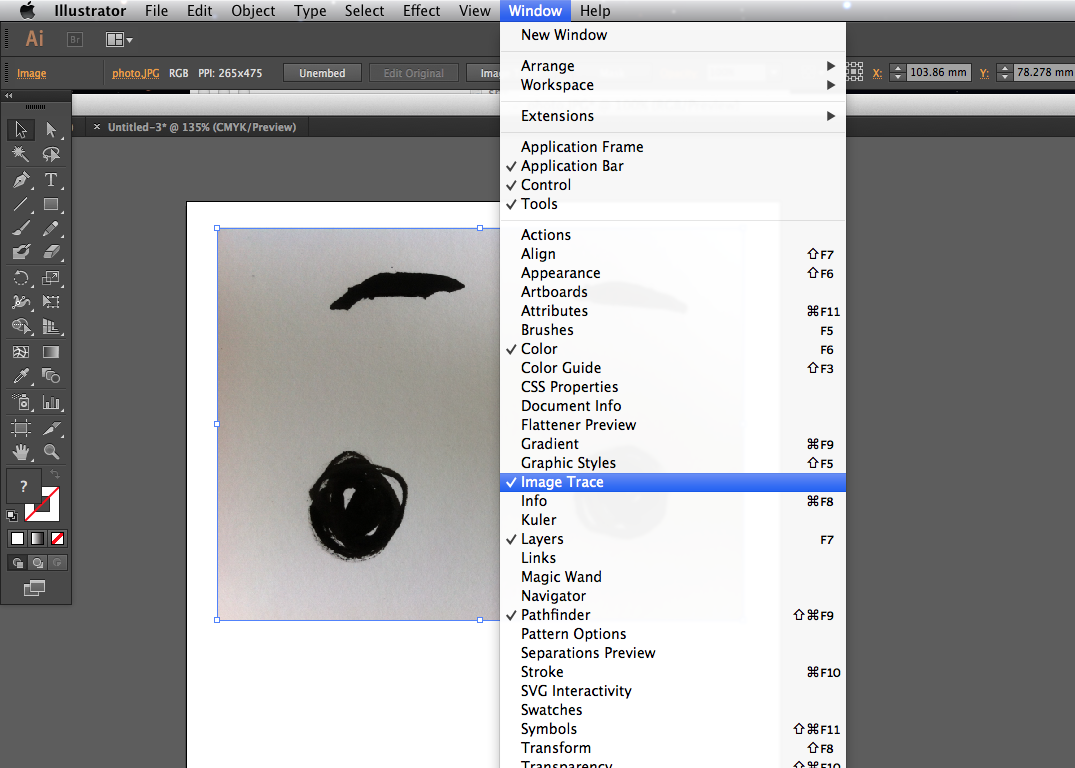
Now click on the jpg and go to Image>Image Trace and click Preview in the bottom left corner. This converts the jpg into a vector image which you can adjust by using the Threshold, Paths, Corners and Noise toggles in Advanced until you are happy with the finished result.
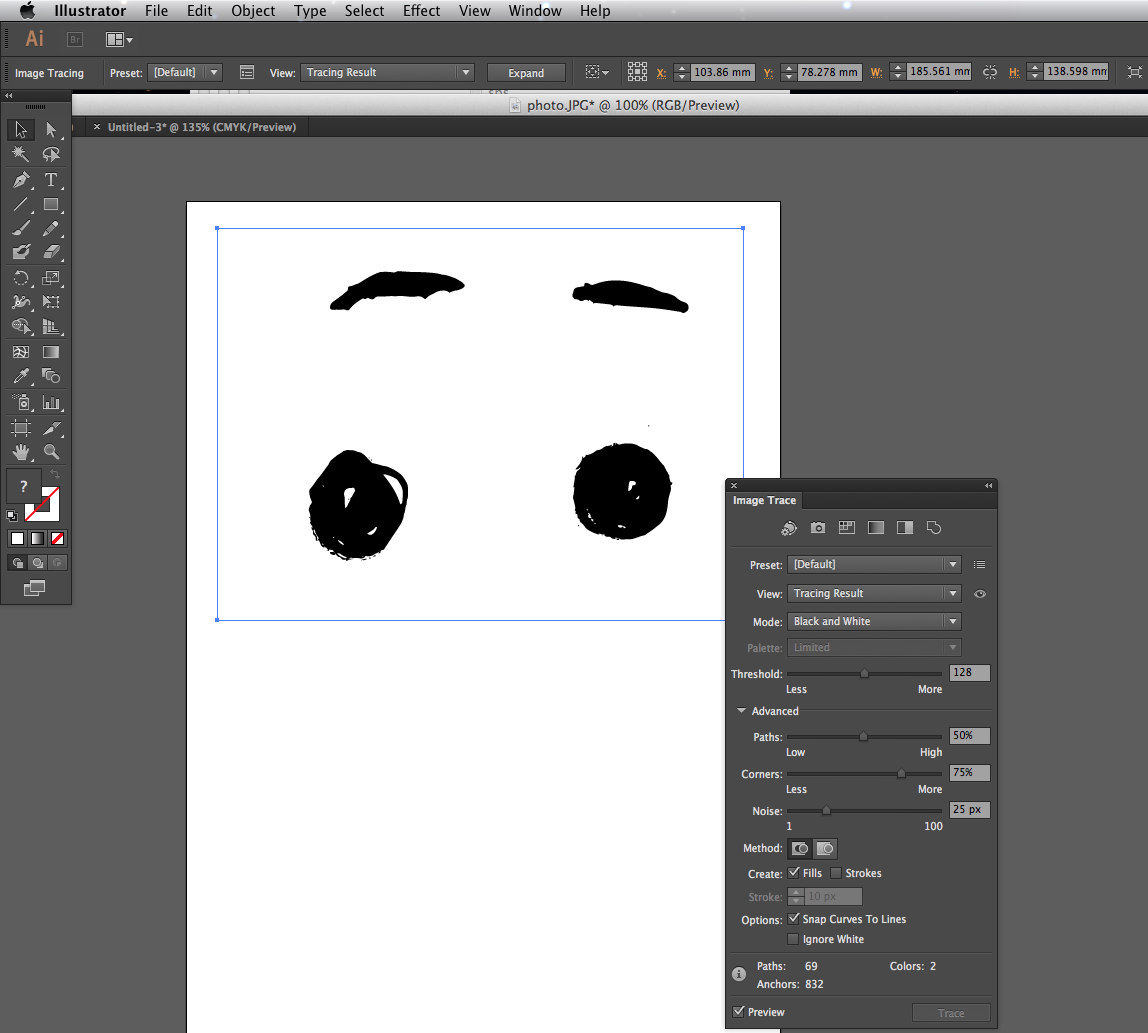
Step 10
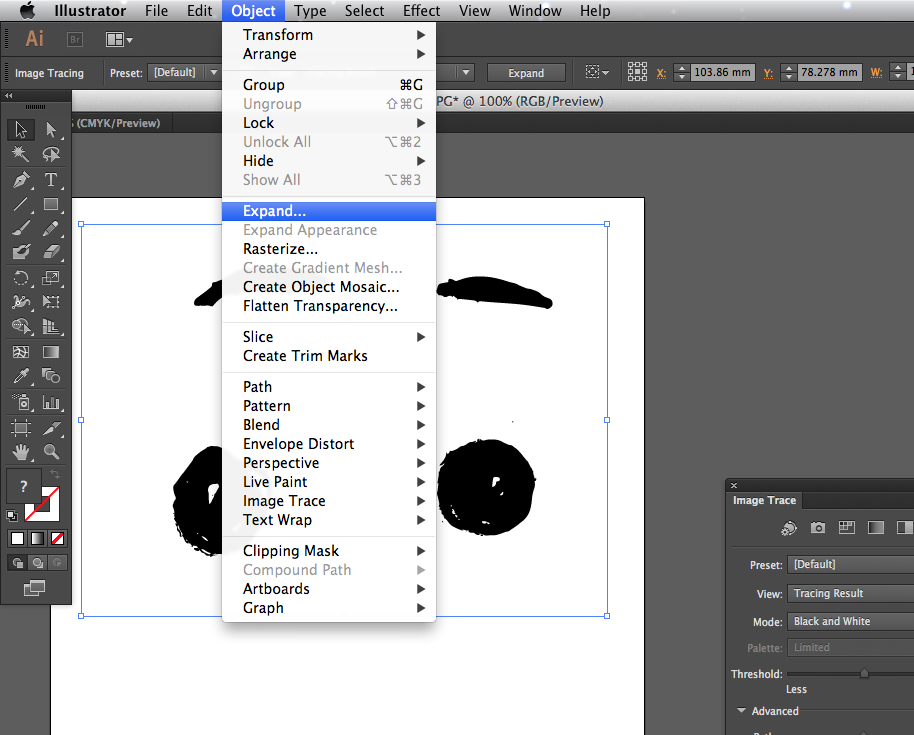
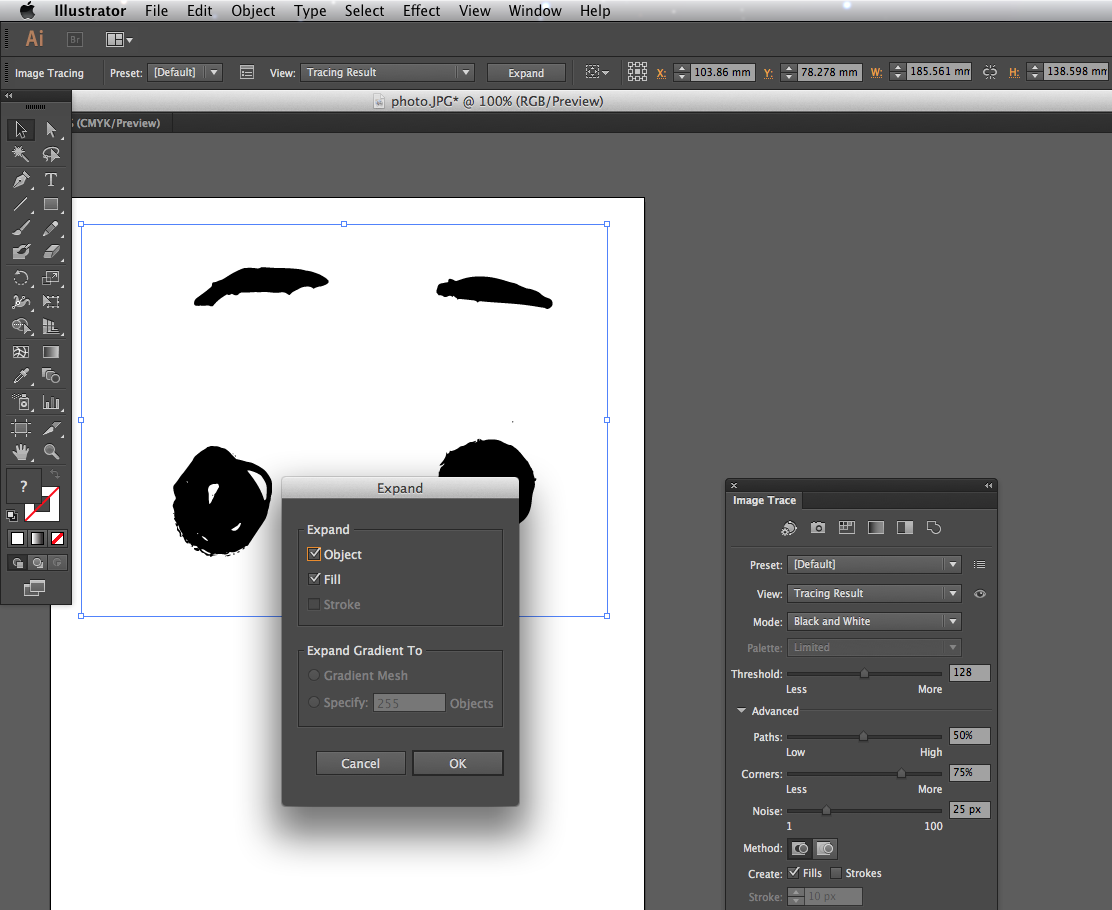
When you are happy, press Object>Expand on the top menu bar, make sure Object and Fill are clicked and press OK. The vector will be naturally grouped on several levels, press Ungroup a few times and you are then ready to edit and combine the vectors with the rest of the illustration. Spend some time composing all the elements through trial and error.
I enjoy playfully recycling parts of the illustration, the eyes are created using the brows and cheeks together, I changed the colour to white and put them on top of the black circles.

What is fantastic about Adobe Illustrator is that you can play around with infinite combinations making a family of characters or just tweak until you are satisfied, unlimited undos are your friend!
Words: Anna Wray
Anna Wray is an illustrator/author and a visiting lecturer on the Ba(Hons) Illustration at Cambridge School of Art. Check out her work and writing on her website.
Liked this? Read these!
- How to build an app
- The best 3D movies of 2013
- Discover what's next for Augmented Reality

Thank you for reading 5 articles this month* Join now for unlimited access
Enjoy your first month for just £1 / $1 / €1
*Read 5 free articles per month without a subscription

Join now for unlimited access
Try first month for just £1 / $1 / €1

The Creative Bloq team is made up of a group of art and design enthusiasts, and has changed and evolved since Creative Bloq began back in 2012. The current website team consists of eight full-time members of staff: Editor Georgia Coggan, Deputy Editor Rosie Hilder, Ecommerce Editor Beren Neale, Senior News Editor Daniel Piper, Editor, Digital Art and 3D Ian Dean, Tech Reviews Editor Erlingur Einarsson, Ecommerce Writer Beth Nicholls and Staff Writer Natalie Fear, as well as a roster of freelancers from around the world. The ImagineFX magazine team also pitch in, ensuring that content from leading digital art publication ImagineFX is represented on Creative Bloq.
