How to draw basic shapes
Follow this guide to learn how to create complex forms by combining simple, geometric shapes.
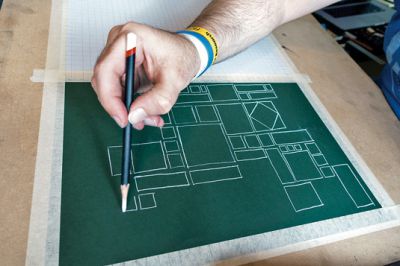
Breaking any process down into small chunks is a great way to tackle what can seem like a daunting task. If you're struggling to figure out how to draw something complicated, breaking the subject down into simple shapes can help you begin to describe its overall structure. All you need a solid grasp of how to draw a cube, cylinder and sphere, which we'll cover here.
In the opening stages of a drawing, you should be looking to describe your subject and its environment in very simple terms: always avoid details too early on.
By drawing with simple shapes, we can focus on proportions, composition, planes and the relationships between forms. It's all about working big down to small; simple into complex; basic shapes into crafted details.
There are three basic shape archetypes that any form can be fitted into: the cube, the cylinder and the sphere. At the heart of these form shapes are two simple geometric shapes: the square and the ellipse.
There are three basic shape archetypes that any form can be fitted into; the cube, the cylinder and the sphere
Learning to accurately draw and combine these will help you to construct any object, observed or imagined. In walking you through this process we will have to deal with concepts like perspective and foreshortening, so we'll take a very brief, practical look at them.
We'll start with drawing the square, leading onto the cube – the most articulate shape when it comes to describing geometry in a drawing that has perspective.
Having six basic planar faces, the cube's proportions help to echo their relationship within 3D space. This aids further description of more complex rectilinear, cylindrical and curvilinear forms.
Get the Creative Bloq Newsletter
Daily design news, reviews, how-tos and more, as picked by the editors.
You might think that drawing simple shapes is... well, simple. But don't be fooled. It takes immense skill to perfect drawing freehand shapes like a simple circle.
01. How to draw a square
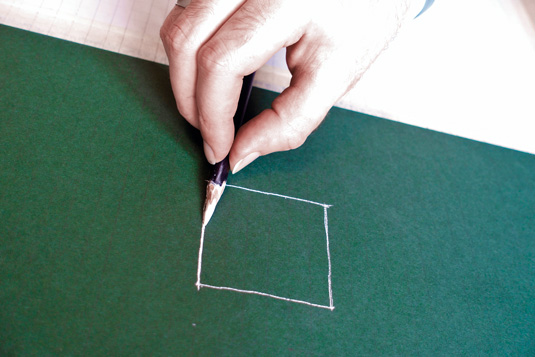
Drawing a basic square is the simple connection of four straight lines, two along the horizontal axis and two to describe the vertical axis. Drawing these lines is all about living in the future: pinpoint your start point; imagine the end point.
Place your pencil on the start point, relax and focus on the end point. Pull your mark along the imagined path removing the pencil once it reaches the end point. Pull your lines towards their goal: this uses more adept muscle groups.
Try this squared exercise
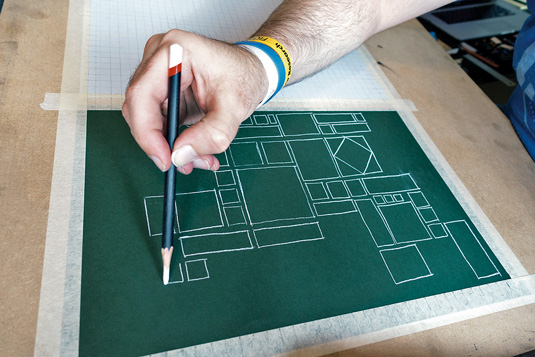
The grip shown above is one we're all accustomed to using when writing. Grip using the thumb, index and middle finger. The barrel of the pencil should rest naturally in your hand's web space.
Avoid closing the web space as this forces the barrel to rest on the knuckle of the index finger and promotes strokes using finger gestures only. Avoid grasping at the tip of the pencil, as this can limit line length and lead to less fluid lines.
02. How to draw a cube
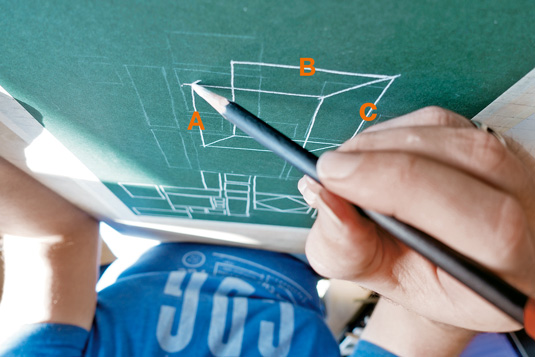
Using the simple square as a starting point [A], begin to describe a box in 3D space. Draw another square that overlaps the first [B]. Connect all the corners of one square to the adjacent corners of the other, using 45-degree lines [C].
This process of showing all six sides of the cube is known as 'drawing through', and here it highlights a problem with this oblique drawing of a cube: it's an impossible shape in nature. For a cube seen in nature we need to apply perspective...
03. How to draw a cube with perspective
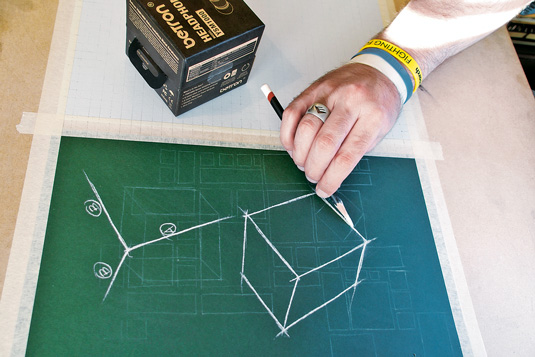
When you first start drawing cubes, it helps to study with an object in front of you. The first line to go down is the vertical line closest to you [A]. The next two lines are for the inside edges [B]. These start at the top of our first stroke as we're looking down at our cube and the top plane is visible.
The degree at which the inside edge lines are drawn depends on how much top plane we can see: if it's a lot, the lines are drawn at an acute angle, for less, a more obtuse angle.
04. Finishing your cube
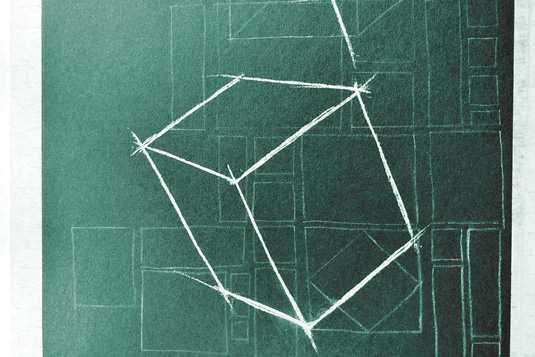
The length and angle of the inside edges depends on how much of the front and side is on show. If both are equal, the angle and length of the inside edge lines are also equal. Turn the front face more towards you and the line gets longer, the angle more horizontal. This turning creates the opposite; the line is more vertical, shorter. To finish, go to the end of each line and join the remaining edges with converging lines.
05. Try this cube exercise
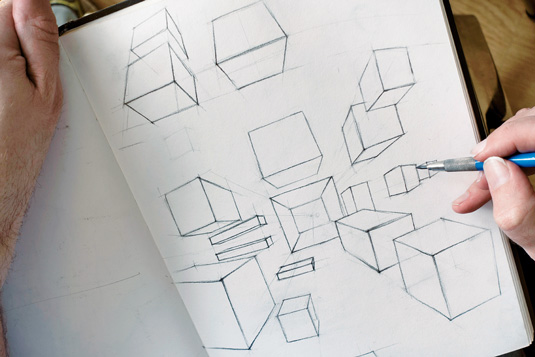
Draw a horizontal line across your surface, this will act as your eye line or imaginary horizon line. Draw a square directly in the centre (note no sides should be visible). Now, above the horizon line and off to the right, draw a cube as if you'd picked up the centre square and moved it up and to the right. Your goal is to populate the paper with 3D cubes as seen from various angles.
Next page: How to draw a sphere and more shapes

Thank you for reading 5 articles this month* Join now for unlimited access
Enjoy your first month for just £1 / $1 / €1
*Read 5 free articles per month without a subscription

Join now for unlimited access
Try first month for just £1 / $1 / €1
