Creative colour: exploring your imagination
Discover how one illustrator approaches painting in colour from imagination.
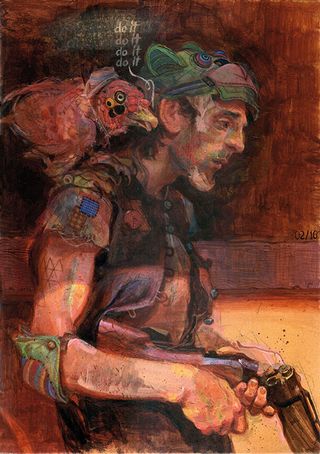
The transition of an image from a rough pencil drawing to a finished painted piece can be a challenge, especially if it's not directly from reference or a live model. It can become confusing to decide which colours to use and how to paint something without anything to look at.
My recommended approach is to do a bunch of thumbnails for both value and colour, and then graduate on to your final piece with a good grasp of your colour scheme.
One way to overcome the fear of a blank sheet of paper is to use toned paper or any printed surface
However, it can also be a great learning experience to work on an image spontaneously and pick colours on the fly. I often do this either while working on smaller commissions or when producing personal work for practice.
One way to overcome the fear of a blank sheet of paper is to use toned paper or any printed surface. This limits the colour range and helps you settle on a scheme. Another issue is that it's hard to recreate objects, figures and landscapes from your imagination. That's when references are useful.
But it's important that references don't dictate your painting. I look for reference images after I've decided what to paint and how to paint it. That way, my artistic decisions don't overly rely on the reference photographs.
01. Drawing a silhouette
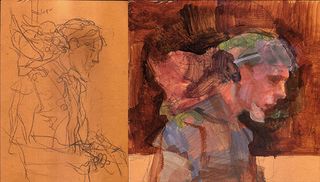
After a quick graphite drawing of what I want to paint, I go in and define the silhouette with burnt sienna and some muted browns and blues. While defining my silhouette, I decide that I want the top portion of the figure to be light against a dark background, and dark against light for the bottom. Together this forms my light/dark pattern.
02. Settling on a colour scheme
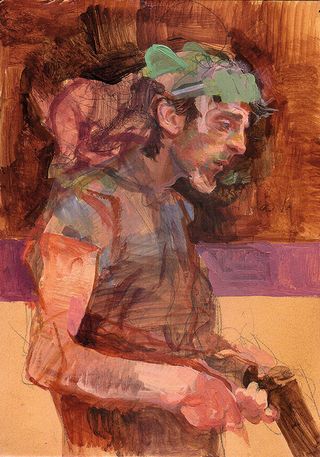
As I flesh out various forms in the composition I also think of the basic colour scheme that I'll follow to the finish. I already have my background colour (ochre and orange) fixed, so I decide to have a violet and a green in there. This gives me a triad colour scheme to work with.
03. Referencing
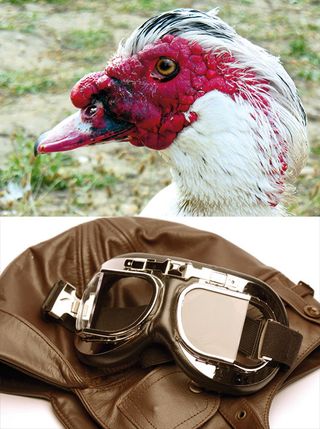
I look for references as and when I need them, while working on individual forms. I use the references in the context of my painting and try to fit them in the setting of my image, keeping in mind my lighting situation and colour scheme.
04. Modelling and lighting
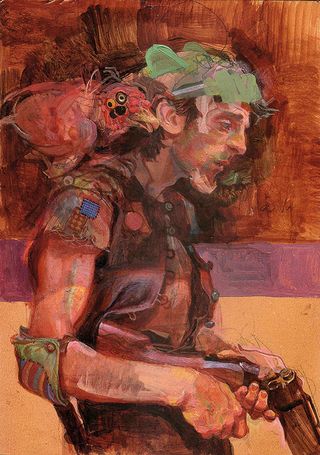
More fleshing out of forms and shapes. At this stage I decide to have the lower portion of the figure in shadow and the head and chest in light, which makes it appear as if he's standing under some kind of roof. This helps with the context of the image.
05. Smaller shapes and finishing
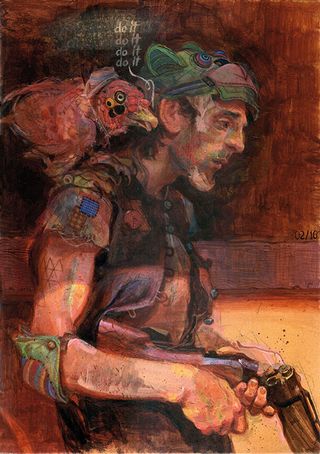
This step is all about finishing and adding finer and smaller shapes wherever needed. I subdue and glaze the region in shadow to push it back, while adding highlights to the area under the influence of sunlight. I add the darkest darks and work on edges to give the piece a sense of completion.
This article was originally published in ImagineFX magazine issue 134. Buy it here.

Thank you for reading 5 articles this month* Join now for unlimited access
Enjoy your first month for just £1 / $1 / €1
*Read 5 free articles per month without a subscription

Join now for unlimited access
Try first month for just £1 / $1 / €1
Get the Creative Bloq Newsletter
Daily design news, reviews, how-tos and more, as picked by the editors.
