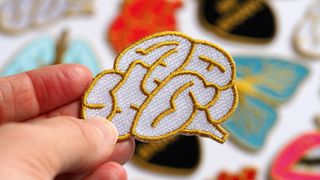
The beginner's guide to tactile illustration
It's time to rediscover the joy of the handmade. Lisa Hassell gets advice from leading exponents on how to get started with tactile illustration.
In a world saturated by digital images, a growing number of image-makers are turning their back on vector illustration and rediscovering the joy of the hand made. Tactile illustration - defined as images with "a sense of touch" - offers a contemporary twist on traditional craft techniques, involving the use of physical materials such as paper, embroidery, fabric and found objects in clever arrangements, creating visually stunning artwork and compelling typography.
Colourful, attractive and playful, tactile illustration has attracted clients across a broad range of editorial publications, book covers, animation and ad campaigns for big-name brands. Illustrators with a handmade aesthetic are pushing the boundaries of their craft, and as we delve deeper into the working process behind it, we discover it's every bit as challenging as it looks...
- Read all our illustration-related articles here
Getting started
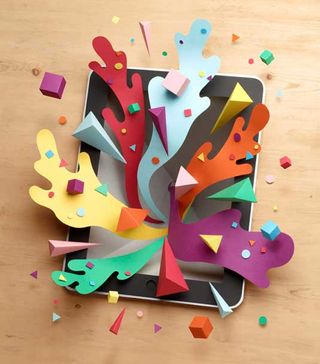
A papercraft illustrator, designer and set maker whose clients include Wired and The New York Times, Owen Gildersleeve's playful, hand-crafted style of working developed following a three month internship in New York. "Initially I was working more with found objects and different tactile mediums to create typographic pieces," he explains. "I wanted to expand my ideas beyond just type, bringing in imagery as well.
The London-based illustrator always starts by drawing out lots of rough pencil sketches. "That way, I can quickly get my ideas down and then work out which route to take."
He advocates meticulous preparation before getting to work. "Creating digital mock-ups is essential. Making changes once you've started cutting things out can add on a lot of extra time - so make decisions about colour and layering before you begin."
The importance of planning
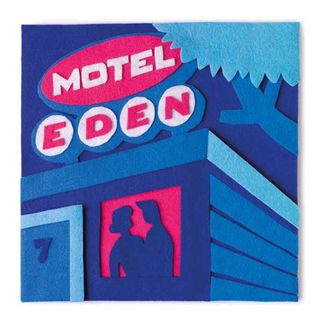
For Italian collage artist Jacopo Rosatti, careful planning is also at the root of every artwork he produces. "I begin by drawing a vector artwork - almost identical to the final collage - which I print, cut and use as stencils to outline the shapes on felt fabric."
Starting his career as a digital illustrator, Rosatti made the switch to tactile illustration two years ago. "I wanted to create something handmade, simple and visually stronger," he reflects. Dismissing paper craft early on - "it's already used by a lot of illustrators" - Jacopo was inspired by the versatility of felt. "It's a simple material, easy to cut and glue, and there are a wide range of colors to choose from."
Get the Creative Bloq Newsletter
Daily design news, reviews, how-tos and more, as picked by the editors.
Like papercraft, making decisions in the planning stages help avoid mistakes later on. "The more time you spend on preparation, the less problem you'll have on the final artwork," he adds.
The rise of quilling
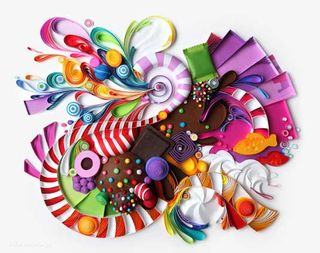
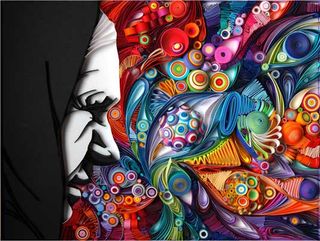
Russian designer Yulia Brodskaya who specializes in quilling or paper filigree, starts every piece with a sketch. "Preparation is very important because once you have glued a piece of paper it's permanent," he says. "I need to have a very clear idea about what I'm doing from the beginning."
A more traditional art form that has attracted a following in recent years, Quilling involves strips of paper, which are rolled, shaped, and glued together to create decorative designs. Brodskaya, who has earned an international reputation for her innovative paper illustrations, gives her creations a unique twist. "My art differs to some extent from traditional quilling because I tend to use paper strips in a more free way as if I am drawing," she explains.
Discovering the technique as a student at Moscow University, it wasn't until she graduated that she was inspired to try it for a self-promotional brochure. "I was looking for an eye-catching way to illustrated my name 'Yulia' - I had no idea that this little experiment would spark a passion for the years to come."
The embroidered approach
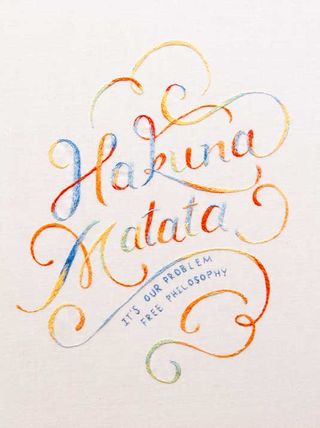
Best known for their distinctive embroidered custom typography, Sydney-based twins Maricor/Maricar first explored tactile illustration whilst employed at design studio Mathematics.
"The project was to animate an embroidered music video for Architecture in Helsinki," says Maricor. "We had never embroidered before but did a crash course during production." Describing themselves as the 'Makers of all things assorted', the pair break each project into two clear phases, beginning with a watercolour sketch to pin down the concept.
"All elements of the design have to be locked in before we can start the sewing phase," she adds.
Studio set-up
A comfortable, bright working environment is essential, and a number of factors should be considered. "It is a very slow and labour-intensive process," says designer Yulia Brodskaya of paper quilling. "I need to work for many hours during the day, doing very meticulous, precise and repetitive actions." Working in natural day light helps her stay focused, and listening to audio books "provides sufficient mental distraction from the monotonous working process".
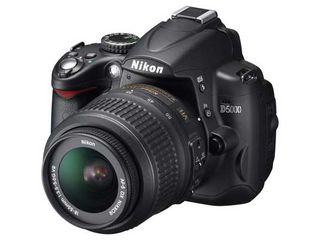
Studio equipment need not cost the earth. A decent camera, tripod and reliable light source form a basic kit: "I shoot with a Nikon D5000, which is a middle of the range camera but it does the job," offers Gildersleeve. "You don't need a lot of technical knowledge and expensive equipment - you can actually make do with quite a basic set-up." Maricor agrees: "We're still tweaking our photography set-up - a tripod with a horizontal arm for taking top/down photos of larger pieces, a diffuser to help even out shadows and highlights and a grey card for white balance make the process easier."
"Try to keep your table very clean and set up a small photo studio with a couple of lights," recommends Rosatti. "Practice your crafting and photography skills as much as possible." Yulia agrees: "Photography is very important, especially when working commercially." Mastering photography also offers the added benefit of speeding up your working process, as observed by Gildersleeve: "I tend to shoot editorial work myself so that I can meet quicker turnarounds."
The need for patience
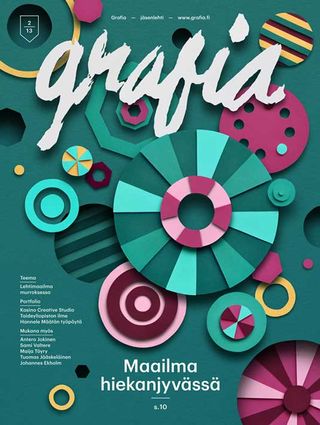
Mastering any one of these techniques can be extremely challenging, and tactile illustration is not for the faint hearted. The added complexity and level of detail involved in making images by hand can be especially labour-intensive. "It can become a torture unless you can enjoy this type of work," says Yulia, who can spend up to two weeks working on an elaborate piece.
"Everything I make is hand-cut, which can be time consuming but also quite therapeutic," smiles Gildersleeve. "The layers in my artworks are created by raising the pieces of paper using foam board and blue tac. This adds depth to the illustration, and helps bring it all to life."
Crafting with felt might sound like the most straightforward of the four techniques, but it still offers it's fair share of challenges, as Rosatti has discovered. "Cut-out felt shapes tend to expand compared to the original vector artwork, so I have to double check margins and bleed edges before gluing" Adapting his technique, whilst allowing time to clean up his images digitally has sped up his working process, as he reflects, "I think that when you work with handmade stuff you have to develop a style around its physical limitations"
Invest in quality materials
Researching and sourcing suppliers of craft materials - locally and online is a valuable exercise, and will give you a good overview of the variety of materials available and the effects that can be achieved. "We always sew with cotton embroidery floss and usually with single strands," reveals Maricor. "It achieves a delicate look and we can simulate different textures by using different stitches."
For budding paper craft illustrators, Brodskaya recommends "thin paper for quilling a basic shape; thicker paper is more suitable for 'freestyle' quilling".
Gildersleeve selects 10A blades as 'the blade of choice for most paper cutters', masking tape to wrap around the scalpel 'to stop your fingers from getting sore', a metal ruler, a cutting matt and of course, lots of paper. "Try out a range of stocks and see which one your prefer. Each cuts differently and gives a different effect, so it's nice to experiment and find a few which work for you."
Further reading
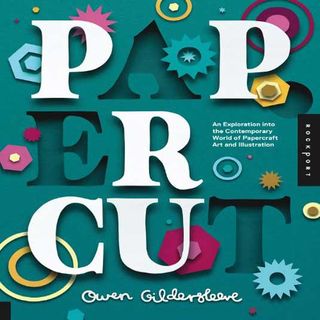
Paper Cut, the first book by illustrator Owen Gildersleeve features 25 of the most exciting contemporary paper-craft artists and illustrators from around the world. Scheduled for release in June 2014, you can pre-order your copy on Amazon.
Liked this? Read these!
- Beautiful examples of paper art
- Illustrator tutorials: amazing ideas to try today!
- Useful and inspiring flyer templates
- The best collage maker tools - and most are free!
- The best photo apps for iPhone, iPad and Android

Thank you for reading 5 articles this month* Join now for unlimited access
Enjoy your first month for just £1 / $1 / €1
*Read 5 free articles per month without a subscription

Join now for unlimited access
Try first month for just £1 / $1 / €1
The Creative Bloq team is made up of a group of design fans, and has changed and evolved since Creative Bloq began back in 2012. The current website team consists of eight full-time members of staff: Editor Georgia Coggan, Deputy Editor Rosie Hilder, Ecommerce Editor Beren Neale, Senior News Editor Daniel Piper, Editor, Digital Art and 3D Ian Dean, Tech Reviews Editor Erlingur Einarsson and Ecommerce Writer Beth Nicholls and Staff Writer Natalie Fear, as well as a roster of freelancers from around the world. The 3D World and ImagineFX magazine teams also pitch in, ensuring that content from 3D World and ImagineFX is represented on Creative Bloq.


