13 ways to improve your card art
Artist Laura Sava reveals how to achieve eye-catching compositions and engaging fantasy card art.
Even though I started dabbling in how to draw fantasy art as a teen, for a long time I never thought of it as any more than a hobby. The first decisive step on the illustration path was putting my best pencils to one side and getting a Wacom tablet. Switching to digital eventually proved to be a game changer for me because it solved both the issue of speed and the high cost of art materials.
I attended an art school, but found that the emphasis was placed on contemporary trends, so I had to learn most of what I know about figurative painting on my own.
However, a formal art education gave me a better perspective on technical matters and perhaps created a framework for an efficient learning approach. So the tips in this workshop are an assorted collection of theoretical principles I picked up in school, personal observations and advices I found online.
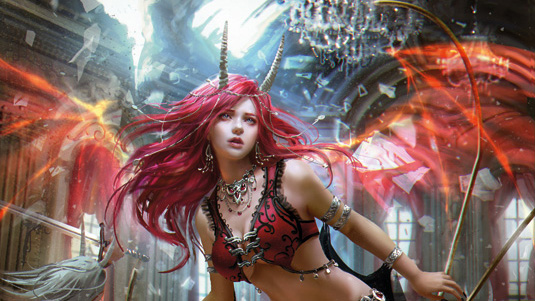
I'm currently illustrating cards for Applibot's Legend of the Cryptids, a fantasy game for smartphones, so I'm going to use images I created for the company to show how I apply this information in practice and, hopefully, provide some useful insight for those who are interested in producing similar work.
01. Deciding on the composition
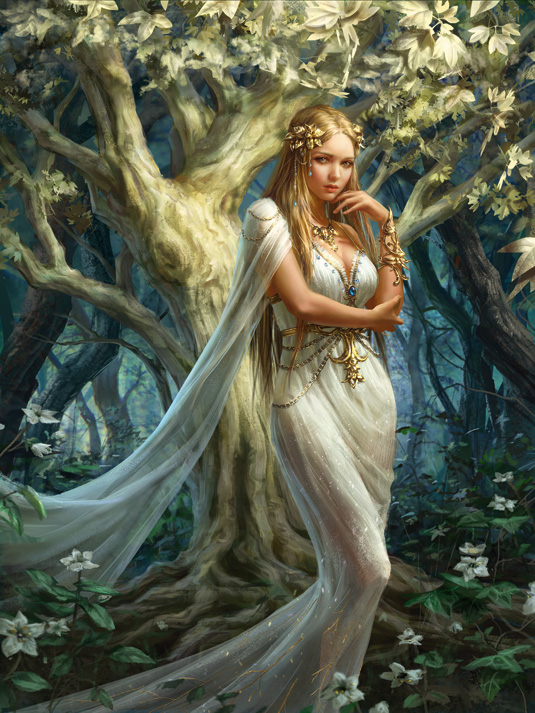
There are basically two types of composition: dynamic and static. The first is characterised by diagonal lines that add movement, while the second features strong verticals and horizontals that either help to create a calm atmosphere if horizontals predominate or suggest harshness if the verticals are emphasised.
I prefer static compositions, but they can be a bit dull for fantasy themes. As a compromise, I use softer diagonal shapes as accents in the foreground. For example, placing objects such as flowing fabric here and there helps to break up the monotony and develops a pleasing contrast with the background.
02. When to use symmetry
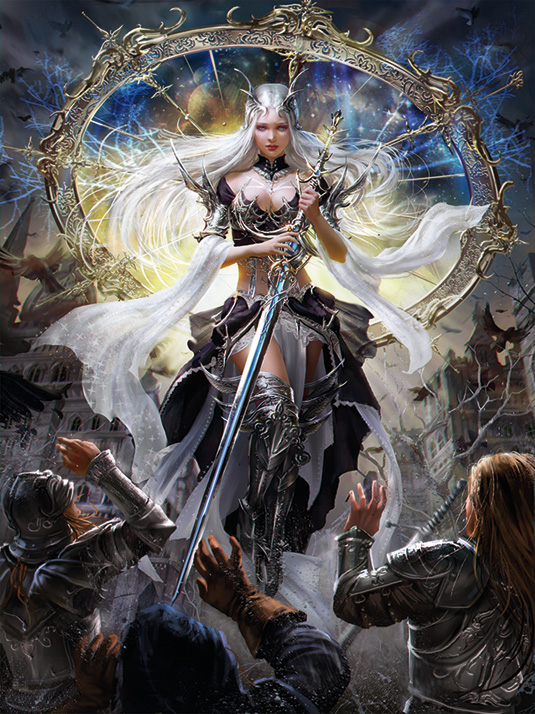
There's a time and a place to use bilaterally symmetrical layouts. Indeed, I'd go so far as to say that this type of composition should be used sparingly, but it's certainly effective in appropriate contexts. Its visual impact is high because all lines converge and the eye is drawn towards the centre, so illustrated subject matter such as book covers or film posters can benefit from it.
Symmetrical poses can make a character look regal, powerful or heroic. They usually work especially well with characters who have wings and mythological beings in general, because they remind the viewer of iconic representations.
03. Apply the S-curve principle
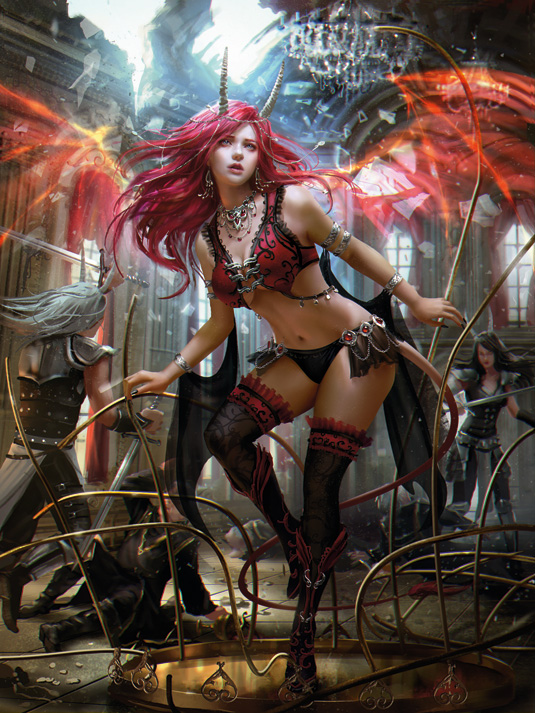
This goes back to ancient Greek art and is considered ideal for depicting the human figure. The body should be positioned in a way that describes an S-shaped line, so that the shoulders and the hips are angled differently. The most basic pose that uses this principle is contrapposto, where the figure rests all its weight on one leg.
In illustration, this formula can be taken even further, and curves and proportions can be exaggerated or stylised according to your own painting method.
04. Develop focal points
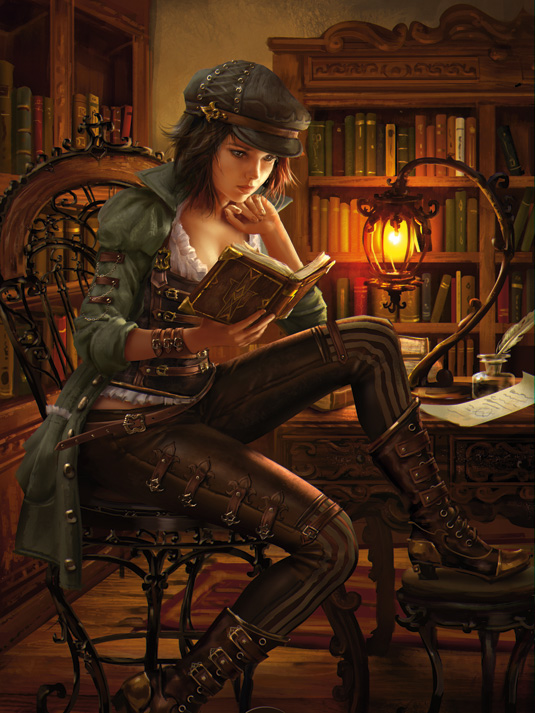
The first thing people notice in a picture are human faces, so they become natural focal points and should, as such, be placed carefully. There are several ways to accentuate them or shift the interest towards other areas of the image. One is manipulating light, such as keeping most of the image relatively equally lit and have strong light hit the area we want to stand out.
Variation in brush strokes or colours can also be used, rendering the focal point and keeping the rest of the image rougher and more desaturated.
05. Dramatic light
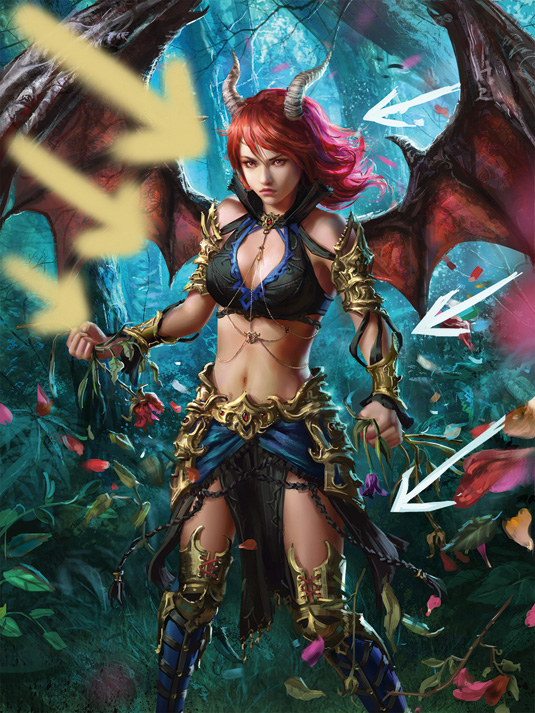
Interesting lightning can quickly give an image a fantasy look. One of the most commonly used – and my go-to lightning scheme – comprises a main softer light and a harsher back light. This combination is even more striking if the light sources have complementary colours, but this can soon become cheesy if overused!
Another of my favourite set-ups is a single light source filtered through a window, placed at an angle that suggests the late afternoon sunlight.
06. Framing techniques
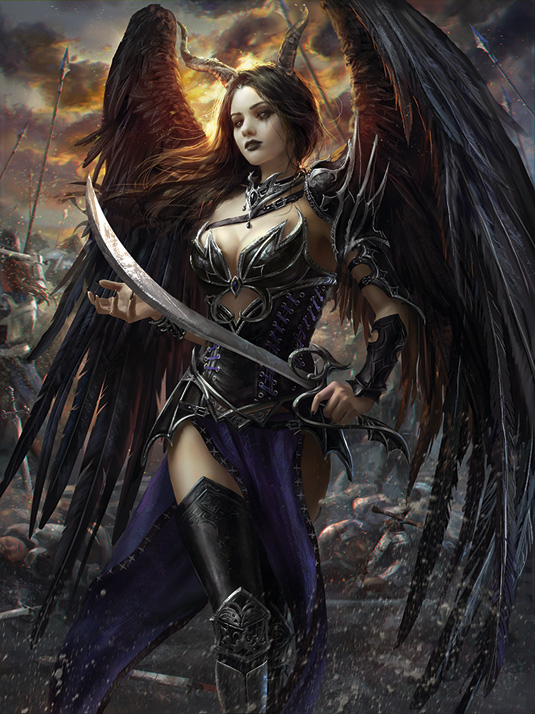
Depending on the purpose of an illustration, some limitations can come into play and one of them is framing. My card art is viewed on smartphones, so the characters need to be large enough to discern details and this means sometimes they won't fit into the frame.
There are a few rules of thumb on how to crop figures: don't cut where there are any joints, never cut through the hands (they should be either visible or out of the picture) and, for portraits, avoid cropping the ears or chin.
07. Detail placement
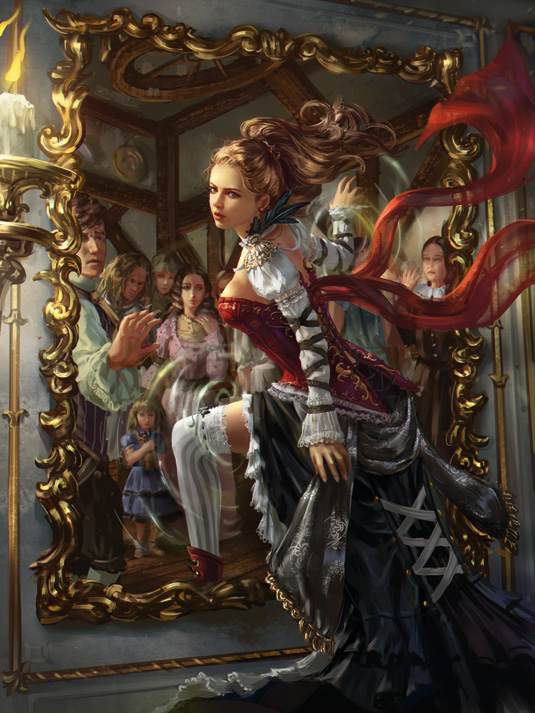
People organise visual elements in categories and group them into larger shapes, based on their proximity to each other. The Gestalt theory of visual perception has derived a series of rules from this premise.
An open area or a barely suggested object will be "autocompleted" by the viewer, as long as its shape is recognised as a whole. This is why it's not necessary to polish every detail or worry about perfect edges – just ensure that the main shape is readable from a distance.
08. Make more of the background
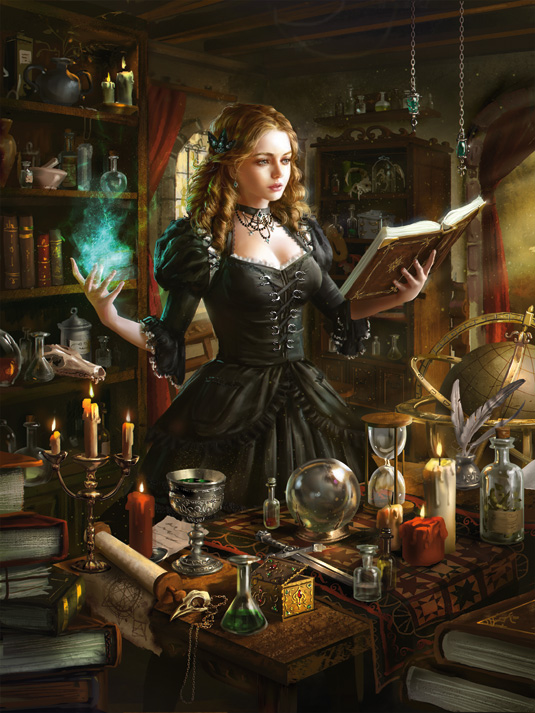
In game cards the focus is obviously on the character, but backgrounds and other details add a whole new dimension. You can hint at a character's personality through their environment or describe their social status or occupation with various nearby objects.
A scholarly character could be surrounded by old tomes and scrolls, a warrior will look more menacing with a stormy sky as a backdrop, and a character could be recognised as a witch even without stereotypical costumes, only by decorating her place with alchemical paraphernalia and other mysterious-looking items.
09. Costume design
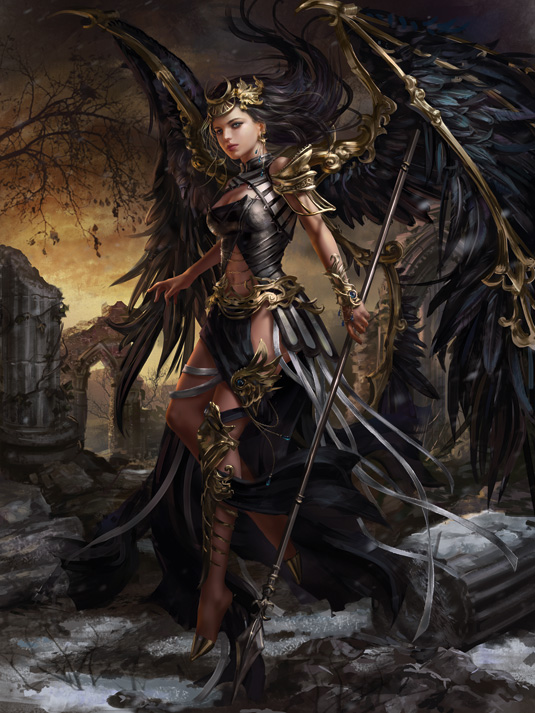
The greatest challenge I face when designing game cards is coming up with fresh ideas for costumes, weapons and accessories. I follow various fashion, history and culture-related sites and blogs, and I save the most interesting clothing and armour designs in an inspiration folder.
I occasionally use Alchemy, which generates unpredictable brushtrokes and random shapes, and then I try to find patterns in the resulted image. Costumes can become quite detailed, so to prevent them from looking too monotonous and "crowded", details should be grouped and placed only in a few key places.
10. Giving metal an interesting look
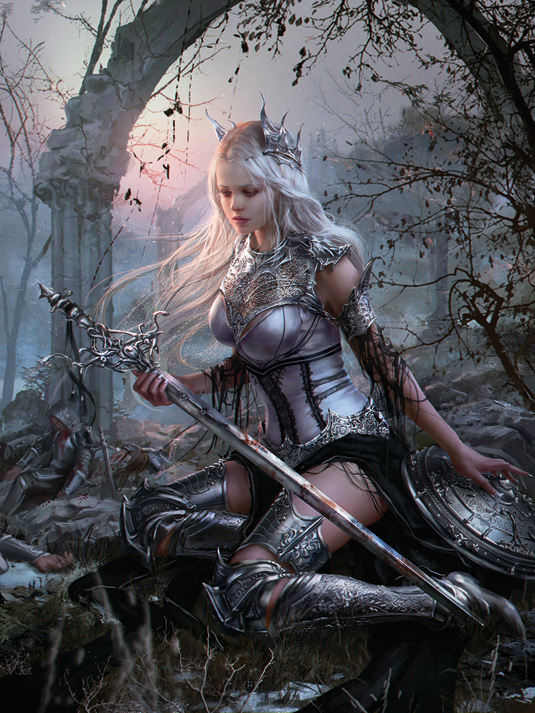
Fantasy art draws inspiration from historical sources, so ornate armour and weapons are commonplace. When dealing with metal objects, I often block in solid shapes and use the the Bevel and Emboss option (Layer> Layer styles).
This is only to create a quick base to work with and shouldn't be used as a standalone technique (except perhaps for very small details), because it'll produce an artificial-looking result. As a final touch, I add a few highlights using a textured brush that's set on Color Dodge mode.
11. Advice for painting skin
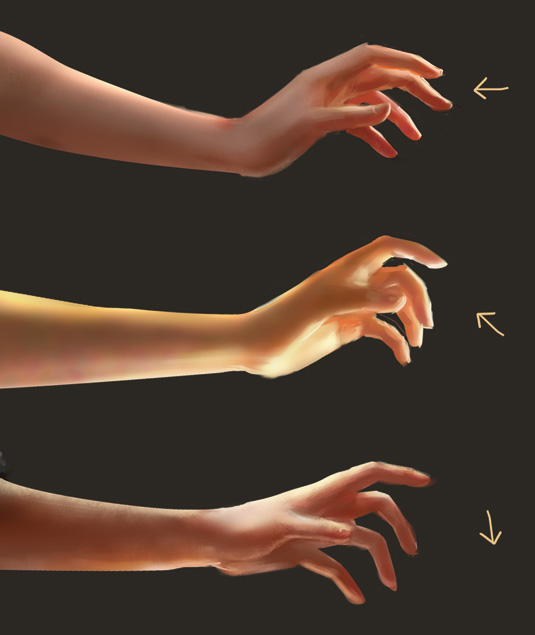
Subtle colour variation is crucial for illustrating realistic skin, but it can also take a while to blend convincingly. To save time, I've reduced this principle to alternating between the cold and warm hues that correspond to value zones: if light is warm, then shaded portions are cold and darkest shadows warm again, and vice versa.
The transition line between light and shadow should be slightly more saturated. Skin is slightly translucent, and so bright light will shine through it, especially in areas with prominent bones and/or less muscles, such as the cheeks or fingers.
12. Colour considerations
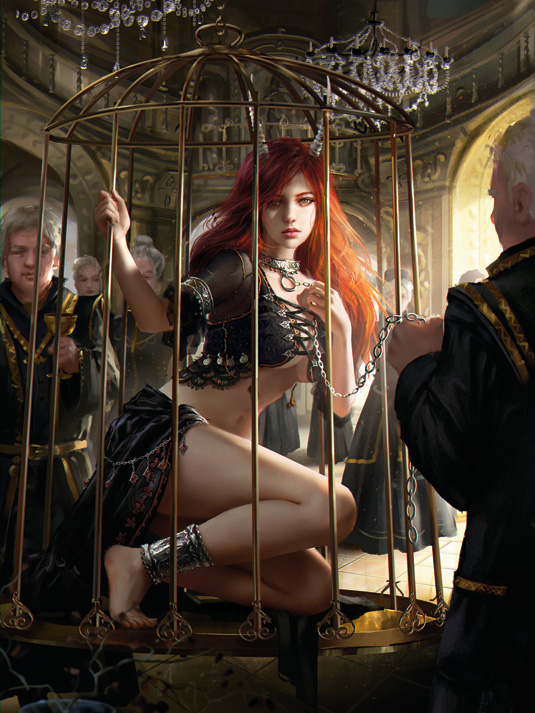
In theory, it seems simple to pick a colour scheme according to the established art theory rules, but achieving realistic results involves more effort than that. You have to keep in mind that an object's colour isn't as much determined by the way it's pigmented, but decided more by its environment: direct and reflect light, weather, time of the day and so on.
On the other hand, values are even more important; done right and you can get away with less-than- perfect-hues. Complementaries are my customary colour scheme, with the warmer colour as an accent.
13. Beyond fantasy
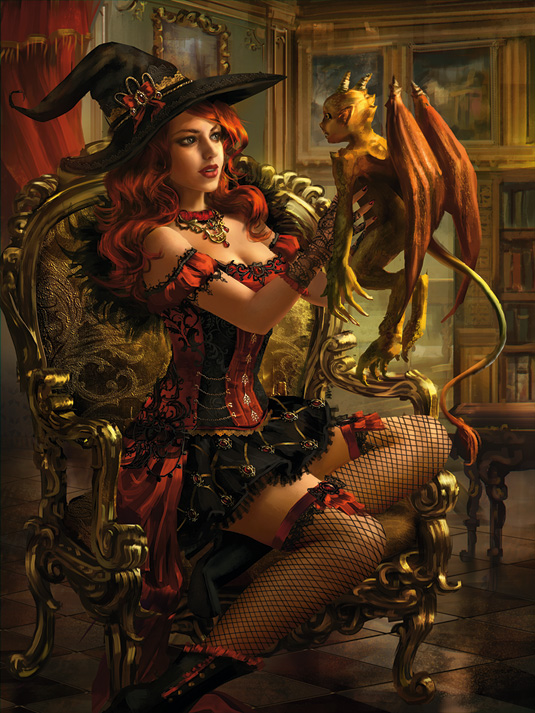
There's no need to limit your concepts at dogmatic sword & sorcery themes; clashing elements that work unexpectedly well together are definitely good for fantasy designs, whether the approach is serious or playful.
Besides the obvious cross-pollination between fantasy and sci-fi art, other types of imagery, ranging from Renaissance art to clean 3D looks can be incorporated into illustrations to varying degrees. Steampunk aesthetics are known to behave well in the mix and classical pin-up styles are a perfect way to spice up a card character.
This article originally appeared in ImagineFX issue 131.

Thank you for reading 5 articles this month* Join now for unlimited access
Enjoy your first month for just £1 / $1 / €1
*Read 5 free articles per month without a subscription

Join now for unlimited access
Try first month for just £1 / $1 / €1
Get the Creative Bloq Newsletter
Daily design news, reviews, how-tos and more, as picked by the editors.
