Build a cross-platform HTML5 game
Ibon Tolosana and Iker Jamardo Zugaza show you how to get to grips with cross-platform HTML5 game development using Canvas.
Daily design news, reviews, how-tos and more, as picked by the editors.
You are now subscribed
Your newsletter sign-up was successful
Want to add more newsletters?

Five times a week
CreativeBloq
Your daily dose of creative inspiration: unmissable art, design and tech news, reviews, expert commentary and buying advice.

Once a week
By Design
The design newsletter from Creative Bloq, bringing you the latest news and inspiration from the worlds of graphic design, branding, typography and more.

Once a week
State of the Art
Our digital art newsletter is your go-to source for the latest news, trends, and inspiration from the worlds of art, illustration, 3D modelling, game design, animation, and beyond.

Seasonal (around events)
Brand Impact Awards
Make an impression. Sign up to learn more about this prestigious award scheme, which celebrates the best of branding.
- Knowledge needed: Basic HTML5 and JavaScript
- Requires: Basic HTML editor and HTML5 compatible browser
- Project Time: 4-6 hours
- Support file
This article first appeared in issue 230 of .net magazine – the world's best-selling magazine for web designers and developers.
HTML5 game development isn’t a straight science. Having your games running on different platforms requires a bit of black magic. Different types of games require different sets of techniques. In terms of development, a tile-based game is completely different to a pinch-and-zoom one, for example. However, in this tutorial, we’re going to focus on the basic elements to develop any kind of 2D JavaScript based game.
We’ll be focusing on JavaScript Canvas based games. This means the rendering will rely on a new HTML5 markup object – the canvas. A canvas is defined very easily:
</script>
var canvas = document.createElement("canvas"); // or document
getElementBy### to reference an already defined one.
canvas.width = 800; // define canvas size in pixels
canvas.height = 600;
document.body.appendChild(canvas);
var ctx = canvas.getContext("2d"); // get a drawing context.
ctx.fillStyle="#f00'; // set a red fill style.
ctx.fillRect(10,10,50,50); // draw a red rect.
</script>
Step 01. Loading assets
JavaScript is a functional language that’s single threaded. This means that asset loading will be an asynchronous task, notified via callback functions. Rolling out a complete asset loader is a straightforward operation. For one single image, the procedure could be:
var image= new Image(); // or document.createElement("img");
image.onload= function() { // called when the image's been loaded }
image.src= "a_valid_url/uri value";
You can generalise this code for N images, and your asset pre-loader will work like a charm. You can also find a complete asset pre-loader here.
Step 02. Animation loop
After loading some assets/images, we need some animation loops that will give the illusion of continuous screen updates. Within managed JavaScript environments, like regular browsers, we can use an out-of-the-box built-in function called setInterval. This function accepts a callback function, and the milliseconds rate you expect that function to be called at. The following is a canvas based example which plays a very simplistic animation, a blue square traversing a line 50 times per second:
Daily design news, reviews, how-tos and more, as picked by the editors.
<!DOCTYPE html>
<html>
<head>
<title>Simple animation</title>
</head>
<body>
<script type="text/javascript">
var canvas = document.createElement("canvas");
canvas.width = window.innerWidth;
canvas.height = window.innerHeight;
document.body.appendChild(canvas);
var ctx = canvas.getContext("2d");
var x = 0;
var y = 0;
setInterval(
function () {
ctx.clearRect(x - 1, y - 1, 40, 40);
ctx.fillStyle = "#33f";
ctx.fillRect(x, y, 35, 35);
x += .5;
y += .5;
},
20 // take 20 milliseconds, or 50 times per second.
);
</script>
</body>
</html>
This way of defining animation loops has two major drawbacks. First, if the drawing function takes too long the animation will clash and start to be queued. Second, this function consumes system resources even when the tab our game is running on is hidden, or even worse, when the browser window is minimised. A better solution would be to call requestAnimationFramework functions, like described in this article.
Step 03. Inputs
Now that we have images and a decent animation loop, we need some in-game interaction. Depending on the platform you focus on, you could make use of different input subsystems. While keys and mouse are the primary input system on desktop systems, touch events and accelerometers are usually constrained to mobile.

Despite the fact that modern browsers are pushing the envelope on gaming, browsers weren’t built with gaming in mind until the latest major browsers, which now support APIs such as mouse-lock, full-screen and so on.
On mobile, there won’t be a problem, since we keep our game optimised to be full screen. But on a regular browser, where a canvas can be any place in the DOM hierarchy, things can get more complicated since there’s no crossbrowser direct mechanism to get a mouse/touch event coordinate related to our canvas object. So the best practice is to keep the markup around our canvas game as simple as possible. This is our procedure in CAAT, our animation library.
Another drawback for the mouse input system is that it lacks a “mouseDrag” event, which you have to simulate yourself.
The final input code abstraction would mean identifying every input source and binding them to some reusable code, for example:
accelerometer-lean-left = touch-left-side-of-screen = key-left-pressed.
Step 04. Moving actors
Moving actors on screen basically means to bind input events to changing on-screen position variables.
More complex operations could require complex path traversal, apply easing functions to traversal, chained animations, either by time or external events and so on. In this example, we’re binding cursor keys to move a rotating rectangle on screen.
<!DOCTYPE html>
<html>
<head>
<title>Simple animation</title>
</head>
<body>
<script type="text/javascript">
var W= 800;
var H= 600;
var canvas = document.createElement("canvas");
canvas.width = W;
canvas.height = H;
document.body.appendChild(canvas);
var ctx = canvas.getContext("2d");
var x = W/2;
var y = H/2;
var inc= 1;
var incx= 0;
var incy= 0;
// key press handler which sets moving increments depending on
pressed key.
window.addEventListener(
'keydown',
function(evt) {
var key = (evt.which) ? evt.which : evt.keyCode;
switch ( key ) {
case 37: // left
incx= -inc;
break;
case 39: // right
incx= inc;
break;
case 38: // up
incy= -inc;
break;
case 40: // down
incy= inc;
break;
}
},
false
);
// key release handler which resets moving increments depending on
pressed key.
window.addEventListener(
'keyup',
function(evt) {
var key = (evt.which) ? evt.which : evt.keyCode;
switch ( key ) {
case 37: // left
case 39: // right
incx= 0;
break;
case 38: // up
case 40: // down
incy= 0;
break;
}
},
false
);
// animation loop. Draw a frame 50 times a second.
setInterval(function () {
// clear animation area
ctx.clearRect(0,0,W,H);
ctx.fillStyle = "#33f";
// draw a rotating rectangle. Rotates 360 degrees per second.
ctx.save();
ctx.translate( x, y );
ctx.rotate( (new Date().getTime()%1000)/1000*2*Math.PI ); // rotate 360
deg per second
ctx.translate( -20, -20 );
ctx.fillRect(0, 0, 40, 40);
ctx.restore();
// set new location based on keypress increments.
x+= incx;
y+= incy;
}, 20);
</script>
</body>
</html>
Step 05. Sound
Sound is the most important feedback feature for any game. Background music and special effects make the difference between an average game and a great game.
For us HTML5 games developers, audio API is not good news. The audio API is a little bit broken. First of all, different browsers play different audio formats so it’s good to have your audio files in as many audio formats as possible. Second, the audio tag is a bit buggy. Loops won’t work on some browsers and on almost all of them, you won’t be able to play the same sound concurrently.

To fix this, the latest major browser versions are shipped with extremely powerful audio APIs, such as Google’s Web Audio API or Mozilla’s Audio Data API. The bad news is API sound fragmentation. That’s why sometimes a Flash audio fallback could be a good idea. But as it usually happens with JavaScript, this language is so powerful that it allows you to come up with most platform pitfalls with a little bit of code.
Our own Audio API workaround can be found here: netm.ag/audioapi-230. We also recommend using SoundManager2. Basically, to programmatically play a sound these are the steps that could be performed:
1 Create an audio object:
var channel= document.createElement('audio');
2 Set the audio data:
channel.src= "valid_url/uri to an audio file";
channel.preload= "auto"; // make the audio file load silently
channel.volume= 10; // change volume
channel.currentTime= 5; // start playing starting at 5 seconds
channel.load();
3 Play the sound:
channel.play();
4 Optionally you could attach callback functions to events such as audio end and so on:
channel.addEventListener(
'ended',
// on sound end, set channel to available channels list.
function(audioEvent) {
},
false );
Step 06. Scaling the game
When focusing on multiplatform or cross-browser HTML5 games development, one thing to pay special attention to, especially in mobile, is screen resolution fragmentation. There are so many different screen resolutions to cope with that it could be a real pain to conform all of our in-game assets to such different resolutions.

Fortunately the canvas API, or even the DOM/CSS, is flexible enough to allow us to apply affine transformations so that we can have our games up- or downscale gracefully at almost no development cost. This means that the relationship between one screen pixel and one world coordinate must not be tied to a 1:1 ratio. The only constraint for this procedure will be to have the canvas occupy the whole window area. Therefore, it’s good to set it to body style="margin:0; padding:0;" with no markup on it. The way to go with the HTML5 canvas object is pretty straightforward:
1 Create a canvas object, or select it from the markup and set the desired size; this size will be our game space size.
2 Add a window event listener for ‘resize’ where you’ll calculate a ratio value between the current window size and our original canvas object’s size:
var scaleFactor= 1;
window.addEventListener('resize',
function(evt) {
// calculate a scale factor to keep a correct aspect ratio.
scaleFactor= Math.min(window.innerWidth/W, window.innerHeight/H);
// make the canvas conform to the new scaled size.
canvas.width = W*scaleFactor;
canvas.height = H*scaleFactor;
// get the scaled canvas context.
ctx = canvas.getContext( '2d' );
},
false);
3 Modify the drawing routine to have a scale applied with the previous scaleFactor:
setInterval( function() {
// drawing routine
// …
ctx.save();
ctx.scale( scaleFactor, scaleFactor );
// regular drawing code, w/o worrying about new canvas size.
// …
ctx.restore();
}, 20 );
Step 07. Conclusion
Despite what it may seem, we truly believe that HTML5 is the way to go when targeting web games development. Right now, the technology is still in its early stages, but it improves daily and powerful APIs are being added.

We would recommend anyone wanting to start with HTML5 games development to rely on any of the available gaming frameworks that are already out there. They’ll help you avoid some common HTML5 pitfalls, and supply you with different rendering technologies to target different deployment devices. We’ve developed our own gaming framework: CAAT, freely available under the MIT licence.
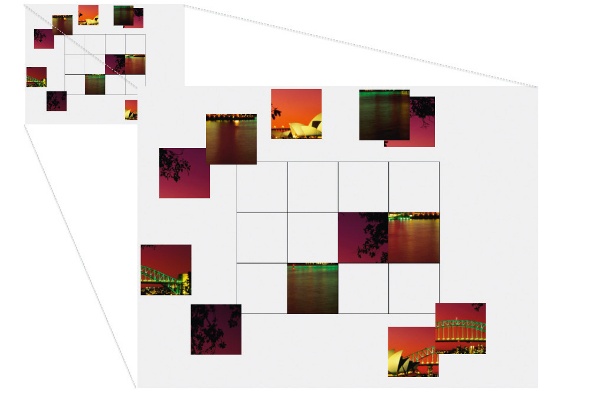
We’ve also made a game as a demonstration of its power that’s under 200 lines of code that you can download here. You can play a complete puzzle game with input abstraction, animations, sound and screen resolution independence.
Taking a look at other coding projects has helped us learn a lot and be able to give simple solutions to complex problems. Choose the framework that best fits your needs here.
Words: Iker Jamardo Zugaza and Ibon Tolosana: www.ludei.com
Liked this? Read these!
- How to build an app: try these great tutorials
- Free graphic design software available to you right now!
- Our favourite web fonts - and they don't cost a penny
- Discover what's next for Augmented Reality
- Download free textures: high resolution and ready to use now

The Creative Bloq team is made up of a group of art and design enthusiasts, and has changed and evolved since Creative Bloq began back in 2012. The current website team consists of eight full-time members of staff: Editor Georgia Coggan, Deputy Editor Rosie Hilder, Ecommerce Editor Beren Neale, Senior News Editor Daniel Piper, Editor, Digital Art and 3D Ian Dean, Tech Reviews Editor Erlingur Einarsson, Ecommerce Writer Beth Nicholls and Staff Writer Natalie Fear, as well as a roster of freelancers from around the world. The ImagineFX magazine team also pitch in, ensuring that content from leading digital art publication ImagineFX is represented on Creative Bloq.
