How to use UV maps
Understanding UV maps is key to placing complex textures on your 3D model. Mike Griggs explains
Your commissioned model is finished, and covered in textures that look amazingly photoreal when you run them through your renderer. Then your client gets in touch saying that they like the model so much that they want to integrate it into an iPhone app, and are getting an animation company to use your asset in some online adverts – could you supply them models and textures? This where UV maps become essential to your workflow.
UV maps are extremely powerful texturing tools that can seem hard to get into, but they allow the sharing of image-based textures between 3D applications. This is because they keep a record of where a specific image should be placed on your 3D mesh via 2D representation called a UV (sometimes UVW) map, which takes vertex points from your 3D model’s XYZ coordinates and applies them to a 2D image with a U and V axis.
This flat wireframe 2D representation of your model will most often looked like it has been peeled from your 3D mesh, alternatively it will look like many parts of your model laid out in a random fashion. Most 3D programmes will help you make UV maps from your mesh and organise them.
The benefit of using 3D maps is that they are 2D- and 3D-application agnostic, using base 3D file formats such as .OBJ. Models that have UV maps applied can be sent between 3D applications with comparative ease, safe in the knowledge that texture placement will be consistent across applications. This is important when creating real-time assets for game engines, which depend on much of their detail from image-based solutions.
A good UV map will provide the coordinates for images that depict colour, specularity etc. They can also be used to define the position of normal and displacement maps that have been generated from higher-resolution versions of the model but can impart this detail onto lower polygon versions.
The useful thing about UV maps is that they can be exported into 2D applications such as Photoshop, which then enables exceptionally fine control of your textures using an image editing workflow, as well as allowing you to place text etc on your model.
These benefits of UV maps make them an exceptionally efficient form of texturing your model.
Get the Creative Bloq Newsletter
Daily design news, reviews, how-tos and more, as picked by the editors.
Exporting a UV map to a 2D program
01 Export the UV map
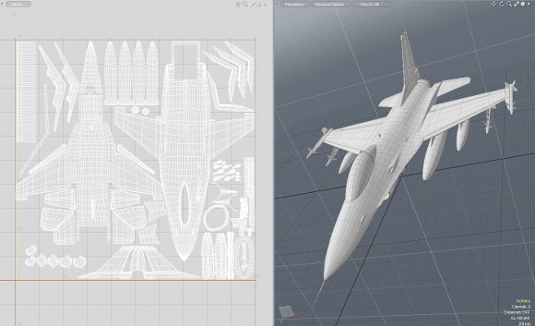
After I have made a UV map from my model, I use my 3D software to export the UV as an image, or I may decide to take a screenshot.
02 Import the UV into 2D software
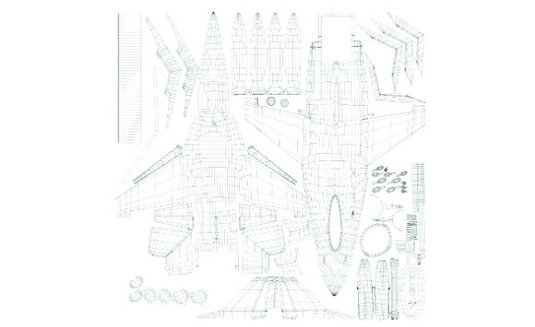
I open my UV map in my 2D editing software, ensuring it is both square and conforms to the pixel sizes.
03 Manipulate your textures in the 2D application
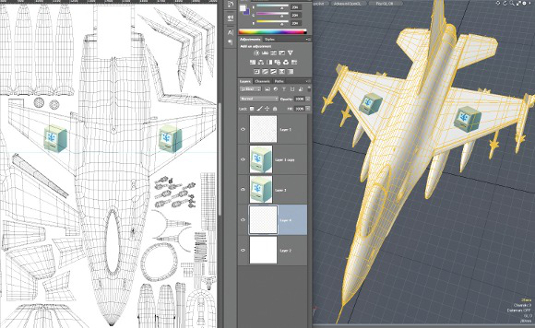
Use the 2D map as a guide for making the texture, which can then be reimported into the 3D applications as a material.
Mapping tips
Simple hints that will make mapping easier
Start on a simple mesh
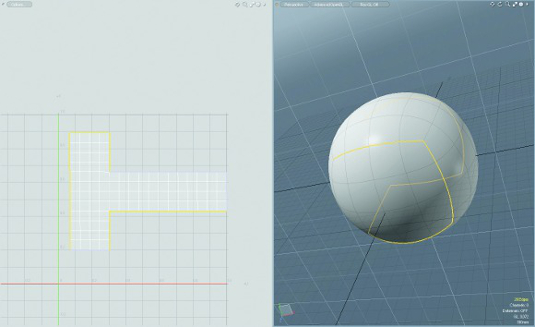
It is always best practice to UV on as simple a polygonal shape as you can. This allows you to see more easily how your UV can be arranged, as well as making it simpler for any UV flattening software to find the logical seams in your model in order to create the UV islands. As you put more detail into the model, you should find that the UV map divides with you.
Hiding seams
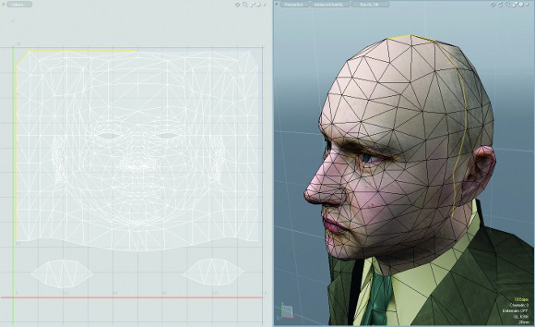
When choosing your seams for your UV, try and make the seams in invisible areas – for example under hairlines or clothes, or on logical parts of a hard-surface model such as a door. This minimises chances of the texture pinching, especially when animated or when you decide to bake a texture for the creation of normal maps.
Scaling UV islands for detail
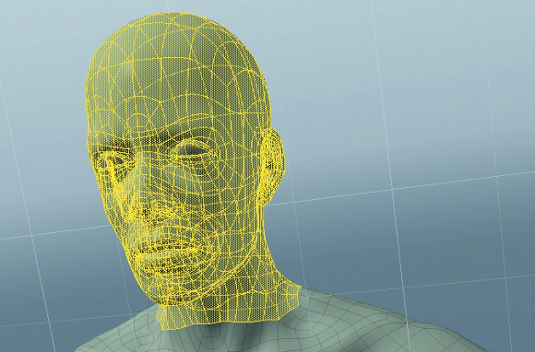
While it is generally a good idea to keep your UV islands the same relative size, there are times when it is appropriate to scale a UV island up or down. This is usually to allow areas where detail will be important or visible to have as access to as many pixels as possible. Scaling elements down allows you to get more of your model into the UV map and is more efficient when creating textures for real-time assets.
Ptex
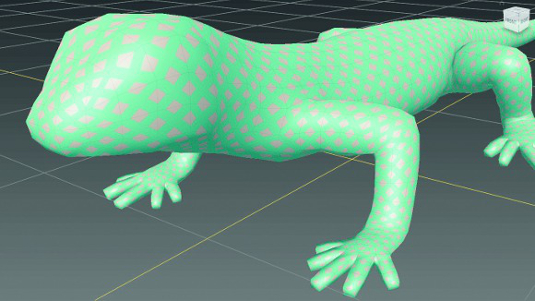
Applications such as Mudbox and Mari allow the creation of Ptex textures. Ptex does not require UV maps to allow you to create complex textures, but instead allows you to paint without seams across your model, and will probably become the default paint method for most 3D applications over the coming years. However, only certain applications support Ptex textures for now, so if you intend to use them, make sure your 3D workflow supports it.
UV mapping applications
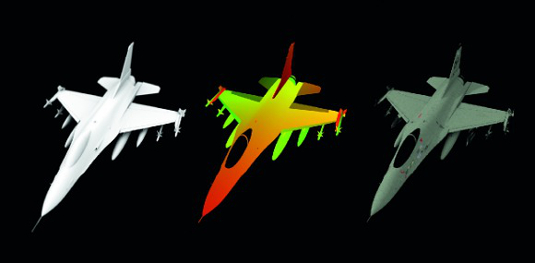
There are standalone UV mapping tools such as UV Layout that can be used independently of your main 3D application. This allows you to develop an agnostic approach to UV mapping which may be useful if you work between many applications. Compositing solutions, such as the RE:Map plugin for After Effects, allow you to change the imagery on your model using a UV coordinates pass without the need to re-render in your 3D application.
Mike Griggs is a freelance concept 3D, VFX and motion graphics artist working across TV, exhibition and digital design

Thank you for reading 5 articles this month* Join now for unlimited access
Enjoy your first month for just £1 / $1 / €1
*Read 5 free articles per month without a subscription

Join now for unlimited access
Try first month for just £1 / $1 / €1

The Creative Bloq team is made up of a group of design fans, and has changed and evolved since Creative Bloq began back in 2012. The current website team consists of eight full-time members of staff: Editor Georgia Coggan, Deputy Editor Rosie Hilder, Ecommerce Editor Beren Neale, Senior News Editor Daniel Piper, Editor, Digital Art and 3D Ian Dean, Tech Reviews Editor Erlingur Einarsson, Ecommerce Writer Beth Nicholls and Staff Writer Natalie Fear, as well as a roster of freelancers from around the world. The ImagineFX magazine team also pitch in, ensuring that content from leading digital art publication ImagineFX is represented on Creative Bloq.
