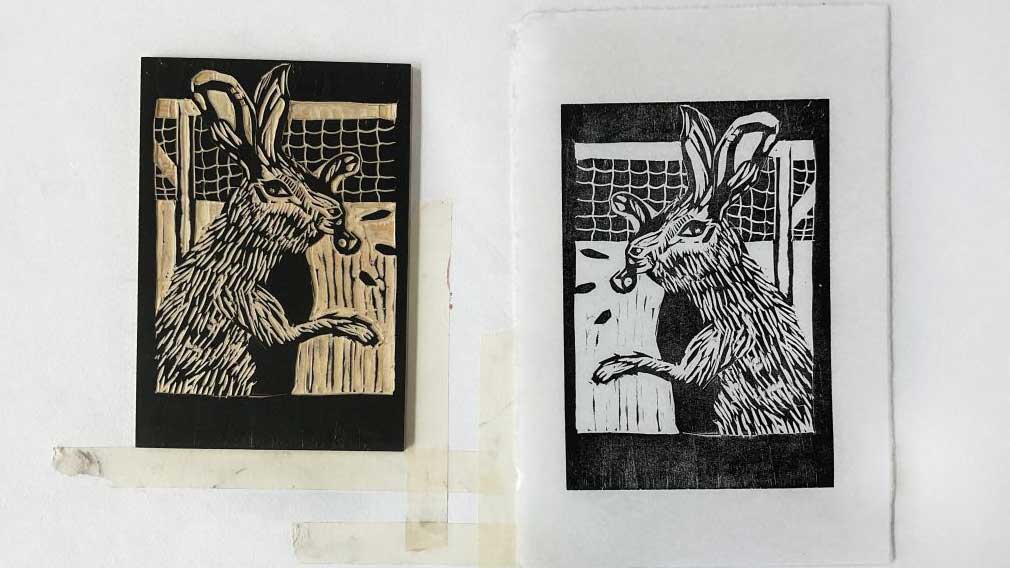
Woodcut printing is a type of relief printmaking that involves carving images out of a block of wood in order to produce prints. Ink is then rolled onto the raised area of the block (or the 'drawing', which is left after carving away all the negative space), paper is laid on top, and the image is then transferred onto the paper by rubbing, or pressing.
Woodcut printing has been around for nearly 2,000 years. Starting in China, then Japan, the method (or something close to it) made its way to Europe in the late 14th century. It's one of the oldest methods of print production - it meant numerous copies could be made and given out to the masses, as a vehicle for storytelling, news, and propaganda.
Though lino is more modern, cheaper, and slightly easier to work with, the grain effect of a woodcut can be far more satisfying to work with and look at. Ultimately it's down to personal taste. If you do decide to try lino first, see our lino printing guide.
In terms of wood, there are some very affordable plywood blocks made specifically for woodcut printing, and they are easy to get hold of. These are also good for beginners, and as they are easy to carve, you'll soon see exciting results, if of course you're willing to gather a few tools. Read on for a step-by-step guide to woodcut printing.
01. Get to know your tools
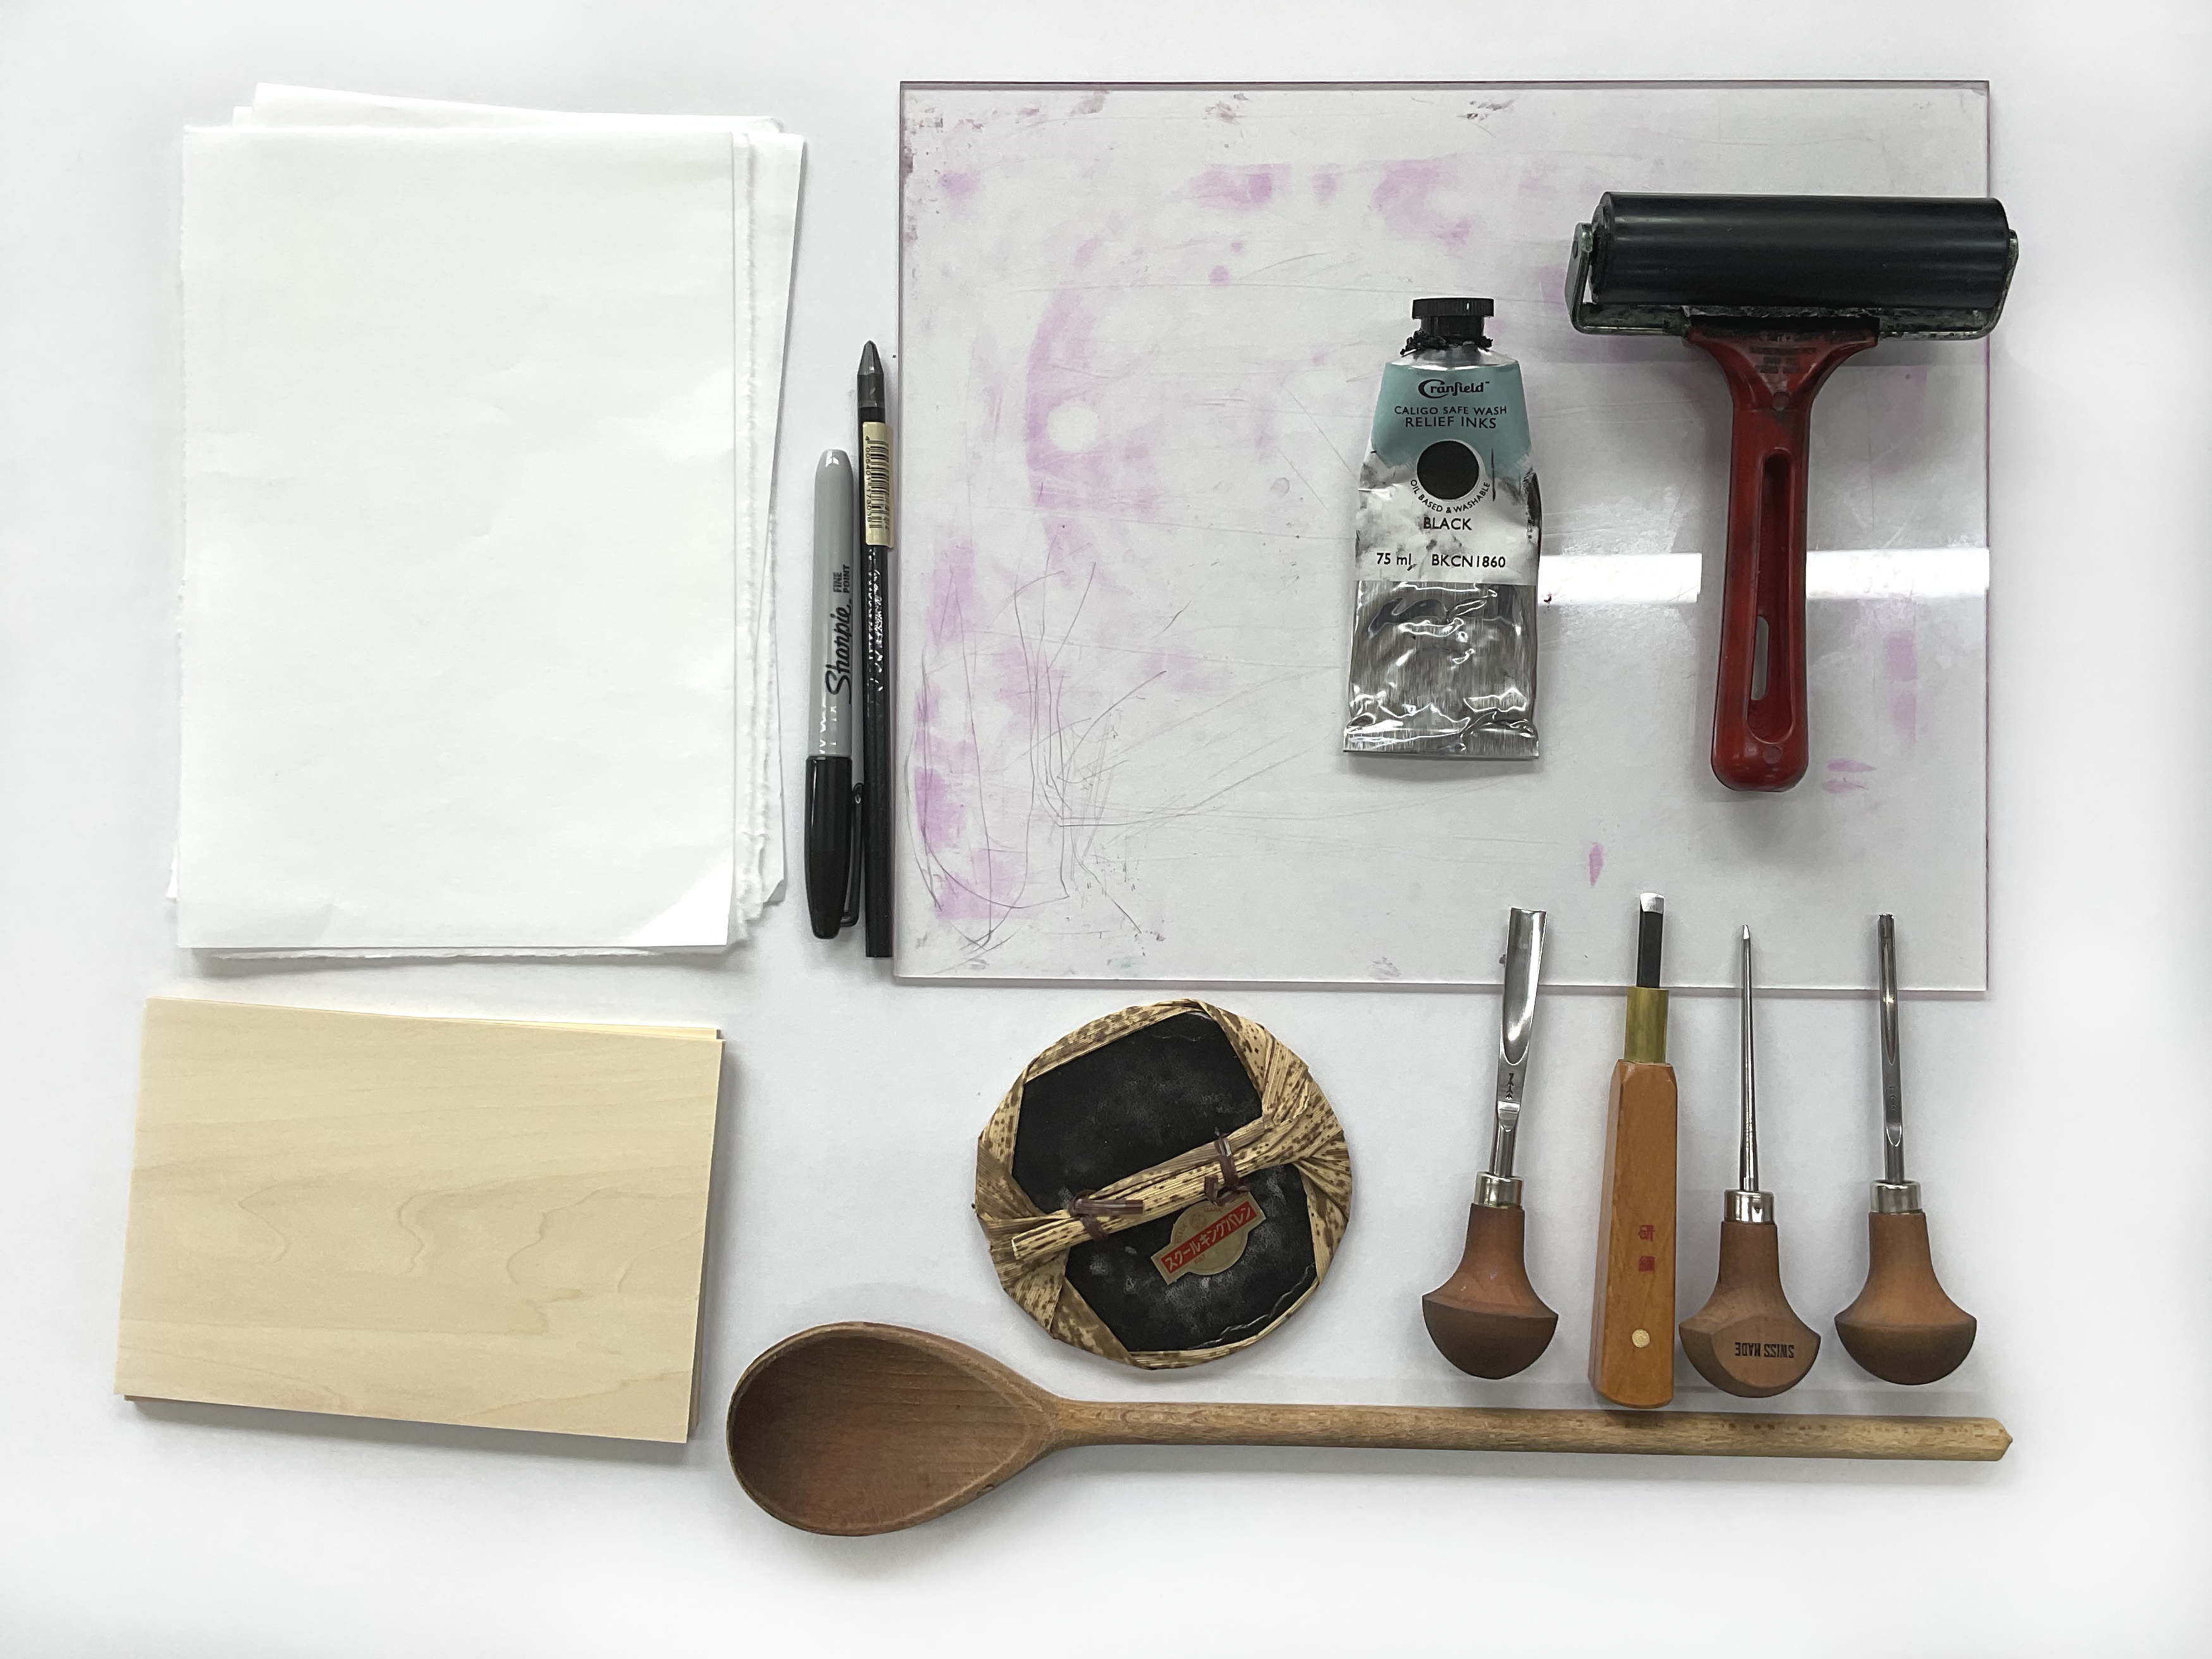
Before you get started you'll need a few things. They aren't that different from the tools you'd need for lino printing, though as wood is ever-so-slightly harder to carve you'll benefit from procuring a sharpener for your cutters.
You'll also need:
- Plywood blocks (Baltic birch, or Japanese ply are both good)
- Ink roller (brayer)
- Carving tools
- Sheet for inking (A piece of perspex, glass, or any flat non absorbent surface).
- A pencil
- A wooden spoon or baren
- Ink - Water-based is fine, but once you get a taste for the process this oil-based ink (which can be cleaned with soap and water) has a nice quality.
- Carbon paper (optional)
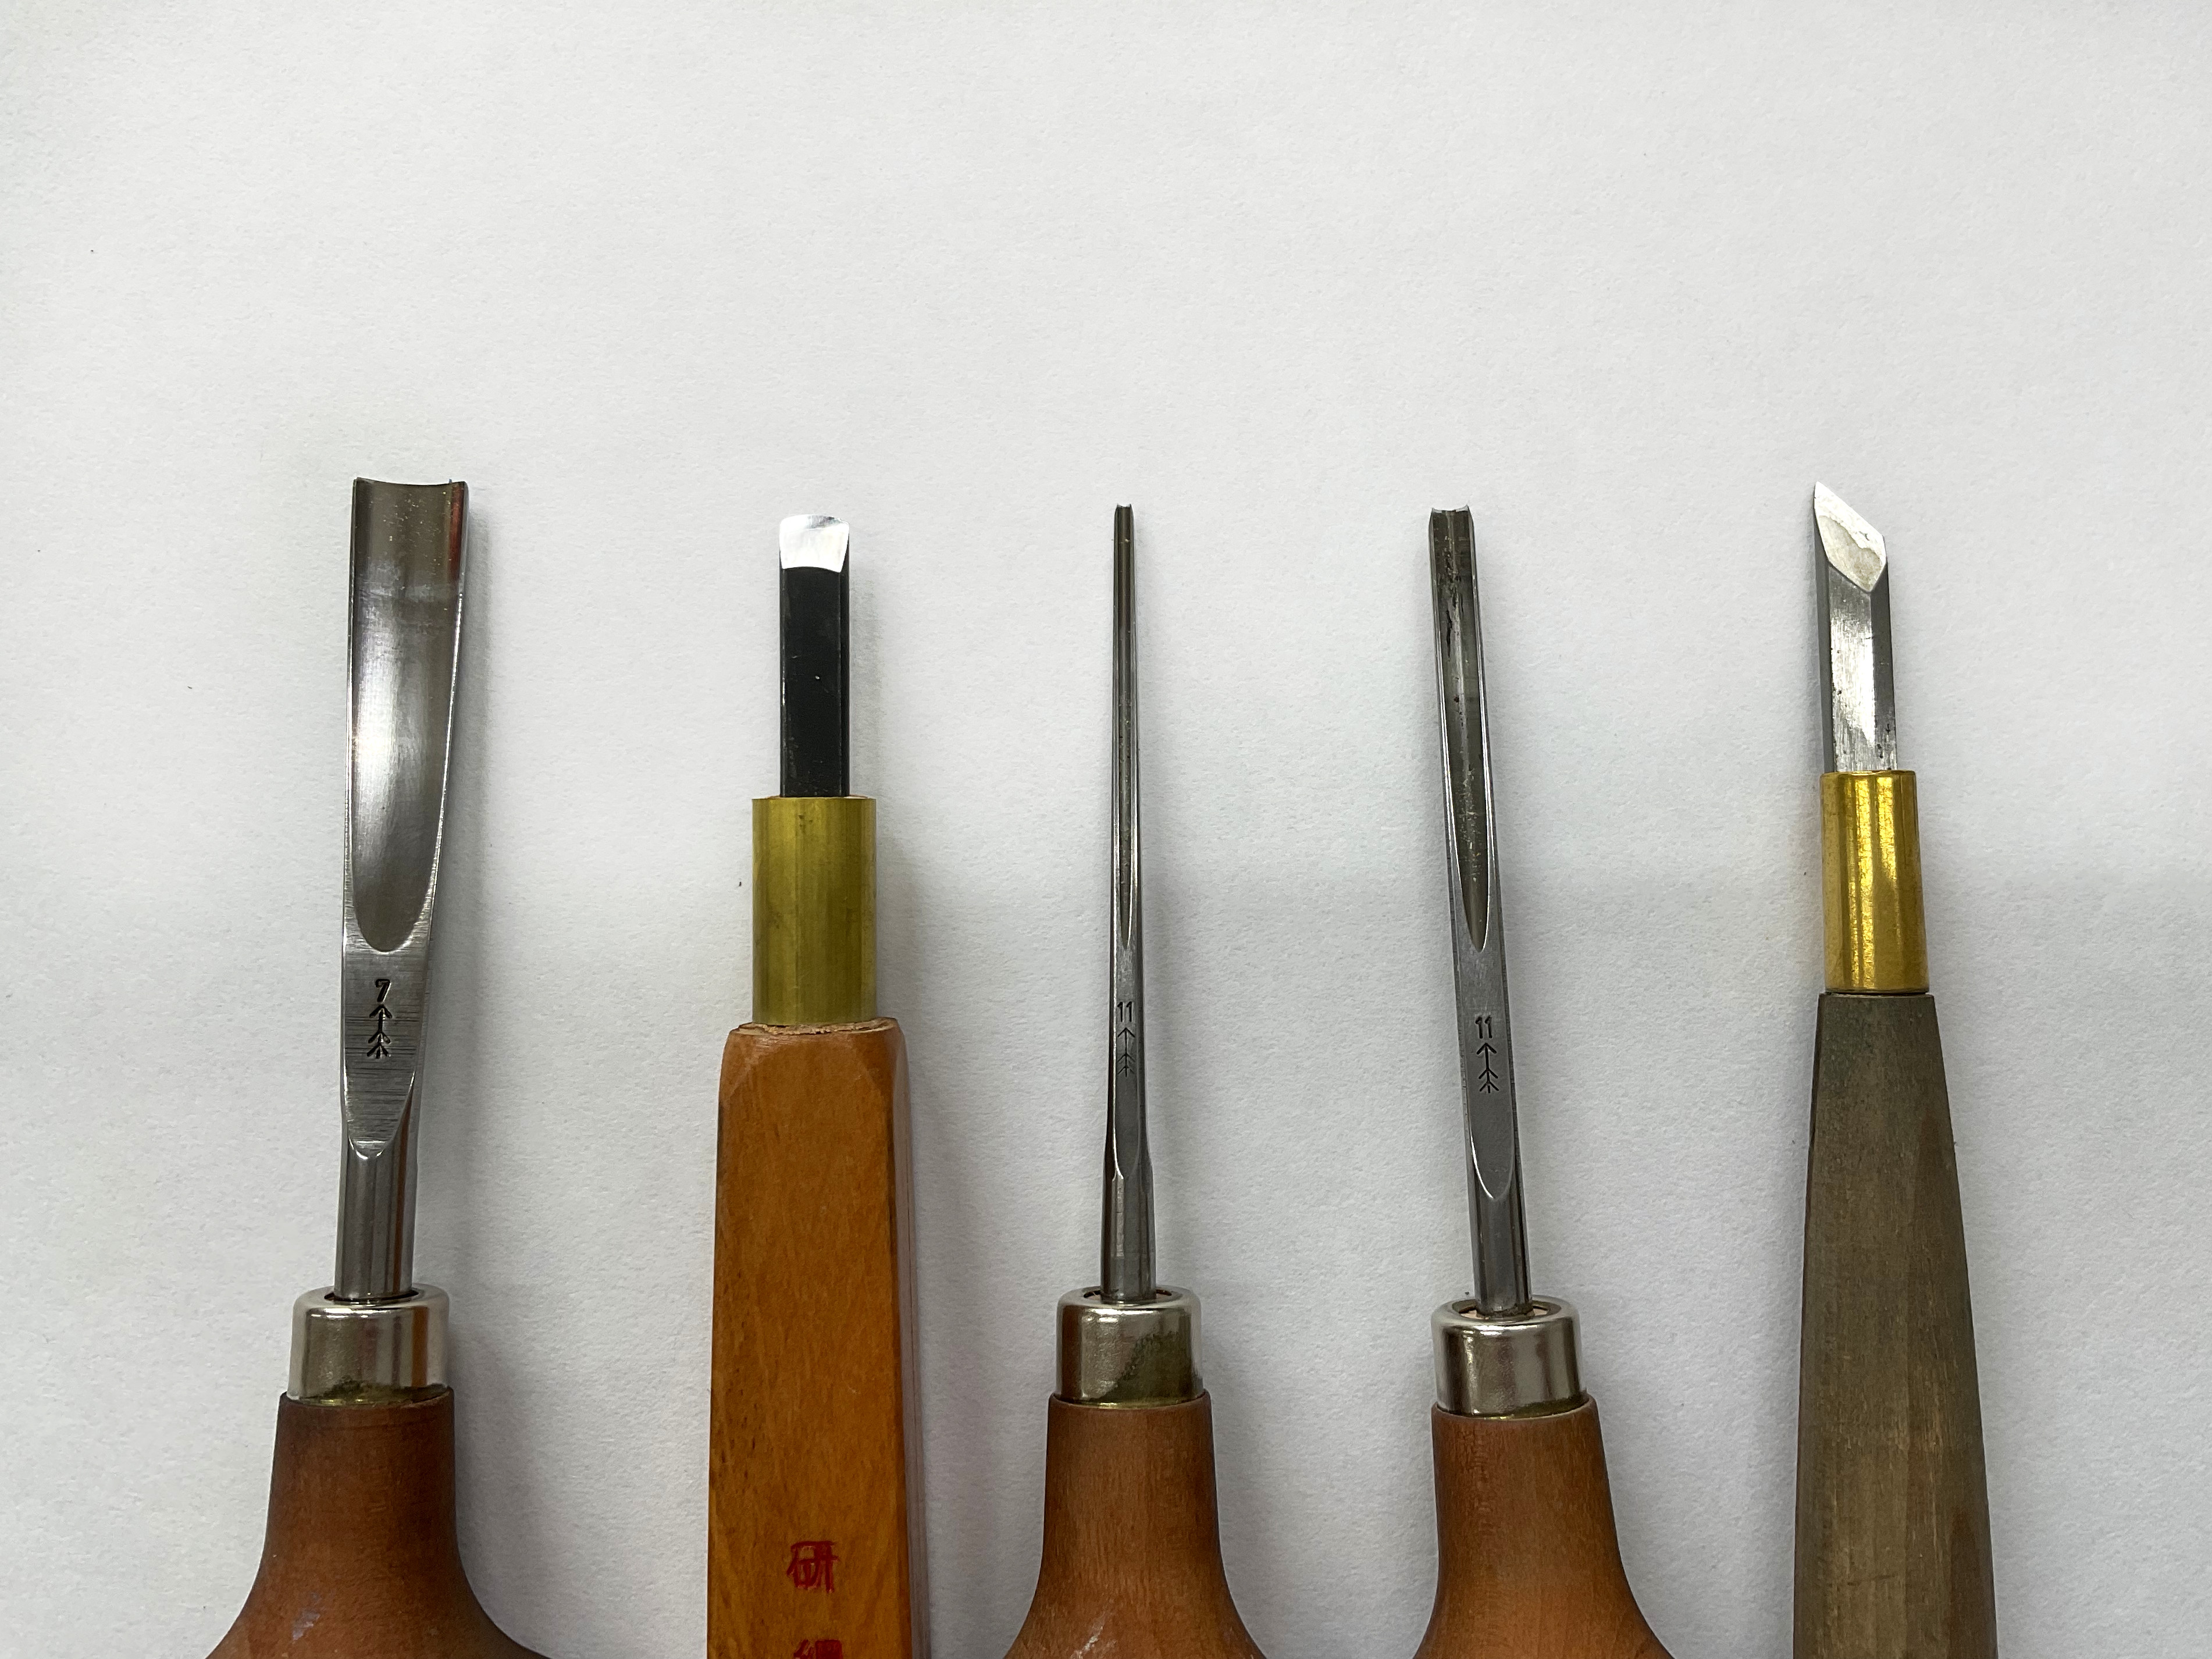
There are numerable cutting tools available ranging from cheap to hugely expensive. Whatever set you get will contain the same variants though - a small V-shaped gouge (good for detail and the initial cuts), small and larger U-shaped gouges good for variants in detail and clearing away sections), and a flat chisel and craft knife for various other jobs.
Get the Creative Bloq Newsletter
Daily design news, reviews, how-tos and more, as picked by the editors.
02. Draw or transfer your image onto the block
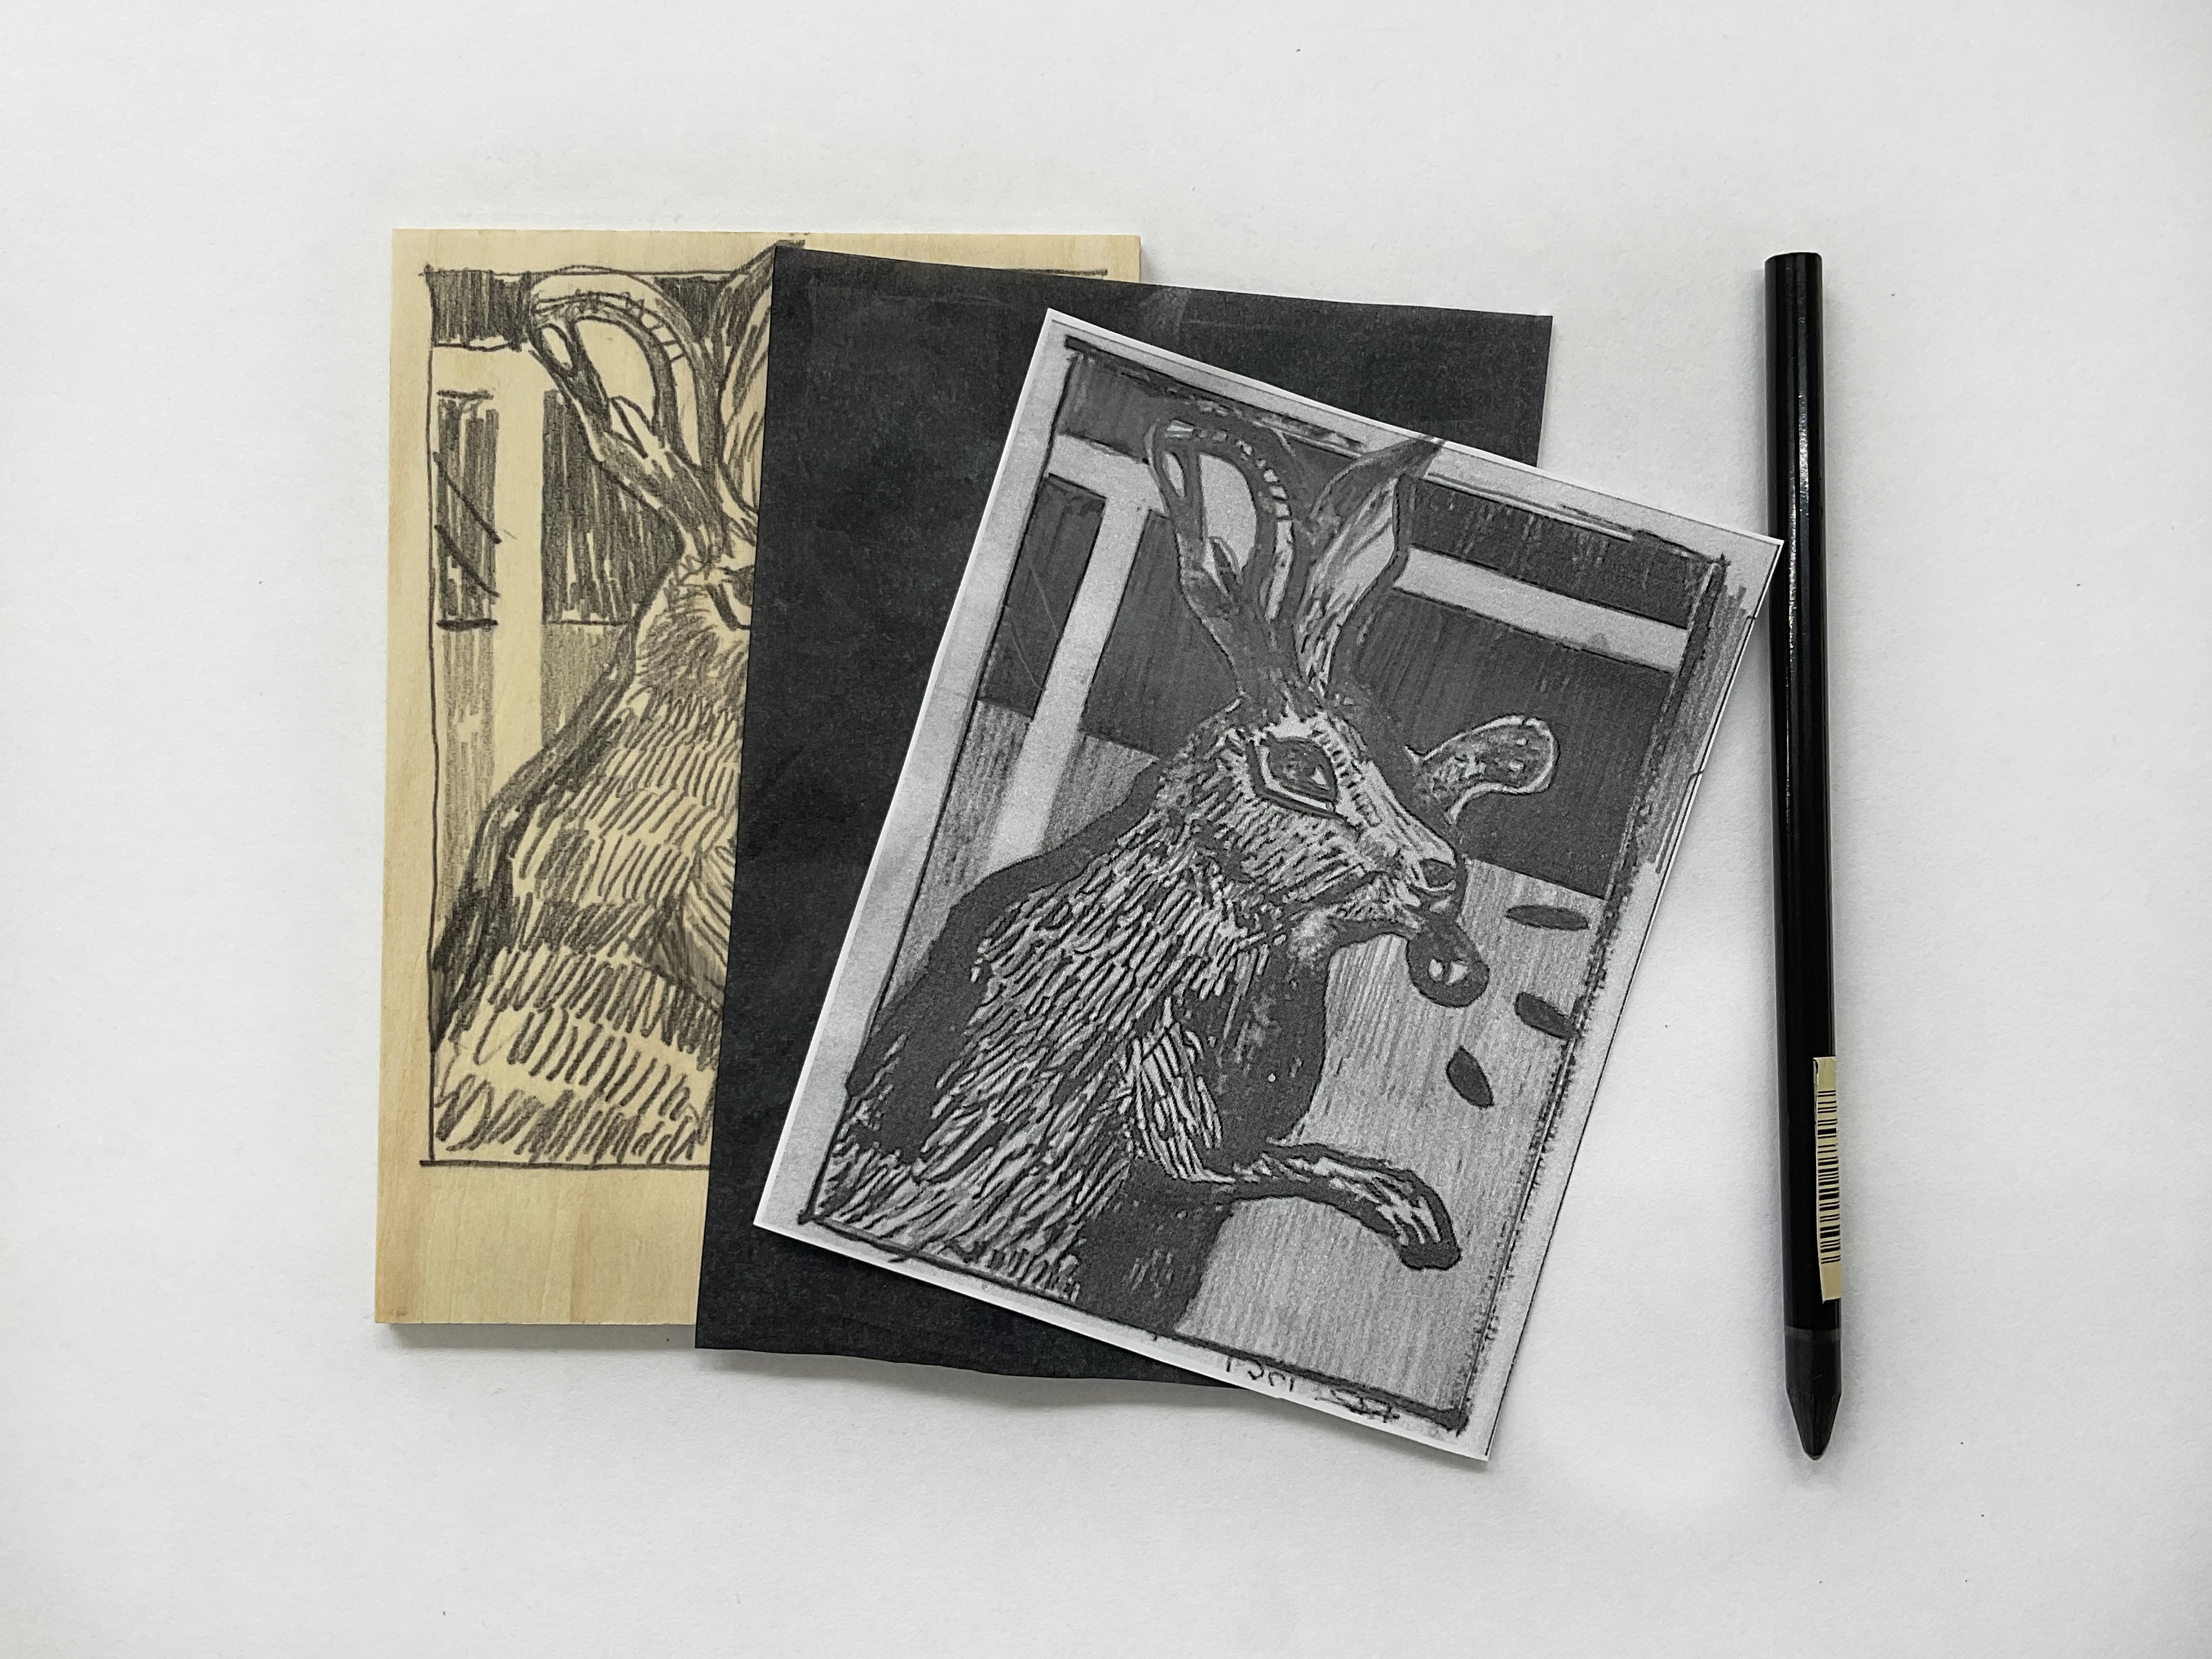
You can draw straight onto the wood, or use a previous drawing and transfer it onto the block using carbon paper, as illustrated above. It can be as simple or as detailed as you like, though the simpler the better when starting out, so you can get a feel for the process.
Note that your image will be reversed in the final print, so adjust accordingly.
03. Prepare the block for carving
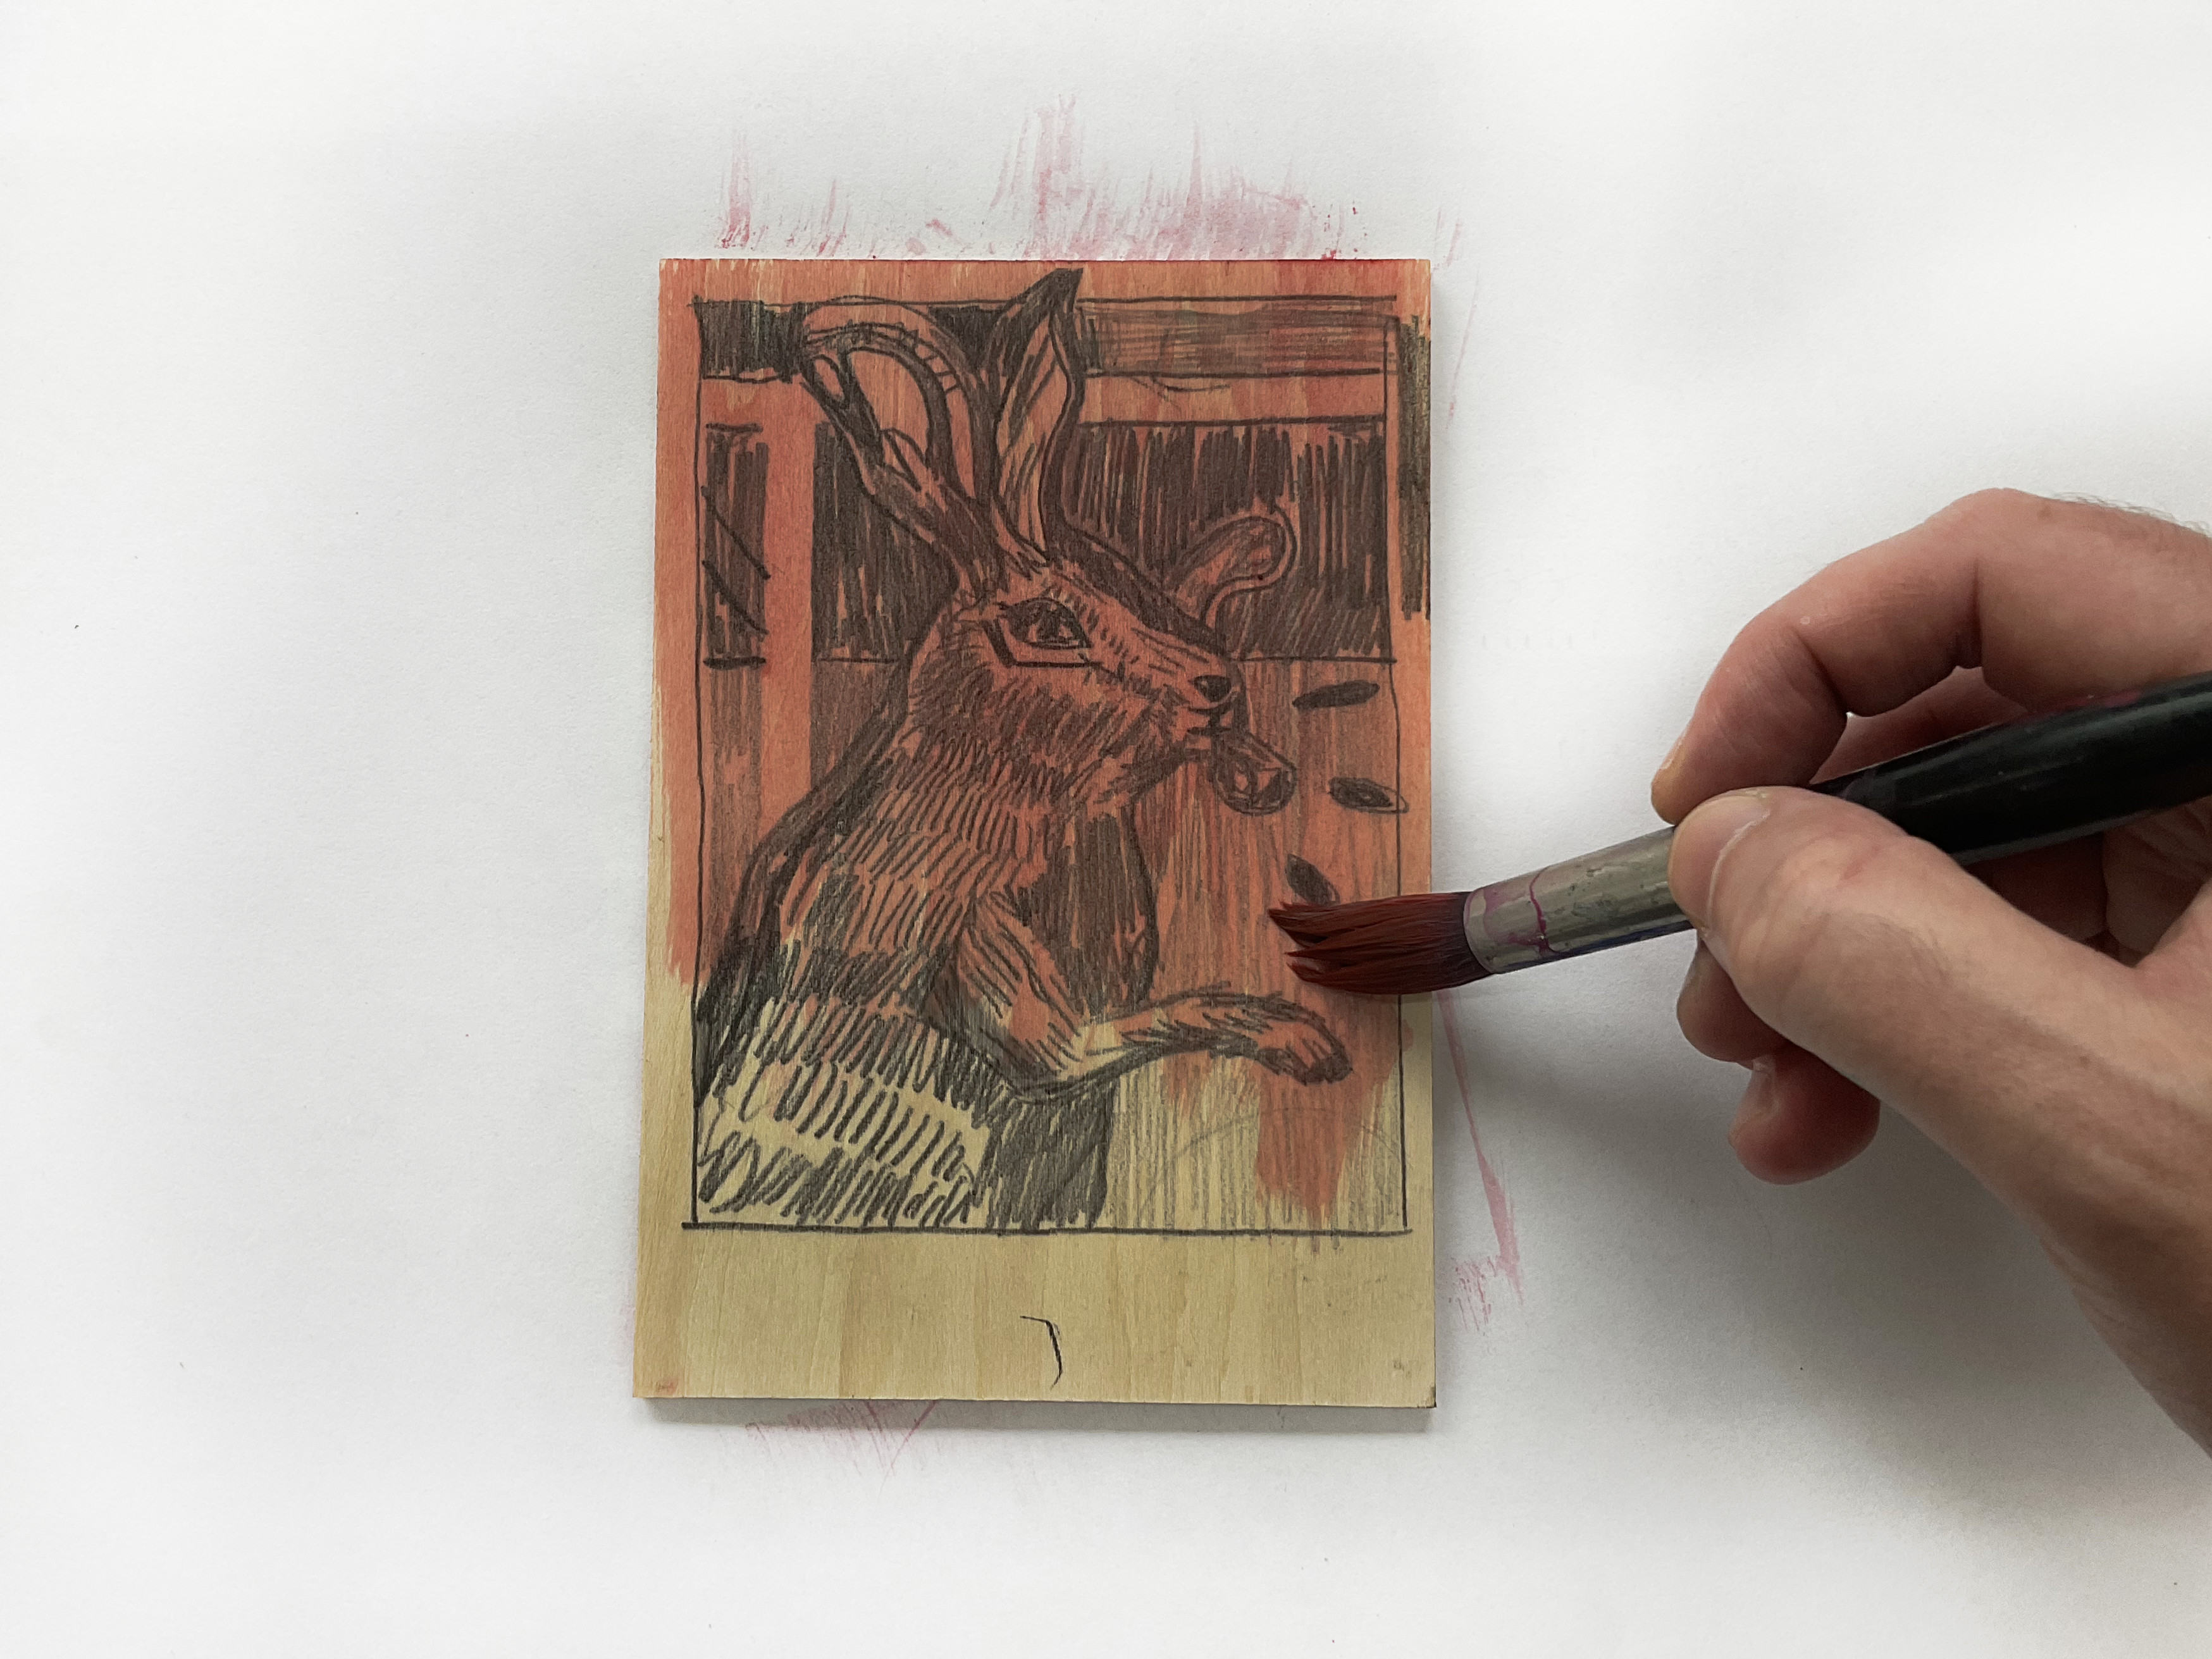
It's a good idea to tint the block with some coloured drawing ink, or watered down acrylic paint, so when you start carving it will be easier to see what the final print will look like.
04. Have a practice
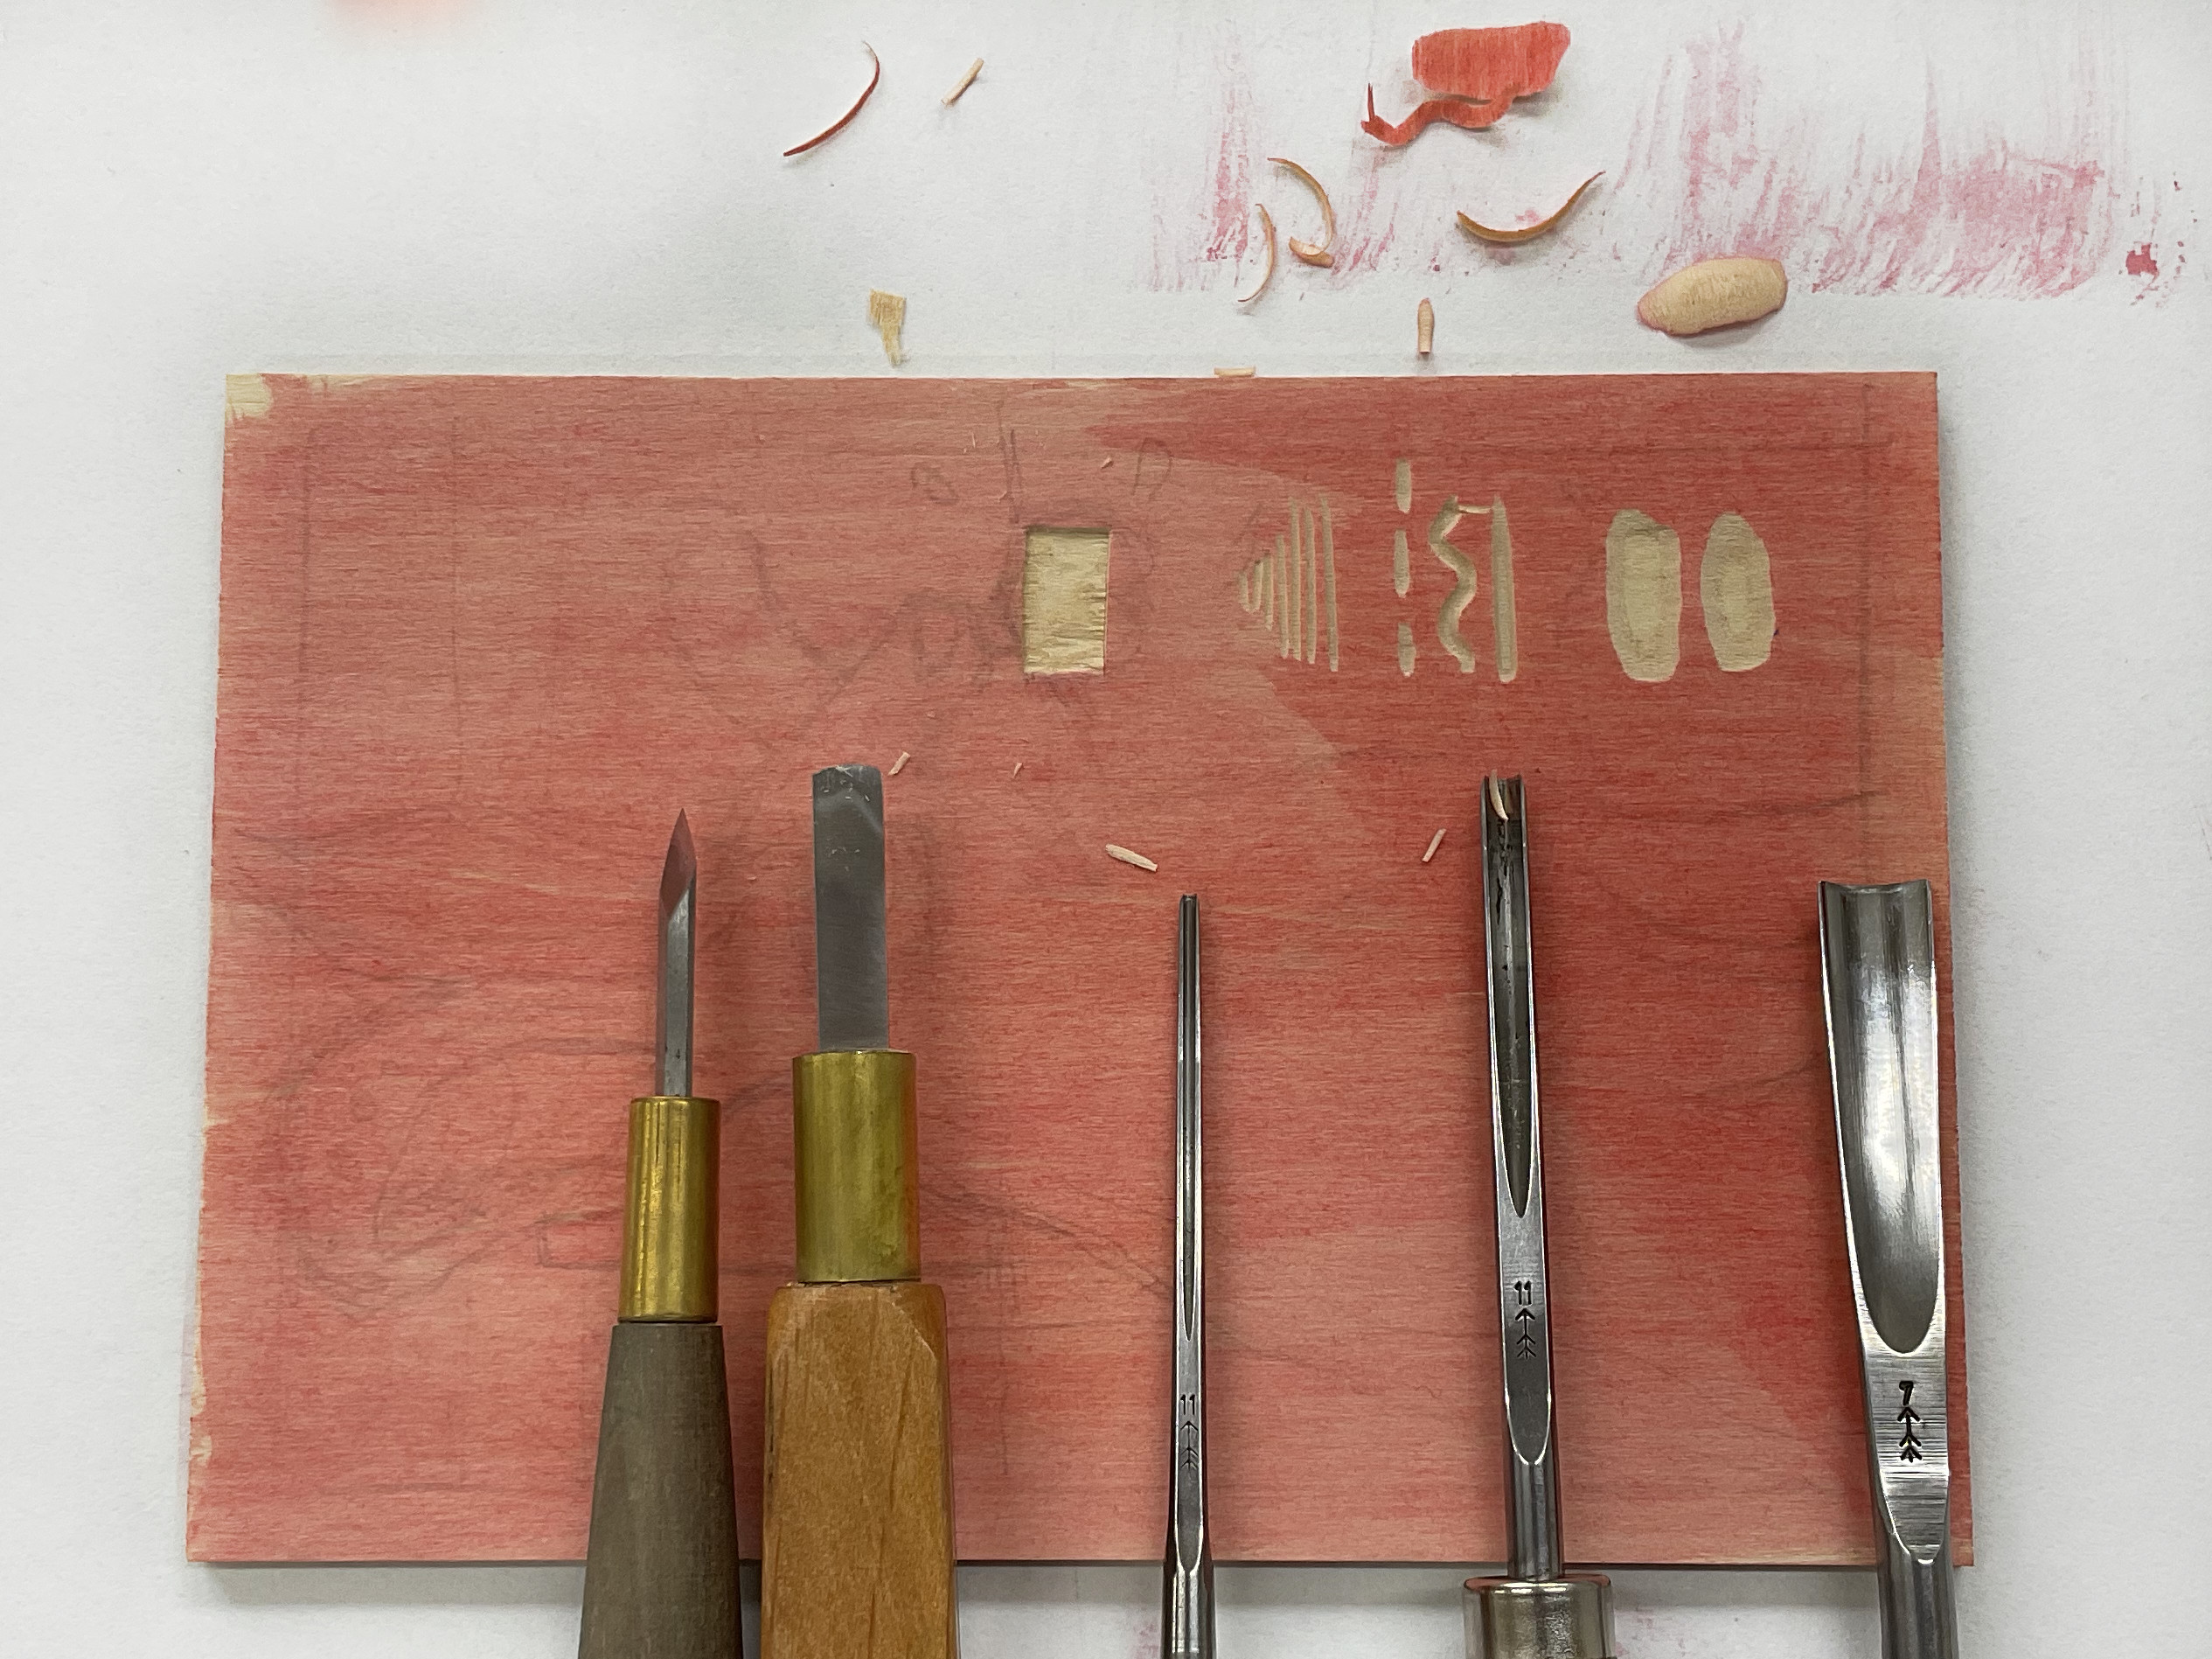
Paint a section of the back of the block, too. This will give you the chance to play around with the tools and see what kind of marks you can make.
It's also a good idea to sit the block on something non-slip, so it doesn't move around. It's a good safety measure too. The tools are going to be sharp, so it's best to keep everything steady.
Hold the cutters with the handle firmly in the palm of your hand. Insert the sharp end into the wood around a 30 degree angle and push forwards.
Notice the way the V and U gouges have different cutting effects, from fine lines to thicker ones. These will be your main shapes. The flat chisel is for clearing larger areas, and the 'noise' left over from your initial test prints (see below).
Always cut away from you. Do not under any circumstances be tempted to turn and cut towards yourself - always turn the block instead and cut in the same direction.
04. Start carving
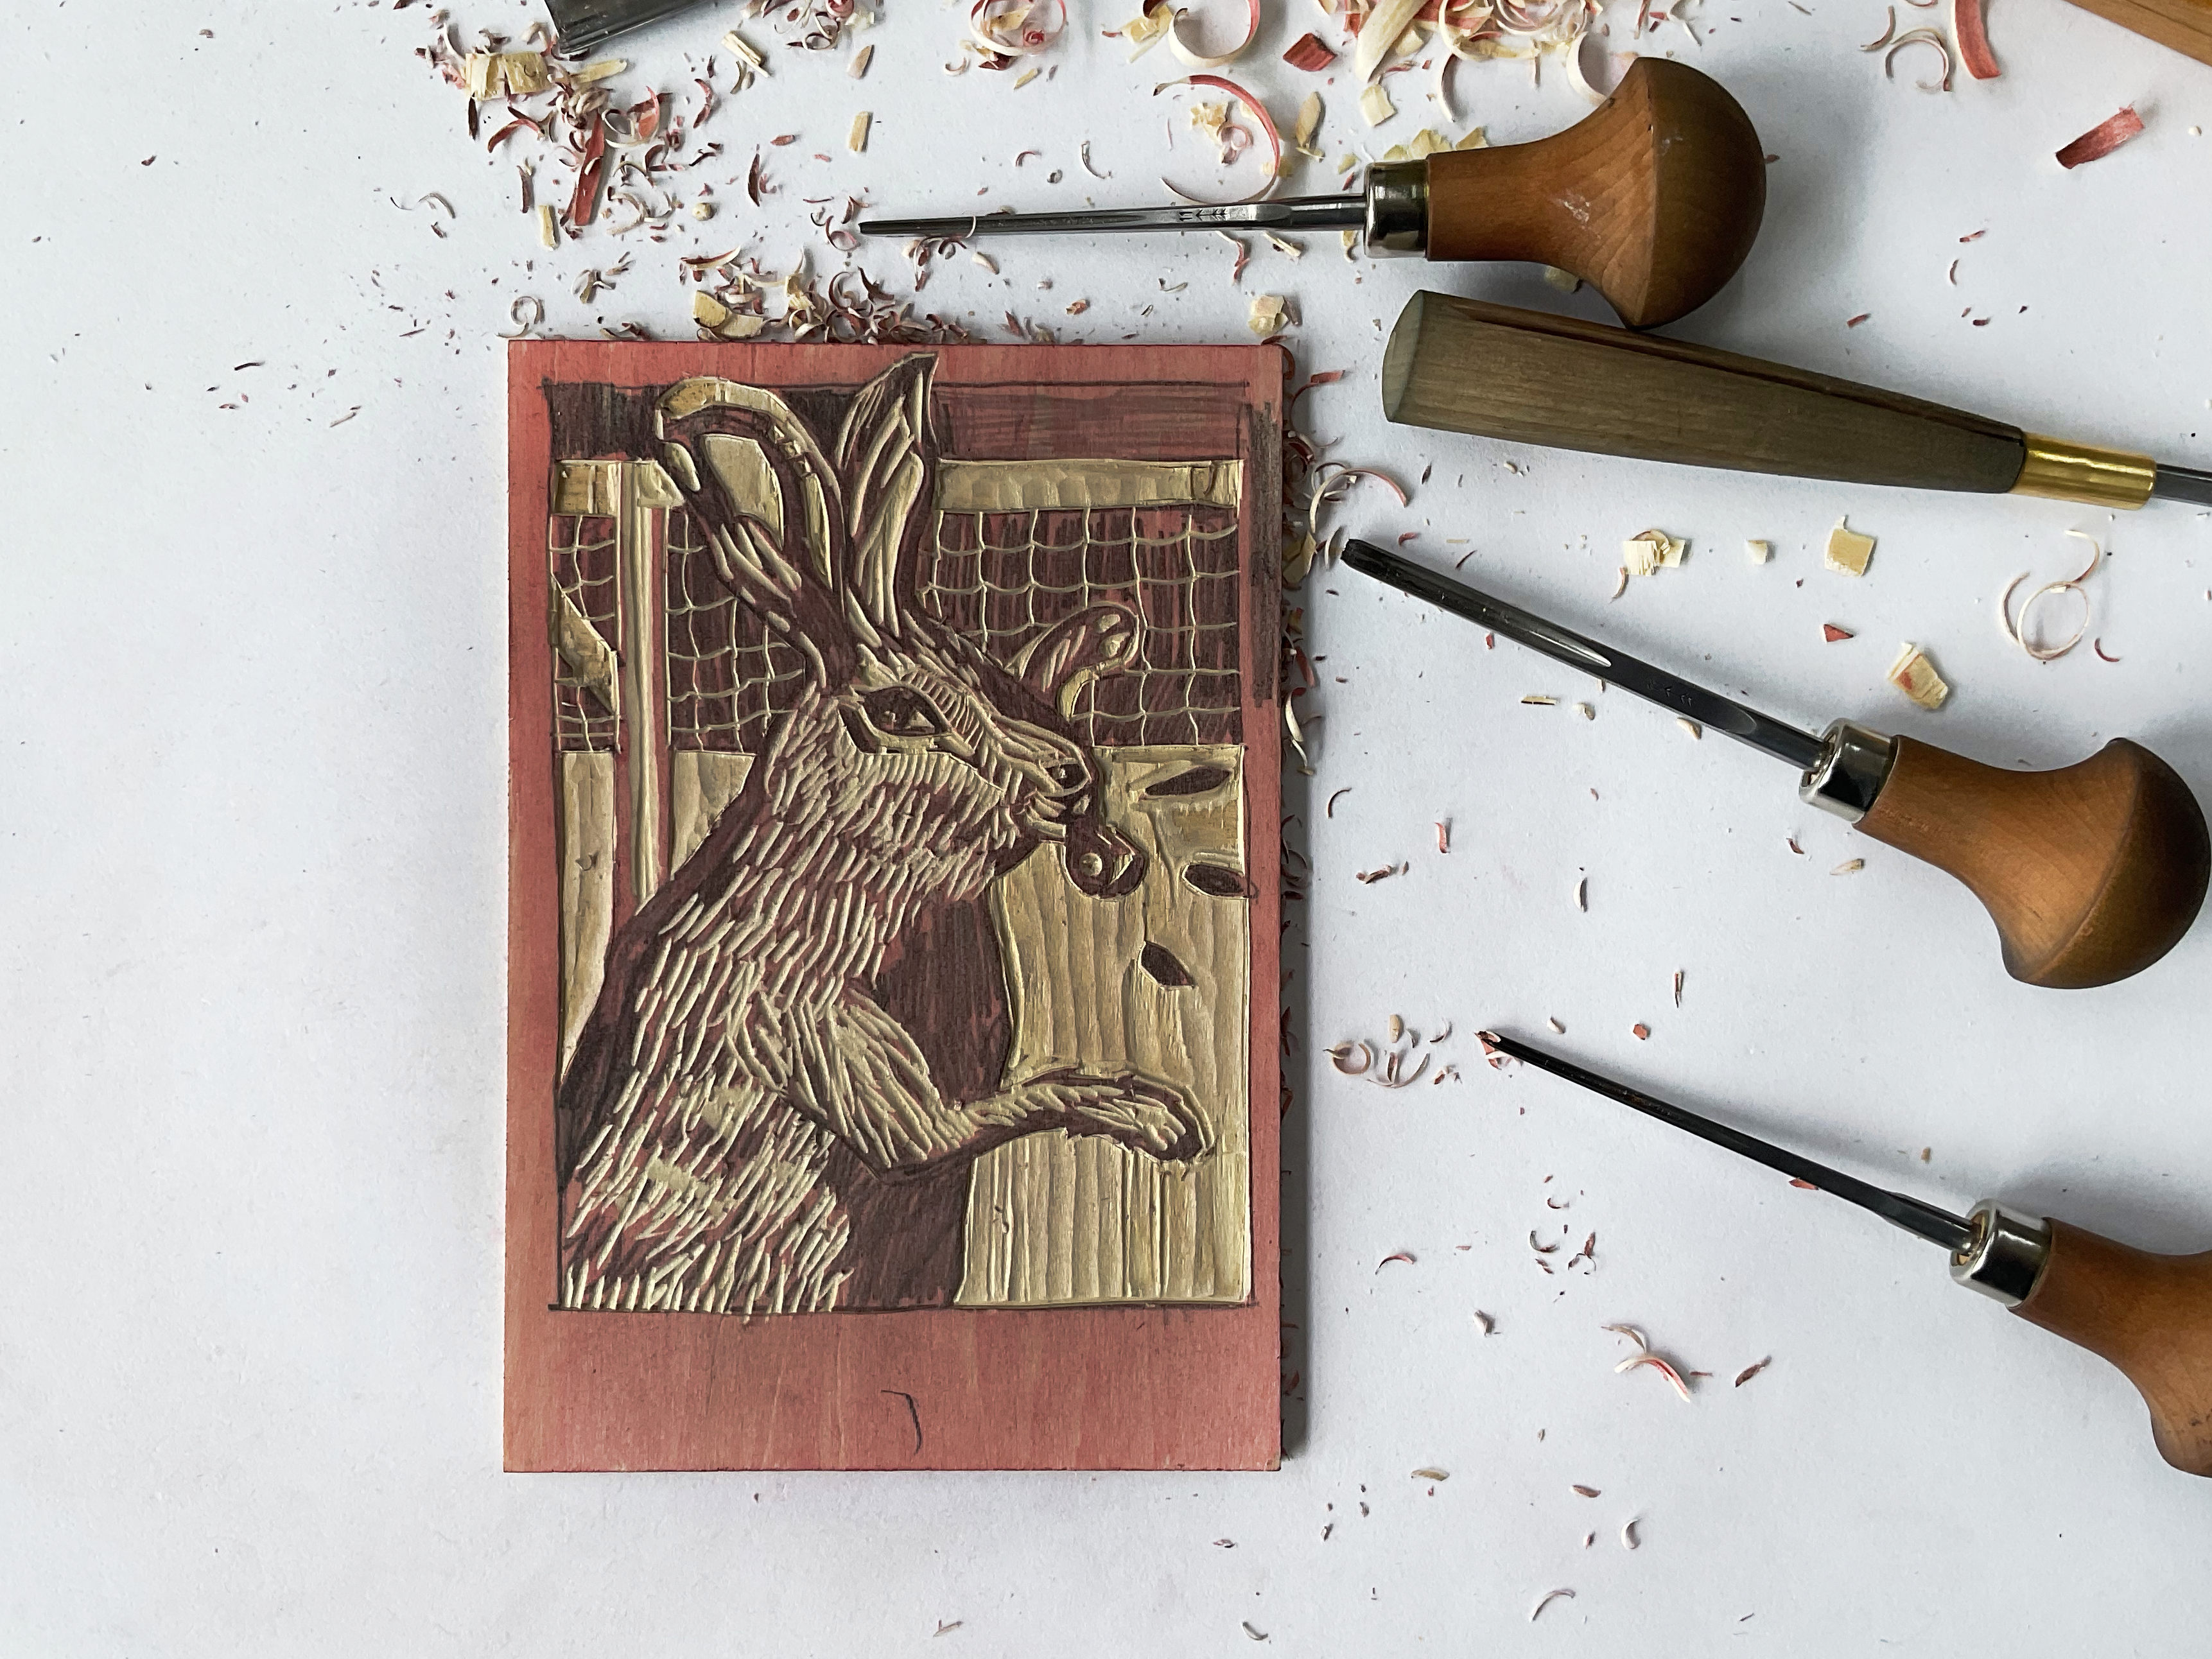
A small V-shaped gouge is usually the best place to start. It's great for carving out initial shapes or doing fine-line work, then using the larger tools for clearing away larger areas.
Remember, what you are doing is leaving the drawing part and removing what will be just paper in the final print (known as 'negative space' in the world of arts and crafts).
05. Roll out your ink
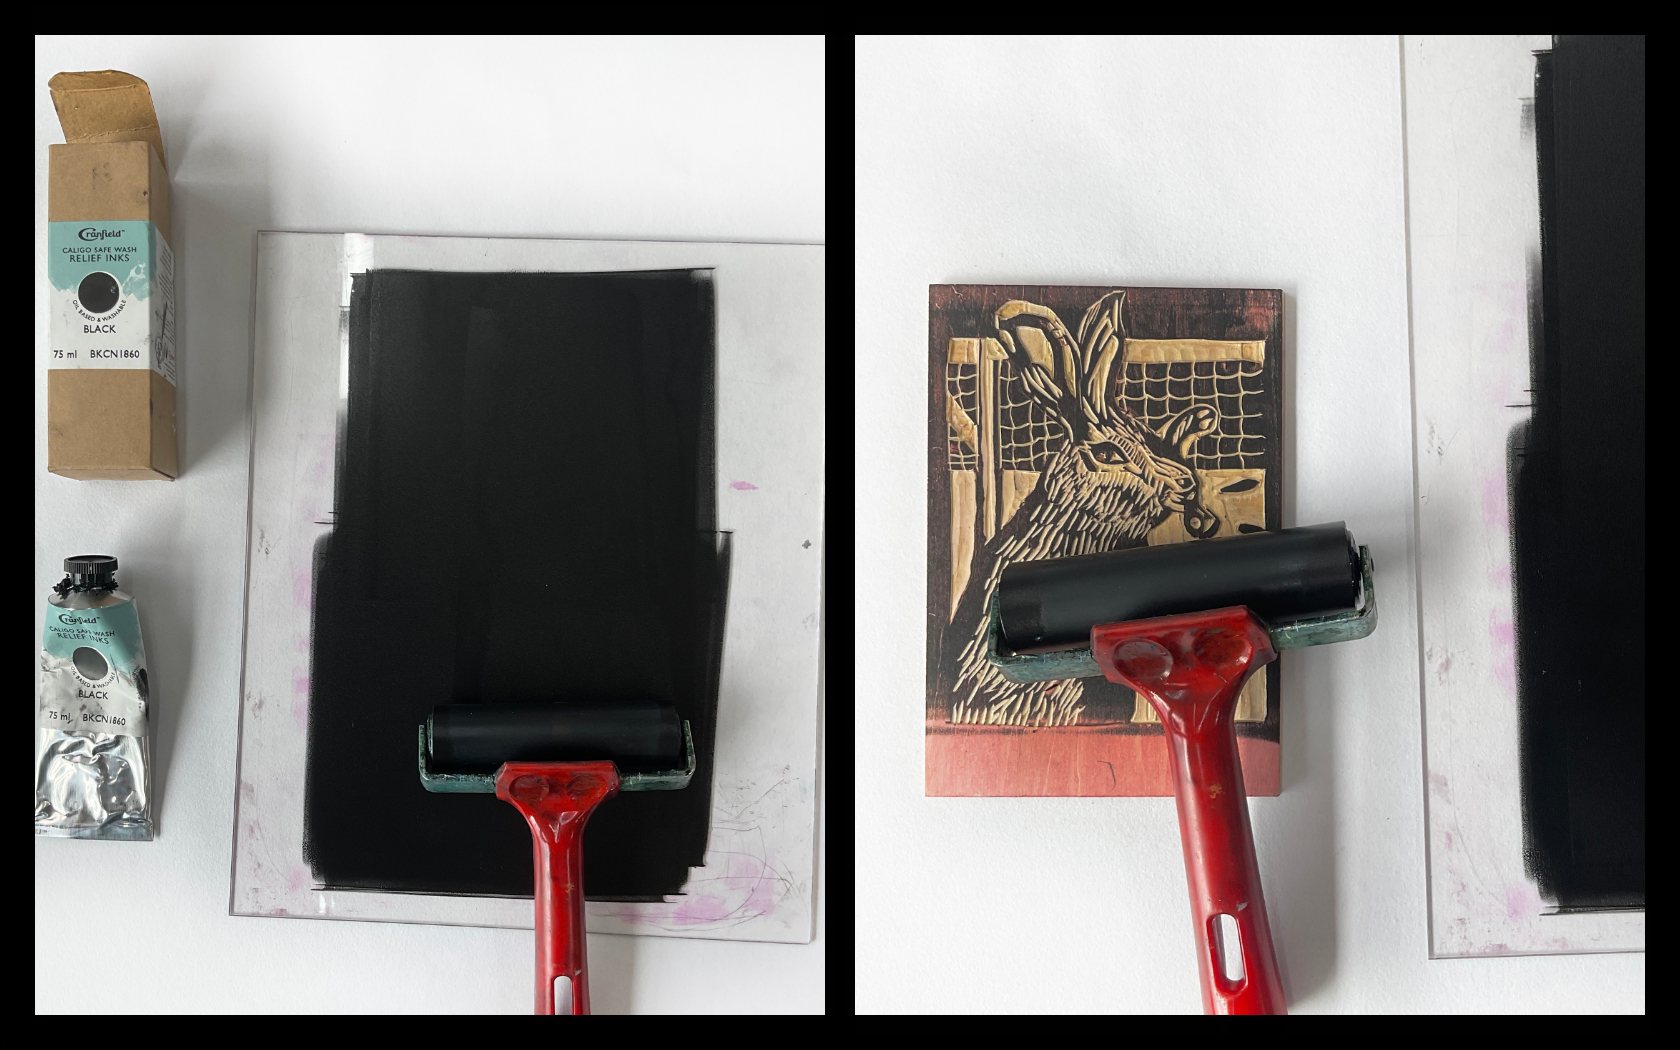
You'll only need a small amount of ink, a little goes a long way. Use the roller to spread out the ink on whatever surface you're using, perhaps plastic or glass.
You want evenness, so keep rolling the ink using a forward and backward motion until you've got a good covering. If you've got too much ink the texture of it will be sticky and almost like orange skin with lots of dimples.
Keep rolling the ink out if this is the case. You want the faintest whisper of a noise as you roll, and a smooth almost satin surface. Then you're ready to ink your carved block.
You'll start to get a sense of what your print will look like now, as you begin covering your block with the inked roller. Don't be too heavy handed, and try to cover all the remaining raised sections of your artwork evenly. Keep topping up the roller until you think you've got an even covering. Doing this in lots of thin layers is better than putting too much ink on in one go.
06. Prepare to print
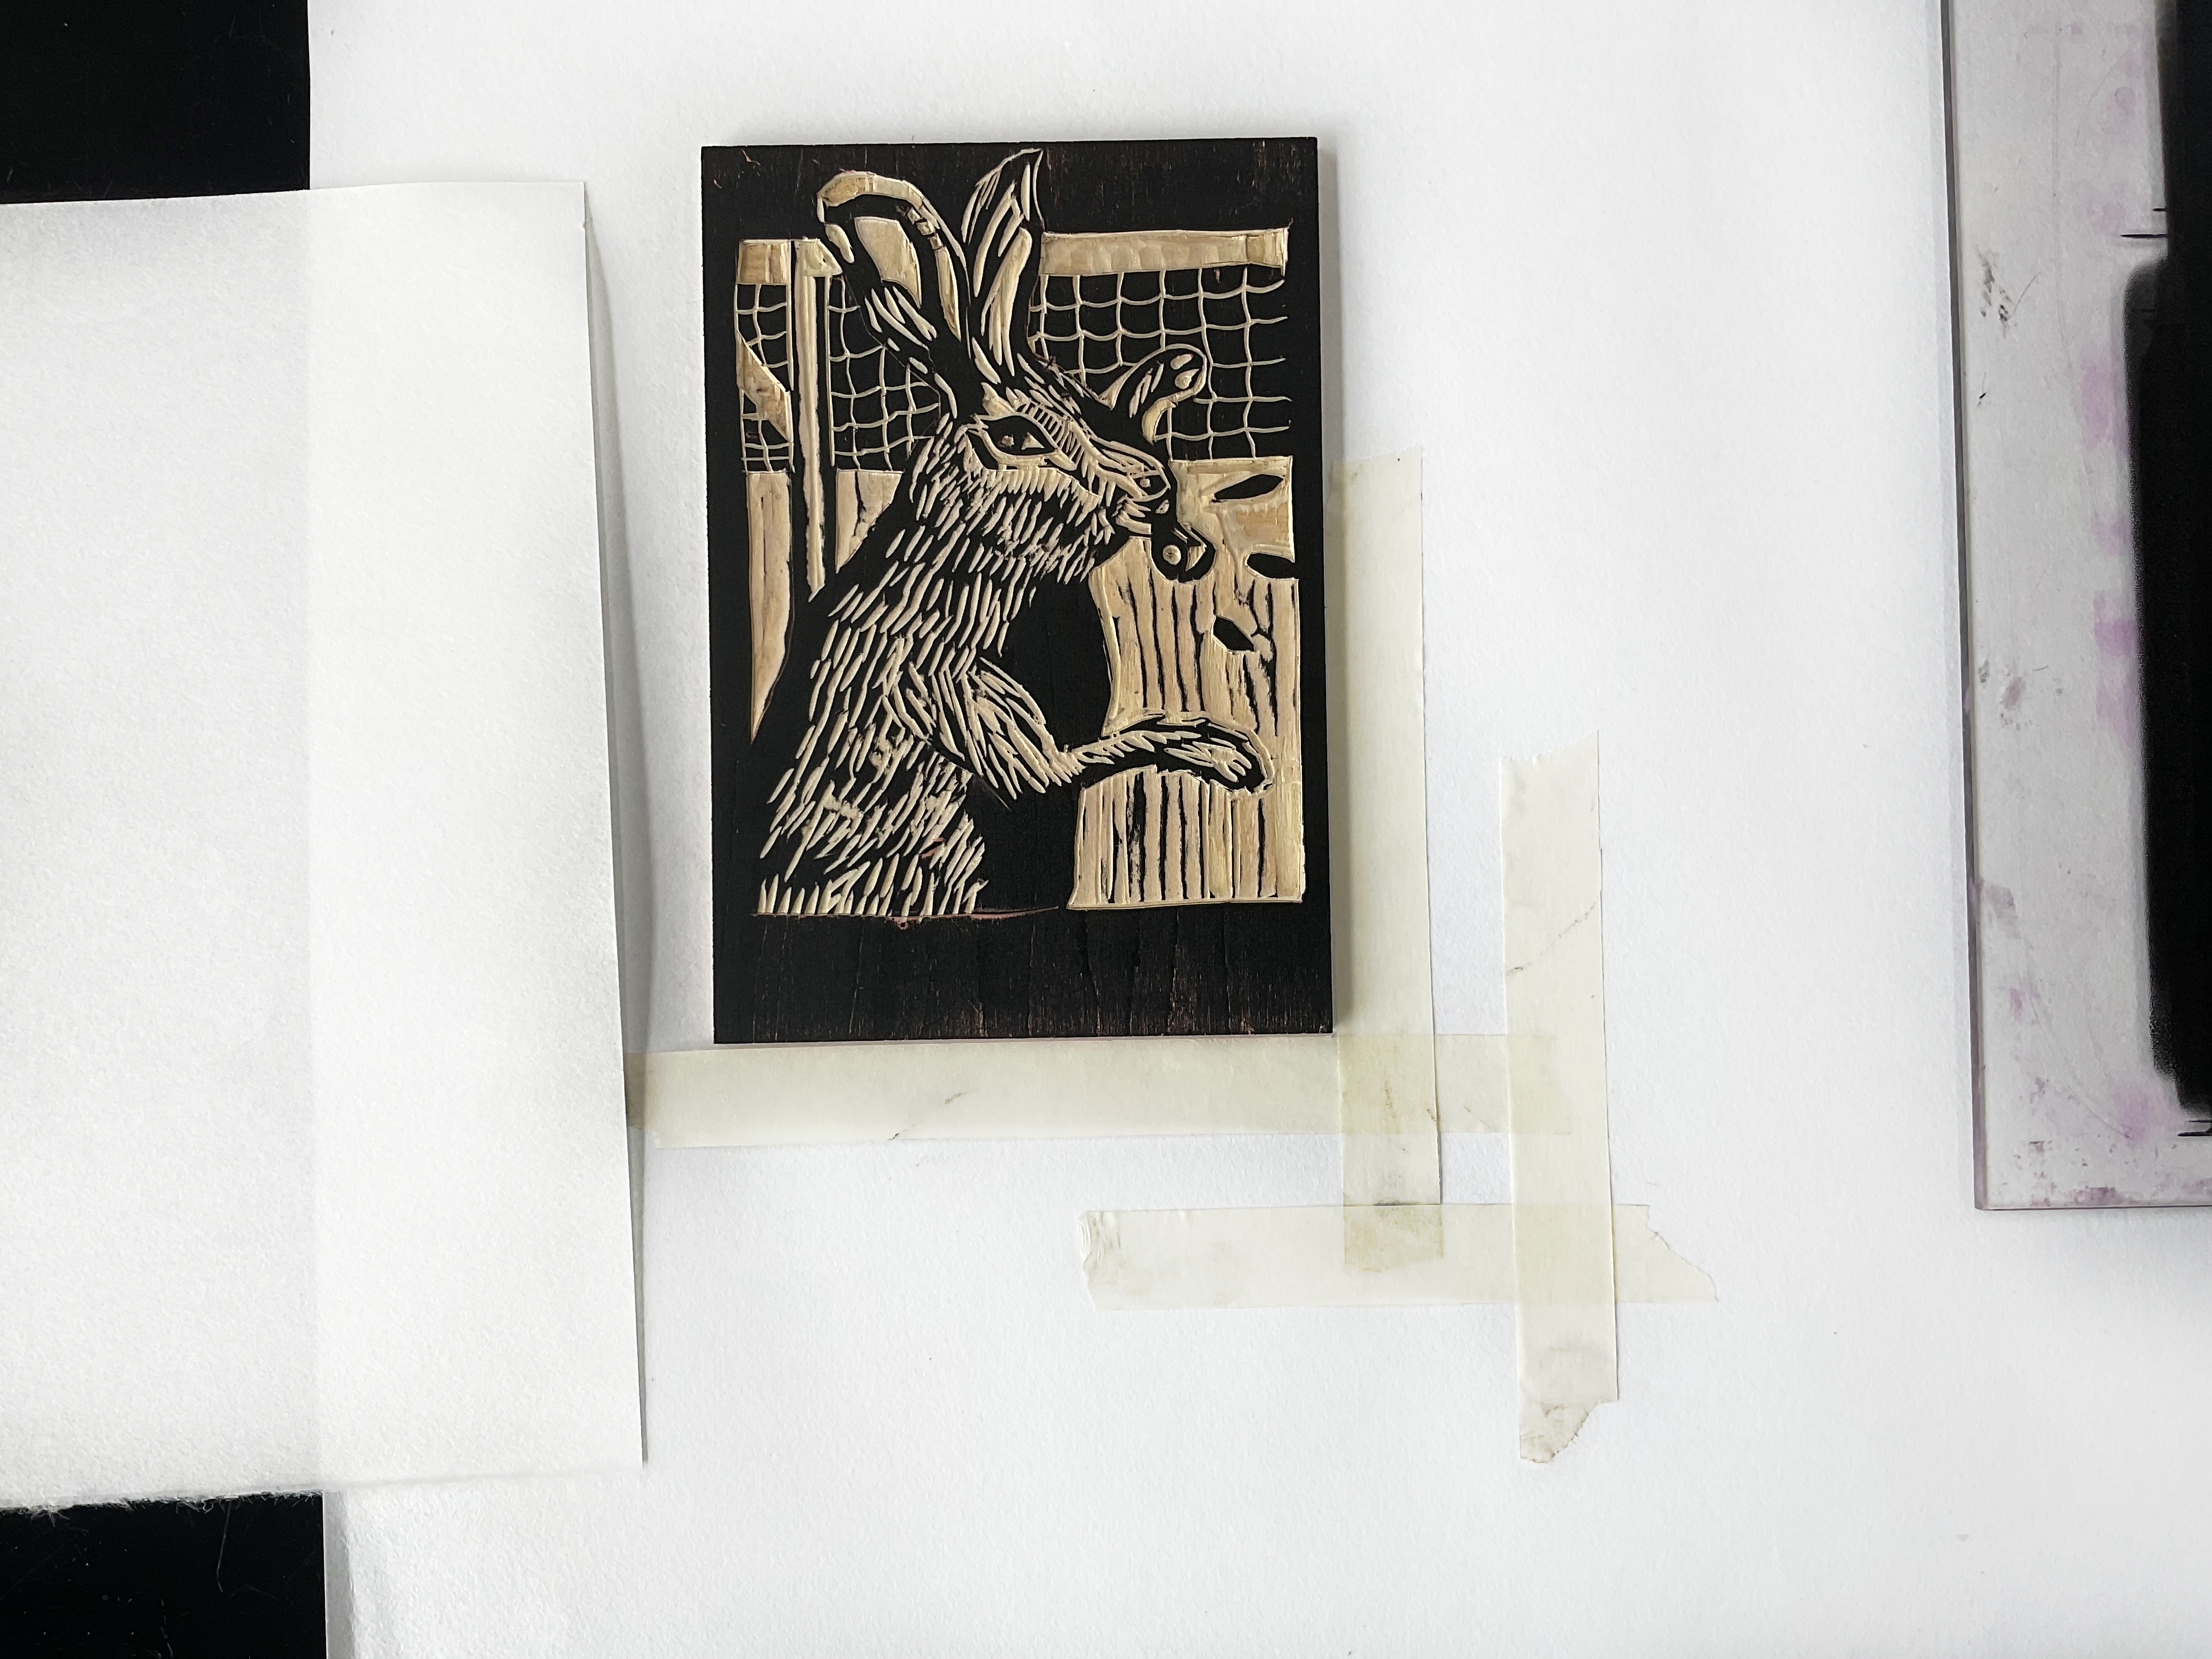
Now that your block is inked get some paper (thin cartridge paper is fine - or news print is good for practising).
If you want the image to be straight every time, use some tape to mark out where to place the block, and the paper.
Place the paper on the raised inked surface of the block, and smooth it down with your hands.
07. Make the print
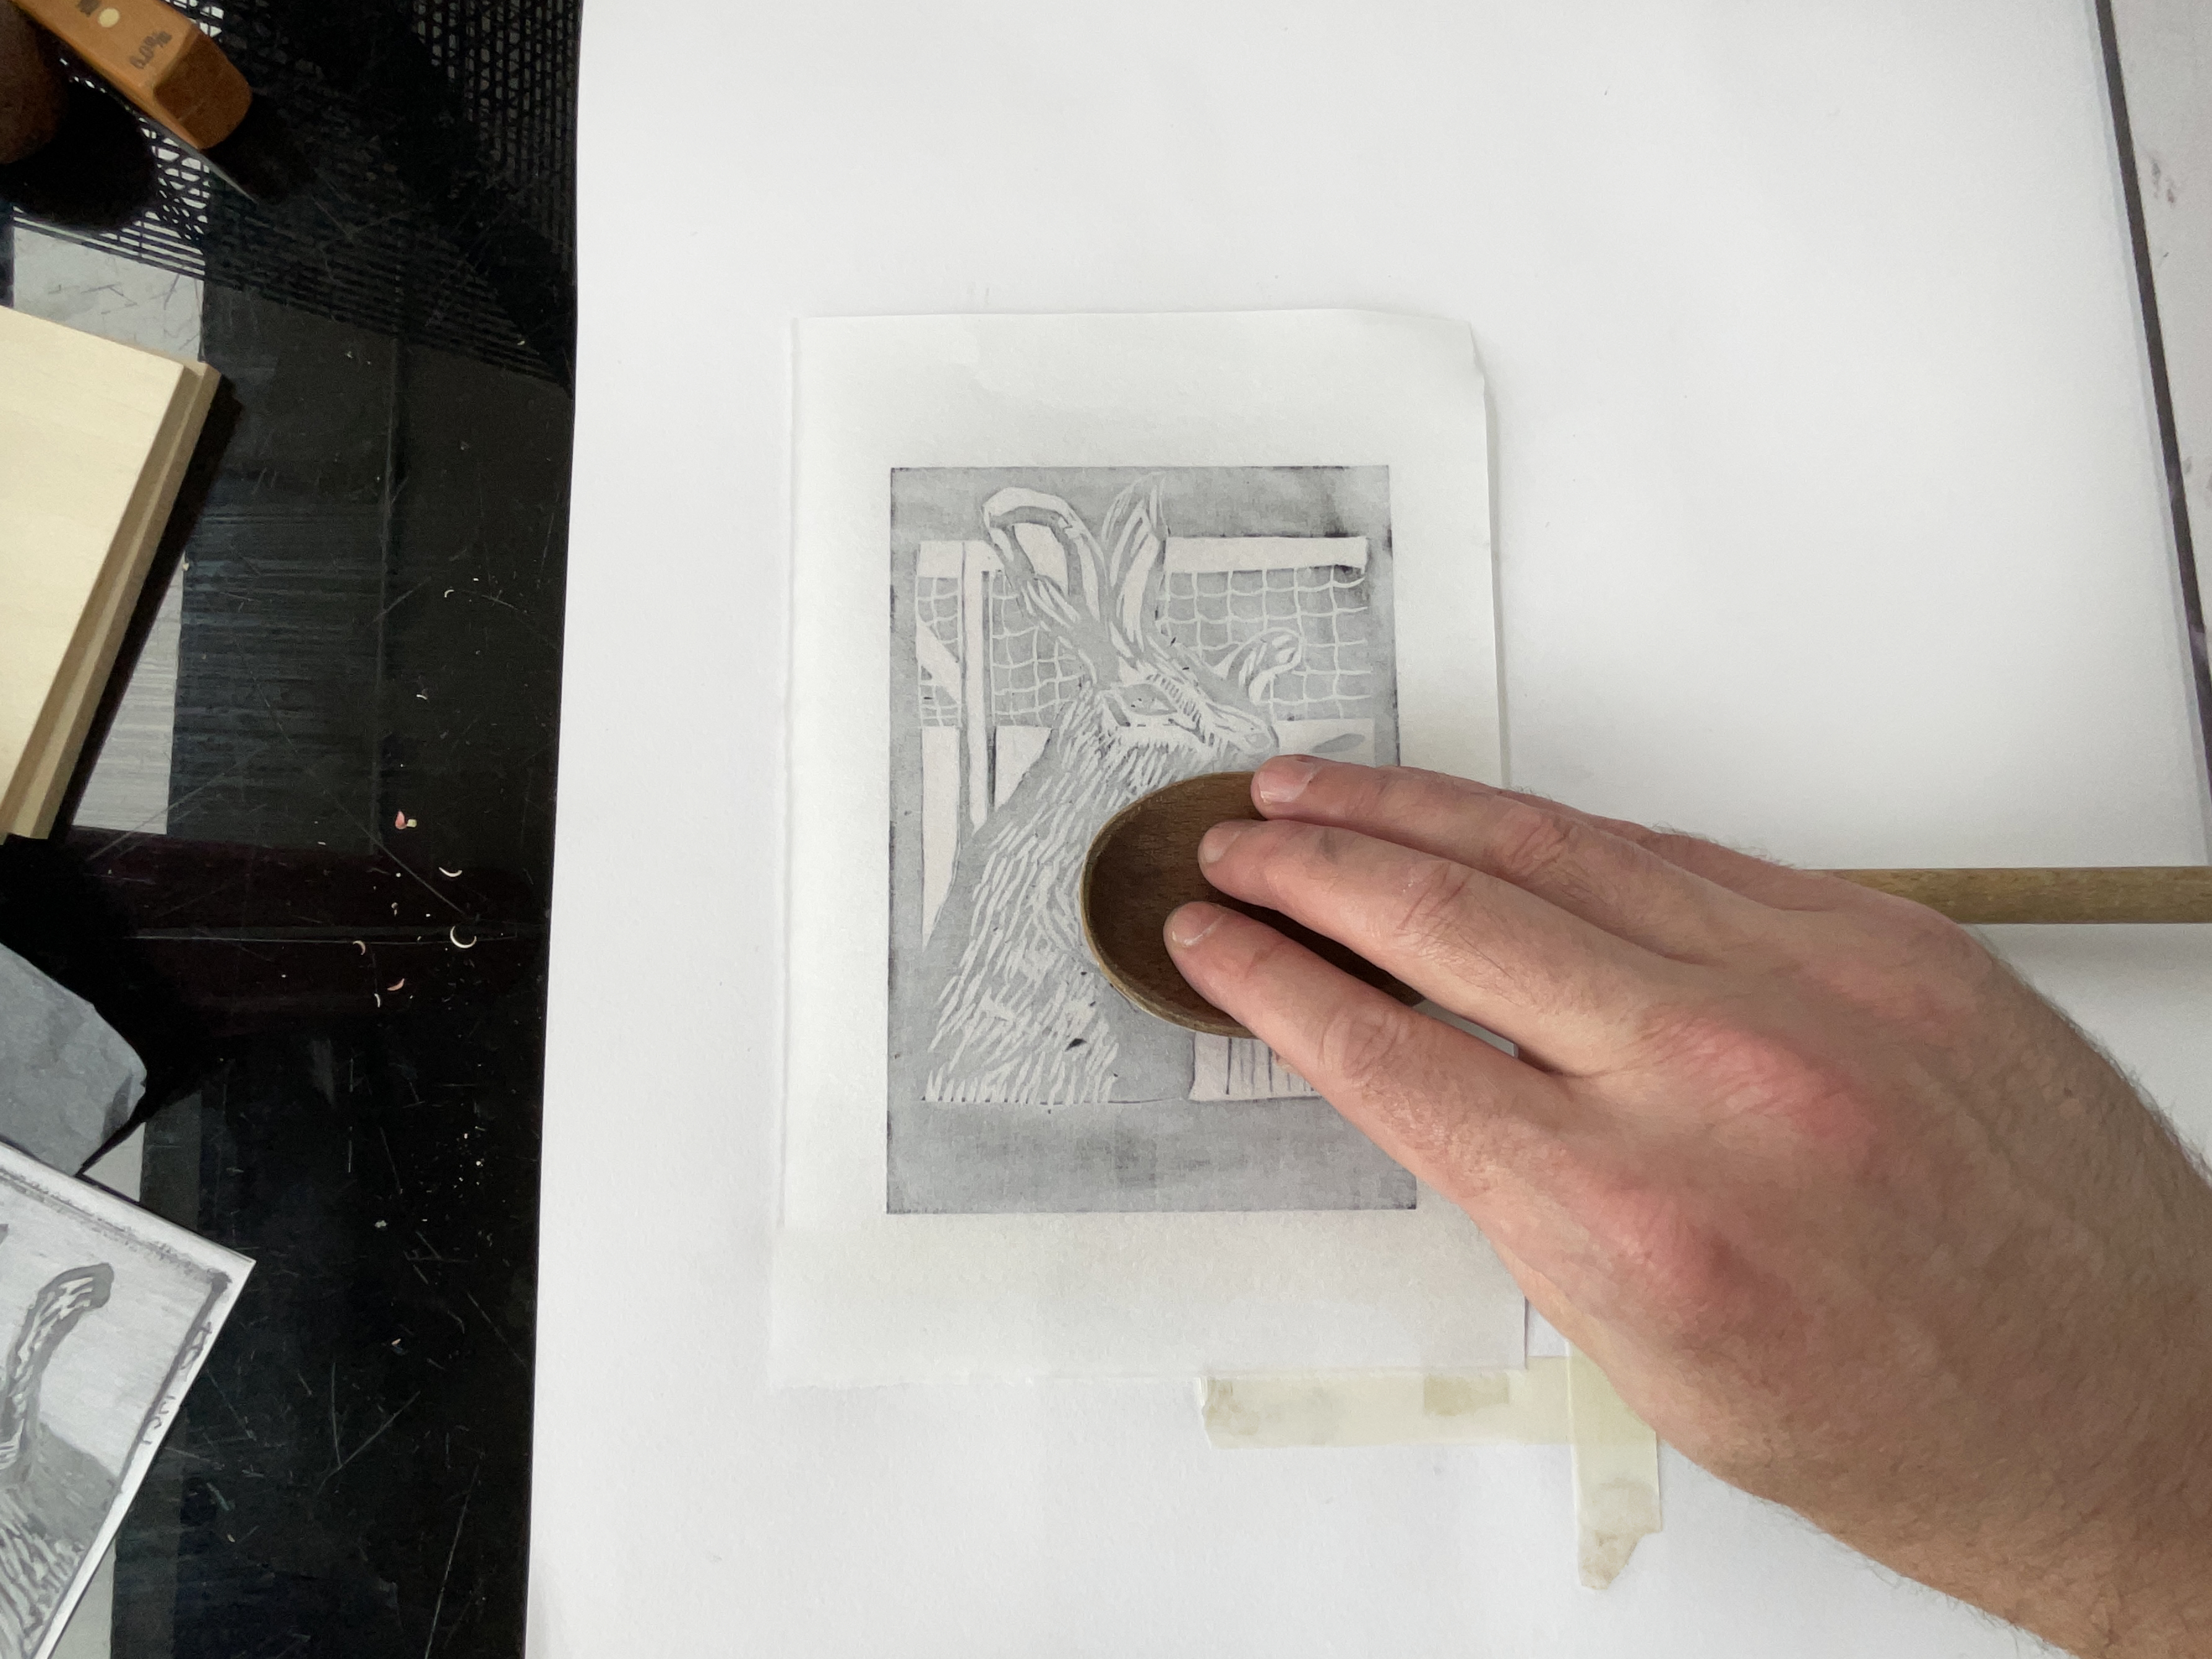
No need for a printing press! Simply rub the paper with the back of a spoon or baren if you have one. Use a fair amount of pressure and use circular motions until you think you've gone over every bit. You can peel corners of the print carefully to see how the transfer is going - if parts are still a bit faded then keep rubbing until you are satisfied.
Printing from wood blocks means there will nearly always be some 'texture' from the grain of the wood, which can be a nice thing, and you'll rarely end up with a solid colour (though that depends on how determined you are with the wooden spoon!).
08. Take a look
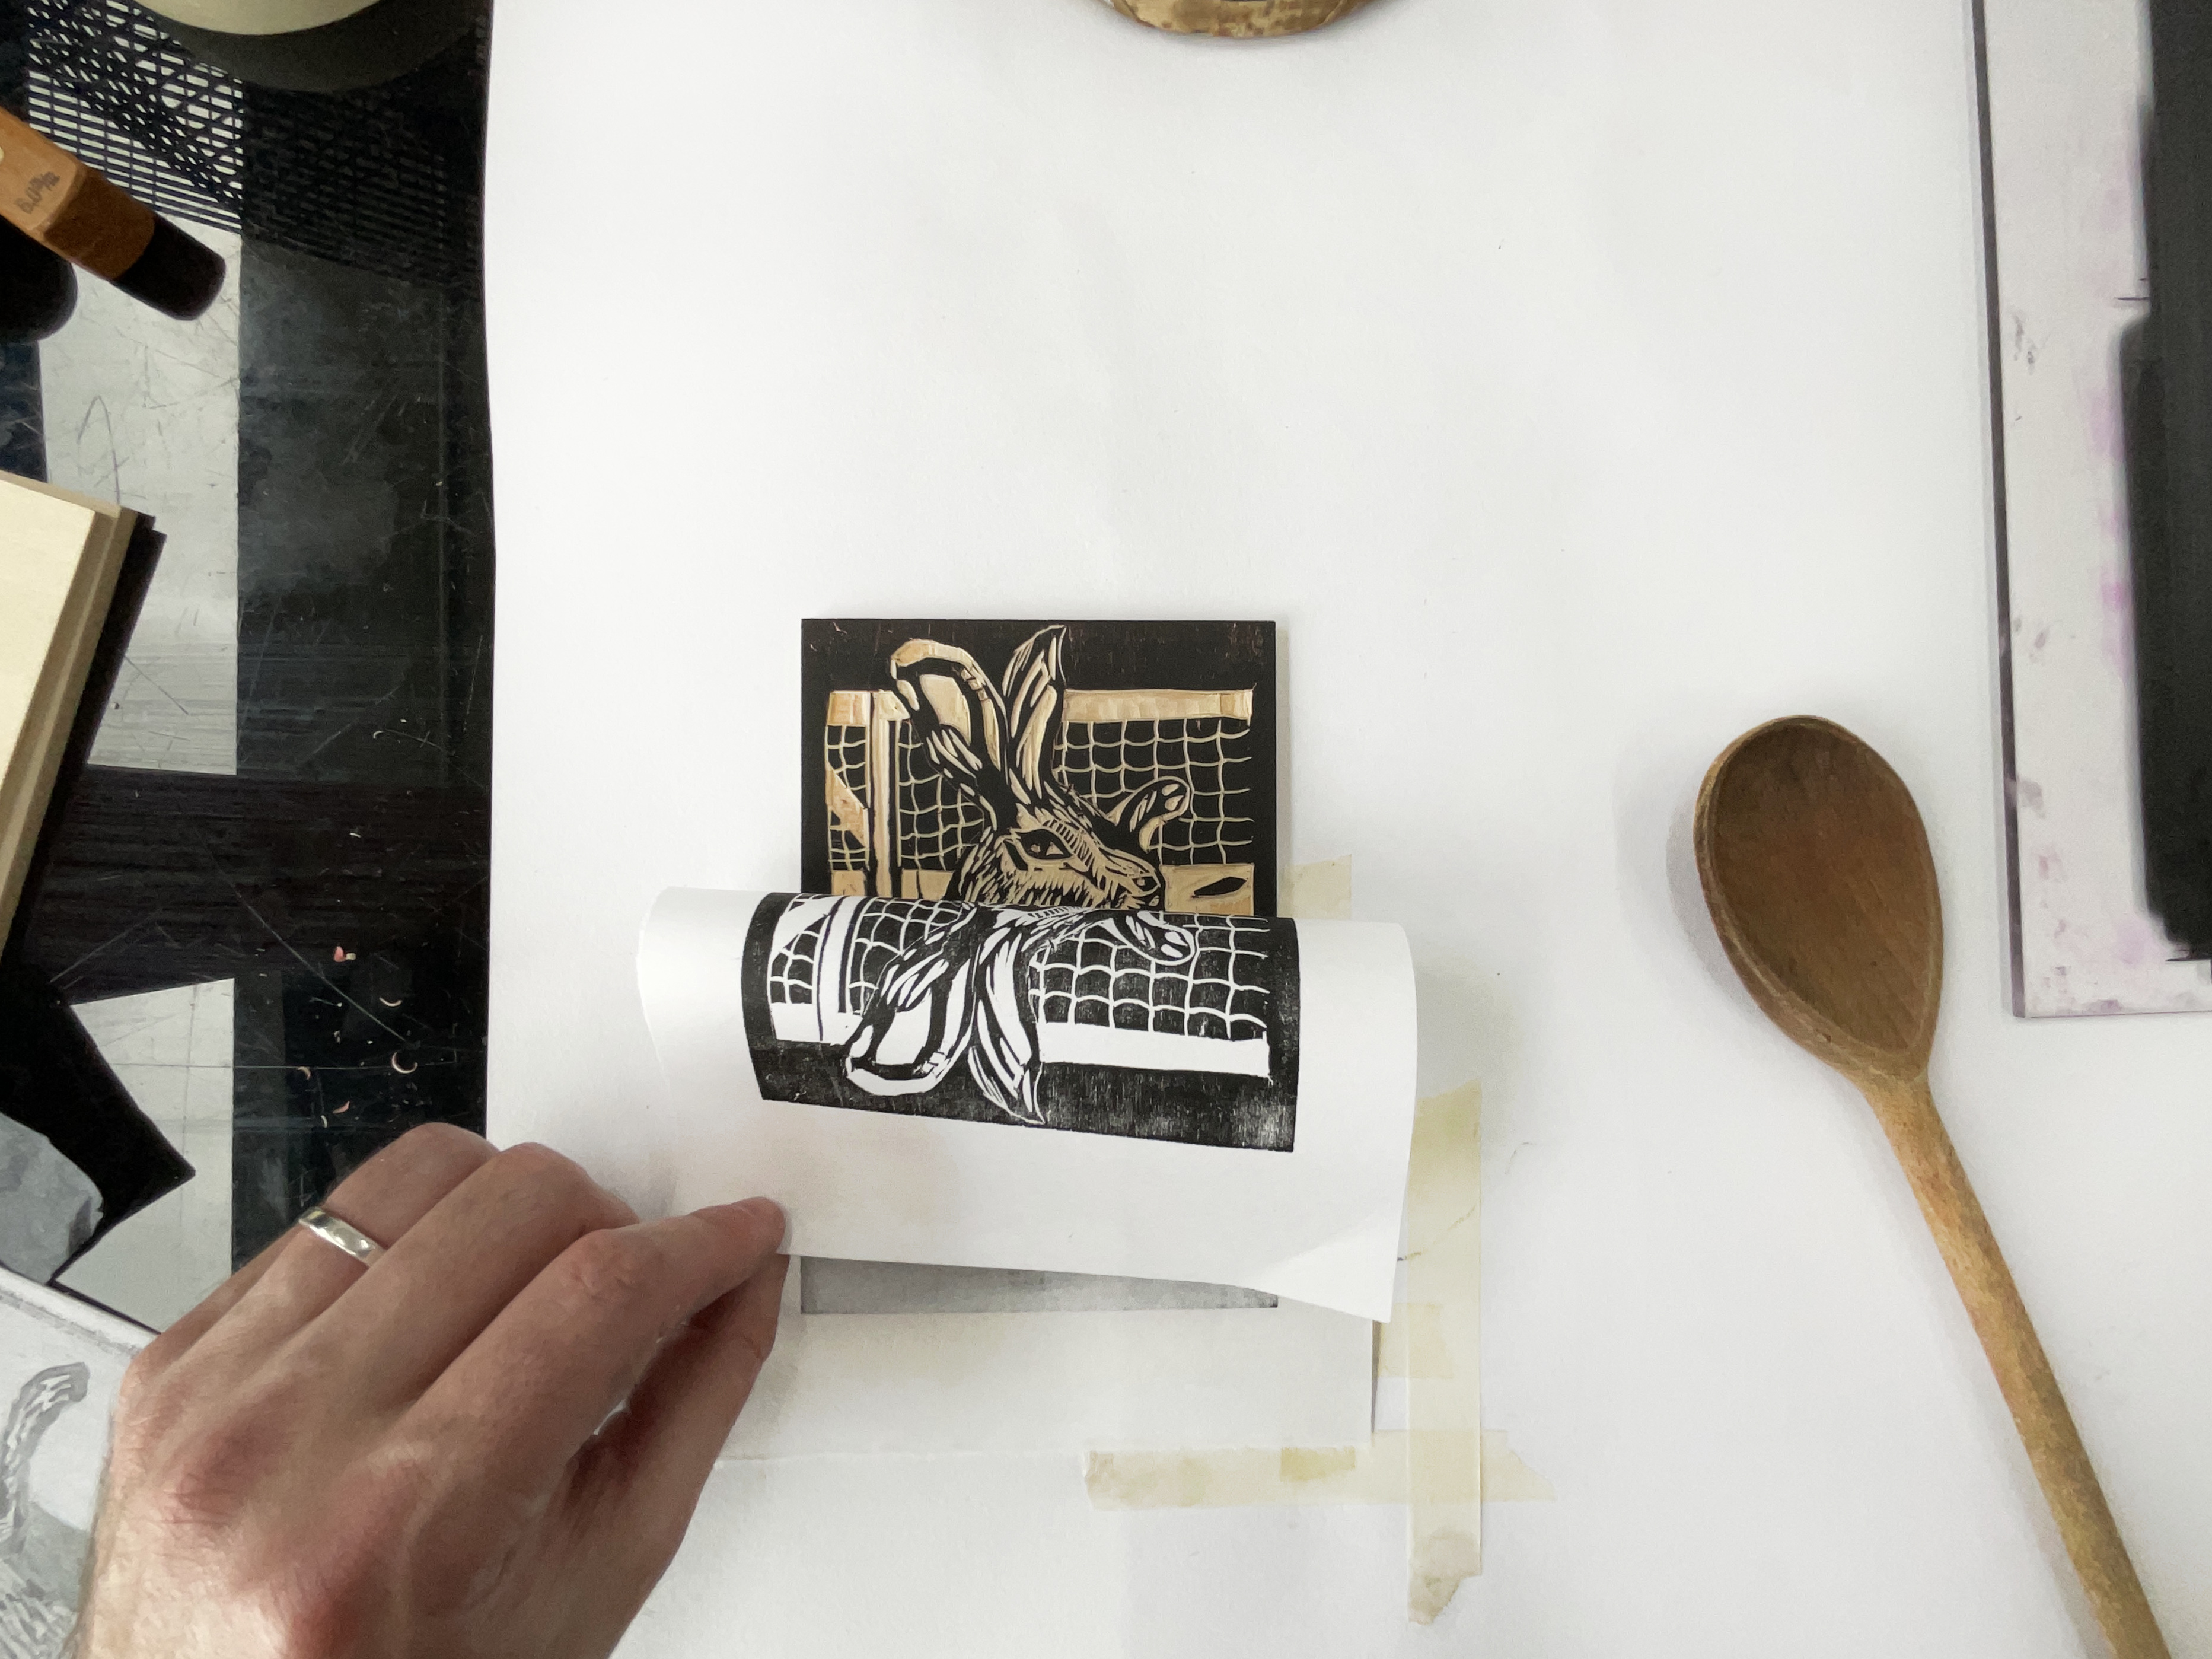
Carefully peel the paper off and have a look. The initial print (or two, or three) gives you a chance to adjust the block if you feel you want to. You can continue to carve and test print as much as you like.
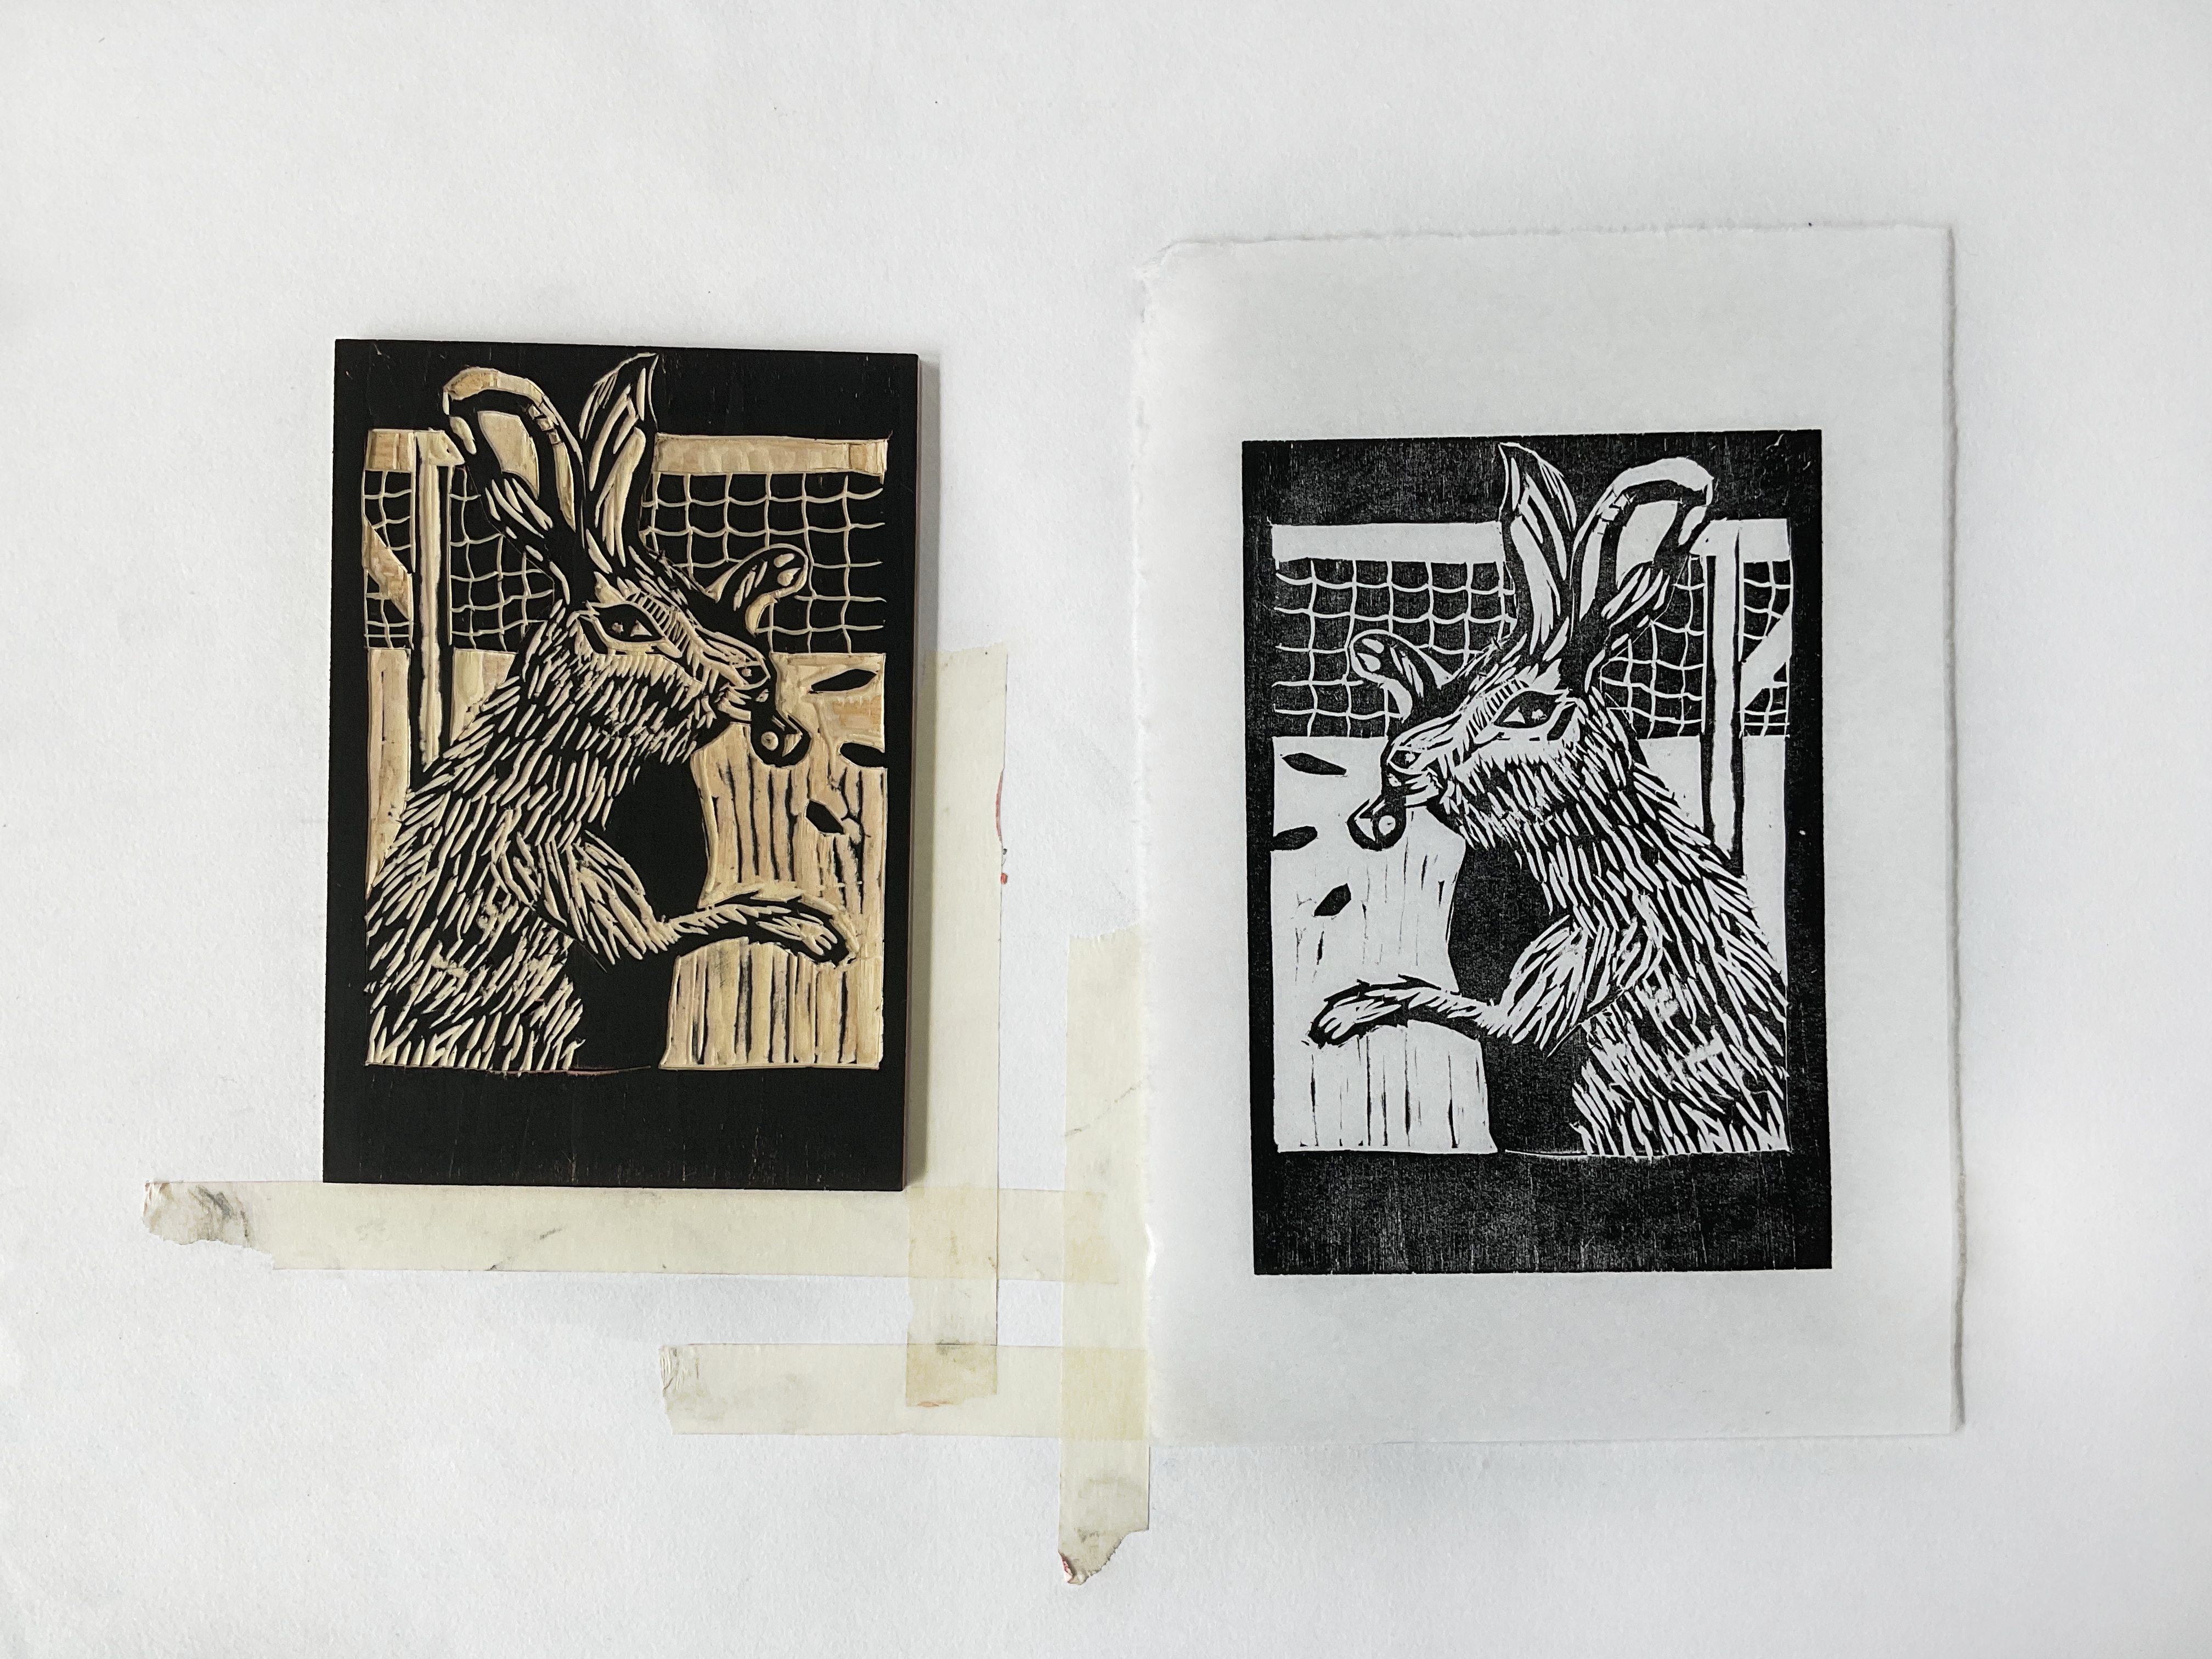
Once you're happy with the result you can make as many copies as you like! The more you practice the more exciting it gets. Why not start experimenting with different coloured inks and drawings? There is a whole world of print making and you can do it all from the comfort of your own home.
Read more:
- The best pencils for artists: Colouring, drawing, sketching
- The best mechanical pencils for creatives
- The best easels for painting for beginners and pros

Thank you for reading 5 articles this month* Join now for unlimited access
Enjoy your first month for just £1 / $1 / €1
*Read 5 free articles per month without a subscription

Join now for unlimited access
Try first month for just £1 / $1 / €1

Ben is an artist and illustrator based in Bristol. He works in traditional woodcut, drawing and digital mediums. For Creative Bloq, he reviews drawing tablets and styluses, as well as the latest and greatest digital software for artists. His artwork has been exhibited across Bristol, and his words have also appeared in ImagineFX magazine.
