Watercolours: how to use masking and spatter effects
Breathe new life into Aggretsuko character art with these watercolour effects.
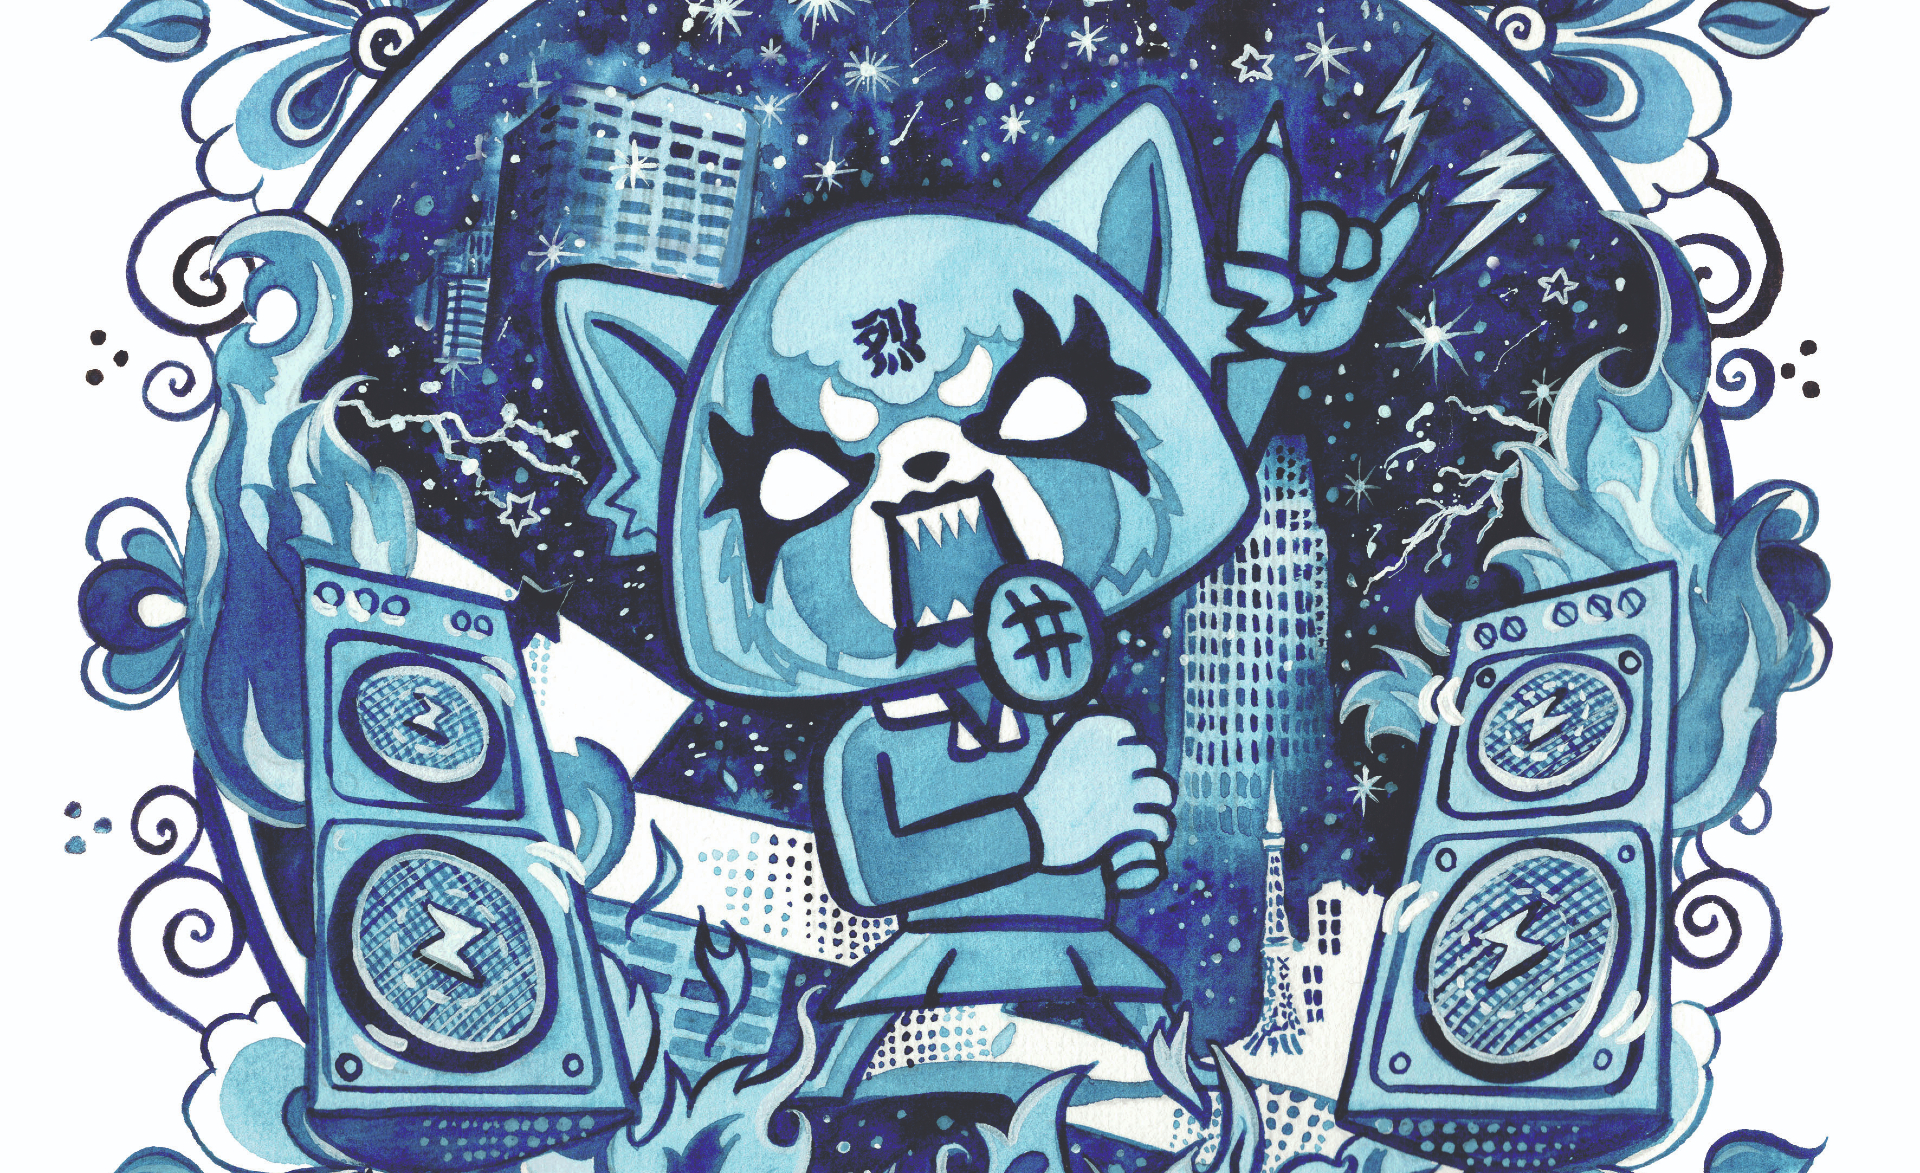
Using watercolour effects can add a new dimension to your work. Award-winning contemporary artist Anna Sokolova has done just that with a series of murals depicting original films and series in a hand-painted Delft Blue style. To achieve this style she applied granulation spray and citric acid alongside wax, masking and spatter effects. In this step by step guide, Sokolova will share her process so that you too can achieve this unique aesthetic.
Improve your watercolours even further with this roundup of essential watercolour techniques and this guide to the best watercolour paints. You also give your own illustrations the edge with our list of the best pencils for colouring, drawing and sketching.
Aggretsuko is a Netflix anime based on the popular character created by Yeti for mascot company Sanrio. Working on the show, which follows the adventures of a 25-year-old anthropomorphic red panda, was a dream come true for Sokolova and she couldn't resist using watercolours to recreate the character. Sokolova used various watercolour effects to add a unique look to the illustration while maintaining Aggretsuko's musical comedy vibe.
She also leaned into the simplicity of design and compositional aspects inspired by the term ukiyo (meaning floating world) that originated in Edo-period Japan and adding intricate patterns and bold strokes for contrast. So what are you waiting for? Read on to learn how Sokolova breathed new life into Aggretsuko and how you can do the same.
01. Find inspiration and ideas
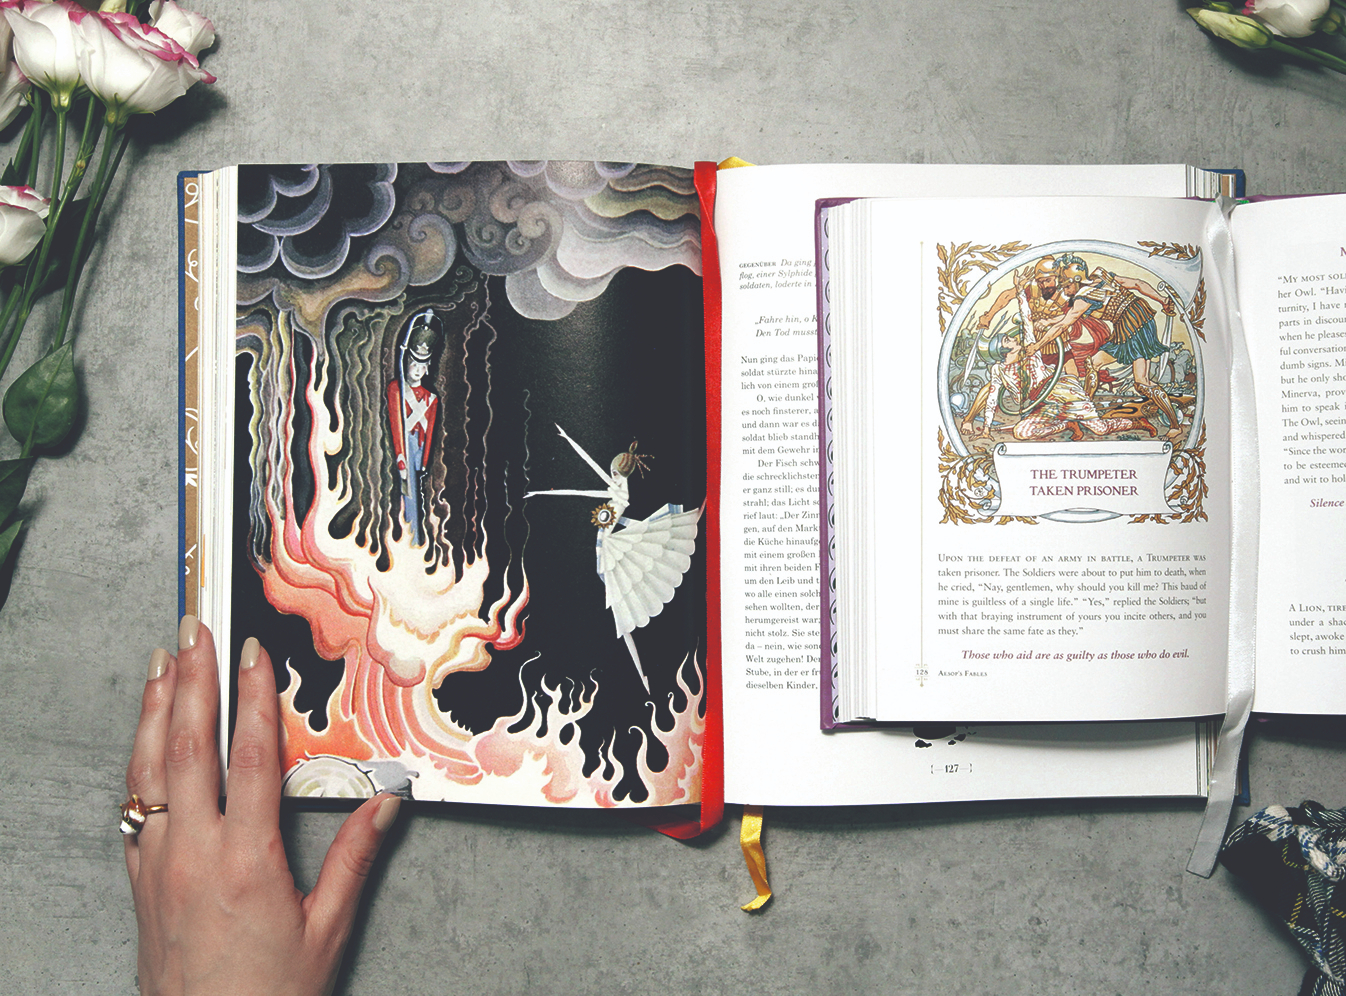
This preparatory step is one of the most crucial for creating unique artwork with an individual vision. I gather various sources including traditional pottery motifs with imagery by Aubrey Beardsley and the magic treatment of subjects in fairy tales.
02. Prepare the materials
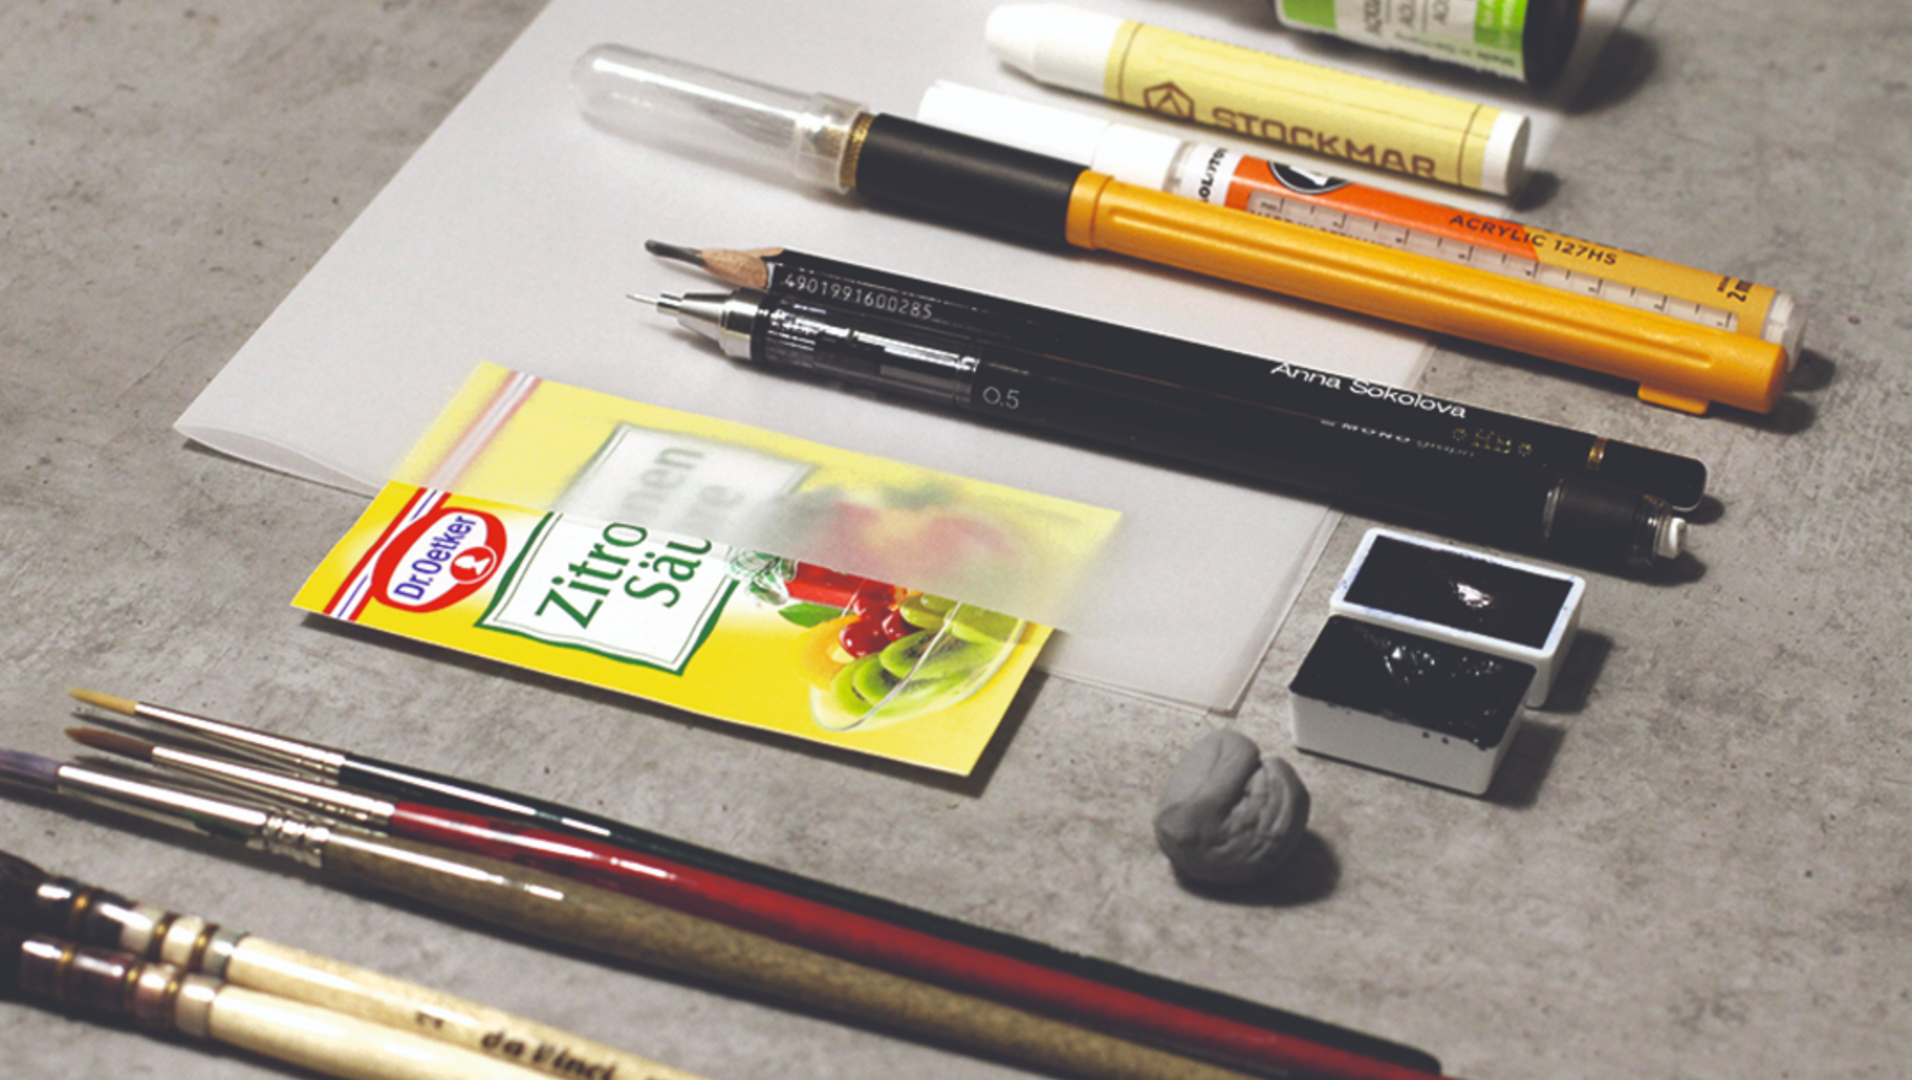
Choosing the right materials makes a huge difference (especially the best watercolour paper). Over the years, I've discovered my favourites, which also helps to save some time and effort when going to the art supply store – naturally, you want to buy everything that's on the shelves! I love working with a real pencil; however, for larger pieces I use a mechanical pencil with an automatic 'shaking mechanism,' which advances the lead.
03. Sketch and explore
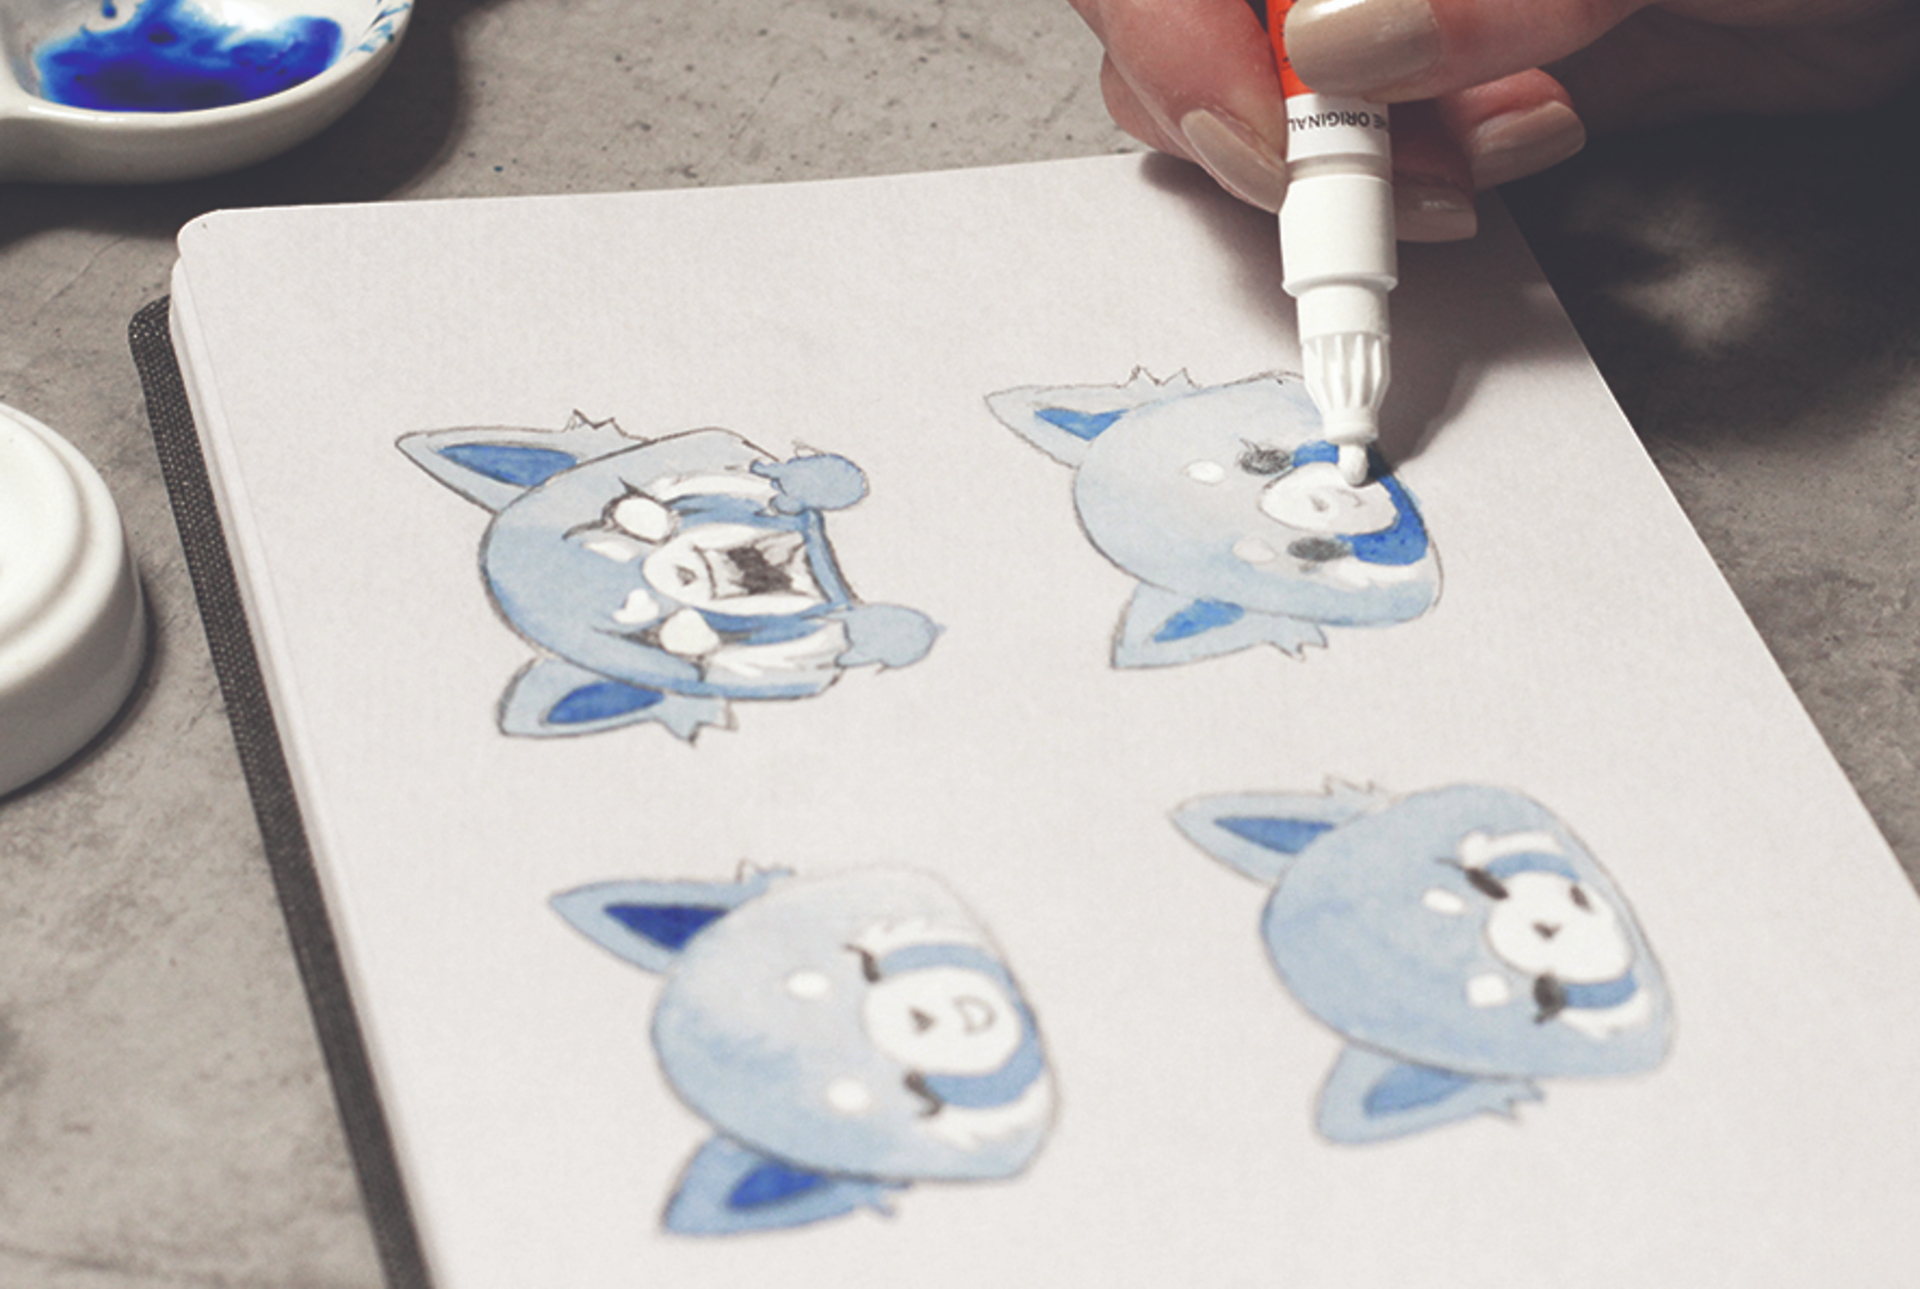
I try various compositions and create some simple tonal drawings. Working at a small scale enables me to see if the image works and has a dramatic impact, quickly drawing the viewer in to take a closer look.
04. Apply granulation spray and citric acid
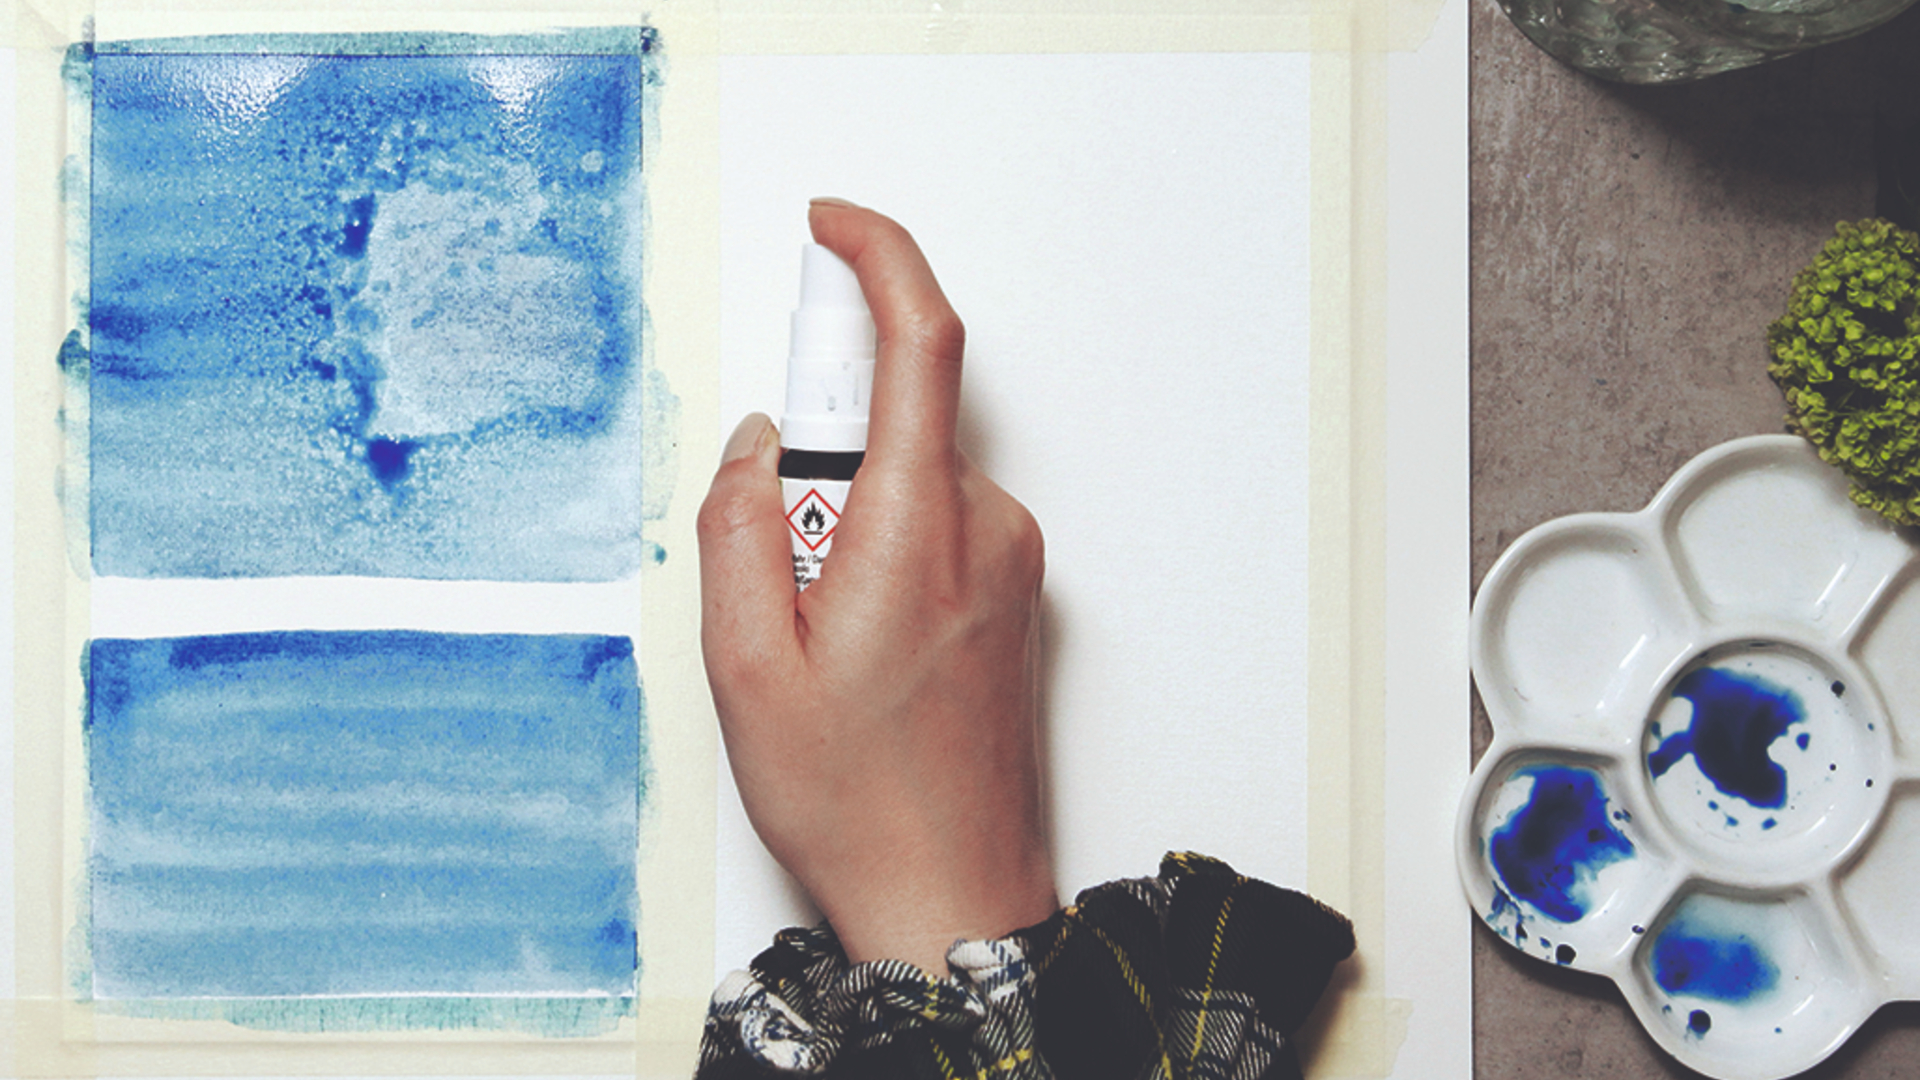
I experiment with various effects and decide what to use for the background. Granulation spray applied to wet paint creates an interesting texture. Adding citric acid disperses the pigment and reveals the white of the paper (salt has a similar effect when creating the intricate shape of ornaments).
05. Incorporate wax, masking and spatter effects
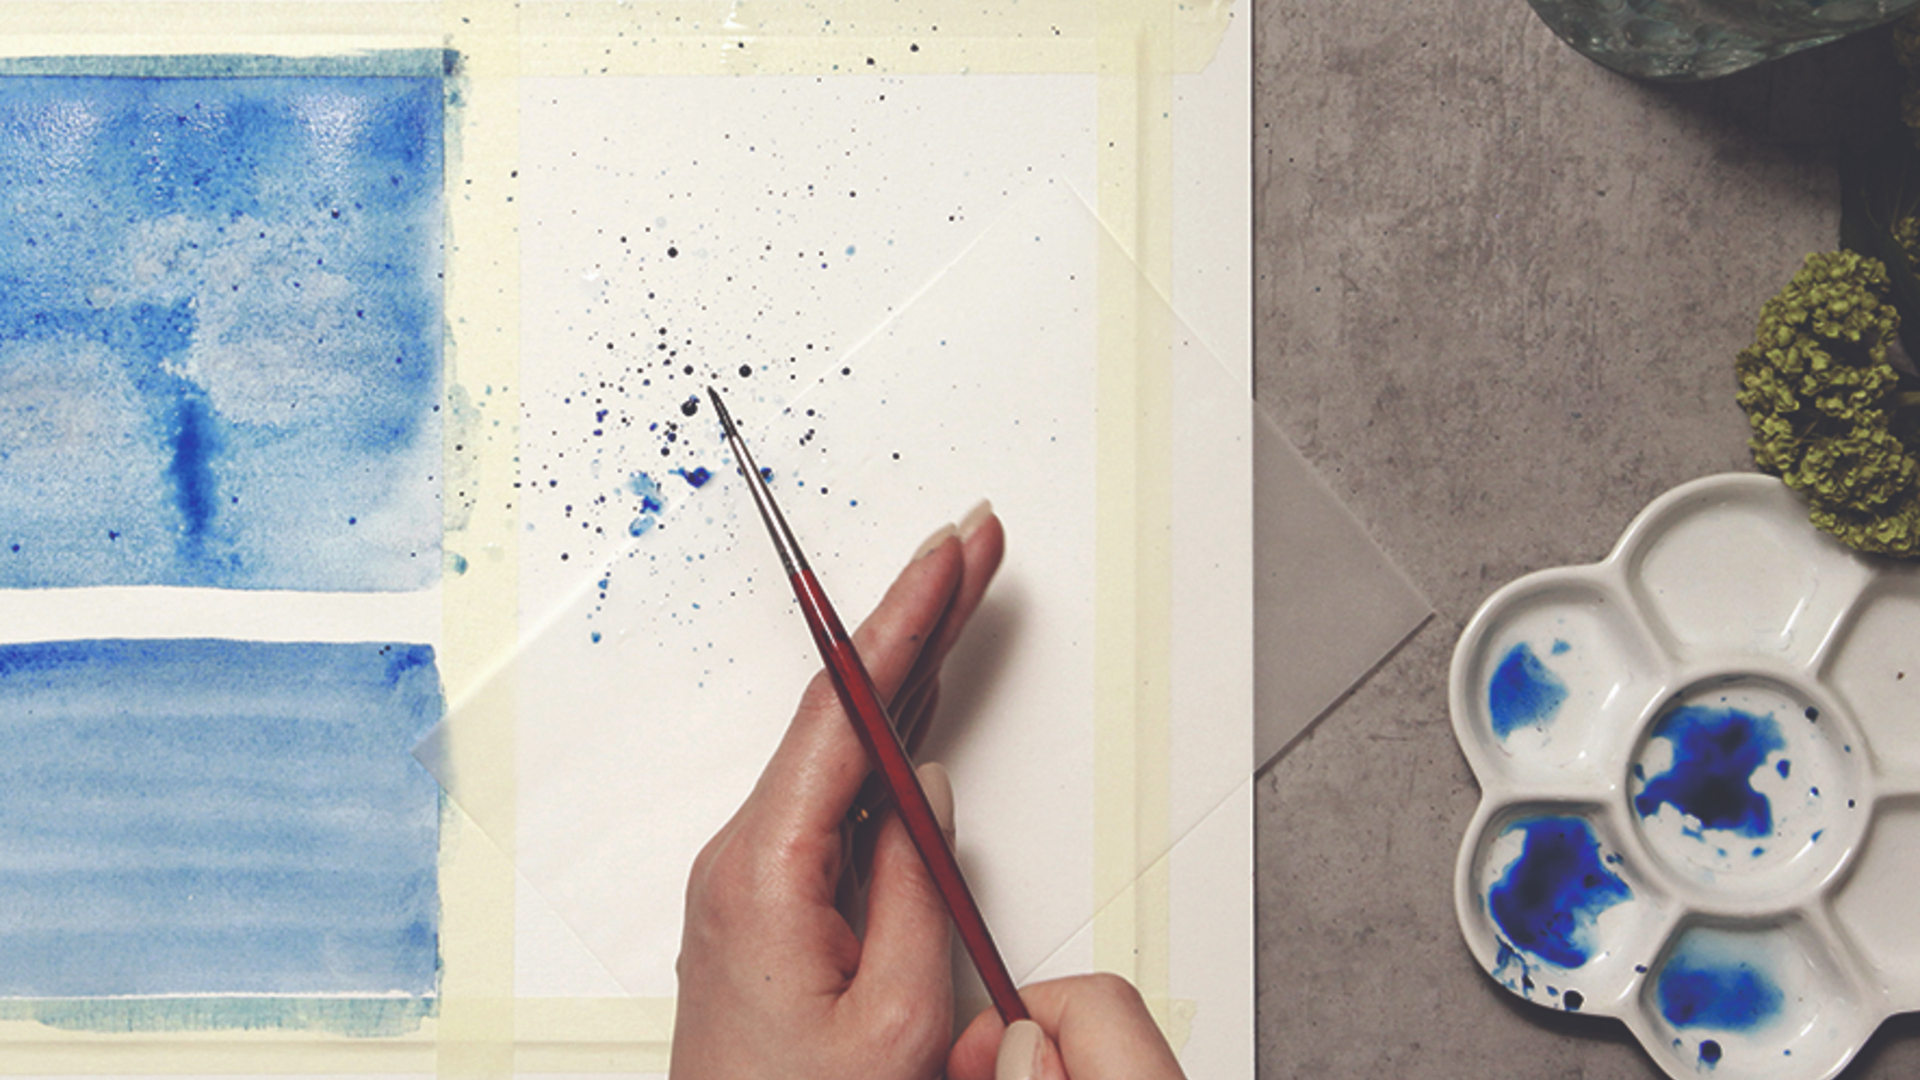
A wax pencil is ideal for preserving the paper's white. It also holds a few layers of washes. Another way to protect part of the painting is to use a sheet of transparent paper that’s cut into the required shape. I splatter the slightly watered-down paint by knocking the brush against my fingers to achieve a spontaneous visual effect. I love how it looks, so this is what I'll use for creating a starry sky effect.
06. Refine the sketch idea
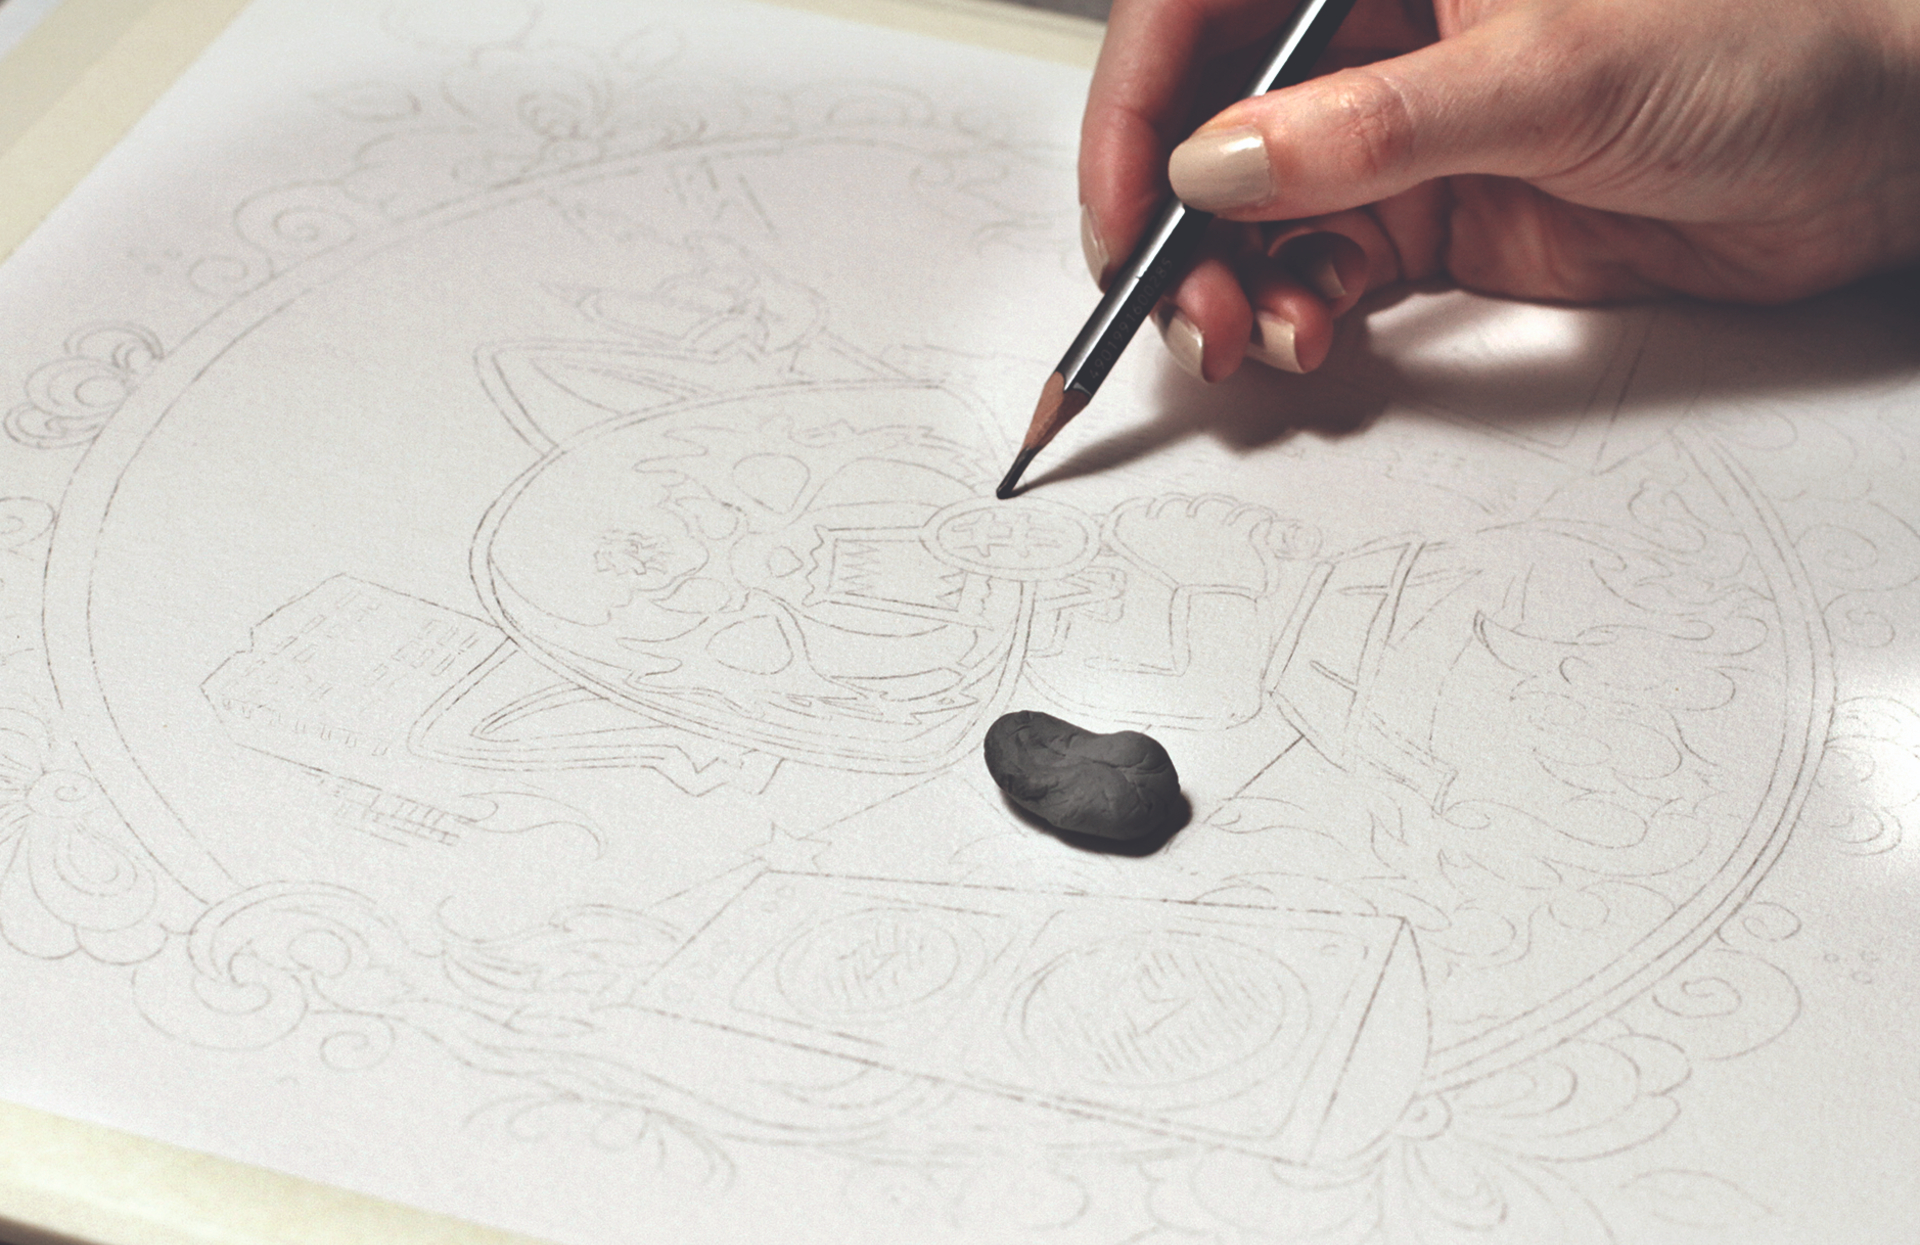
I create a detailed sketch on a large sheet of watercolour paper and secure it to the polymer panel using light paper tape. Knowing that the composition is taken care of means that I can concentrate on the painting process. I lighten the sketch using the kneaded eraser, to ensure my lines are subtle.
07. Paint the sketch outlines
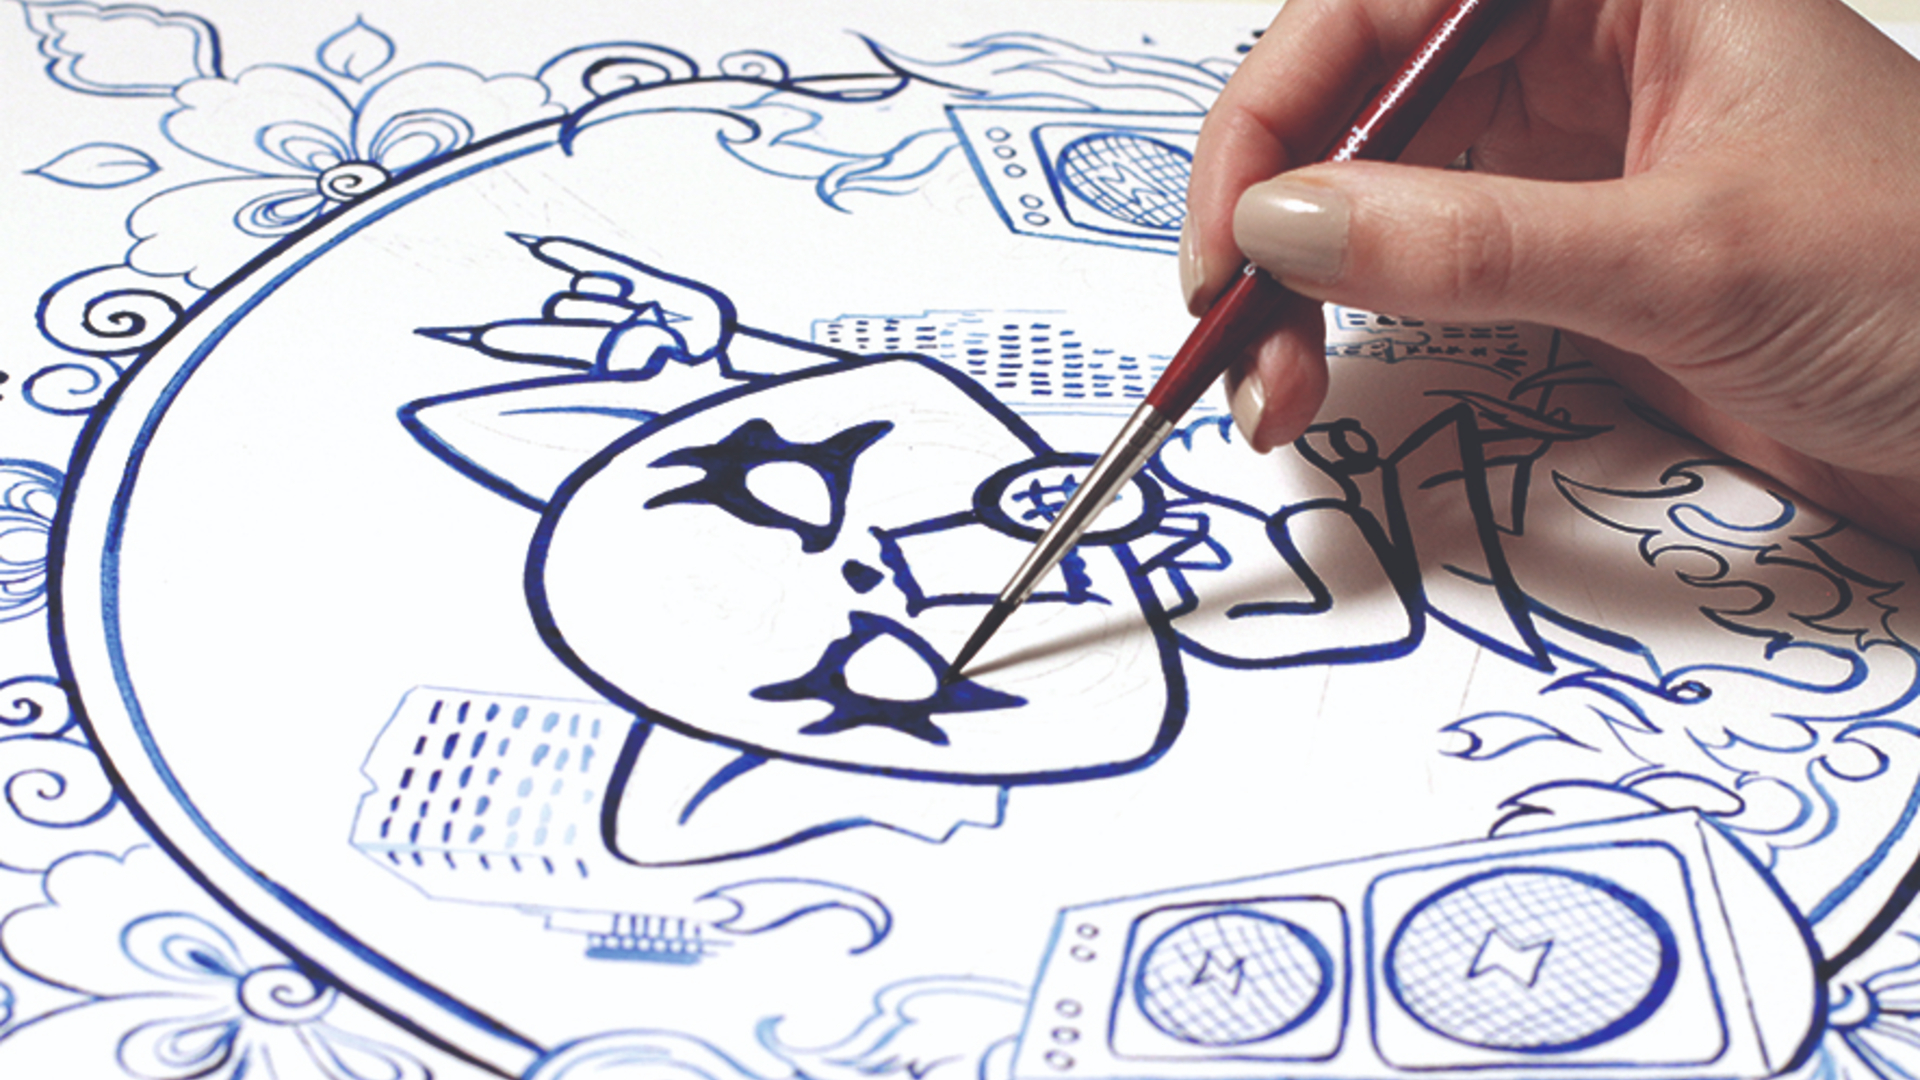
I use the synthetic Rounded brush to apply paint and begin with the first ornamental parts of the artwork, just to get comfortable. After my confidence grows, I reinforce the focal areas of the painting by paying special attention to the lines and shapes on the face.
08. Add a wax pencil reserve
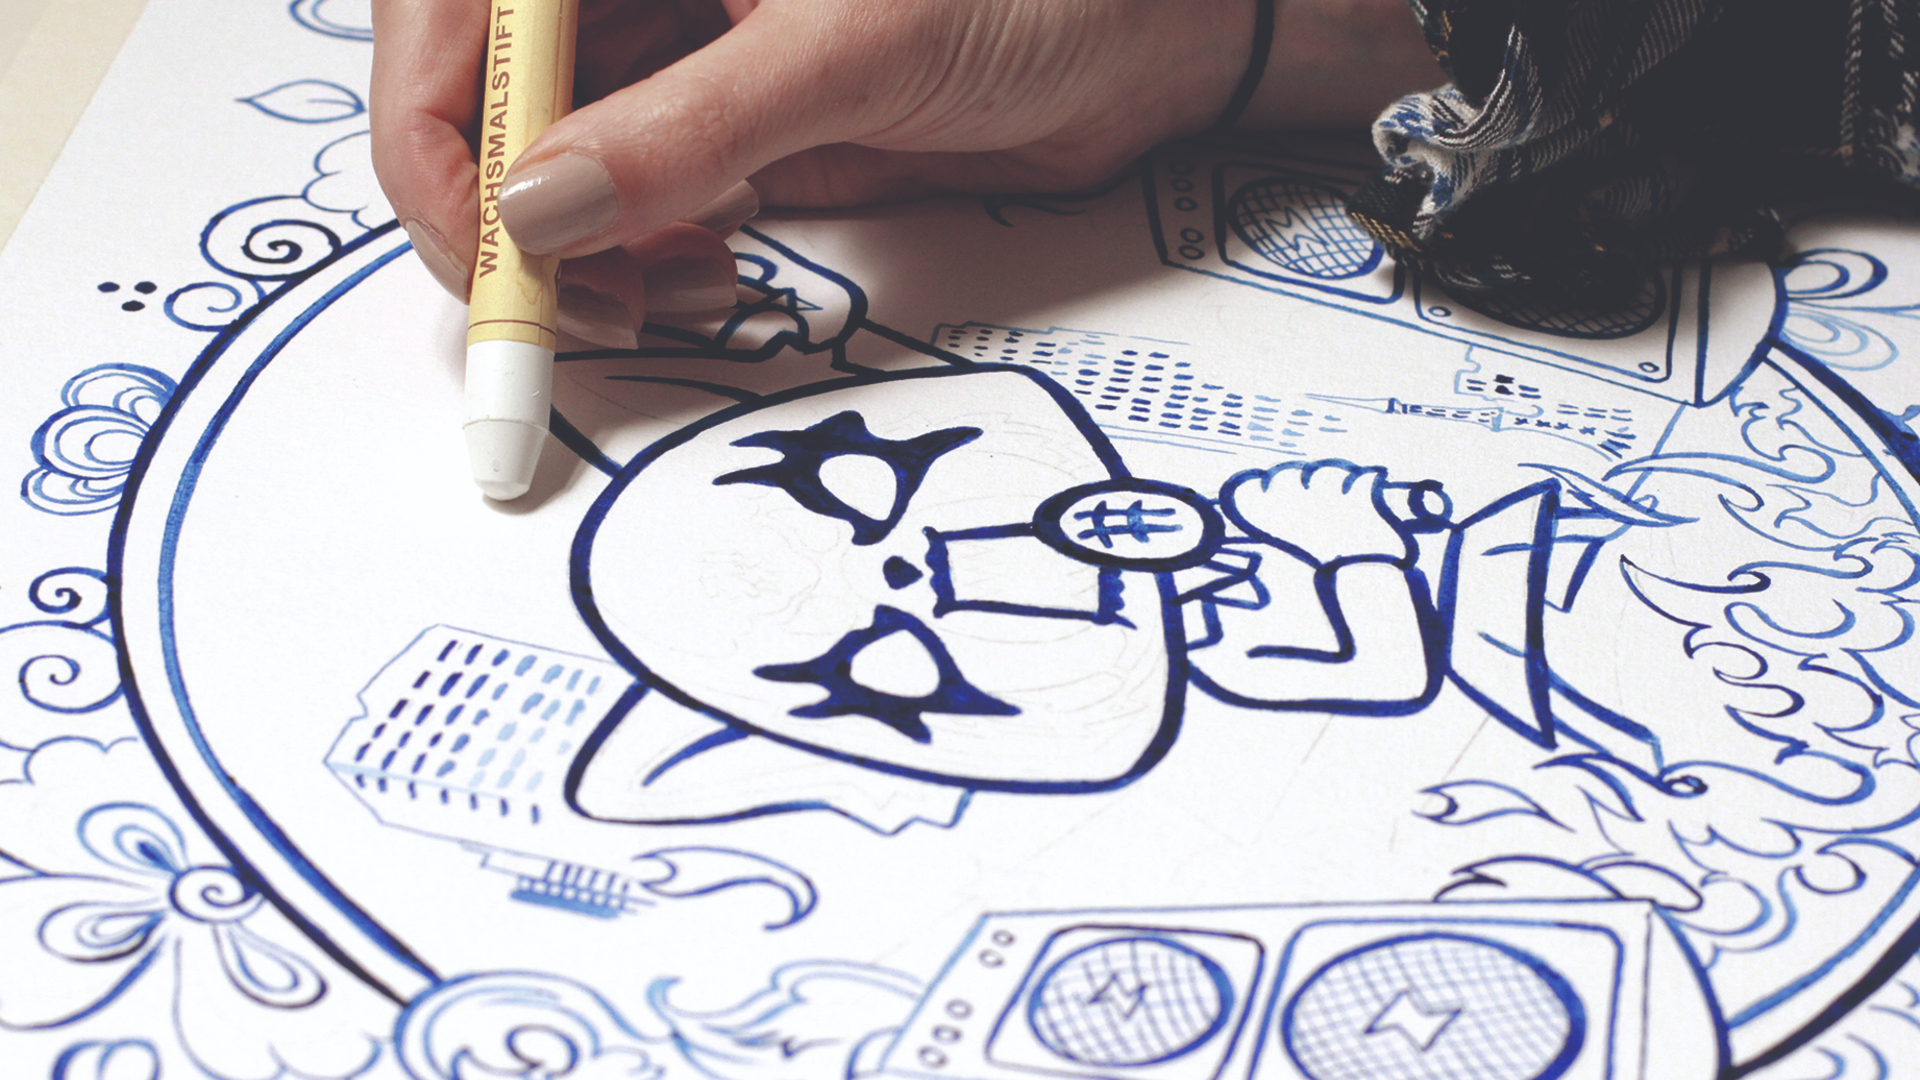
I make some chaotic marks with a wax pencil in the background's magical areas. I add stars and lightning flashes, keeping in mind the variety of the pattern. The wax is barely visible, but it shines if you hold the canvas at certain angles.
09. Lay down the sky wash
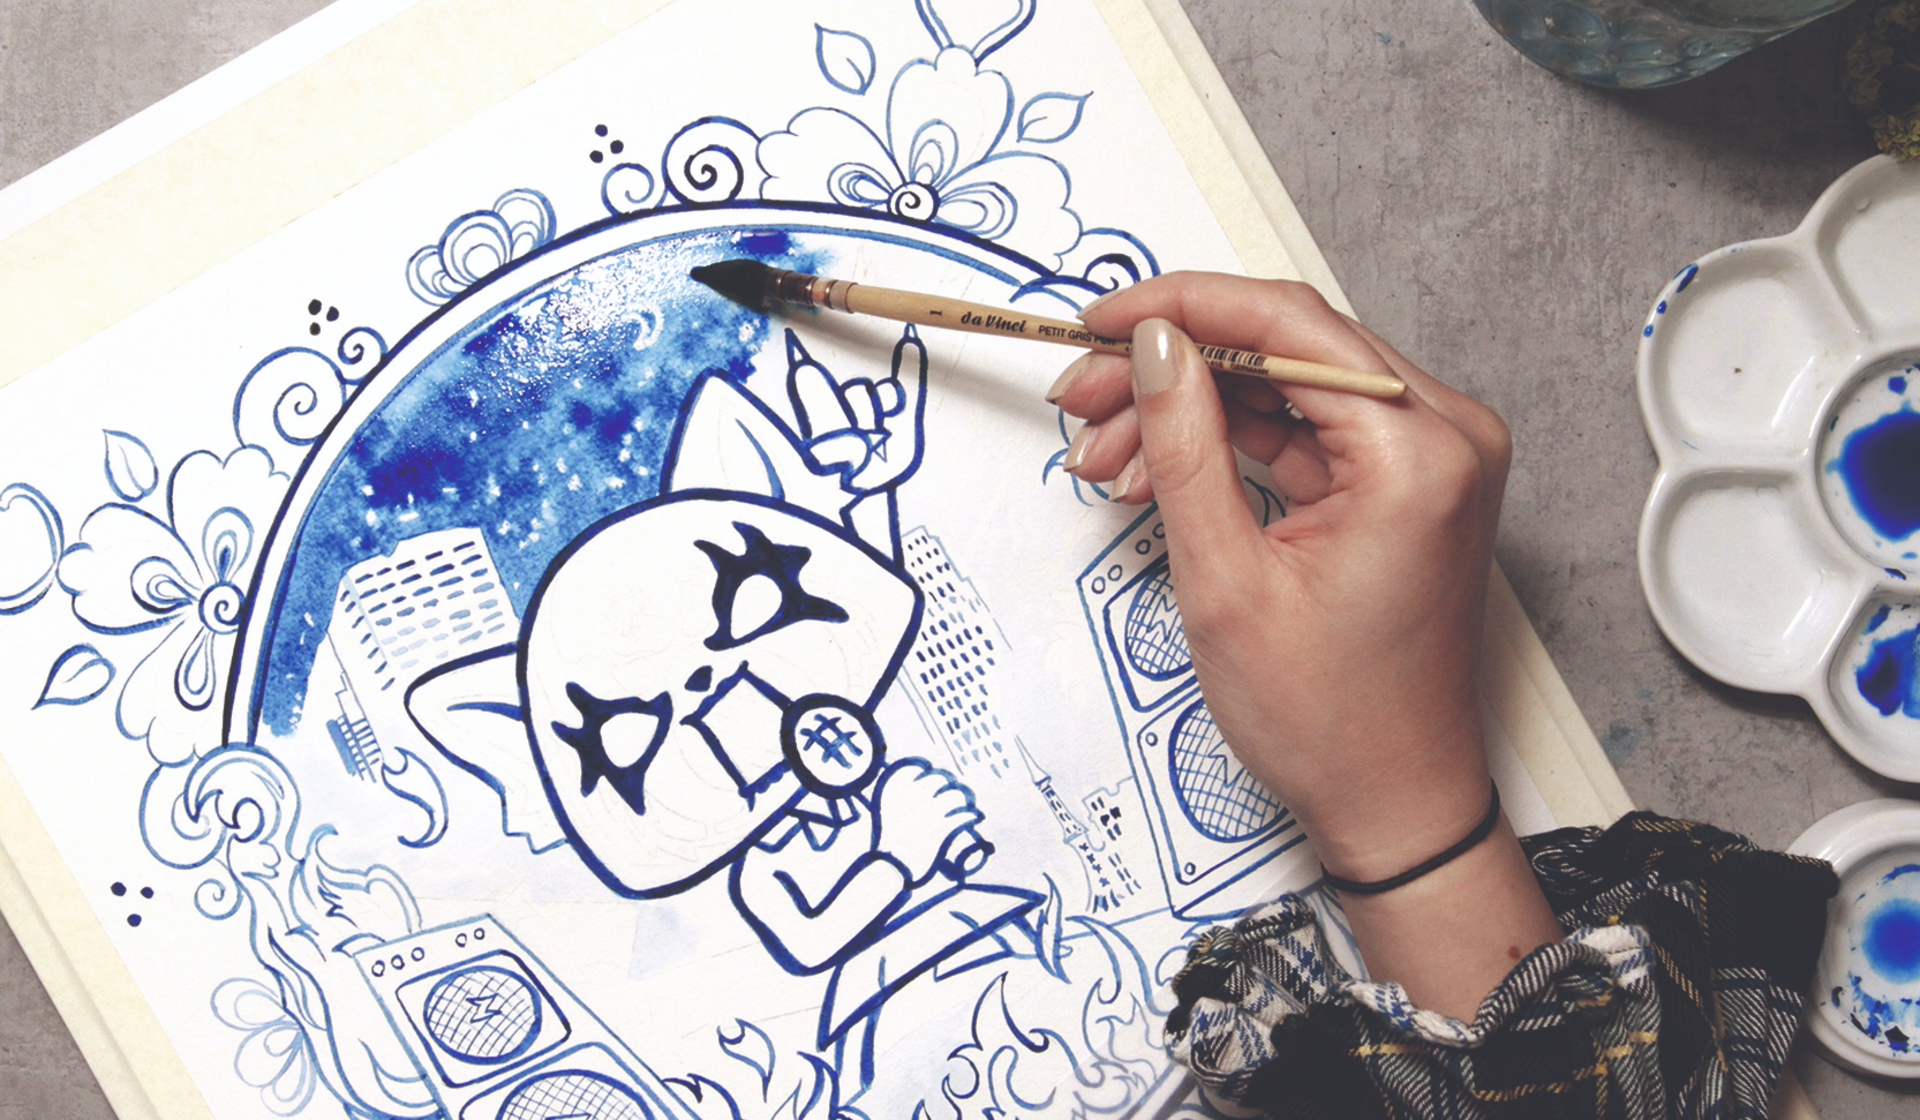
I use a French brush to cover the whole sky area with the main colour. Then, while the paint is still wet, I add some bigger dots of almost neat paint here and there. This creates an irregular field of stars.
10. Apply subtle layers
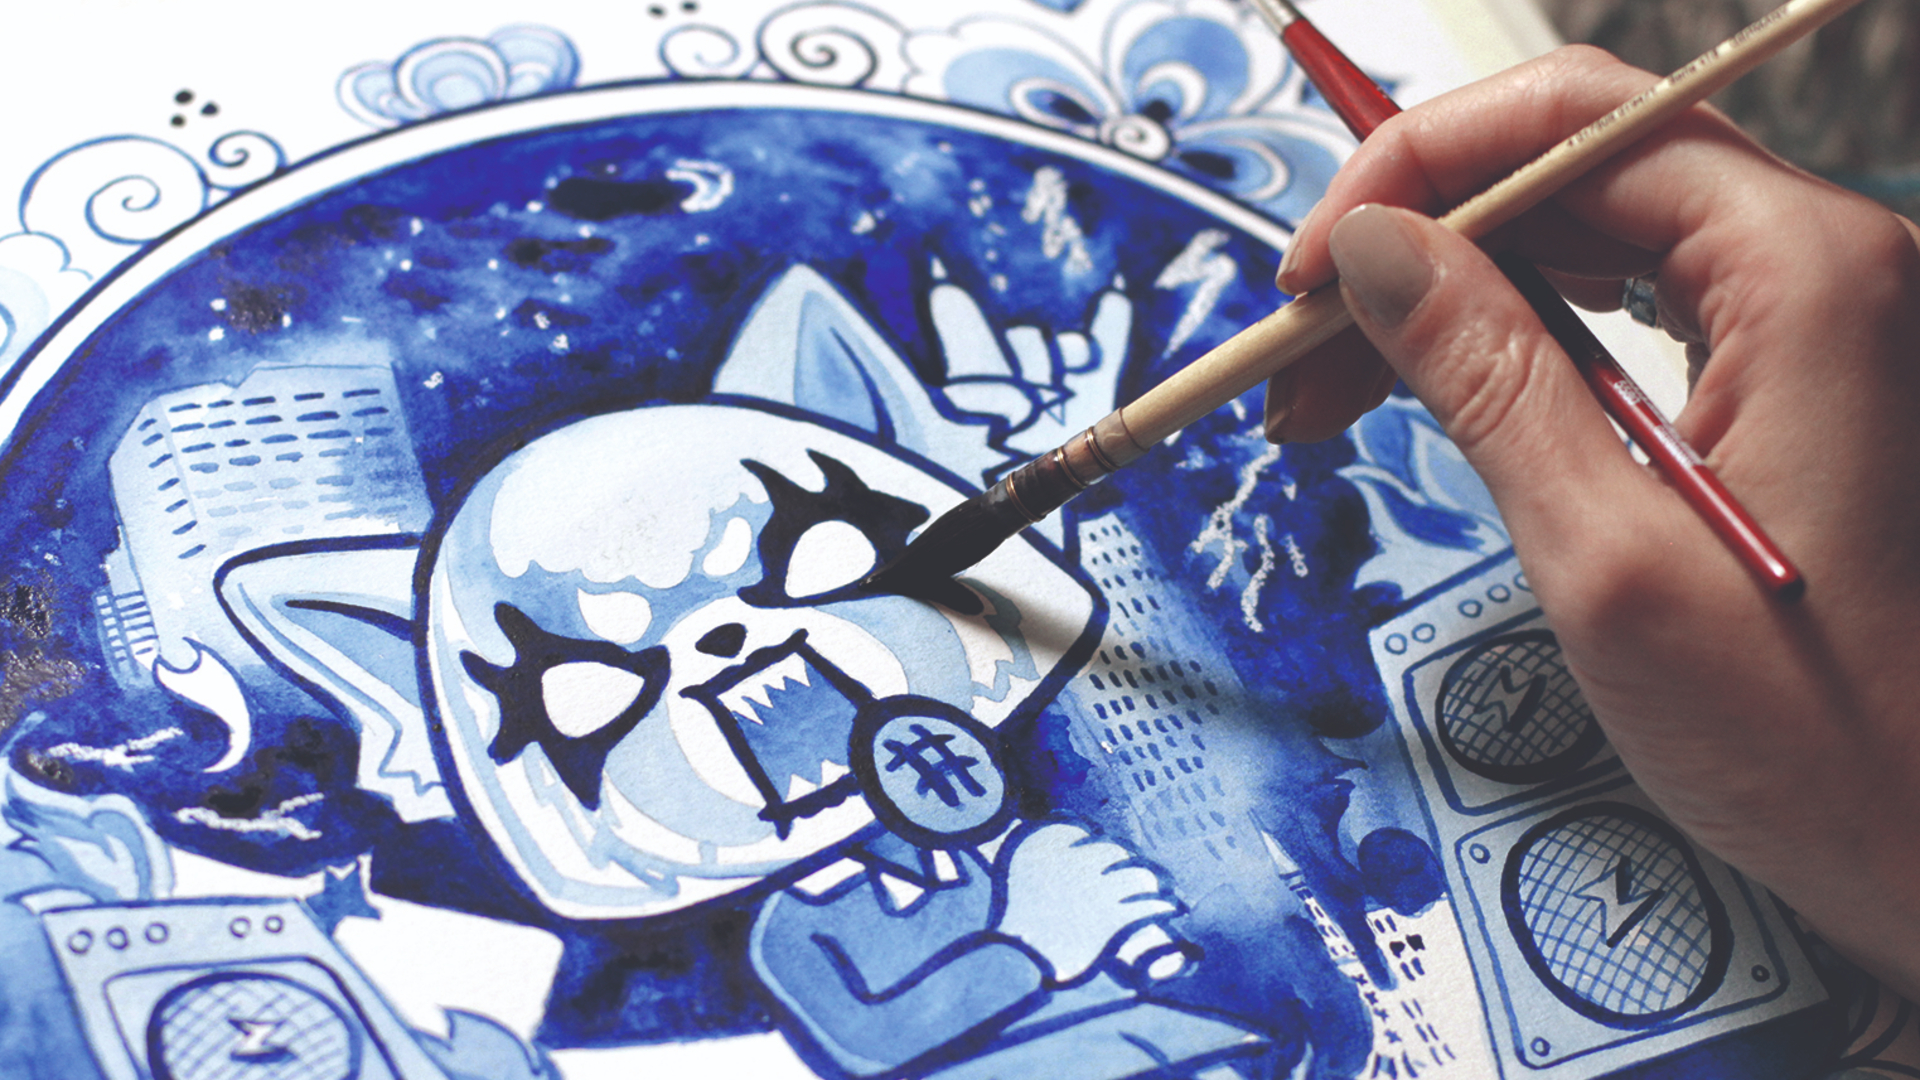
I wait until the background is dry before covering the whole area with a subtle wash of highly diluted paint. I repeat this process two more times, focusing on certain areas which makes them darker. The variety of a few washes helps to add depth and interest.
11. Make a transparent paper mask
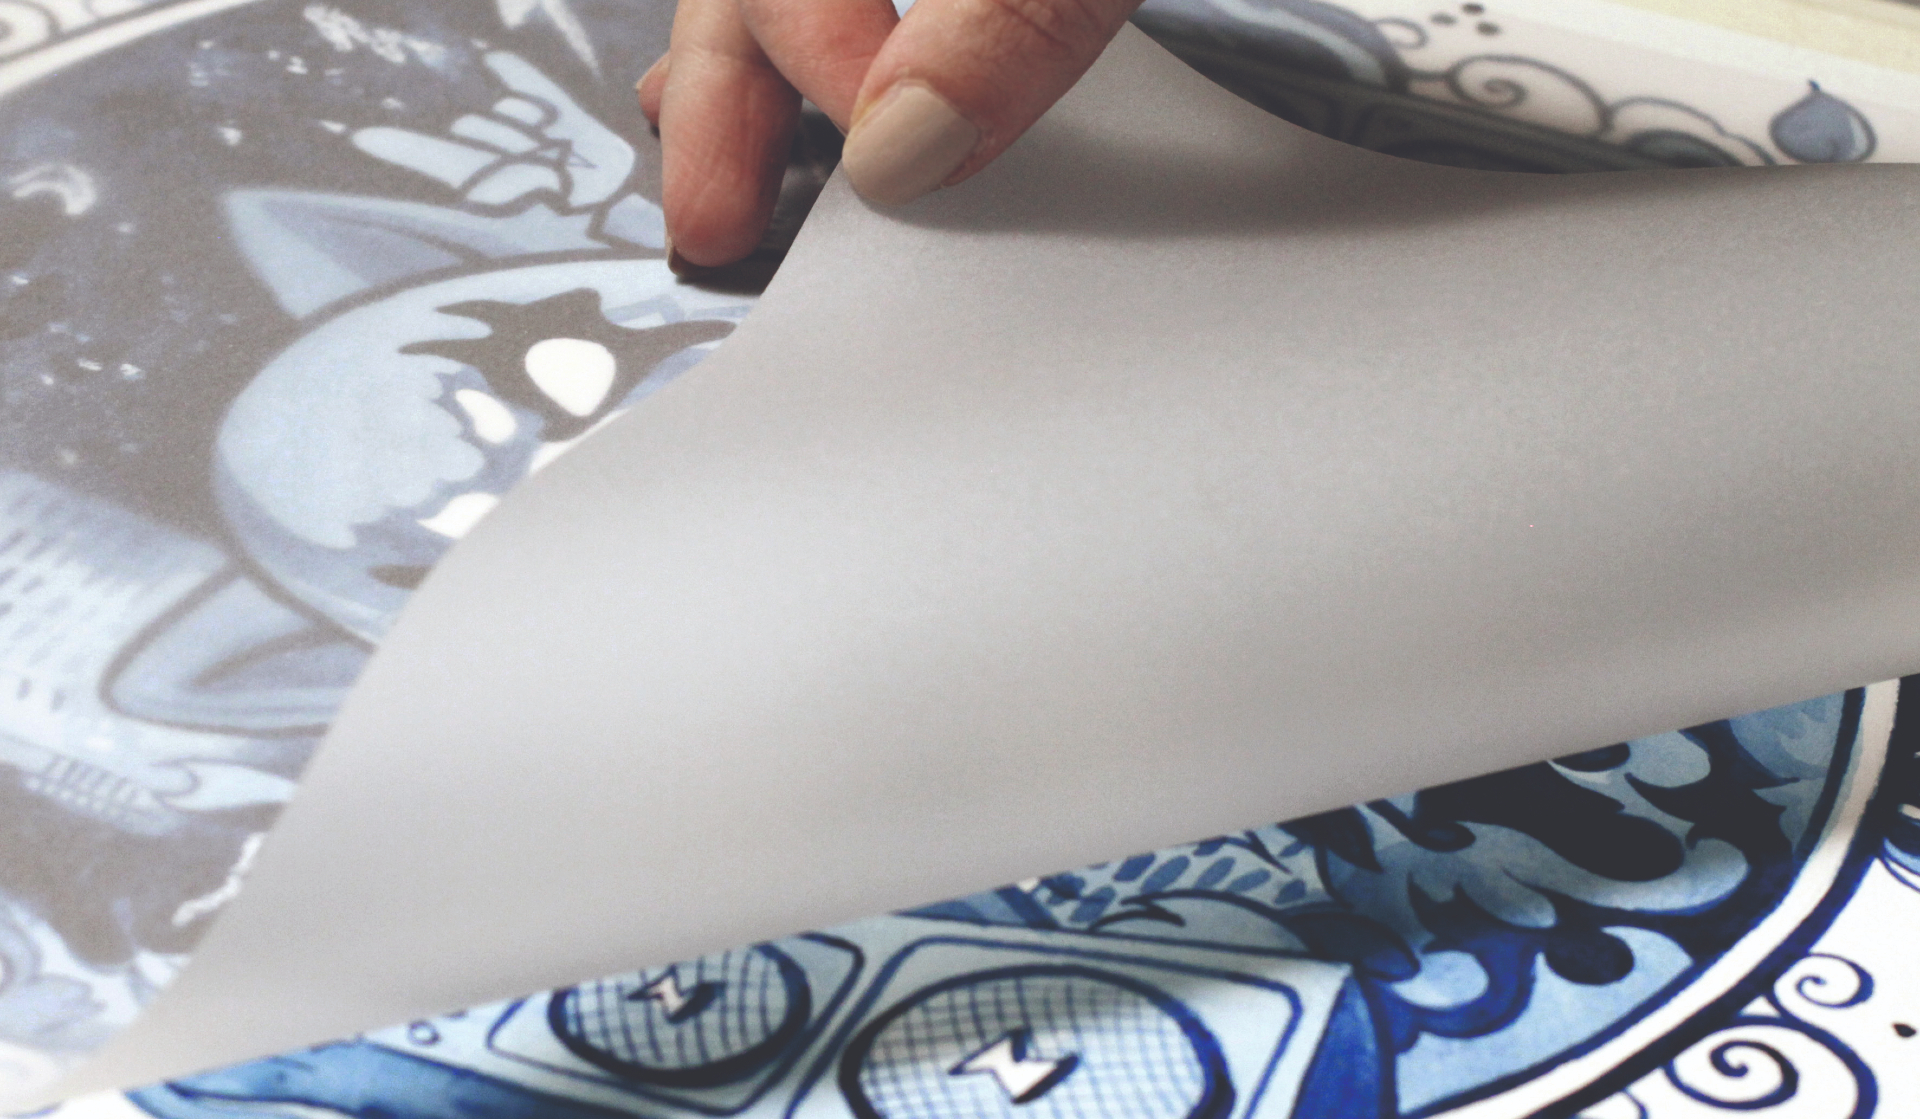
I place a large sheet of transparent paper over the painting and plan the area that I want to cut out afterward. It's almost like working in Photoshop, but far more satisfying. I take an HB pencil and outline the area of the sky with subtle lines.
12. Cut out the shape
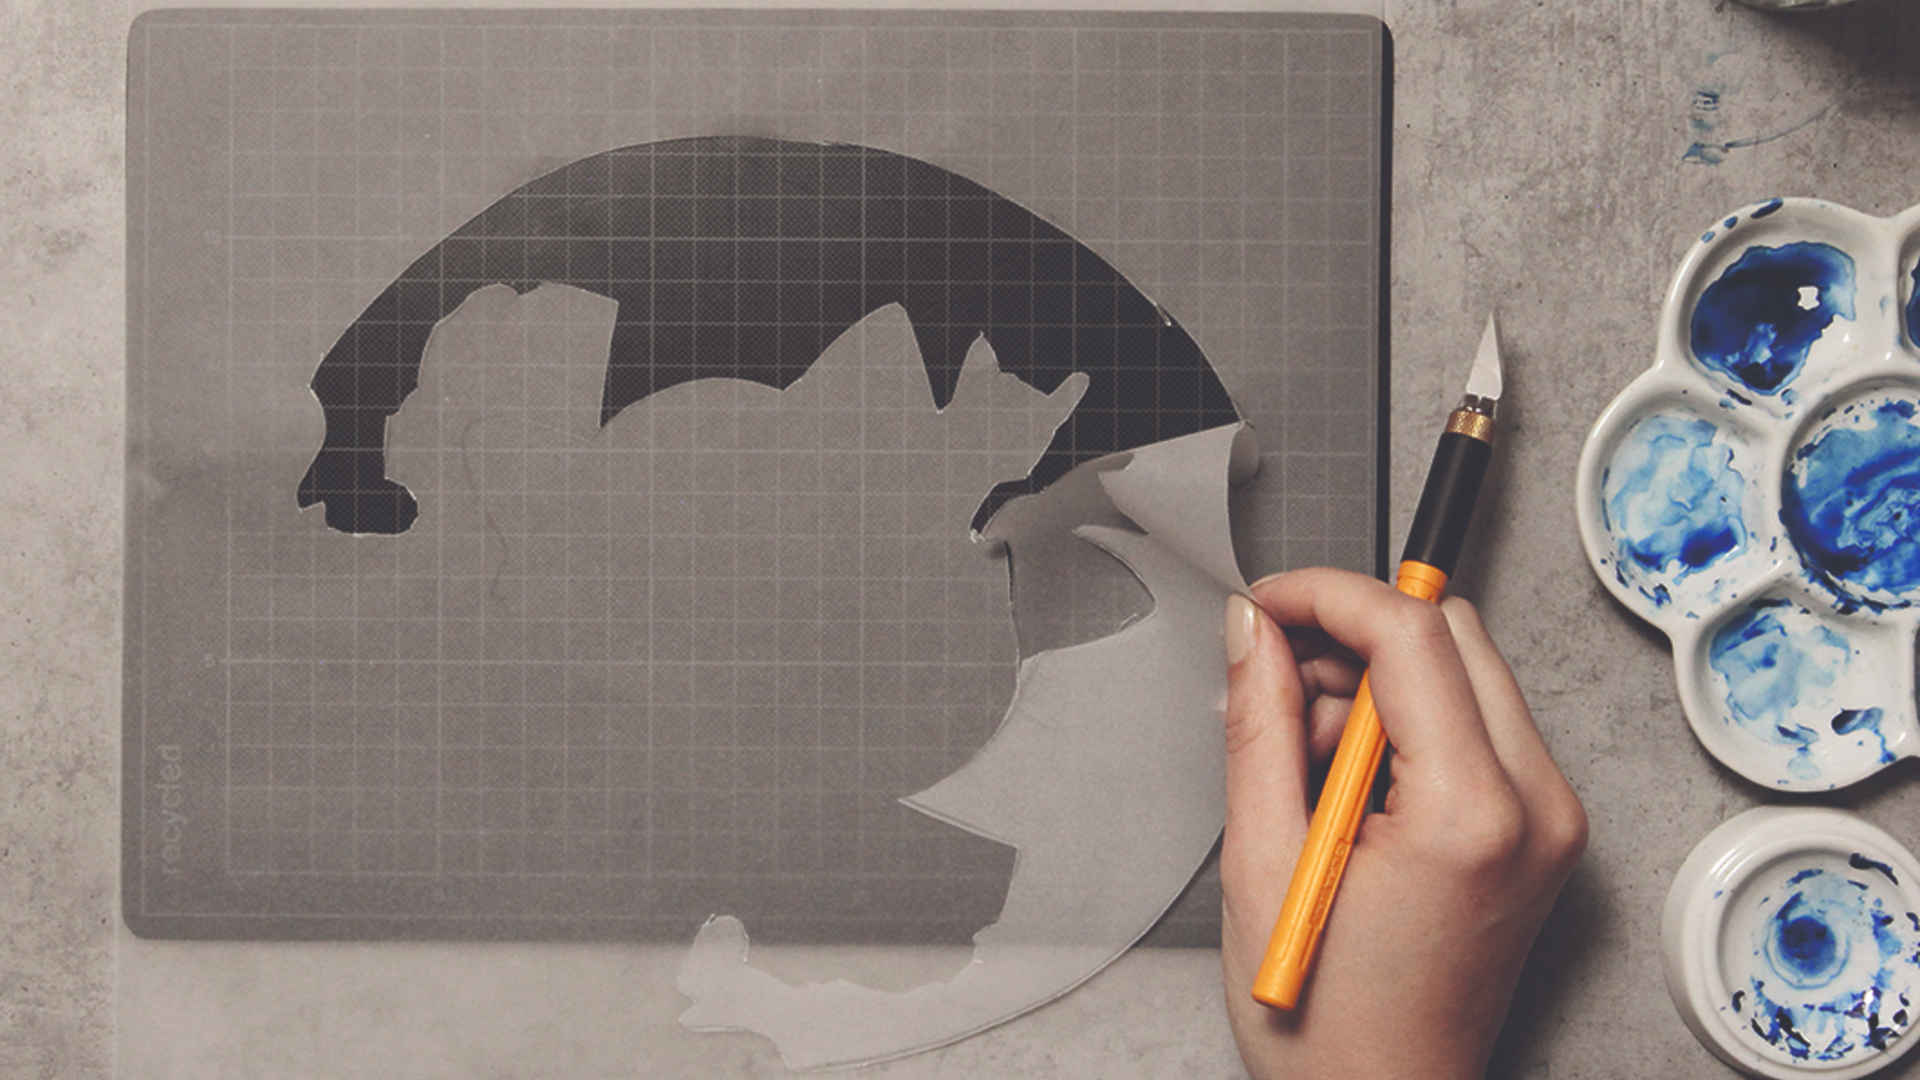
I take a cutting knife and cut out the shape of the sky, leaving the rest of the artwork protected from the spatter technique, which I'm planning to use in the next step. There’s no need to be extra precise for this particular background.
13. Create a splatter effect with gouache
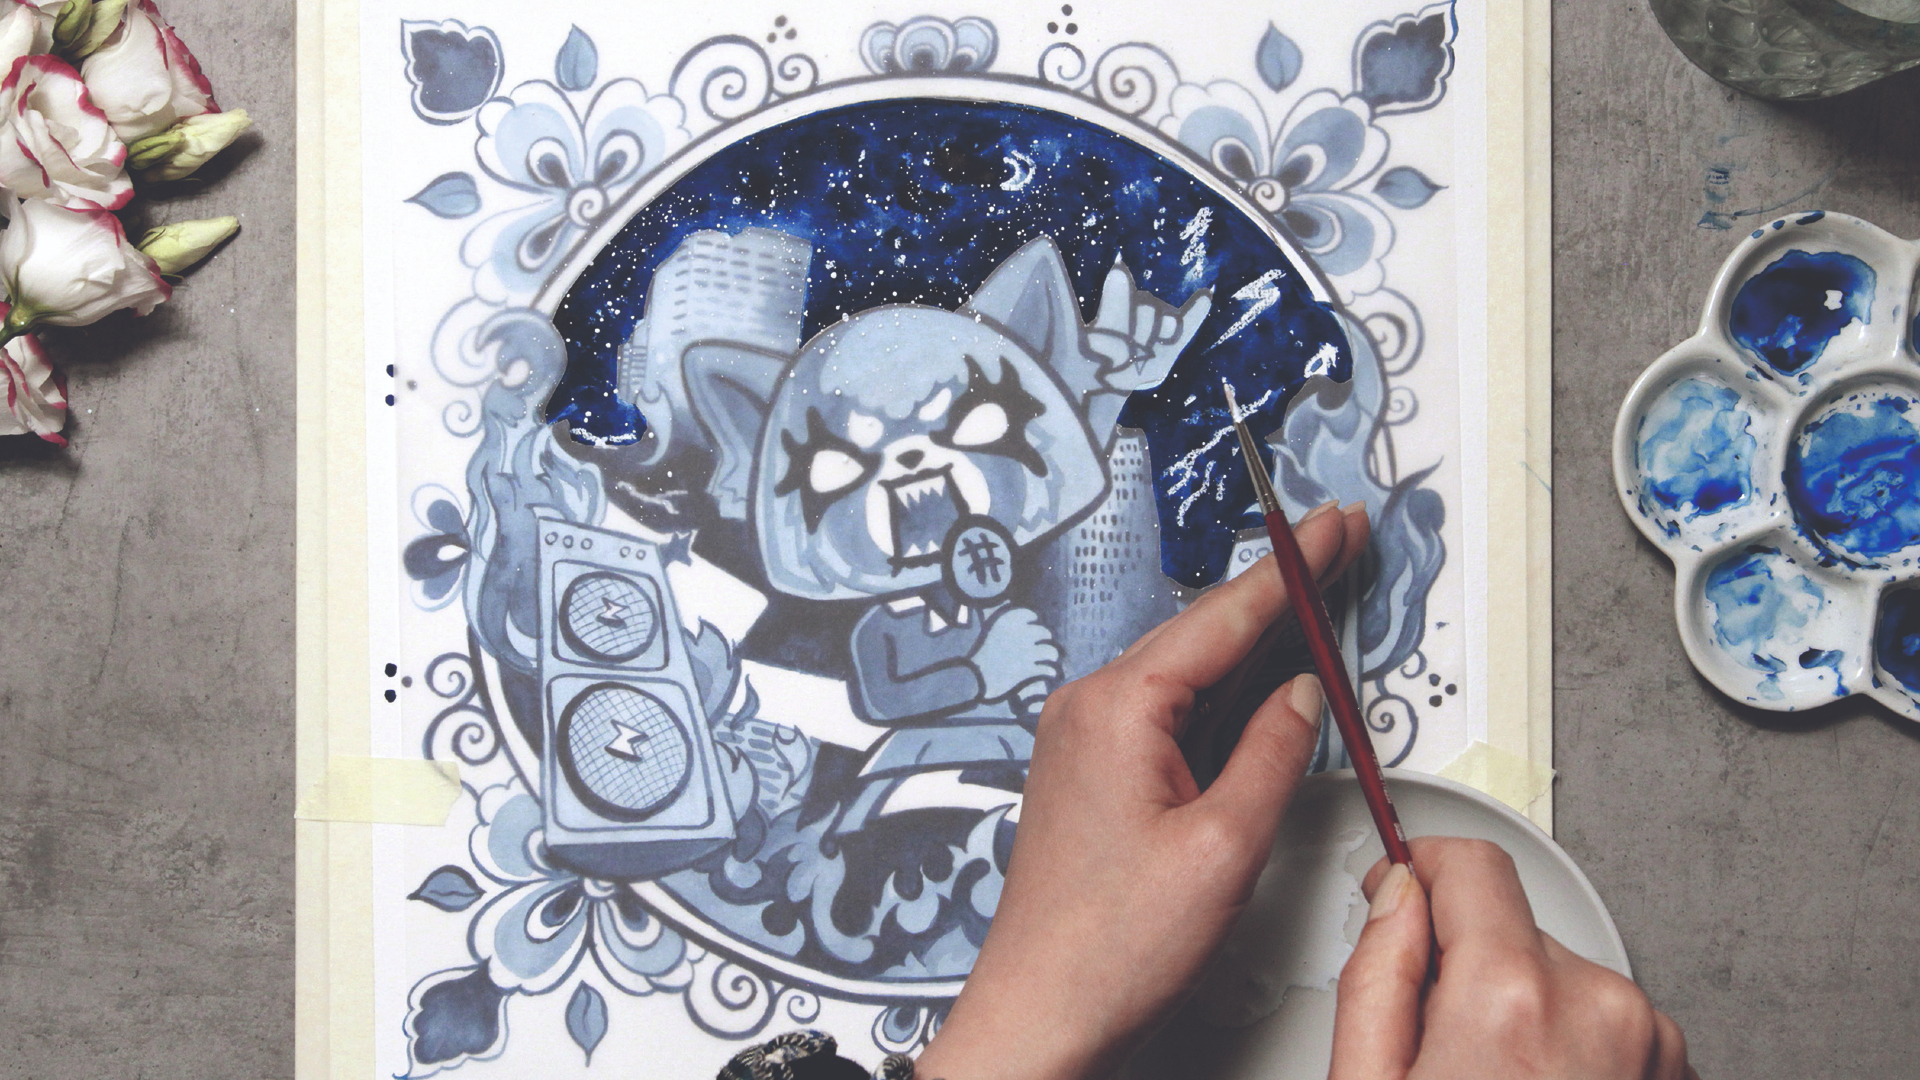
I carefully put the transparent paper back into place. The magic is happening with white gouache over a much darker background. I knock the synthetic brush loaded with paint over my fingers to create a starry sky effect.
14. Add the final touches with white
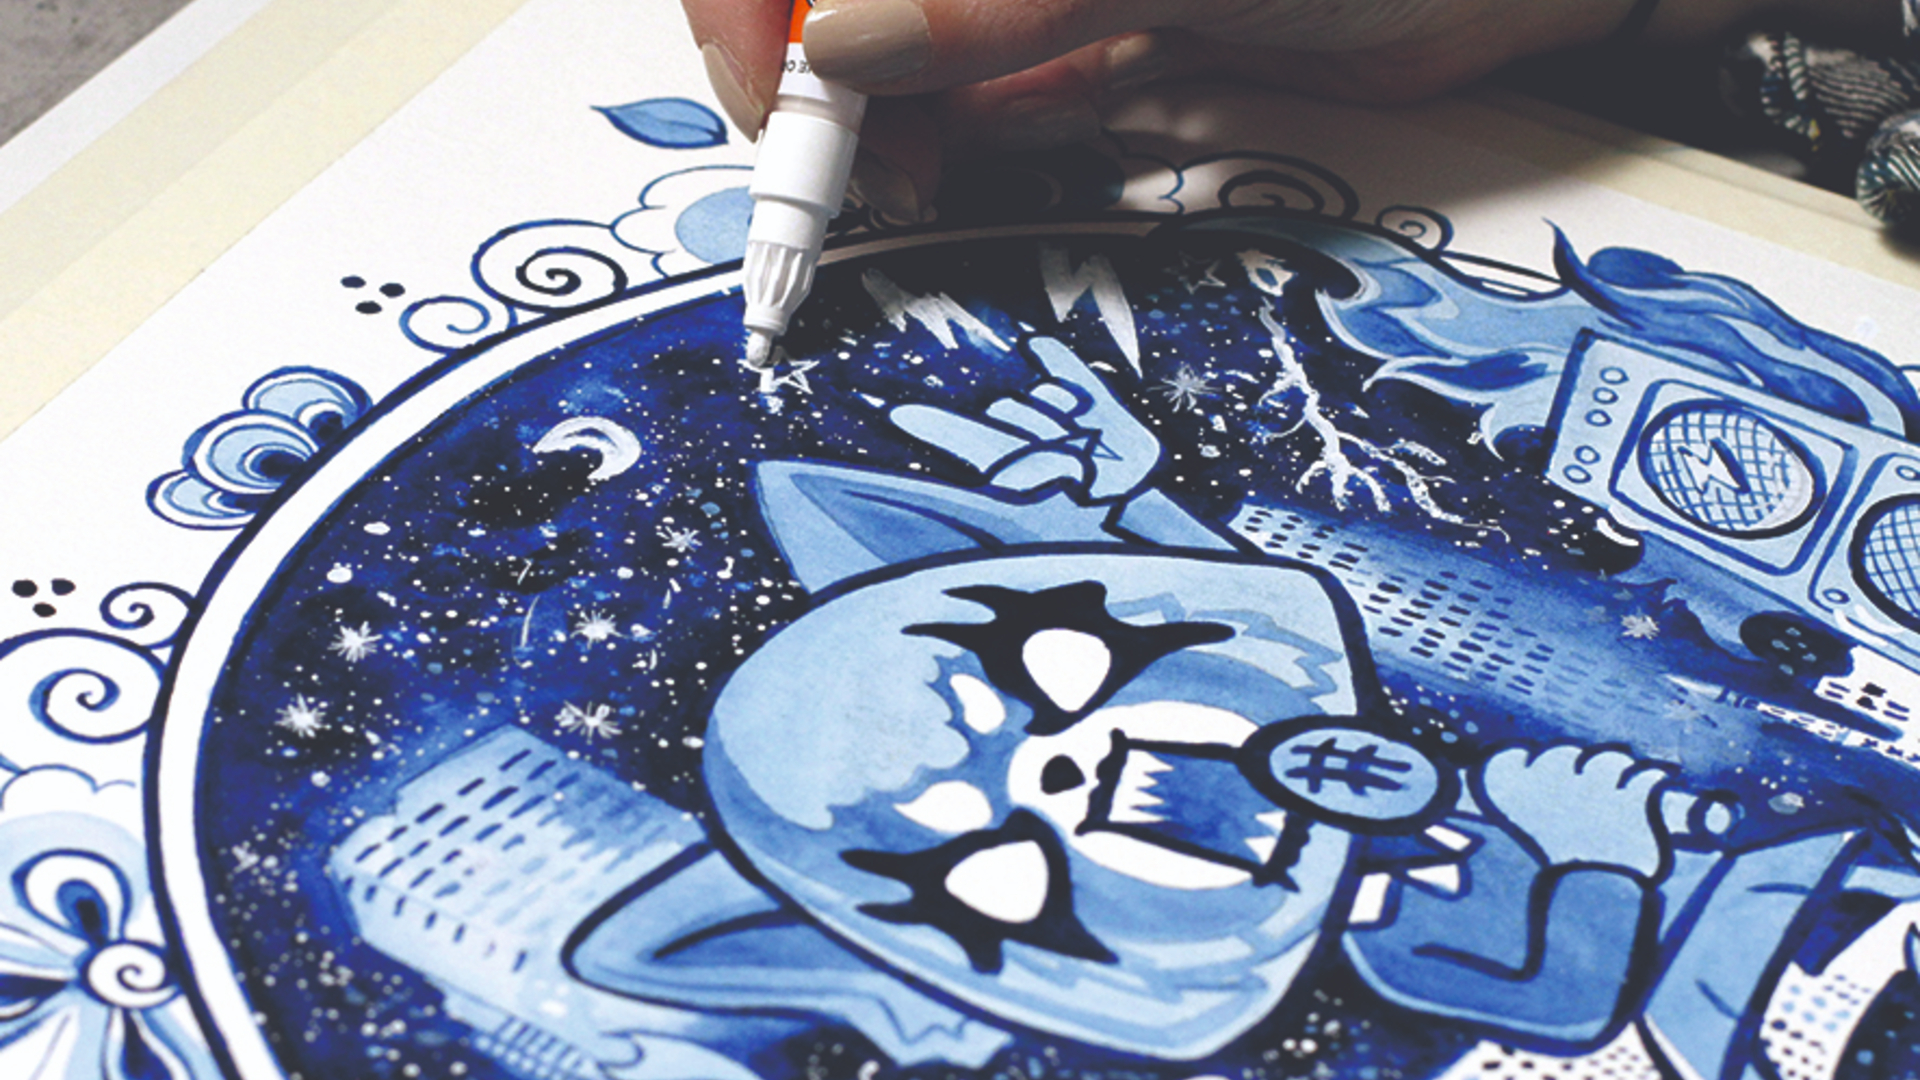
I love adding hard lights and always try to test which materials work best on the current surface. I'm using an acrylic marker and white gouache to add the brightest whites over the paint. It's tempting to add white sparkles all over the place, but it can make an image look flat. It's important to remember that every brush stroke is intentional and is contributing to the main idea.
15. Wrap things up
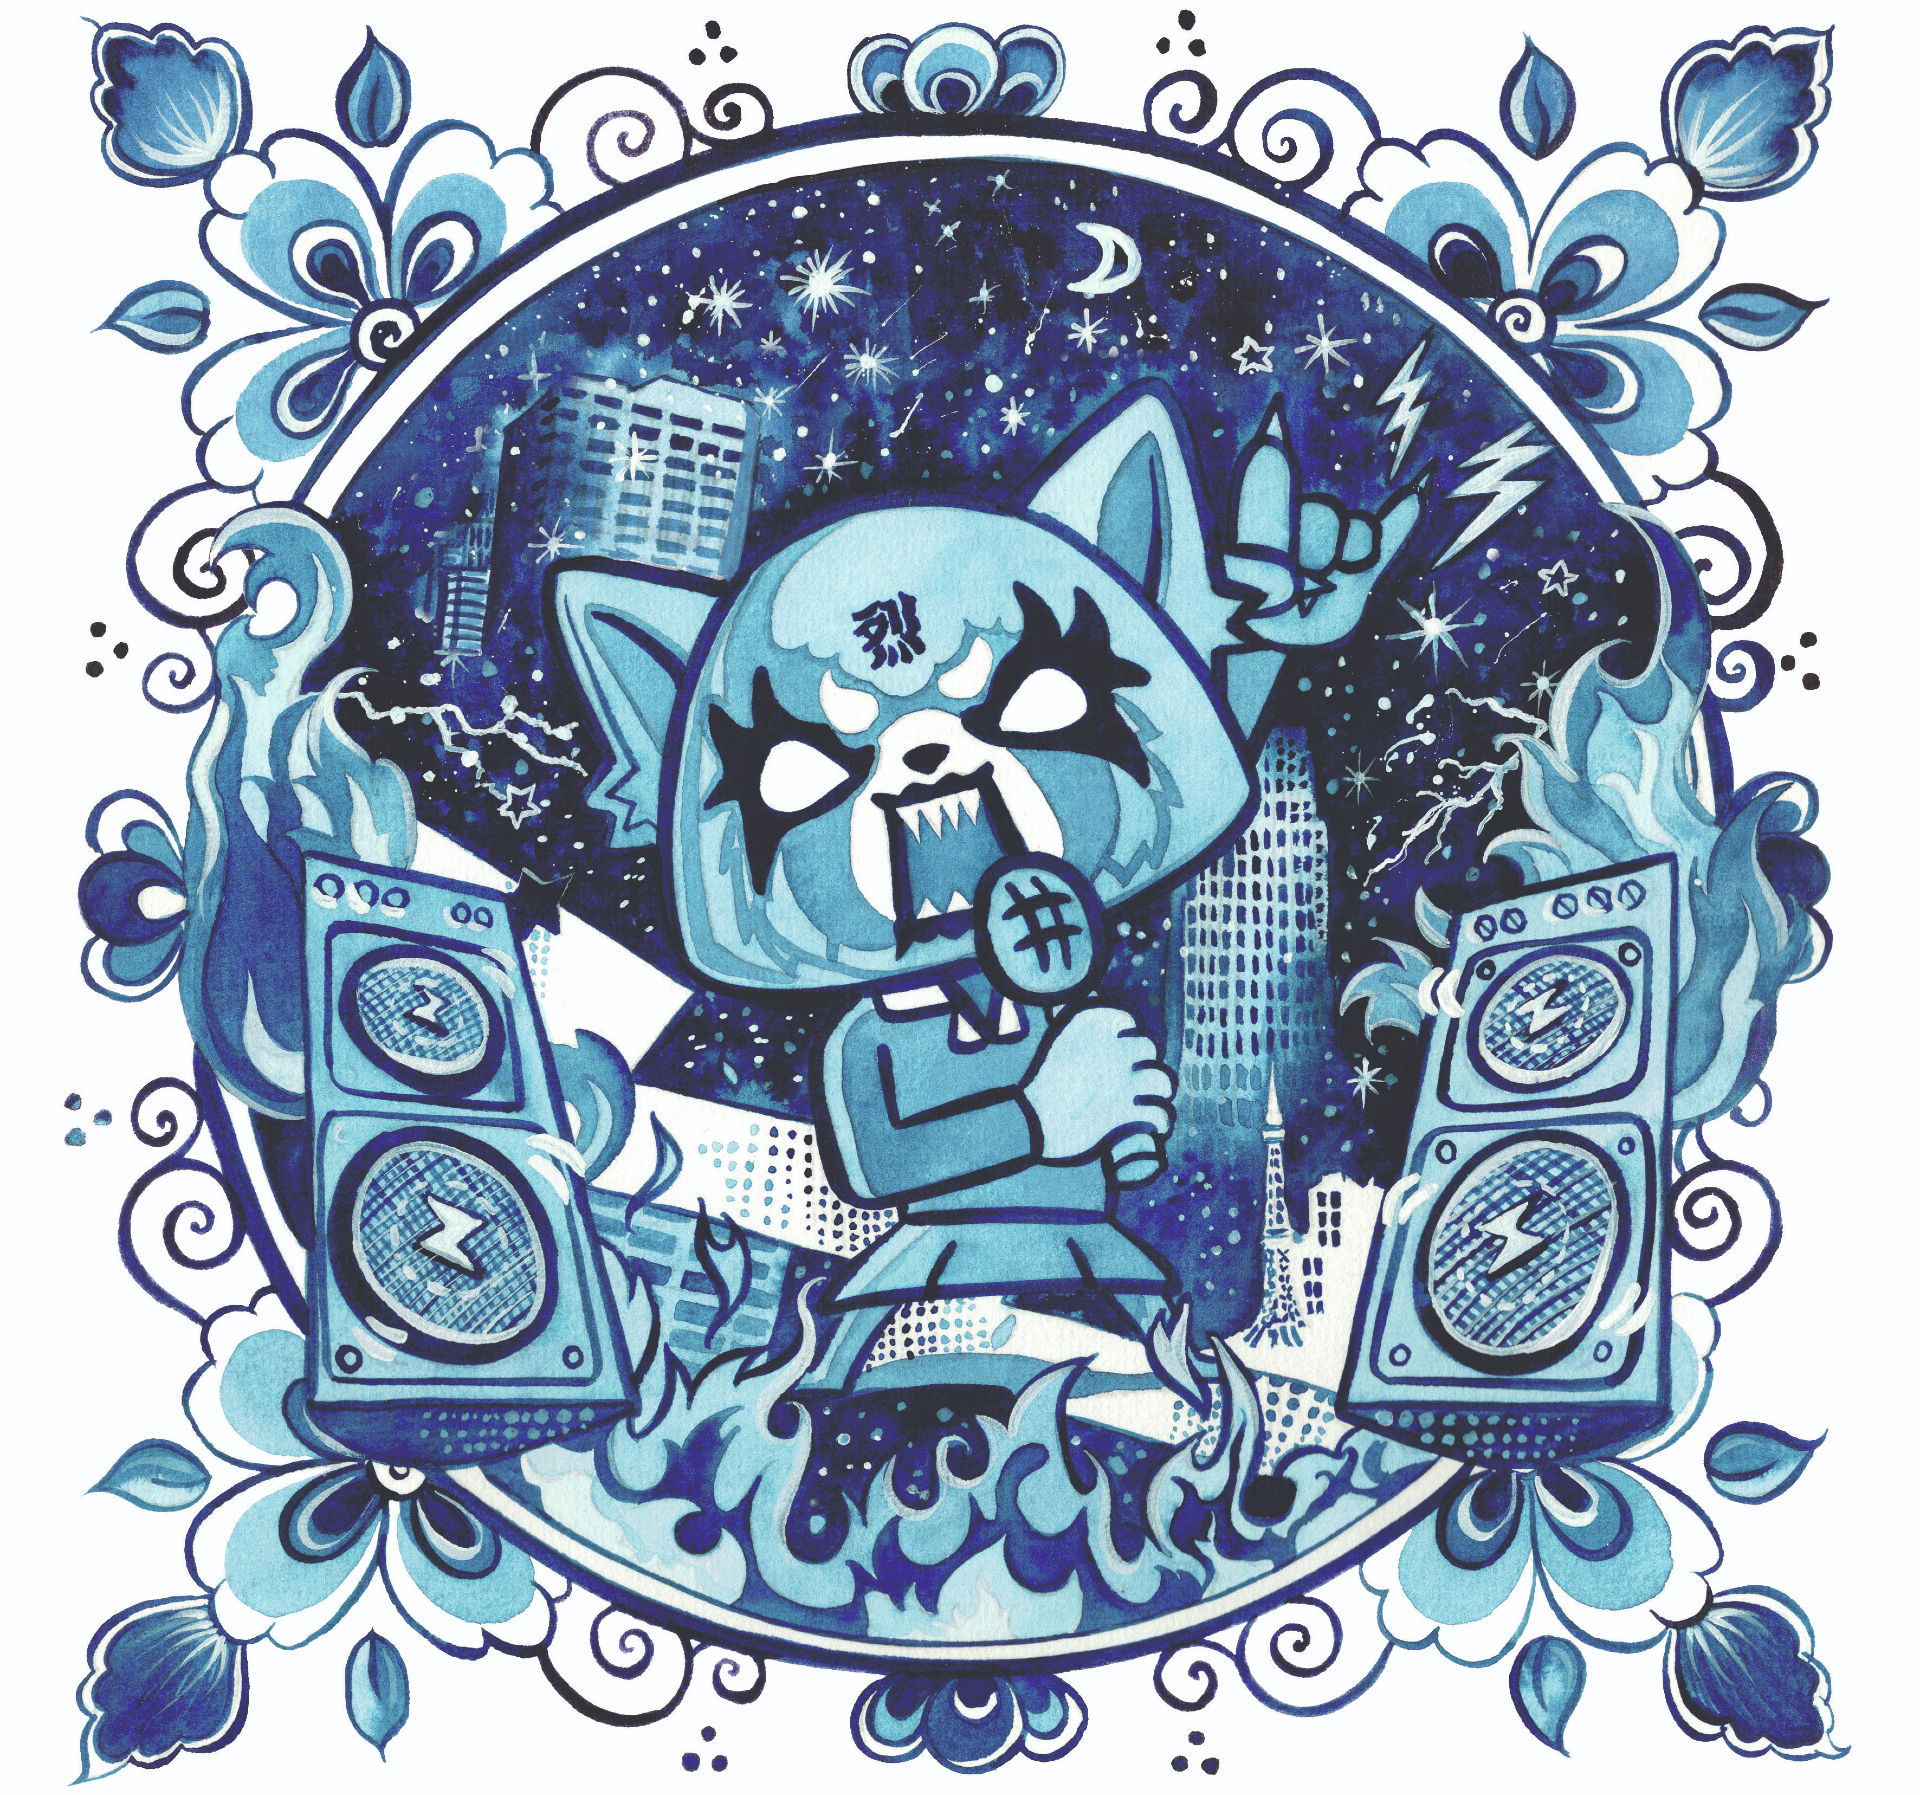
I check everything once again, ensuring all the nuances, shadows, highlights and patterns are fulfilling my initial vision. I then wait until the paint is dry and then scan the artwork at 600dpi for future production. The painting will be transferred to the special tiles by experts, so I enhance brightness and contrast in Photoshop slightly and then send the hi-resolution file to the atelier.
This article originally appeared in ImagineFX, the world's best-selling magazine for digital artists. Subscribe here.
Related articles:
- Essential watercolour techniques for every artist
- The best watercolour pencils you can buy right now
- Autumn watercolours: How to capture fall
Get the Creative Bloq Newsletter
Daily design news, reviews, how-tos and more, as picked by the editors.

Thank you for reading 5 articles this month* Join now for unlimited access
Enjoy your first month for just £1 / $1 / €1
*Read 5 free articles per month without a subscription

Join now for unlimited access
Try first month for just £1 / $1 / €1
Anna Sokolova is an artist and illustrator who’s inspired by merging the traditional and innovative approach in arts.

