Understand the Unity asset import pipeline
Learn how to import your assets and bring them to life in real time with Unity.
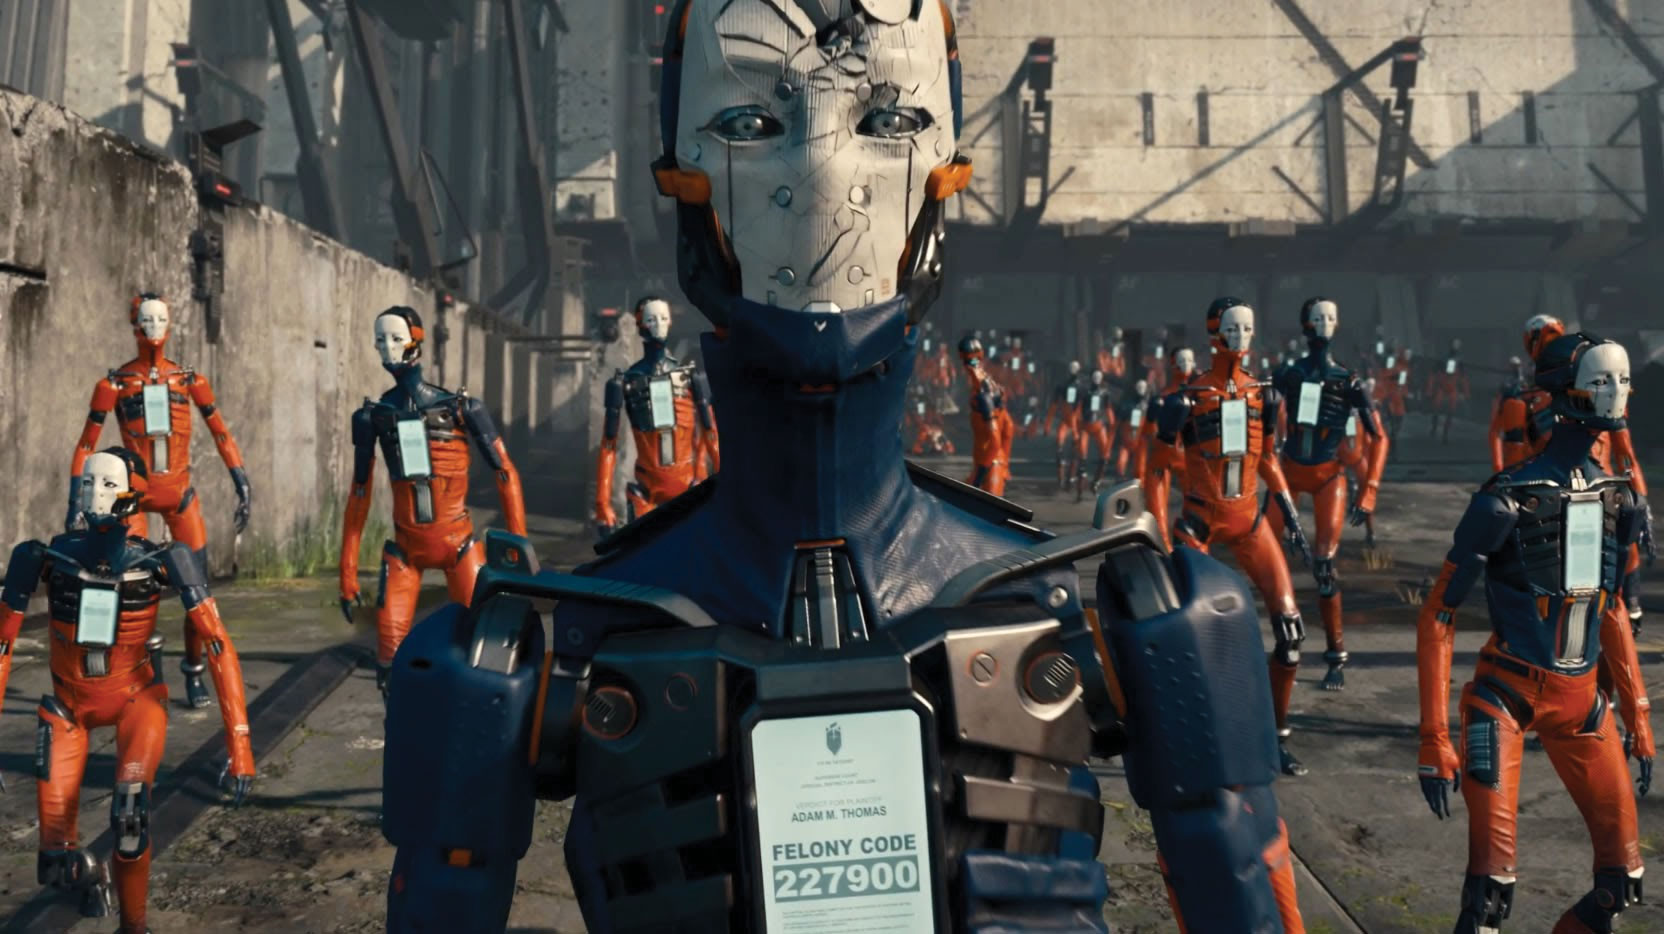
Unity is one of the world's most popular game engines, responsible for powering hundreds of thousands of games all around the world on over 25 platforms.
You may already know how easy it is to get started, prototype, iterate and publish to your chosen platform, and over the past few years we have been improving the Unity toolset to be more than a developer or programmer tool. Artists or designers can now use Unity to bring their assets to life, whether they're custom-built or free 3D models, and express their creativity without the bottleneck of needing an experienced coder. With the release of our Webby award-winning demos Adam and Book of the Dead, Unity has shown that it can produce Triple A quality productions in real time.
In this tutorial we'll take our exported FBX model from our DCC tool and import it into Unity, add in our procedural camera system (Cinemachine), apply our animations via the Timeline sequencing tool and then make our scene look beautiful with our post-processing stack. We'll demonstrate how easy it is to put something together with no code, and bring your creations to life in real time. Download the assets and follow along whilst watching the video with the link below.
Download the files and accompanying video here.
01. Get started in Unity
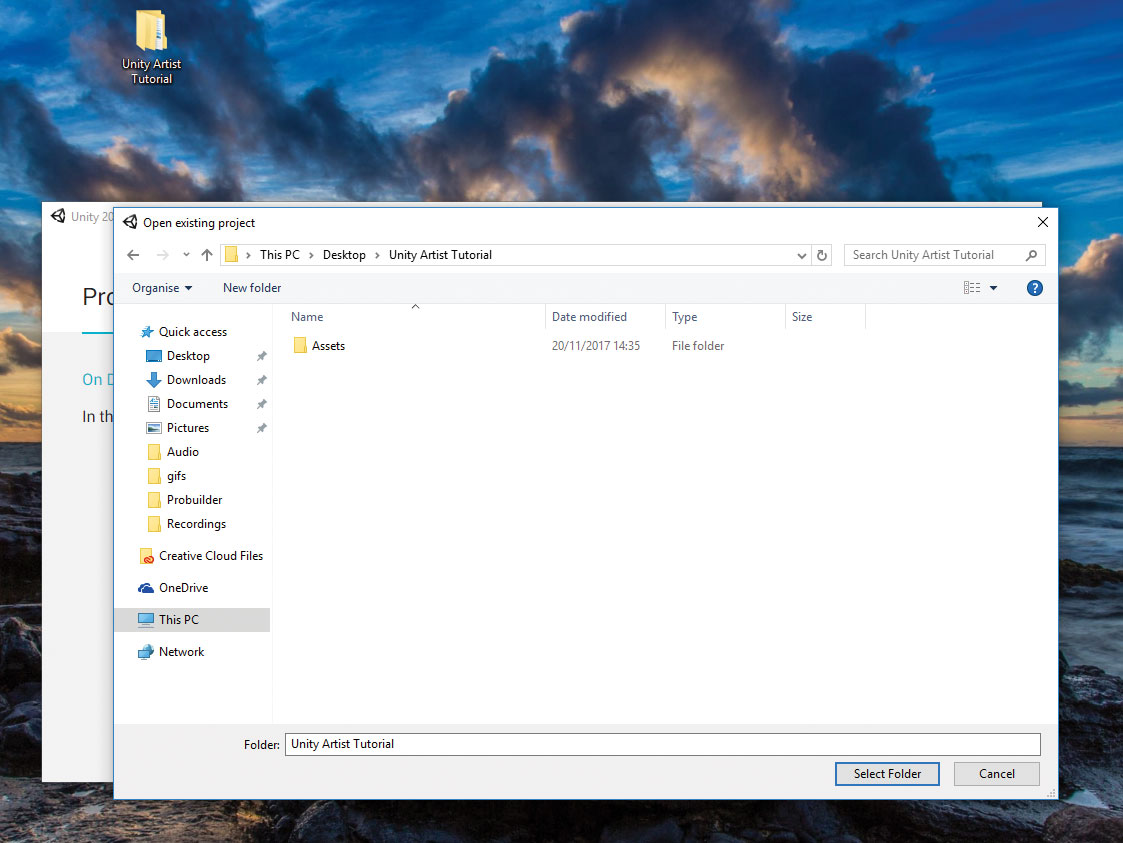
Make sure you have the assets for this project downloaded, and open Unity. Select Open Project then navigate to the Unity Artist Tutorial file. It might be useful to familiarise yourself with the Editor layout by watching this video on our Learn site.
02. Import your model
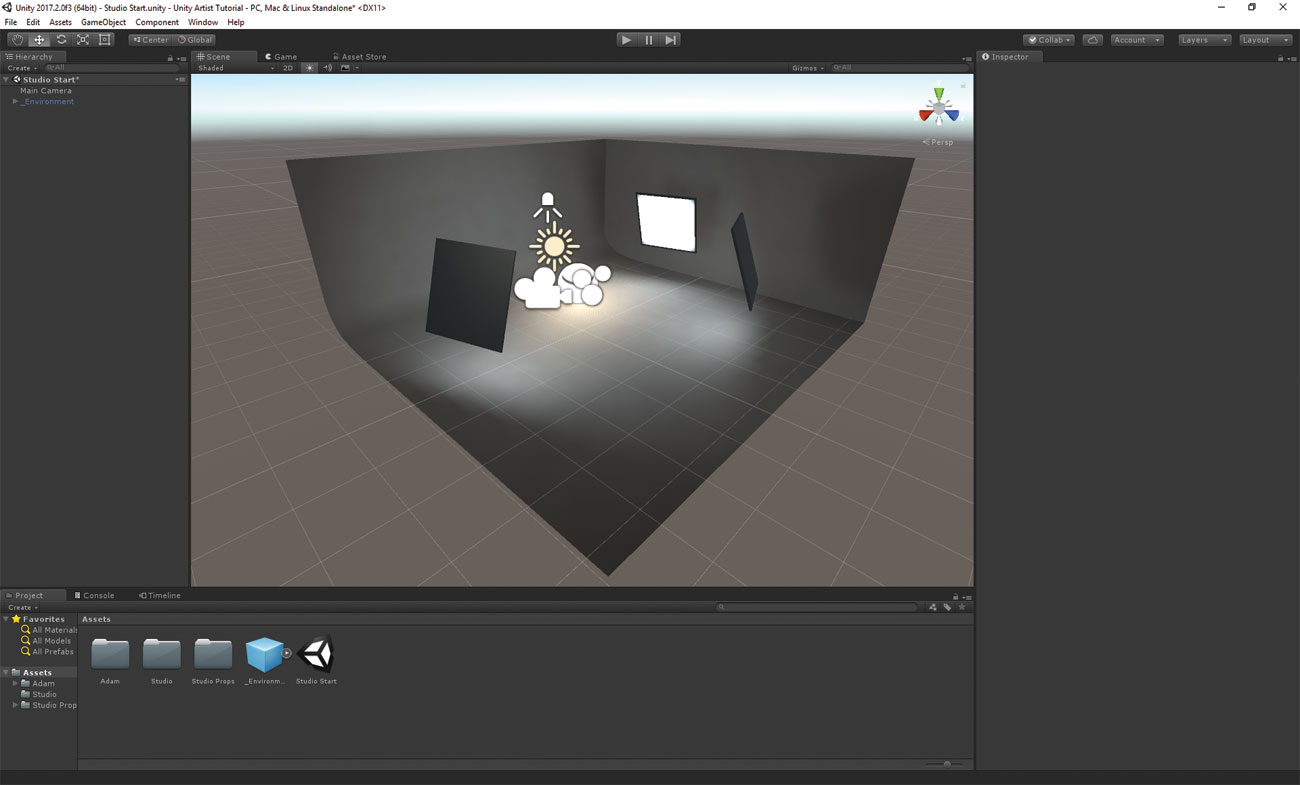
In our Project window we have imported our FBX models into the project by simply dragging them into this window or pulling them into our Assets folder. When we import an FBX into Unity we import all of the mesh, materials, animations, light data, animation curves and many other values.
03. Add your character
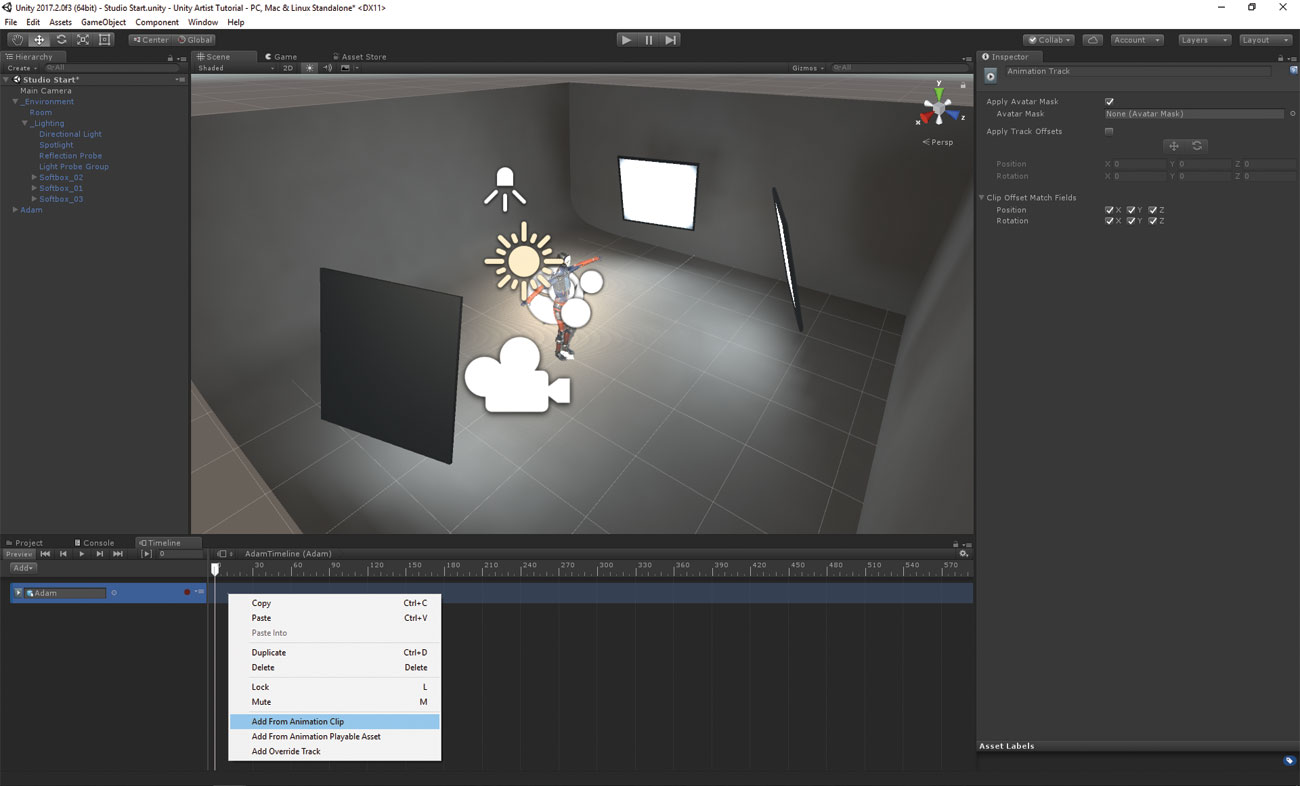
Navigate to the Adam Prefab in our Project window and pull that into the Hierarchy. You will see it pop up in the scene and Game window. You'll notice that he is already very well lit; you can view how we have lit this scene in the Environment GameObject by expanding it.
Get the Creative Bloq Newsletter
Daily design news, reviews, how-tos and more, as picked by the editors.
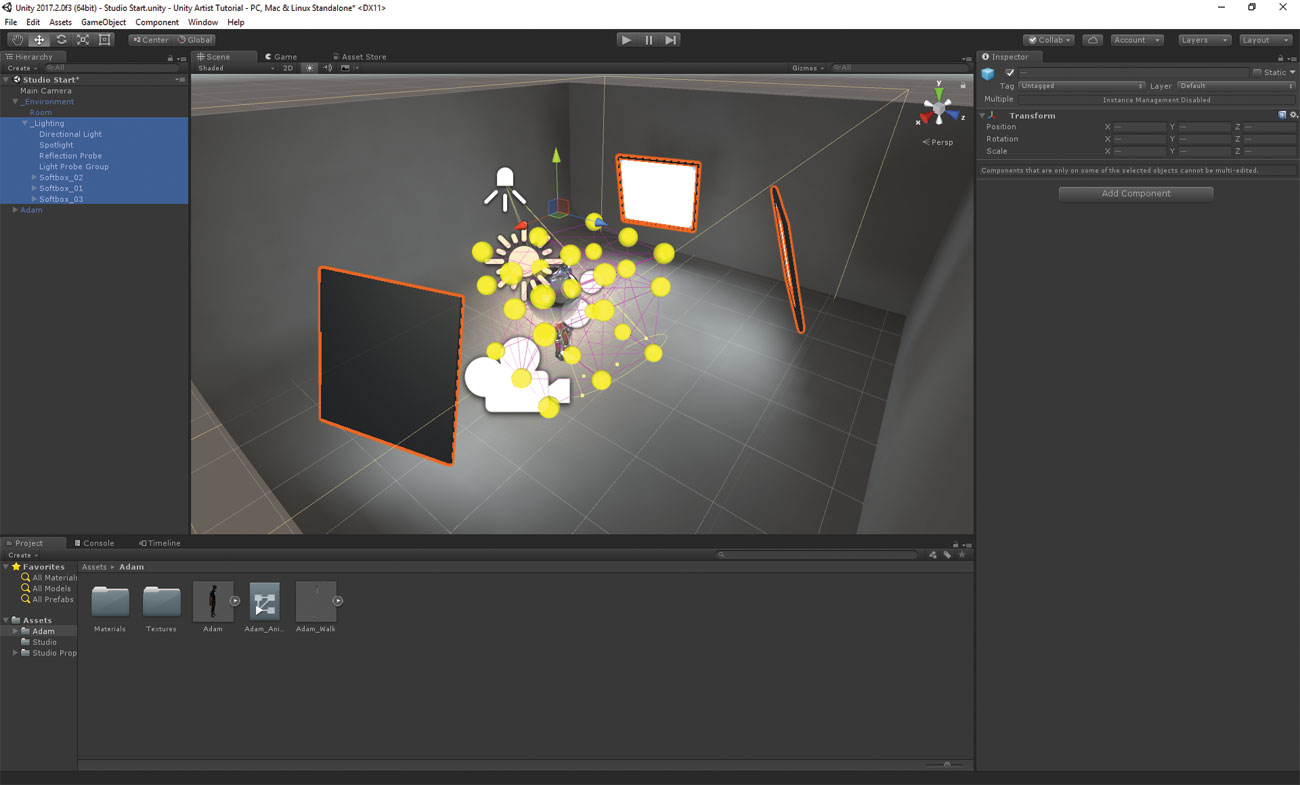
For this project we are using one Directional Light for the main source of light, a spotlight so Adam is backlit, some softboxes for the environmental soft lighting as well as some reflection and light probes in order to help distribute the lighting around the scene. Feel free to have a play with the lighting available and experiment with how it looks with different objects turned off and on.
04. Animate the character with timeline
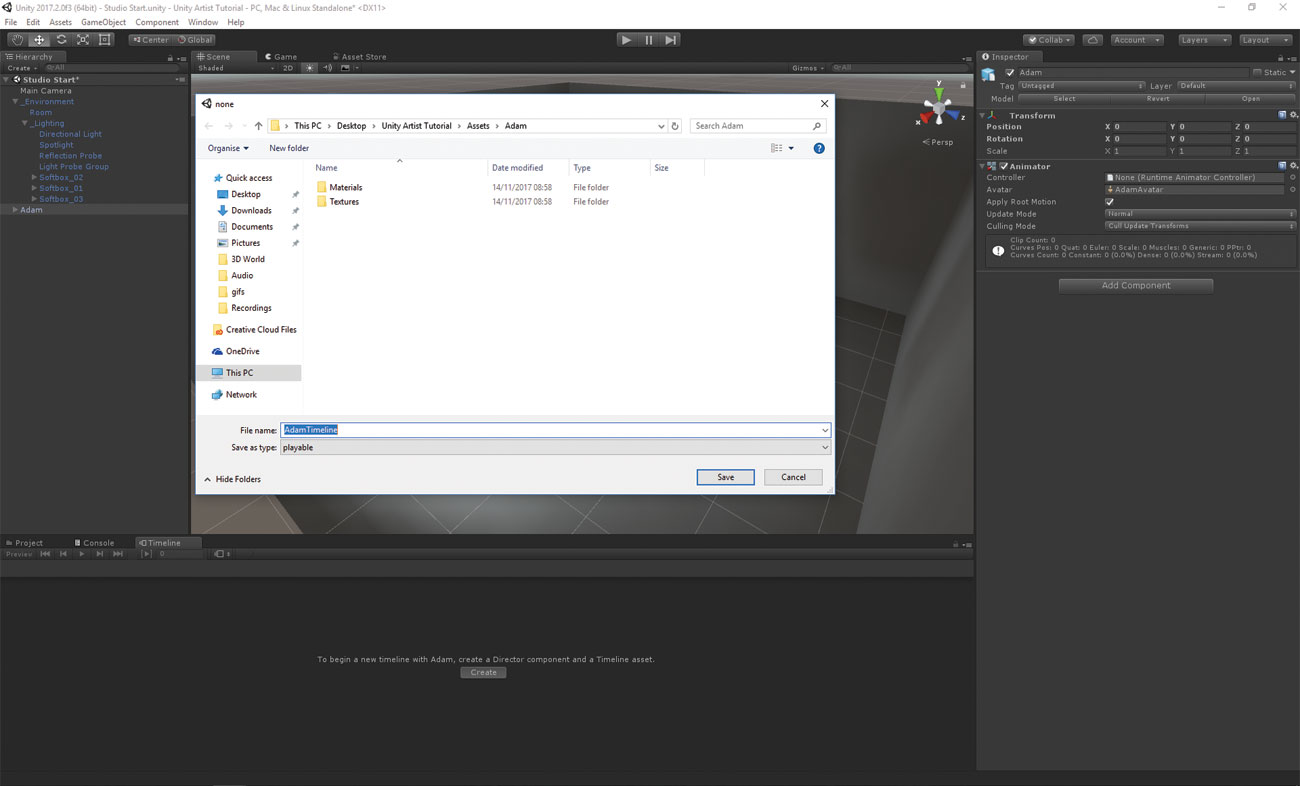
We are going to animate the character using our sequencing tool called Timeline. Go to the toolbar and select Window > Timeline and dock the Timeline window wherever you want in the Editor. Select Adam in the Hierarchy and in the Timeline window click Create. This will prompt us to create a Timeline asset. Save it as AdamTimeline.
05. Set an animation soundtrack
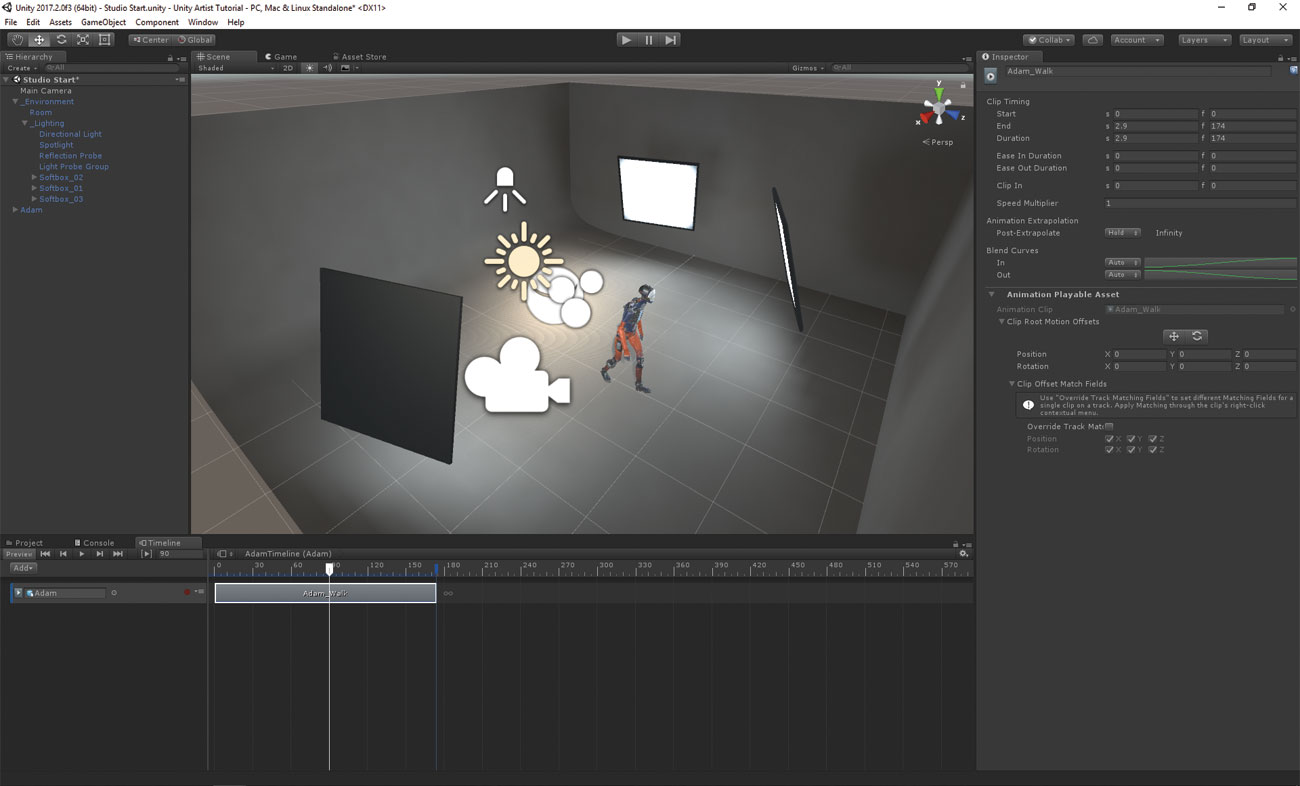
On the Adam track in the Timeline right-click and select Add from Animation Clip, then choose Adam_Walk. We will now have this block in our track that will play the animation. We can now press play and scrub through this timeline in the window instead of pressing play.
06. Add the camera system
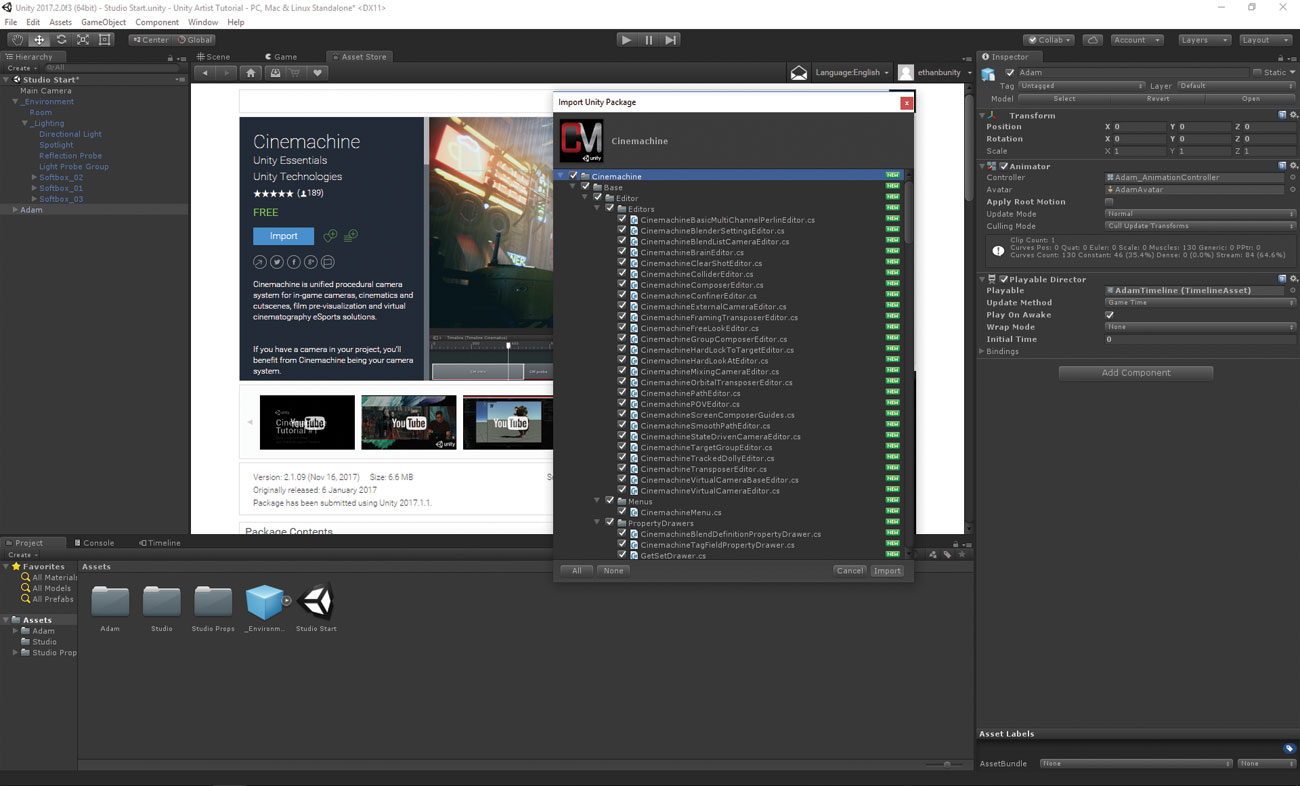
We want to create a procedural third-person camera system to follow and move around our character. We already have a ready-made package called Cinemachine, which is available for free on Unity's Asset Store. So, search for, download and import Cinemachine into your project.
07. Add a Freelook camera
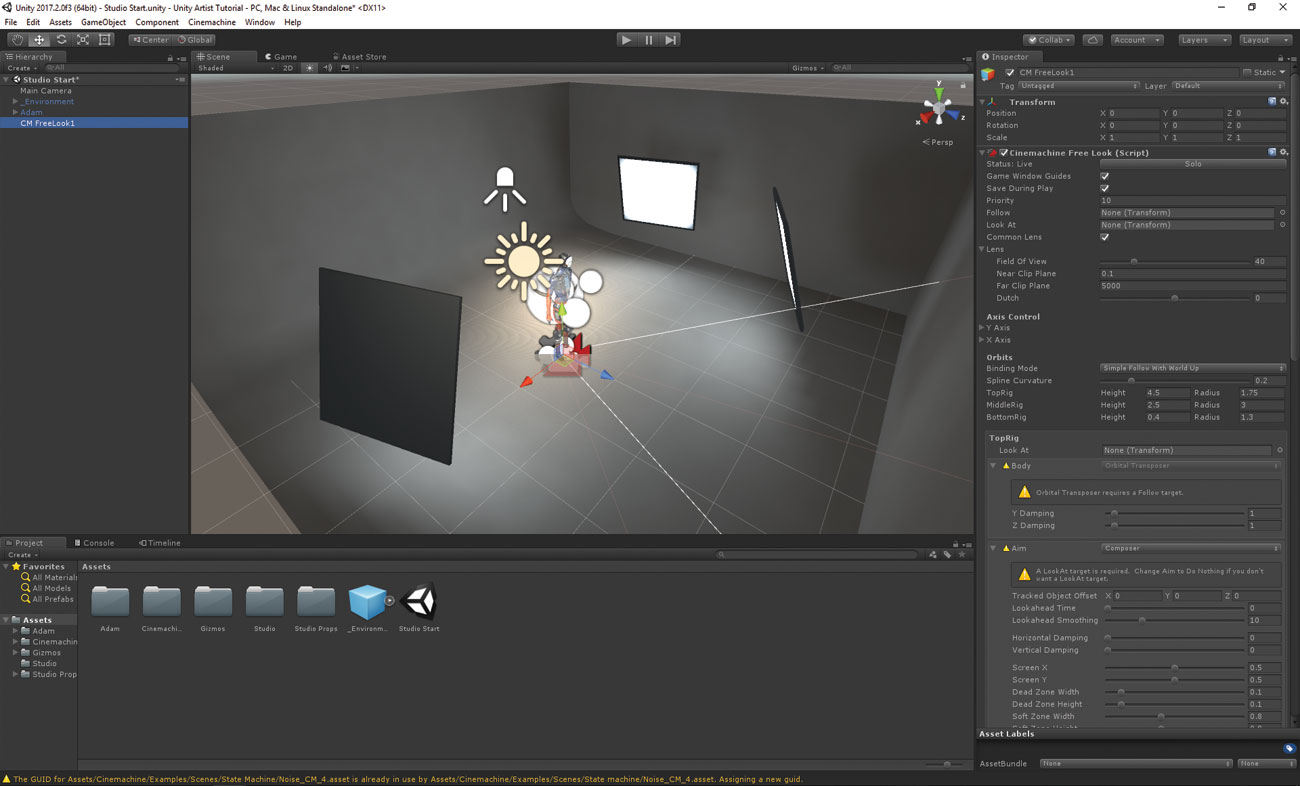
On the top toolbar navigate to Cinemachine > Create FreeLook Camera. In the Hierarchy we now have a camera icon on the Main Camera stating Cinemachine is in control, and we have the GameObject CM FreeLook 1 which has a big component on it in the Inspector. We need to pass in a Follow transform and a Look At transform. Drag the Adam GameObject from the Hierarchy into these two slots.
We will now see three rings, called rigs, around our character in the scene.
08. Modify the rig
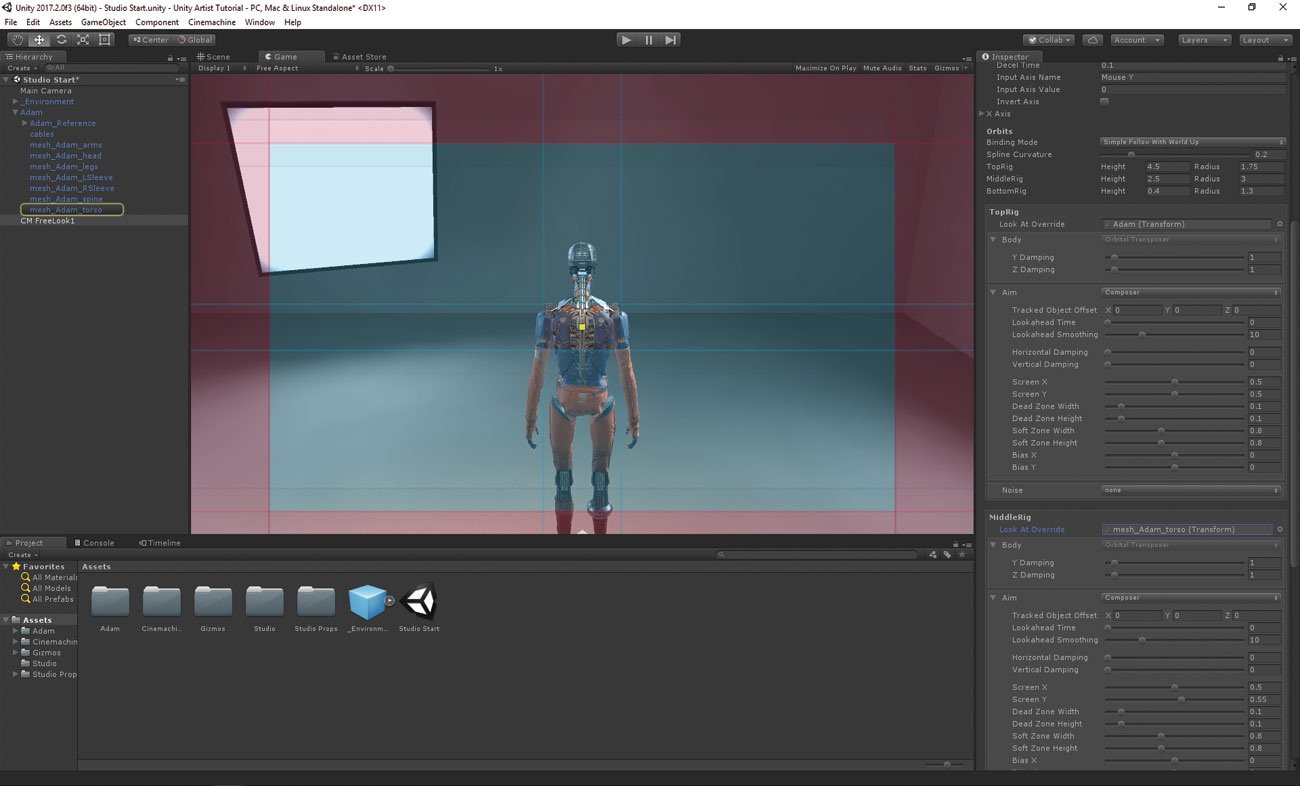
Now we want to modify our rig so that we have complete control over the look and feel. We want to be able to focus on different parts of our character depending on where our camera angle is.
There are three rigs in this component – Top, Middle and Bottom – shown by the three circles around our character in the scene. Because our target's root is on its base, all the cameras will focus on its feet. We can change the focus of the camera by setting up individual Look Ats for each rig.
On the Top rig our Look At transform wants to be set to Adam, the Middle rig to Bip01 and the Bottom rig to Bip01 Spine.
We can see the transition between these different rigs by either entering Play Mode, or by changing the Y axis value in the Axis Control section of the FreeLook camera.
09. Import post-processing
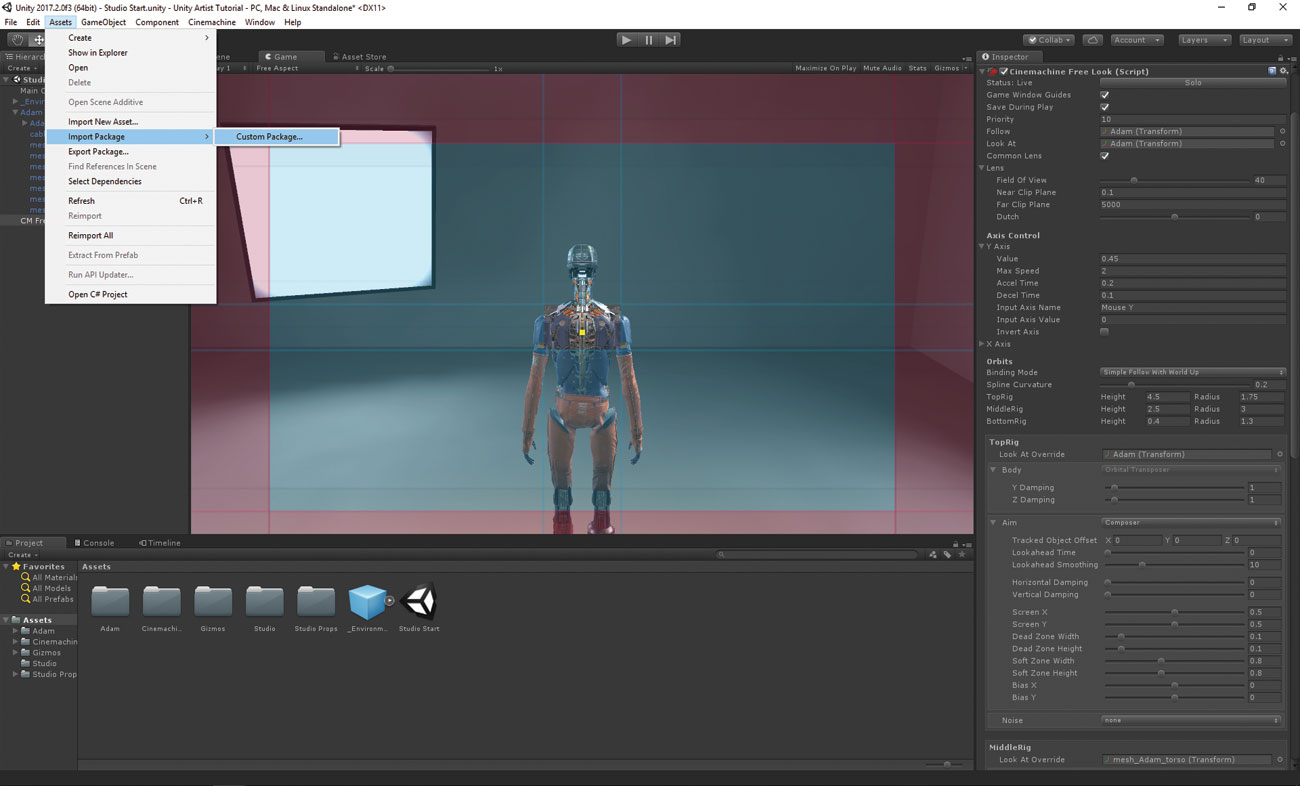
Next we are going to add the post-processing into our project. We can download the PostProcessing package from the Asset Store via your browser or via the 'Asset Store' windows in the Editor and search 'Post Processing Stack'. On the top toolbar, navigate to Assets > Import New Package > Custom Package. Then locate the PostProcessing package and click Open.
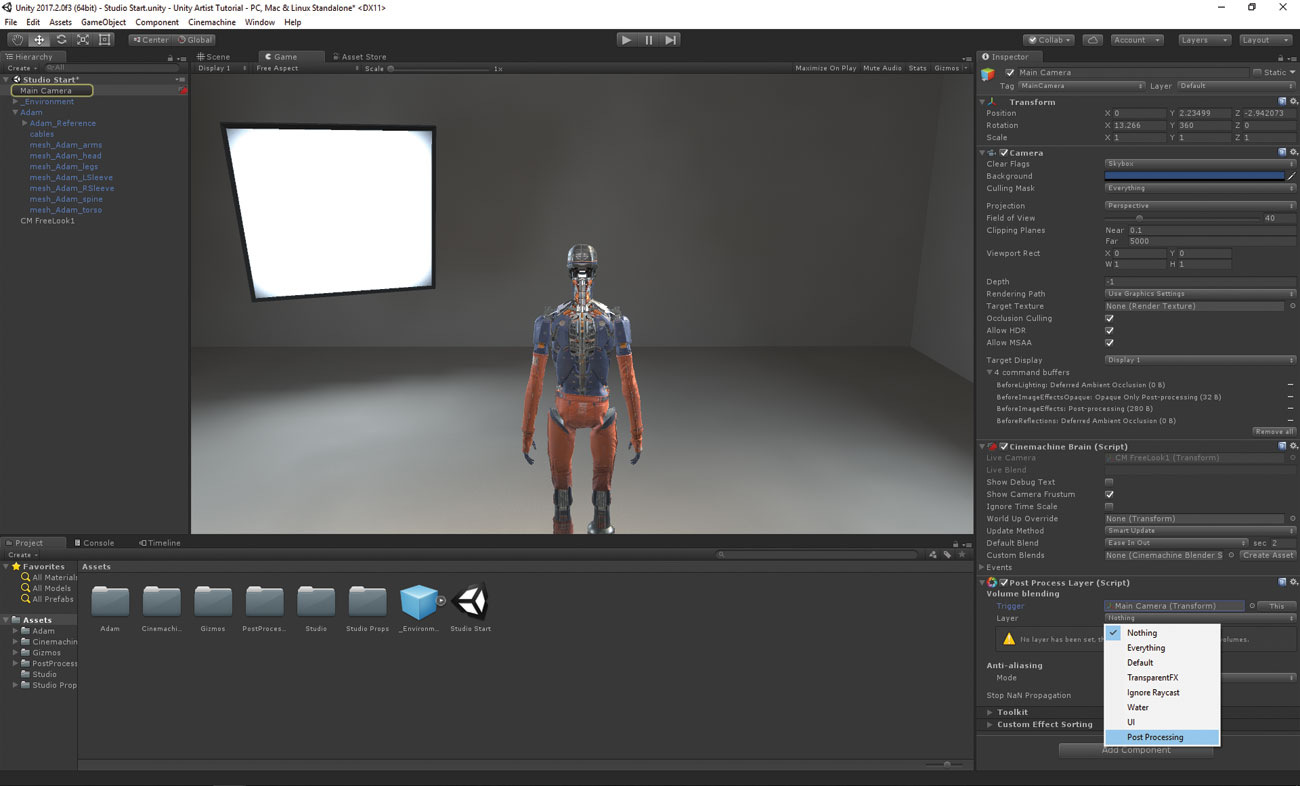
On our Main Camera we want to add a new component, and that component is a Post Process Layer (Add Component > Rendering > Post Process Layer). This will handle our post-processing for us, so the only thing we will need to do is create a new layer. On the top toolbar, navigate to Edit > Project Settings > Tags and Layers. Next click the arrow to reveal all layers in our project, and add in a new User Layer called Post Processing. Now we can go back to our Main Camera and set up the Volume Blending Layer on the Post Process Layer Component.
While we are on our Main Camera, we want to add some anti-aliasing to our view. Let's change the anti-aliasing mode to FXAA (Fast Approximate Anti-Aliasing).
10. Set up post-process volume
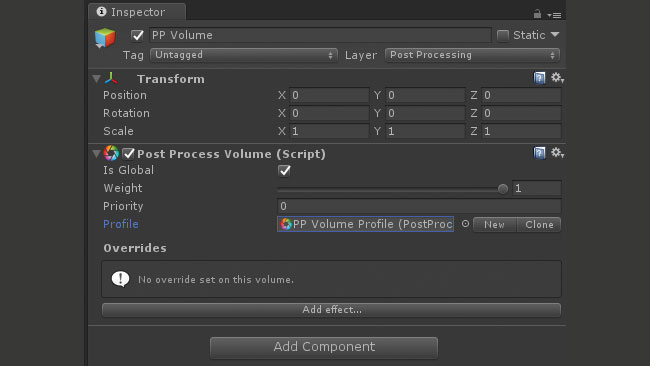
On the top toolbar, navigate to GameObject > Create Empty. Select this GameObject and rename it 'PP Volume'. Let's set the layer of this GameObject to the layer we set up earlier, Post Processing. Next let's add the Post Process Volume, by navigating to Add Component > Rendering > Post Process Volume. On this new component we want to tick the 'Is Global' checkbox. This will ensure that the effects are applied to the camera.
Next we want to create a new Post Process Profile by clicking New next to the circle selector for Profile. Now it is finally time to start adding all of our post-processing effects.
11. Apply post-effects
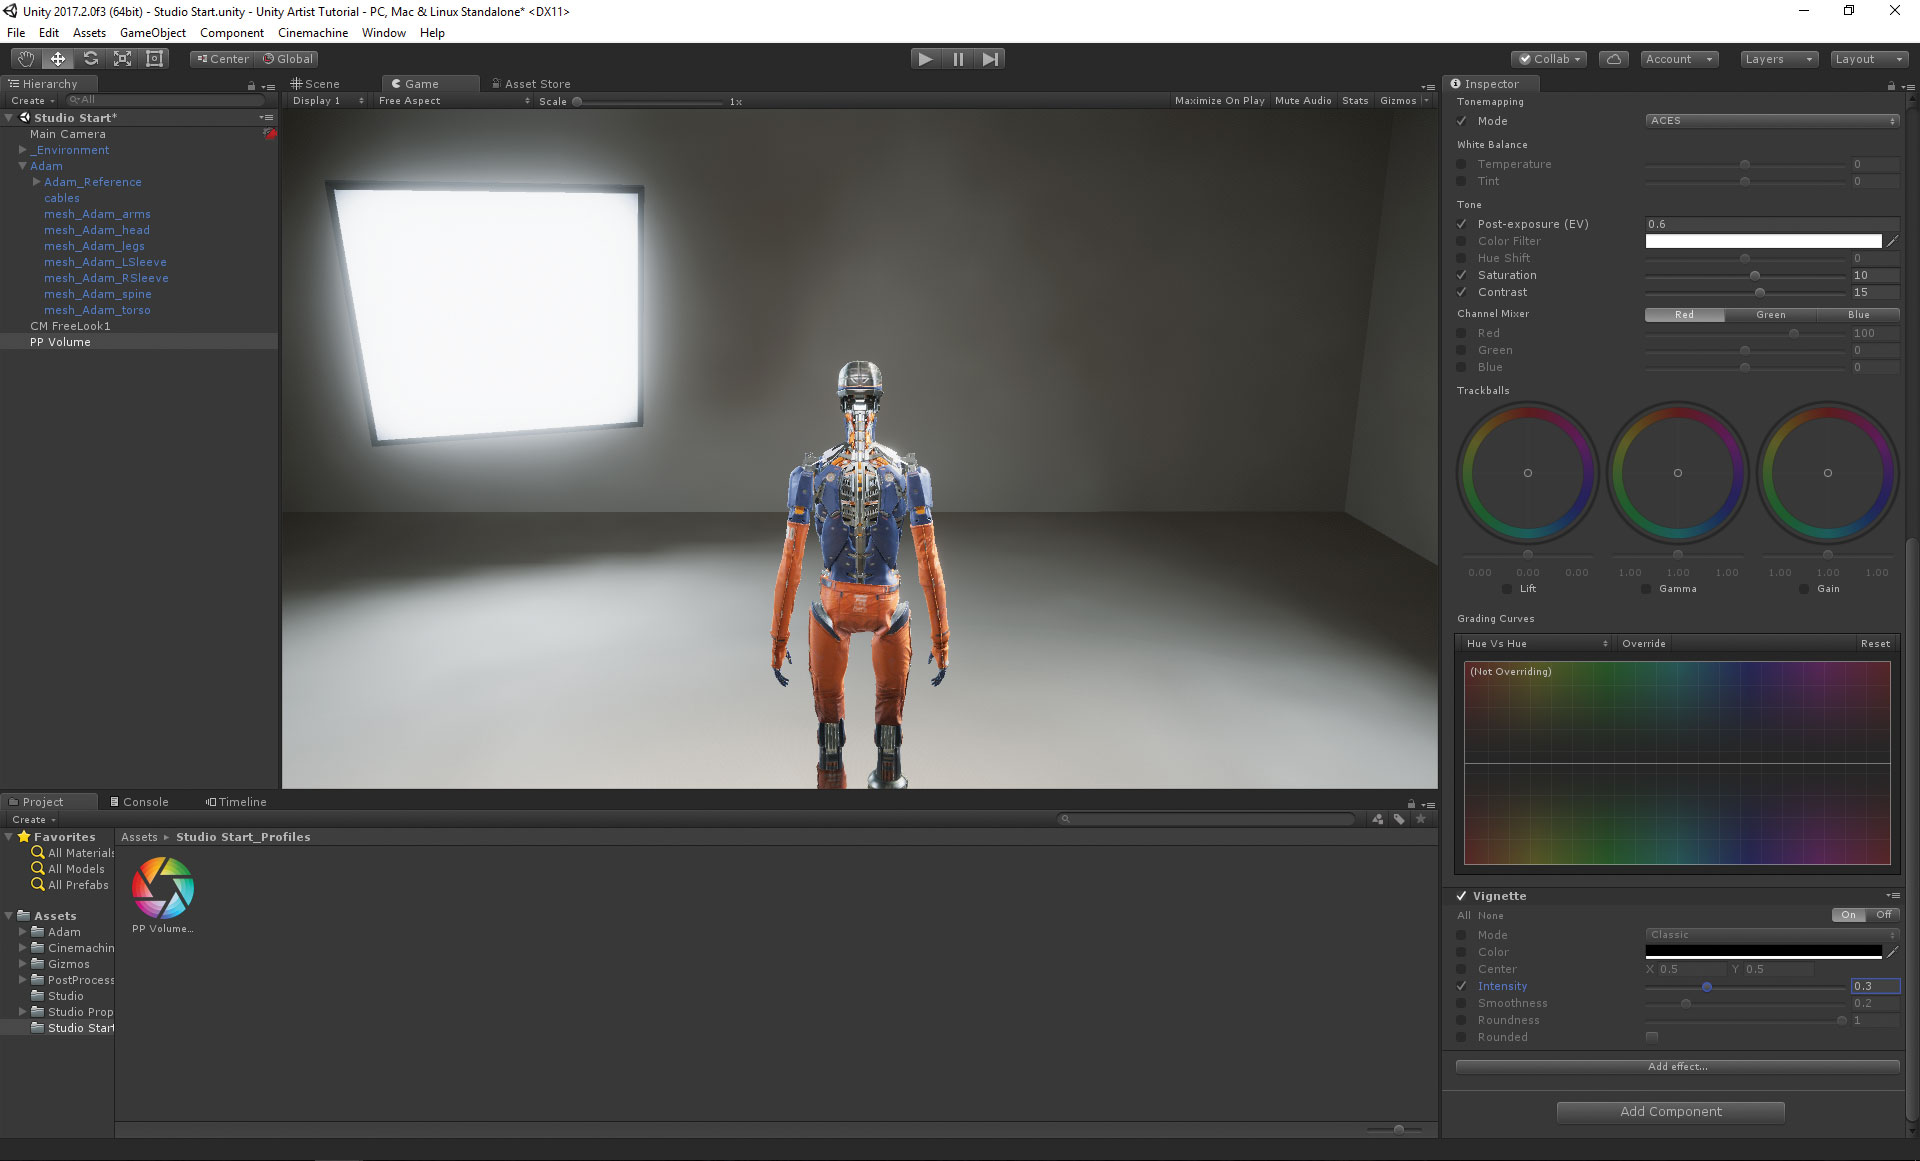
Let's work our way through the post-processing effects. The first effect we'll add is Auto Exposure. Within this effect if we want to edit a value, first tick the box to the left of the variable, and then it becomes editable. We're going to do this for the following options: Minimum (EV) – set the value to -0.35, Maximum (EV) – set the value to 1, and Key Value – set to 1.25.
The next post-processing effect we are going to add is Bloom. As we did with the previous effect, we are going to tick the variables we want to edit, and then we can tweak them as desired. We are going to do this for: Intensity – set to 1.5, and Soft Knee – set to 0.1.
The scene is looking a bit dull, so let's add in the Color Grading effect. The variables we will set are the following: Tonemapping Mode to ACES, Post-exposure (EV) to 0.6, Saturation to 10 and Contrast to 15. The final effect we will add to the profile is Vignette, which will add a darker edge to our camera, serving to focus the user towards the centre of the screen. We only need to set one variable on this effect and that is Intensity at 0.3.
And there we have it, our final product. We've managed to import a model into Unity, create a camera system using Cinemachine, apply an animation using Timeline and finally add some image effects using post-processing. You can add in more characters, some landscape in the background or even some more animations and use the Timeline to sequence them all together.
This article was originally published in issue 236 of 3D World, the world's best-selling magazine for CG artists. Buy issue 236 here or subscribe to 3D World here.
Related articles:

Thank you for reading 5 articles this month* Join now for unlimited access
Enjoy your first month for just £1 / $1 / €1
*Read 5 free articles per month without a subscription

Join now for unlimited access
Try first month for just £1 / $1 / €1
