How to turn day into night in Photoshop
Convert a sunny landscape into an atmospheric night-time composite.
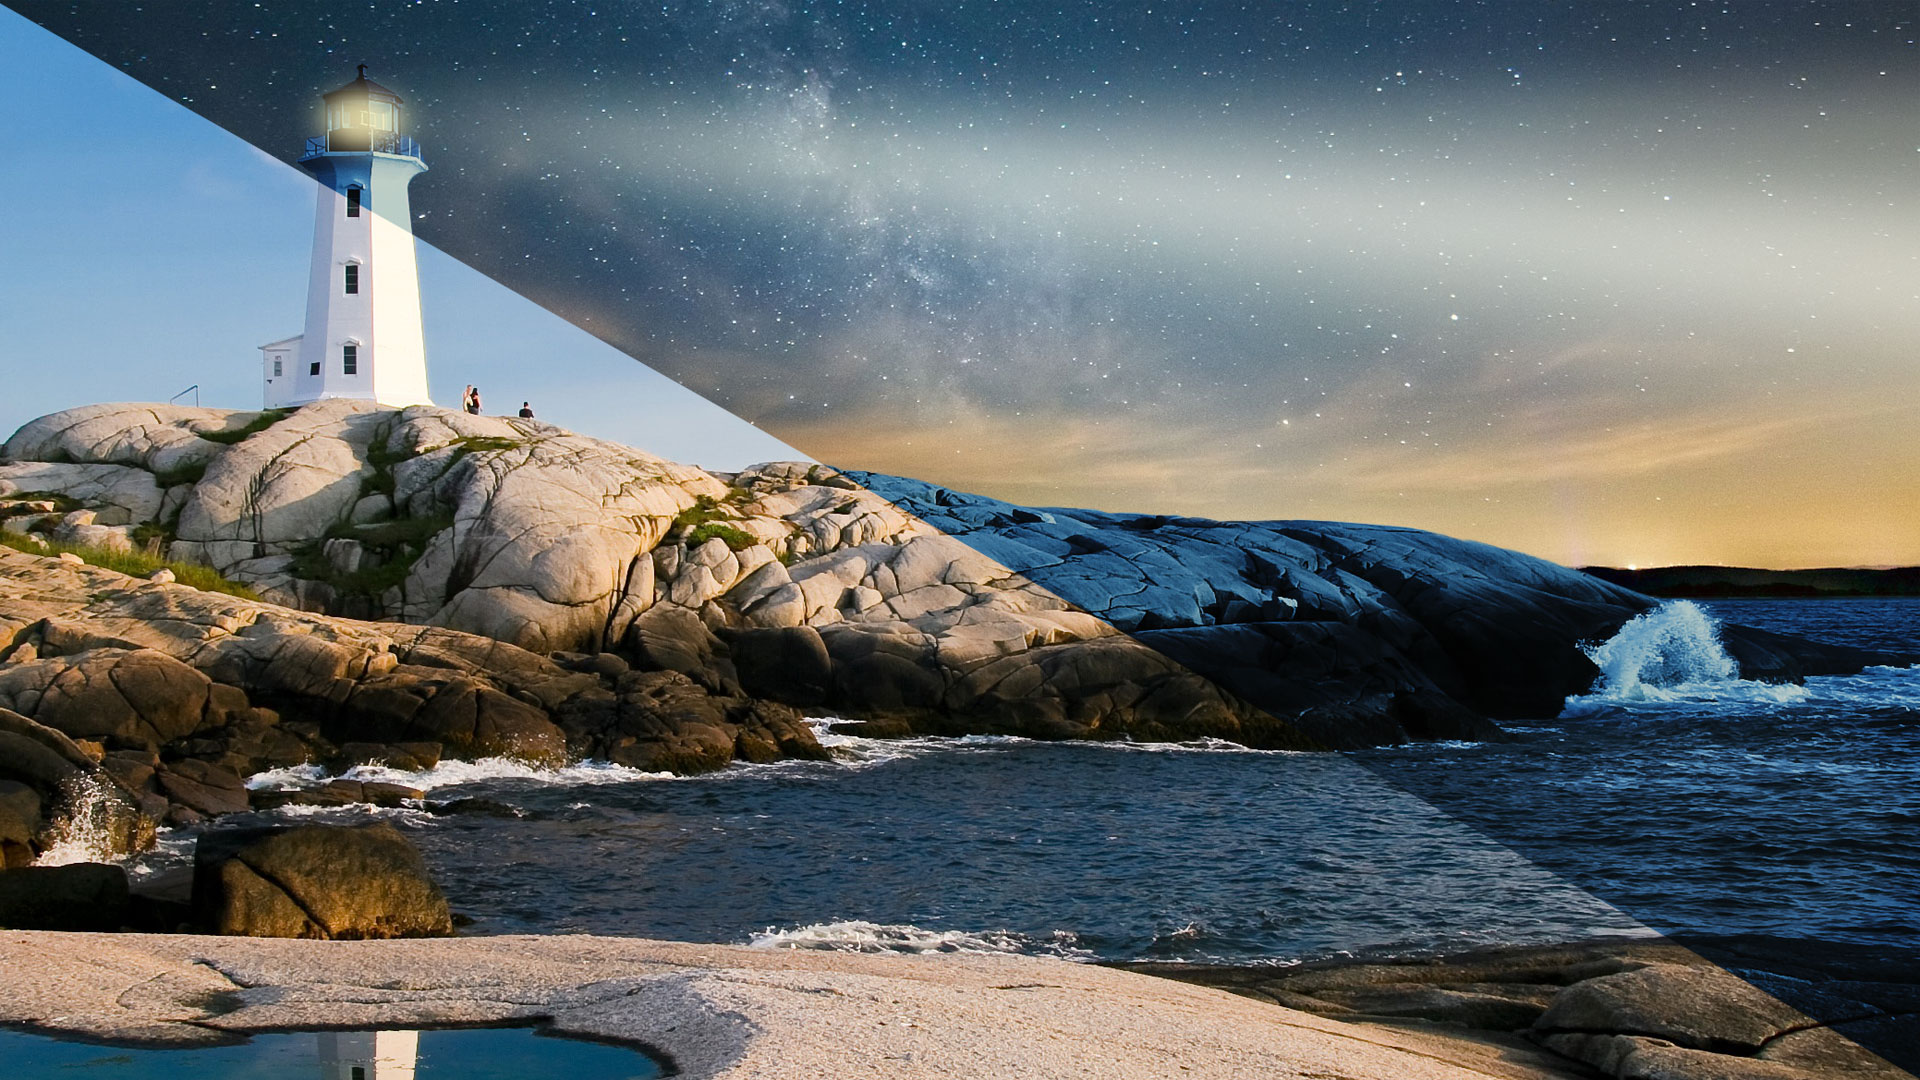
Day-to-night conversions have been around for as long as Photoshop has had adjustment layers, but mastering the effect takes lots of practice. The key to making a day picture look like night in Photoshop is in learning to navigate the various adjustments, such as the Gradient Map and Curves, to achieve a believable tone.
Darkening the image to such an extent that there's hardly any detail left in the shadows is part of the technique, and we can further the effect using brushes to alter the balance of light on layer masks. The deep-blue tone is created with the Gradient Map adjustment and some of the photographic presets in Photoshop CC. Selections then come into play, swapping out the day sky for a star-filled nightscape.
By the end of this Photoshop tutorial, you should have all the skills and know-how you need to transform any daytime image into a night-time masterpiece.
Download the files for this tutorial.
01. Begin with the Gradient Map adjustment
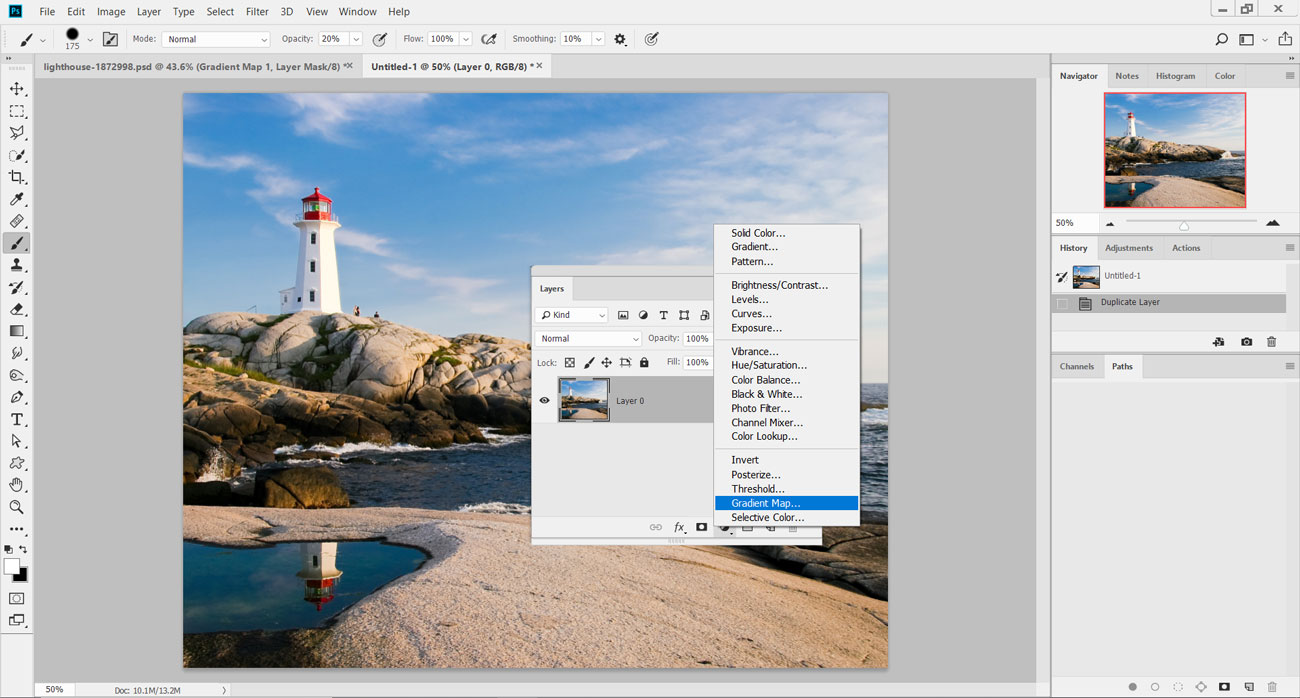
Load up the start image 'pix_lighthouse_1872998.jpg' into Photoshop, and head to the Layers palette. Locate the adjustment layer icon and select Gradient Map.
02. Initial tint
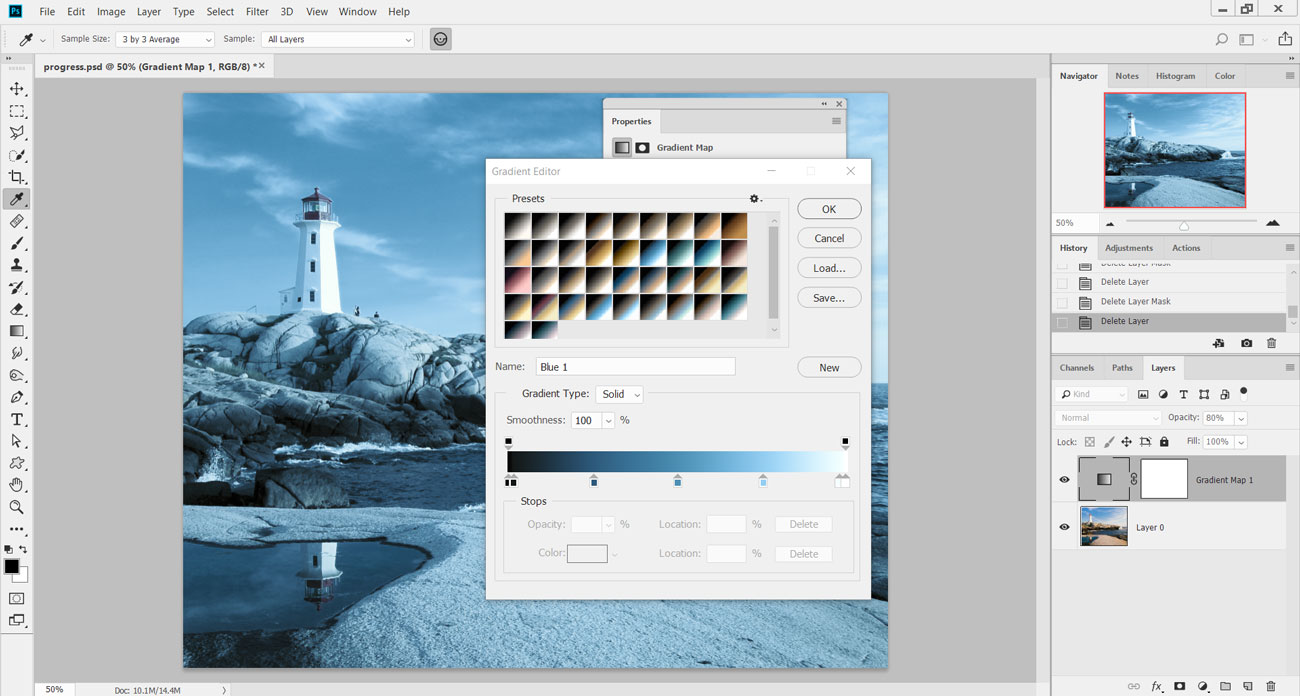
Inside the Gradient Map editor, select the Photographic Toning set of presets from the drop-down menu. From the array of thumbnail gradients, select the preset Blue 1 and hit OK. This will tint the image with a light blue all over.
03. Black of night
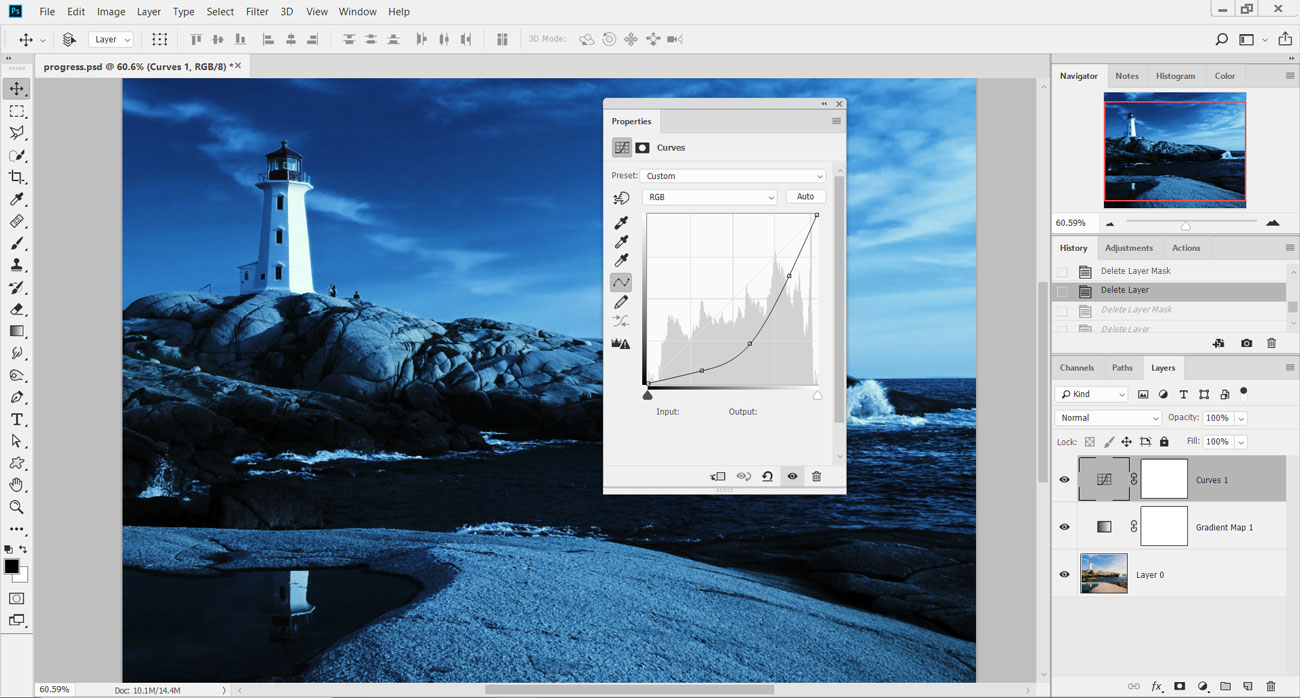
Lower the Opacity of the Gradient Map layer to 80% to reduce the effect slightly, head back to the adjustment layers and add a Curves adjustment. Darken the image by dragging the curve downward from the centre. The idea is to darken the shadows and midtones here.
Get the Creative Bloq Newsletter
Daily design news, reviews, how-tos and more, as picked by the editors.
04. Darken even further
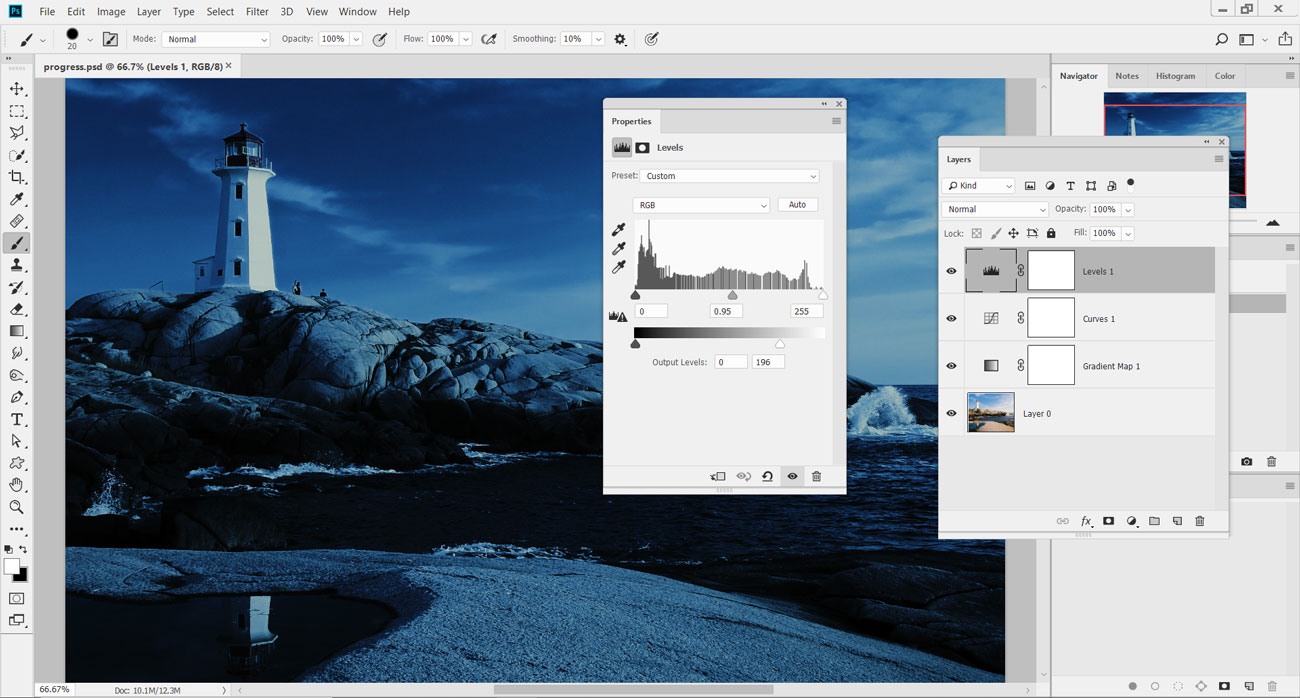
Add a Levels adjustment layer above the Curves adjustment. Inside the Levels dialog, set the midtones marker to 0.95. Then, under Output Levels, set to 0 and 196. This adjustment should darken the image further, making it appear as though it is night.
05. Select the sky
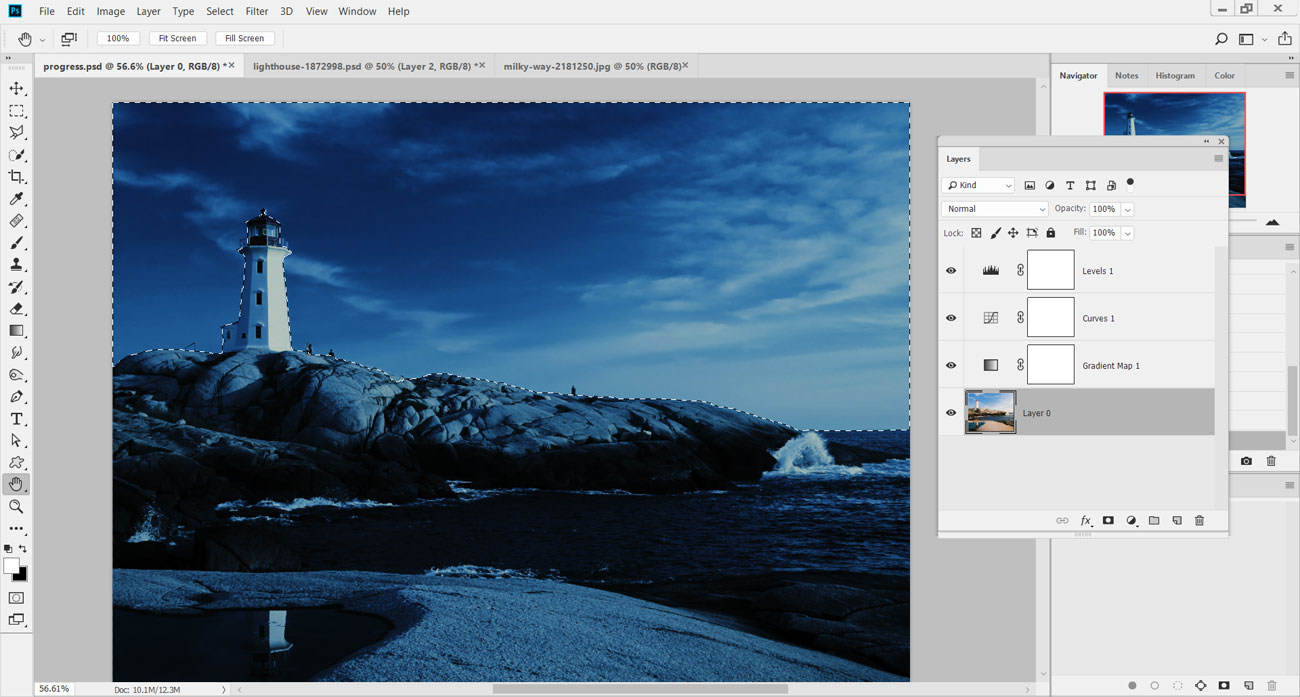
Now we've converted the image to night, we need to swap out the sky. Press W for the Quick Selection Tool and click on the image's layer. Drag a rough selection over the sky and around the lighthouse.
06. Improve the selection
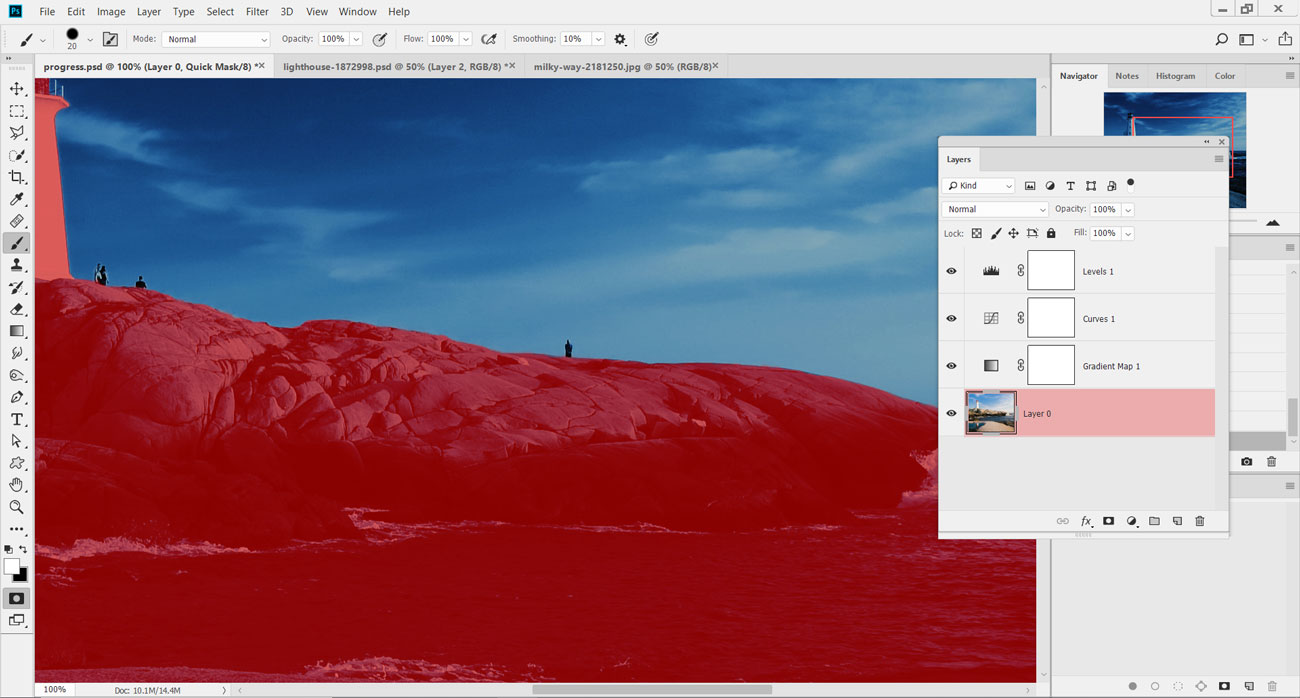
Hold opt/alt to remove areas of the selection that spill over onto the rocks and lighthouse. Press Q to load the Quick Mask Mode and preview the selected area. Use the Brush Tool to refine the edge of the mask, and press Q to return to normal view.
07. Save the selection
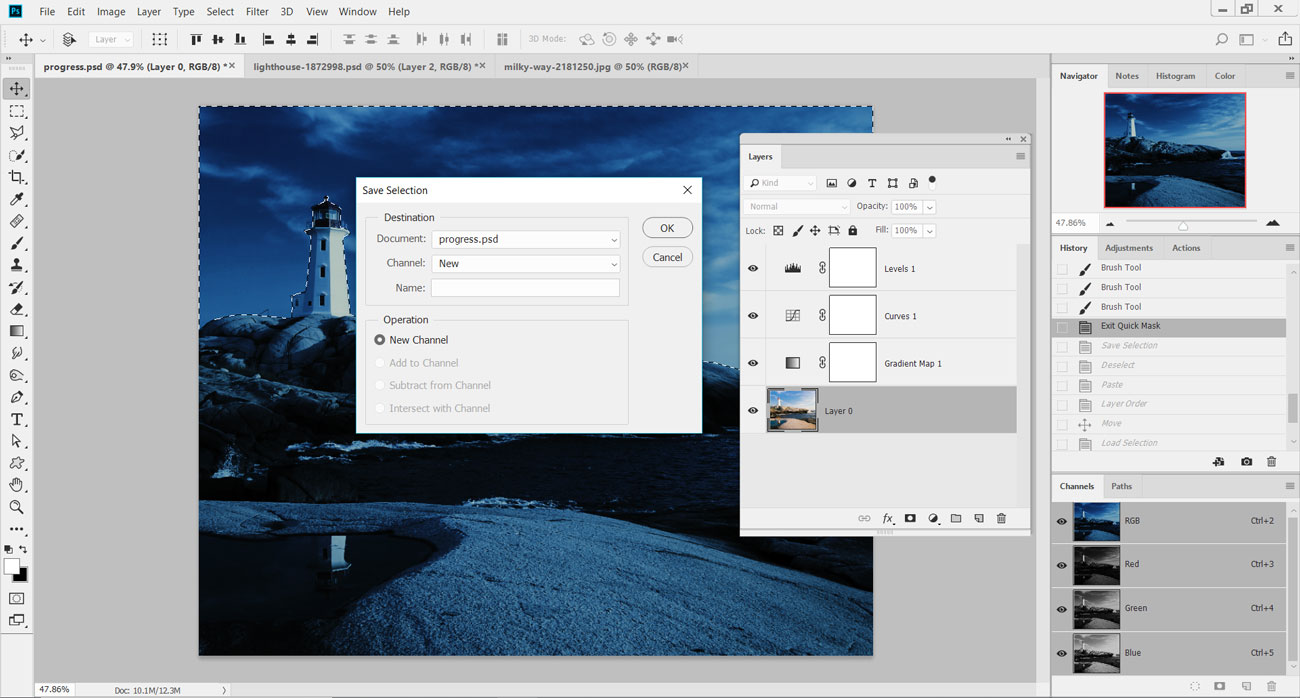
Go to the Select menu and down to Save Selection. In the pop-up menu, set Document to the current image, and set Channel to New. Leave Name as blank and hit OK to add the selection as a new Alpha Channel (Window > Channels to view).
08. Quick copy and paste
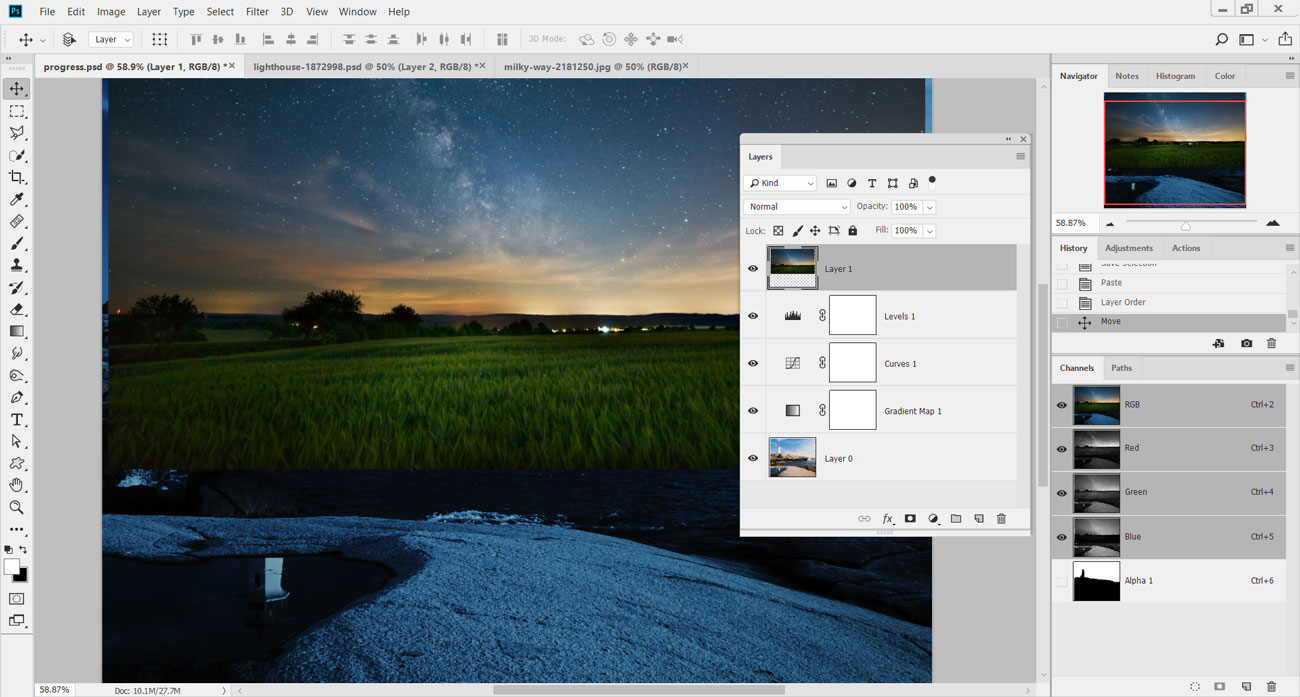
Load up the image 'pix_milkyway_2181250.jpg' from the FileSilo and press cmd/ctrl+A to select the entire image, then cmd/ctrl+C to copy. Head back to the lighthouse image and press cmd/ctrl+V to paste the new sky onto the image. Move this image to the top of the layer stack.
09. Apply a layer mask
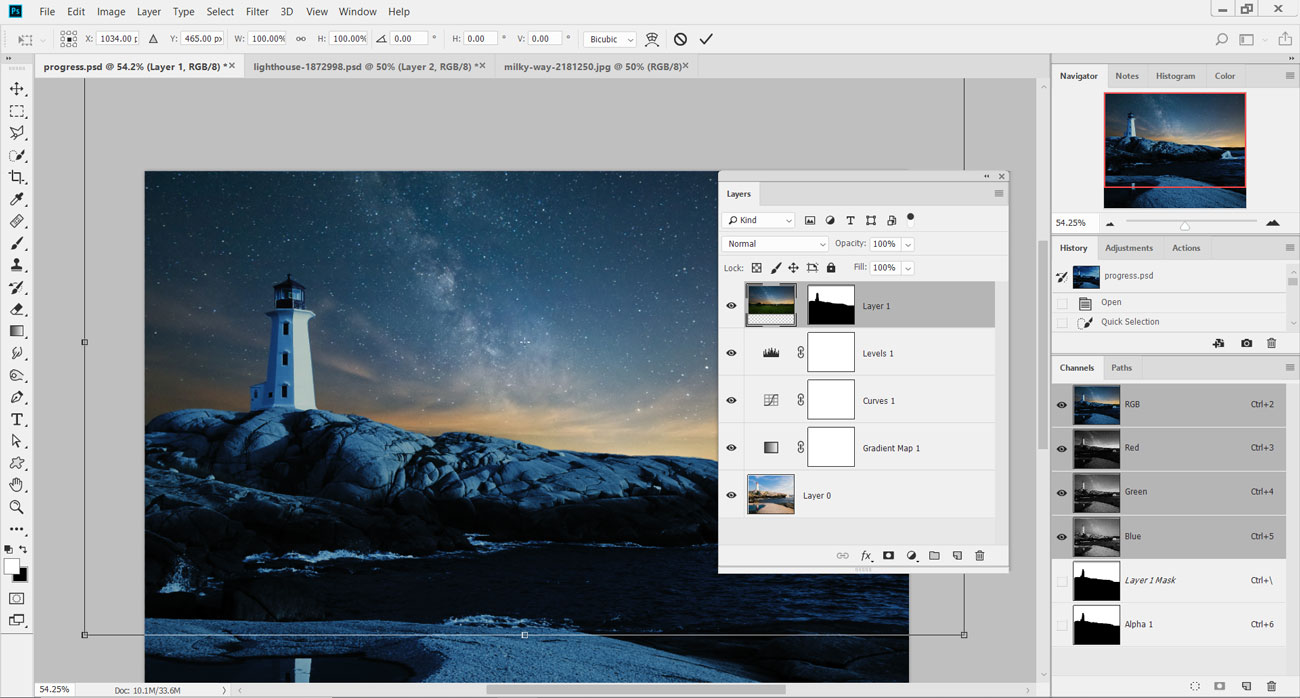
In the Channels palette, cmd/ctrl-click on the thumbnail of the Alpha Channel created in step 7. On the new sky layer, add a layer mask to apply the selection. Click on the small chain link symbol between the mask and the thumbnail, and press cmd/ctrl+T to resize the sky to fit over the area.
10. New Curves adjustment
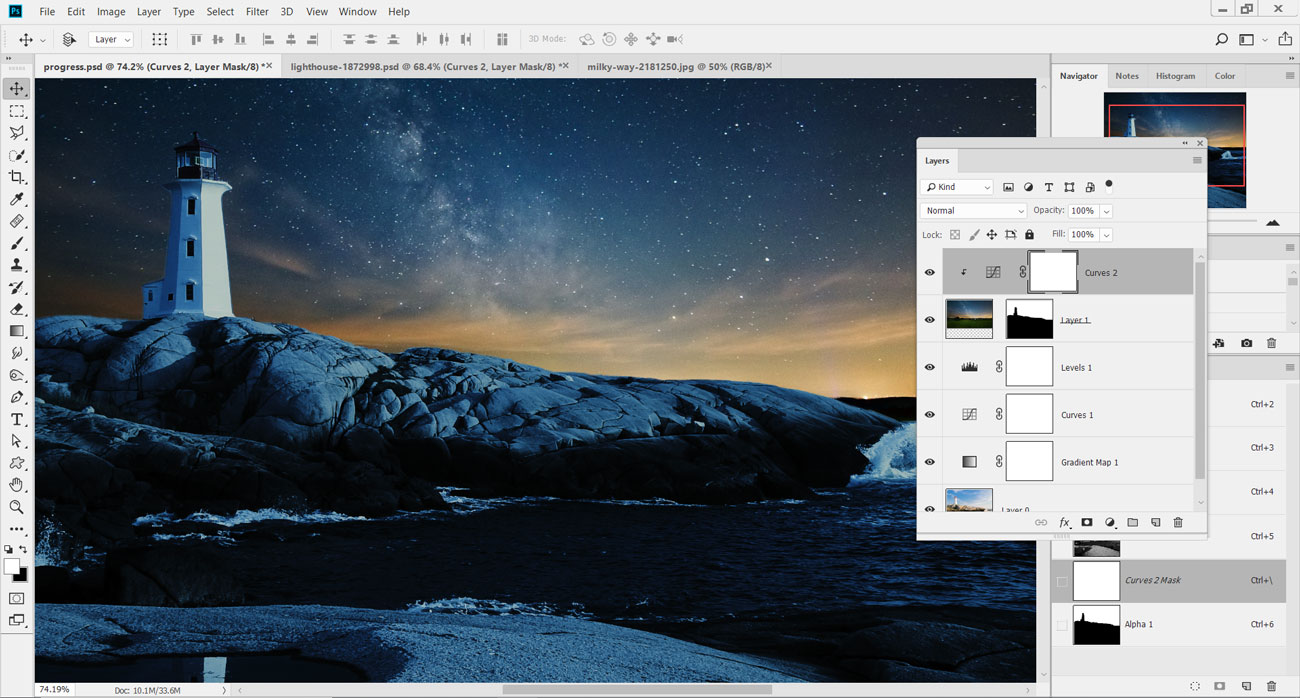
Add a new Curves adjustment above the new sky layer and clip them together (opt/alt-click between their layers). Lower the brightness of the new sky layer by pulling down the centre of the Curves adjustment. Adding three points along the line and lowering them all slightly provides more accuracy.
11. Paint in light
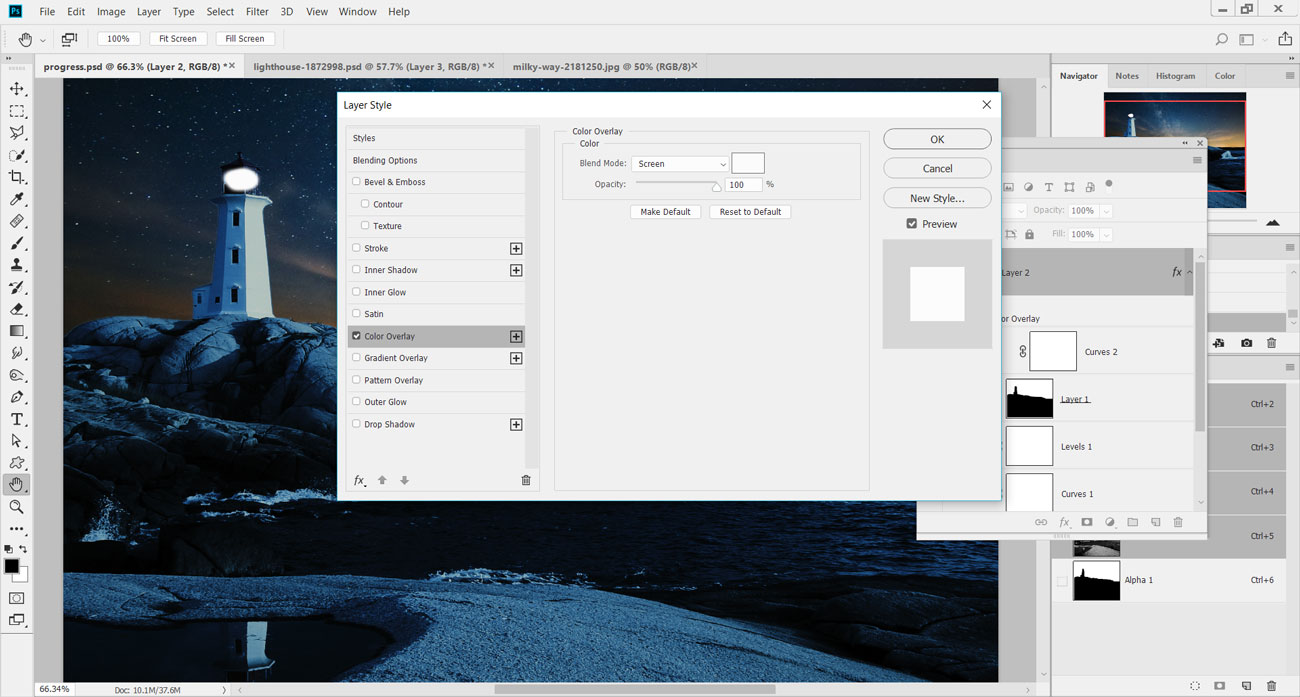
Add in a new layer and select the Brush Tool. Set the tool to black and 0% Hardness and paint in the small light for the lighthouse. To choose the colour of the light, double-click on the layer to load the Layer Style menu, and then select the Color Overlay option.
12. Add a Color Overlay
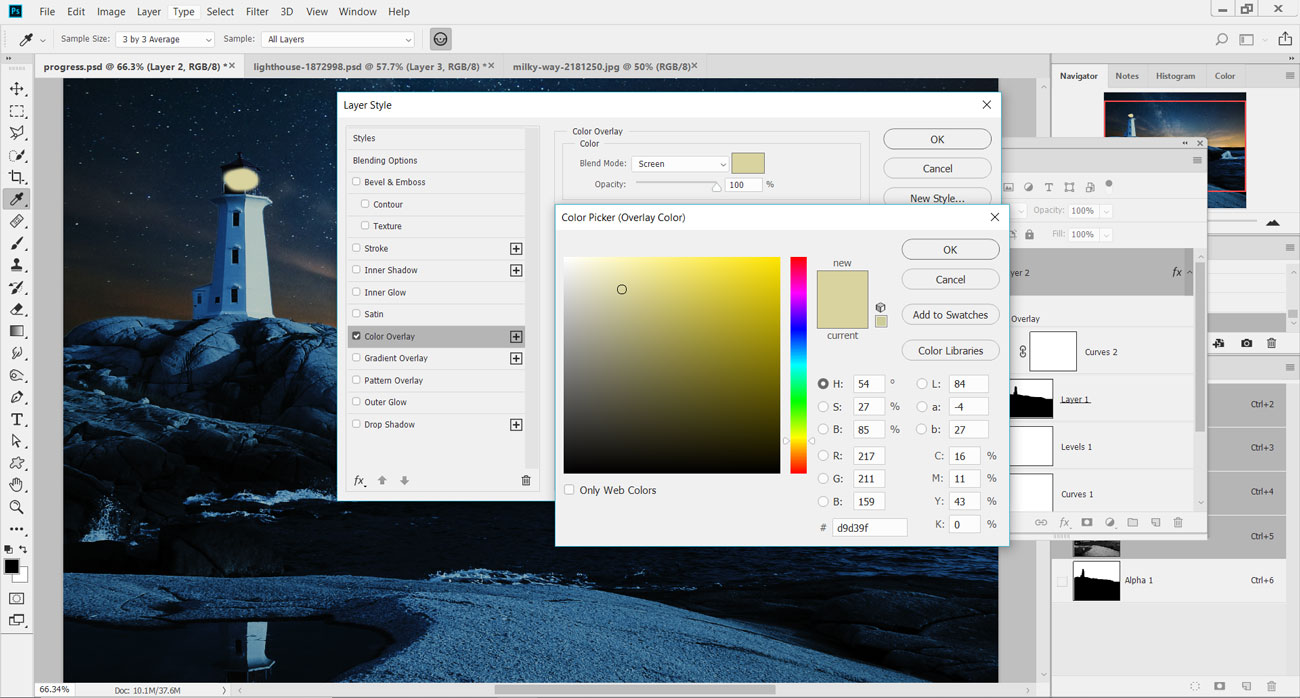
Change the colour of the Color Overlay style to an orangey yellow and set its Mode to Screen. Setting colour this way will enable you to change it later on, if needed. Hit OK and lower the Opacity of the layer down to 85% to fade it slightly.
13. Blur the light
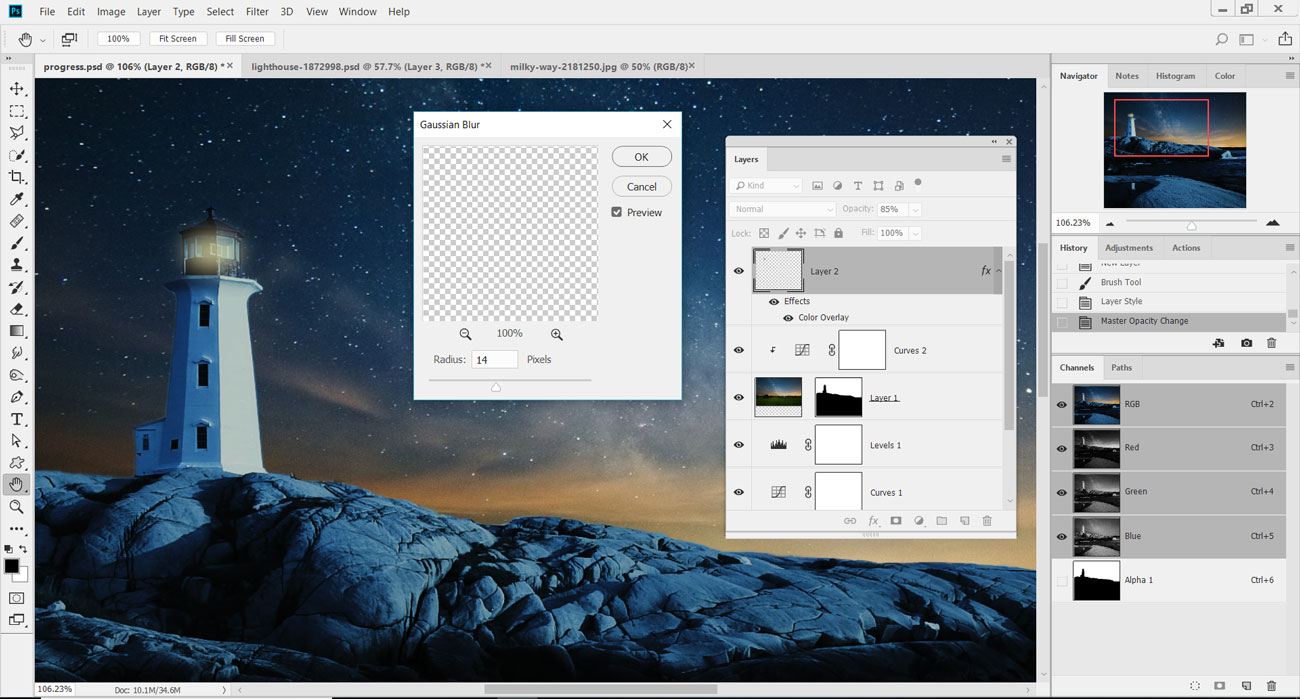
Head to the Filter menu and down to Blur > Gaussian Blur. Set the Radius slider to 14px and hit OK to soften the light in the lighthouse. Load up the Free Transform controls (cmd/ctrl+T) and resize or rotate the light to fit within the lighthouse.
14. Create the reflection
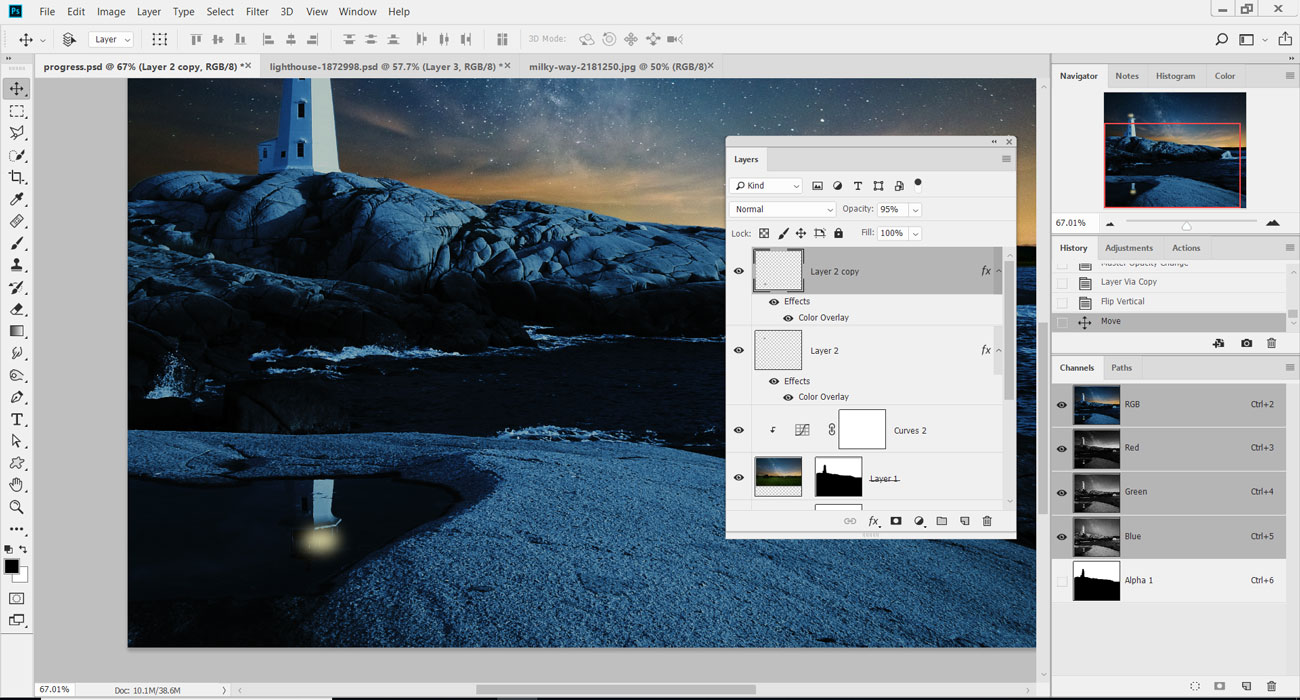
Press cmd/ctrl+J to duplicate the light layer onto a separate layer. Go to Edit> Transform> Flip Vertical to rotate the light and flip it. Use the Move Tool to position it over the reflection of the lighthouse in the pool in the foreground.
15. Light rays
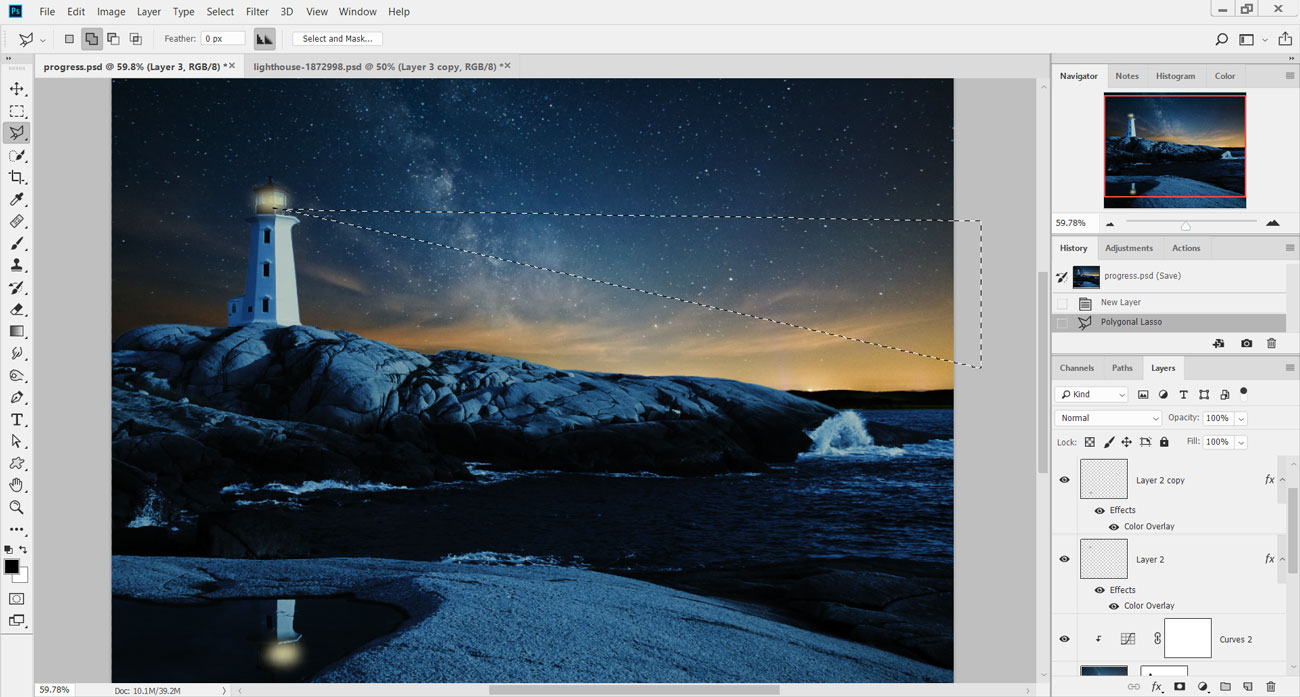
To add the beams of light from the lighthouse, on a new layer (cmd/ctrl+shift+N) create a long rectangle using the Polygonal Lasso Tool (L). The shape should extend out from the lighthouse and across the entire image.
16. Fill with colour
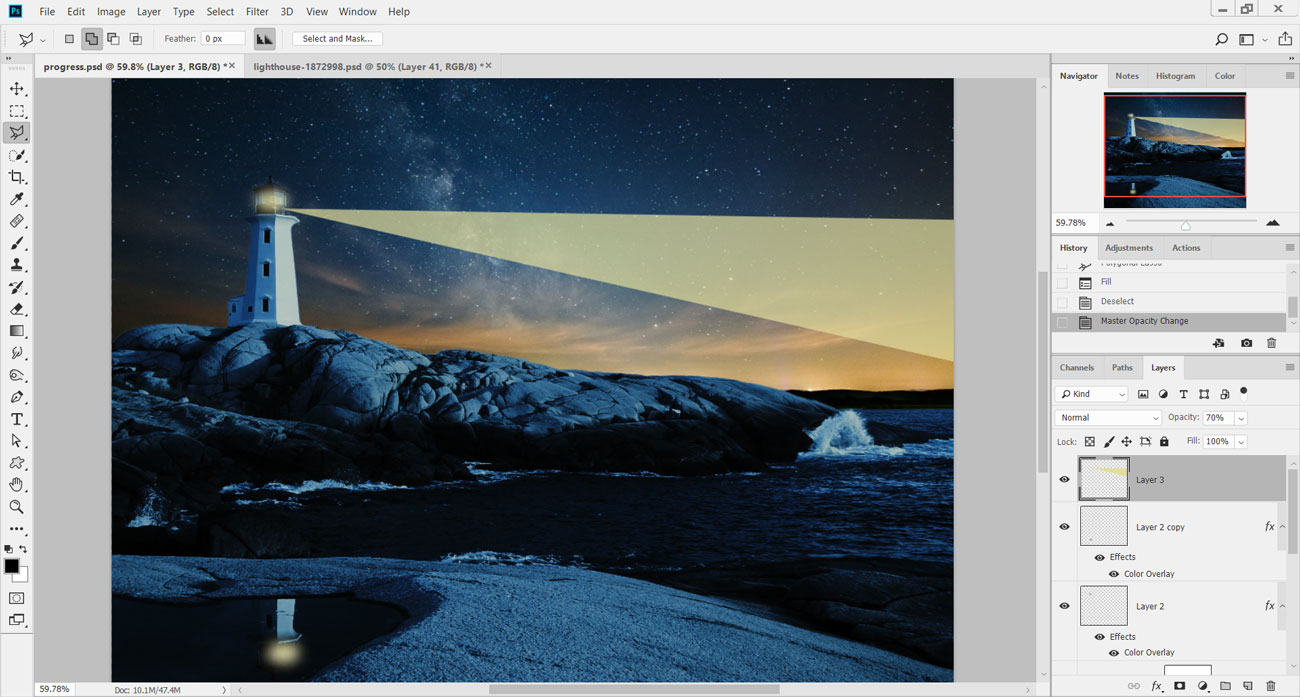
Go to Edit > Fill and choose Color under Contents. Set this to a yellow colour that is similar to, but lighter than, the colour used for the main light in the lighthouse. Hit OK, then cmd/ctrl+D to remove the selection, and then reduce the layer's Opacity setting down to 70%.
17. Soften and colourise
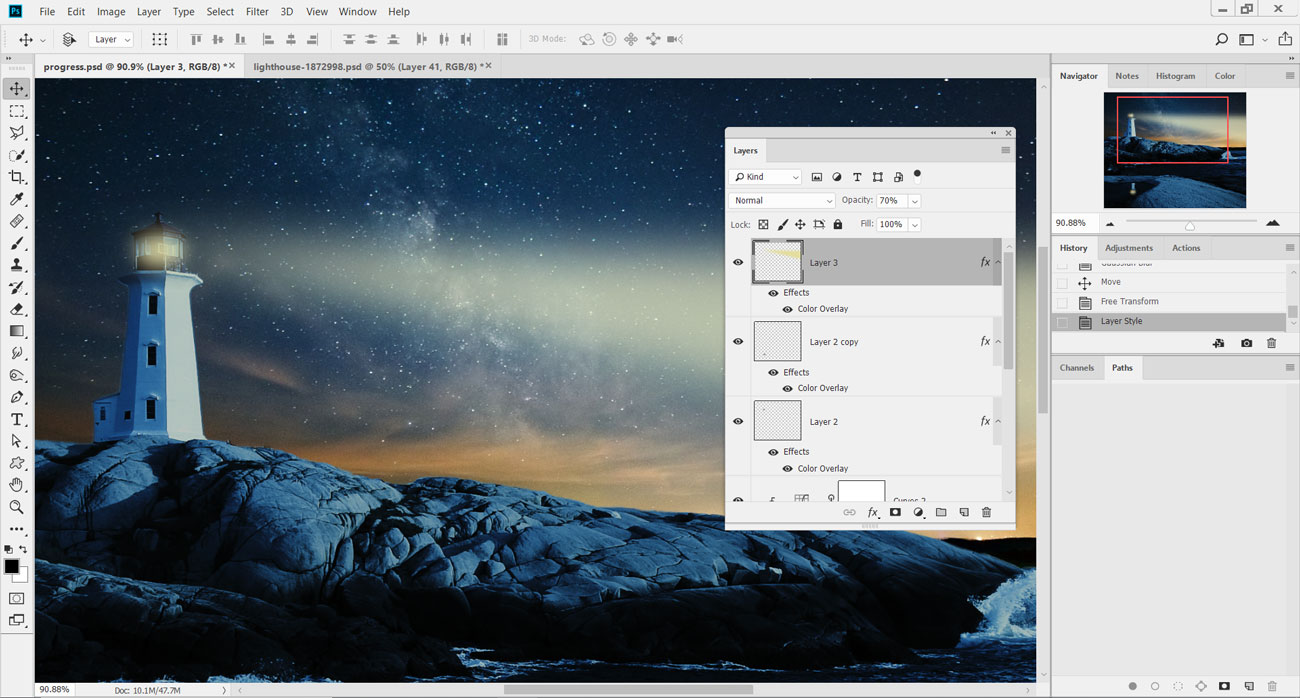
To soften the light beam, go to Filter and down to Blur > Gaussian Blur. Set the Radius for the blur to 36px and hit OK. Double-click on the layer and add a Color Overlay style to change the tone of the light, if you think it's required.
18. Double the light
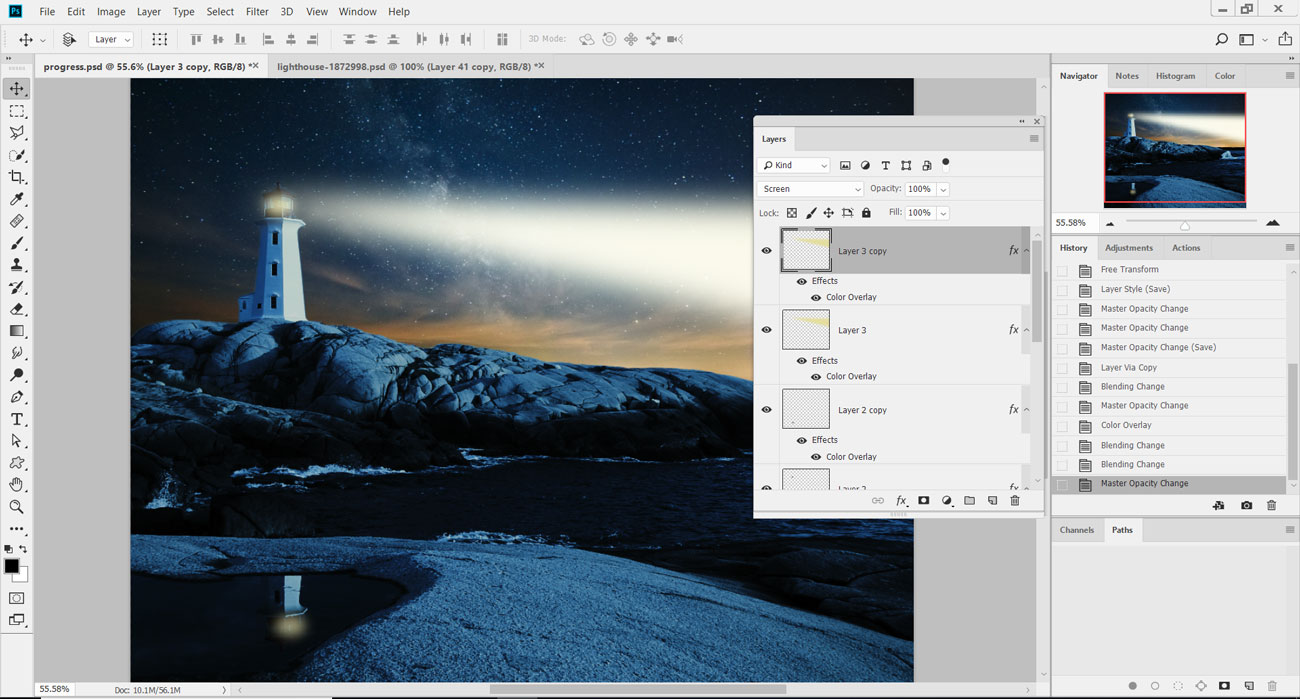
Duplicate this layer (cmd/ctrl+J) and then change the Color Overlay style to a lighter yellow, almost white. Set the layer's blend mode to Screen in the Layers palette to blend into the light beam underneath.
19. Resize the second beam
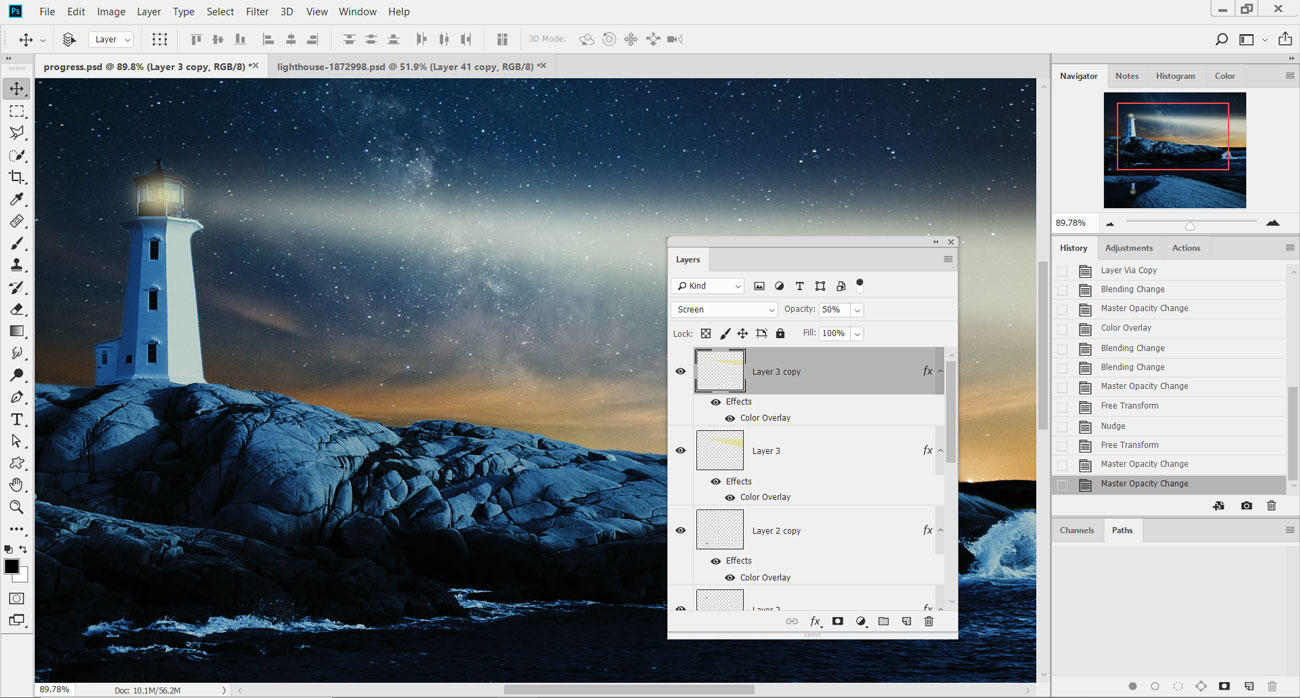
Shrink the second light beam so that it's smaller than the one underneath. Lower the Opacity of this layer to 50% to make it fainter. The result should be two light beams coming out of the lighthouse, one on top of the other.
20. Duplicate and reposition
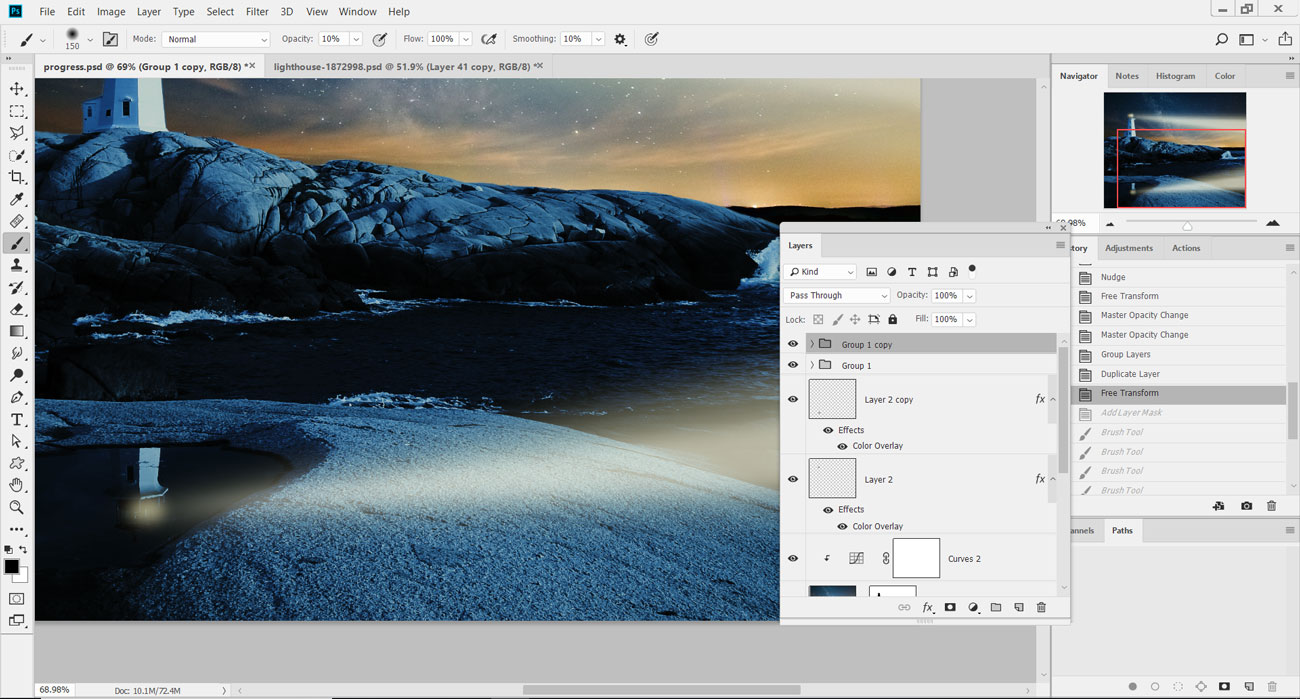
Group the two light beam layers together and press cmd/ctrl+J to duplicate the group. Flip the group vertically (Edit > Transform > Flip Vertical) and position so the light beams are included in the reflection of the lighthouse.
21. Control with masks
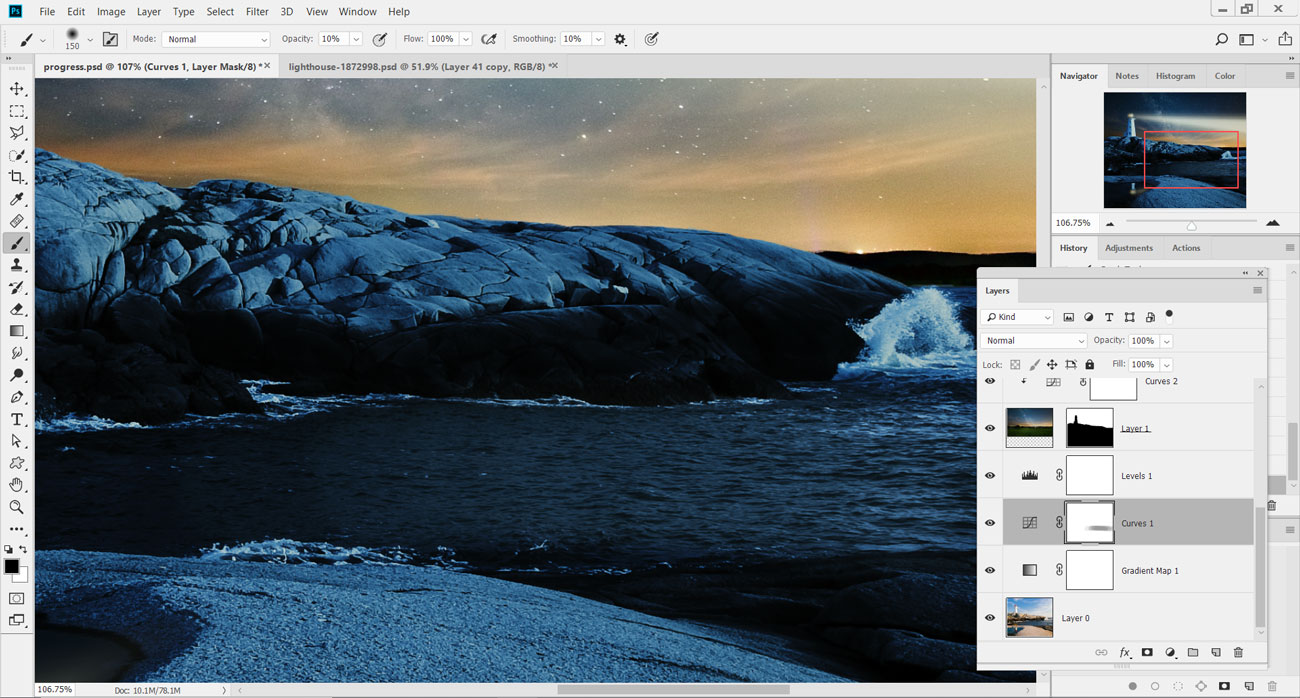
Add a layer mask to the group and brush away the light that falls outside the water. Also, on the Curves adjustment layer's mask, use a low Opacity brush over the sea in the foreground to reveal more detail on the water.
22. Explore a different approach
Fancy trying a different approach? In the video above, Ben Secret walks through his technique for how to make a day picture look like night in Photoshop. He starts by adding a Curves adjustment layer, and altering the balance of levels to make the light cooler. Next, he creates a soft, moonlit look with another Curves layer and a mask. Finally he balances the colouring and adds in a moon and clouds. Watch the full video to see how it's done.
Related articles:

Thank you for reading 5 articles this month* Join now for unlimited access
Enjoy your first month for just £1 / $1 / €1
*Read 5 free articles per month without a subscription

Join now for unlimited access
Try first month for just £1 / $1 / €1
