Texture an authentically worn K-2SO droid
We explain how to texture Rogue One's sardonic droid using Substance Painter.
11. Keyshot preparation
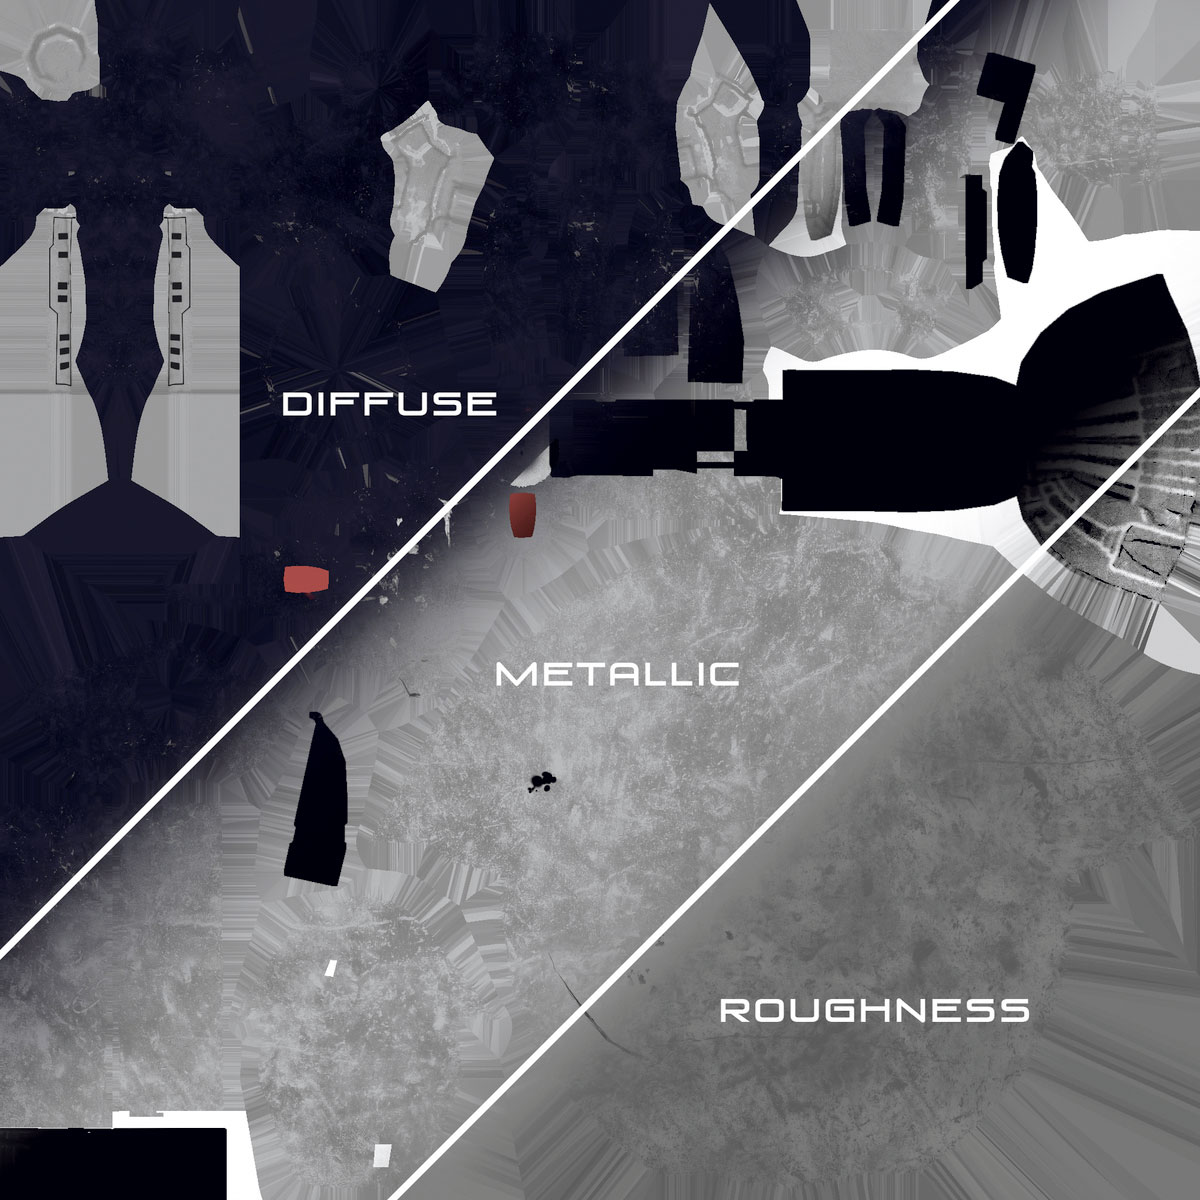
The textures are exported from Painter using the KeyShot present configuration for Diffuse, Roughness, Height and Metallic. Before we take everything into KeyShot, subdivide your meshes until the geometry smoothens to your liking, whilst ensuring Smooth UV is not active under the 'Tools > Geometry' menu. Remember, every subtool also needs to have a unique name as duplicates will not export.
12. Material preparation
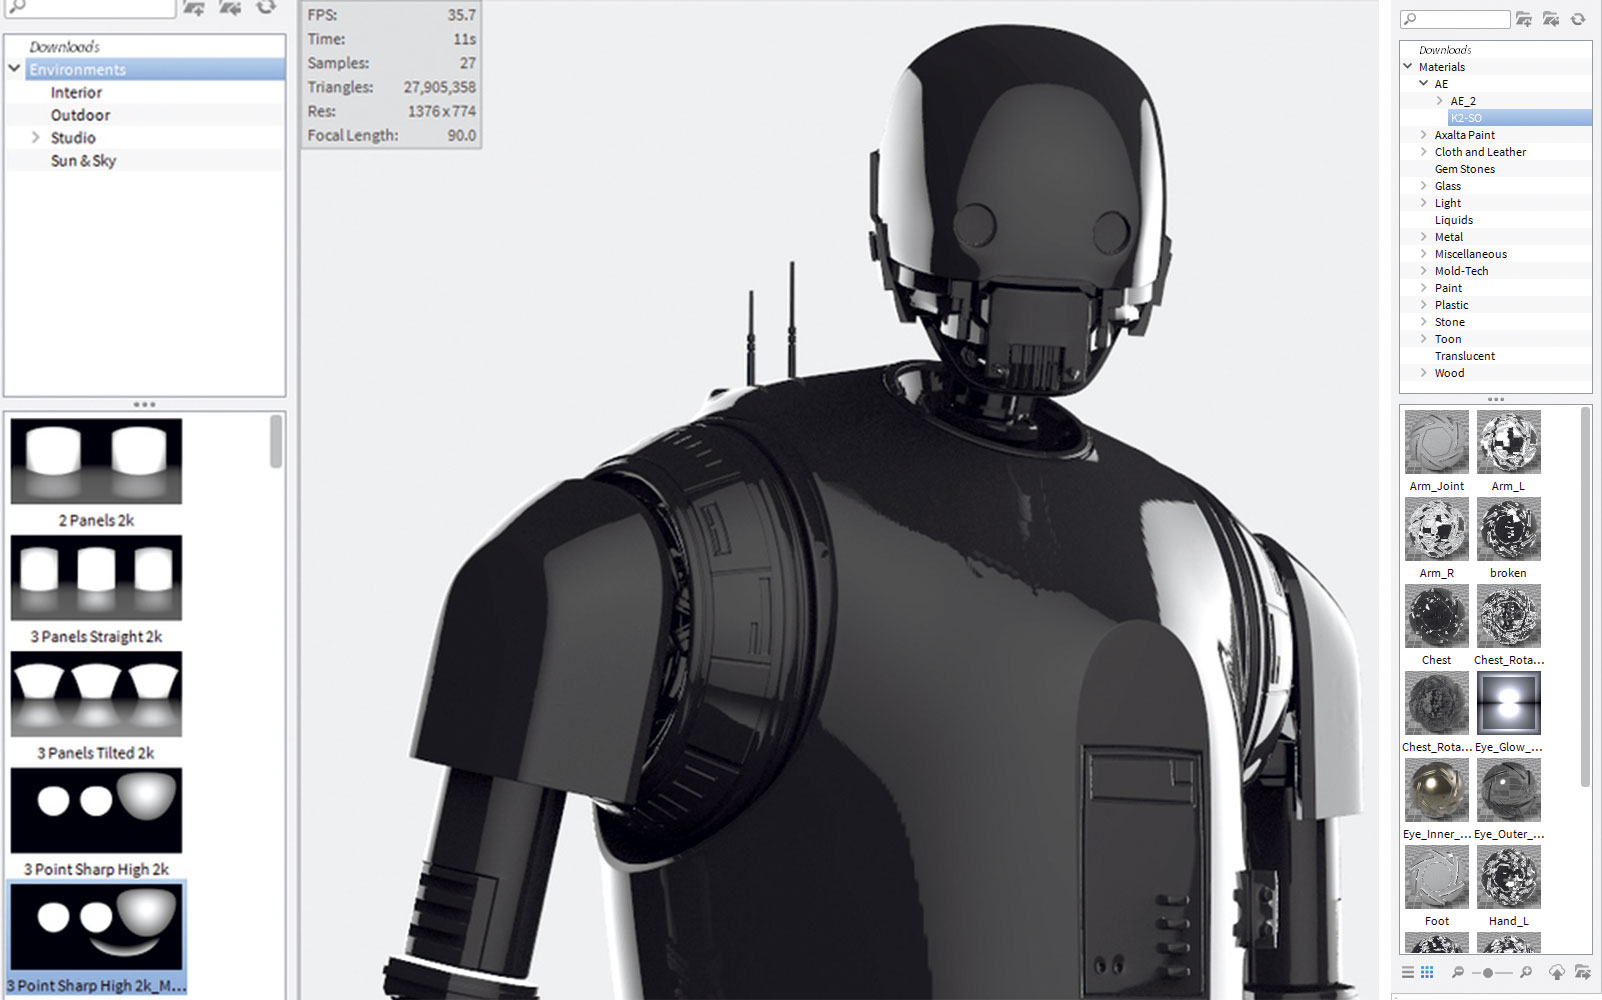
In ZBrush the diffuse textures are applied to the meshes in their texture map slot. This is done so UVs are sent with the model to KeyShot. Be mindful that between sessions, the KeyShot bridge may wipe over the materials you've set up if you change a subtool name, for instance. So, try not to rename subtools and keep everything as consistent as possible to prevent this. As a failsafe, get into the habit of saving your materials in a folder.
13. Material focus
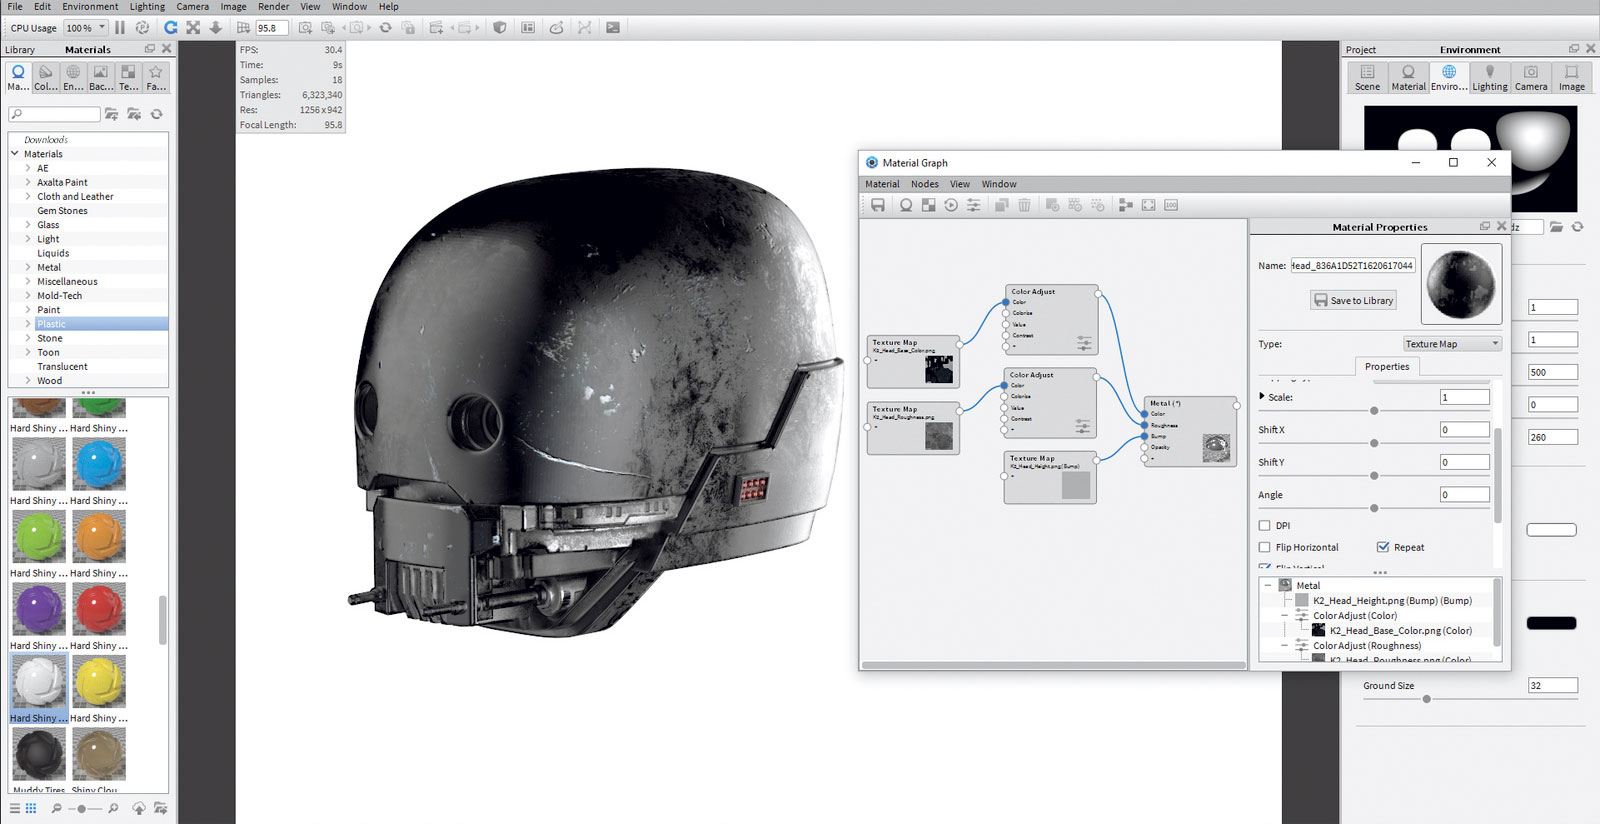
The head is isolated, since it has a large variety of forms, which allows me to focus and tweak its material properties. Using a metal shader, the rest of the textures are brought in and assigned one by one. Diffuse goes into Colour, Roughness goes into Roughness, Height goes into Bump. Spend some time adjusting the roughness texture brightness and contrast sliders to fine-tune to the desired look.
14. Perturb the surface
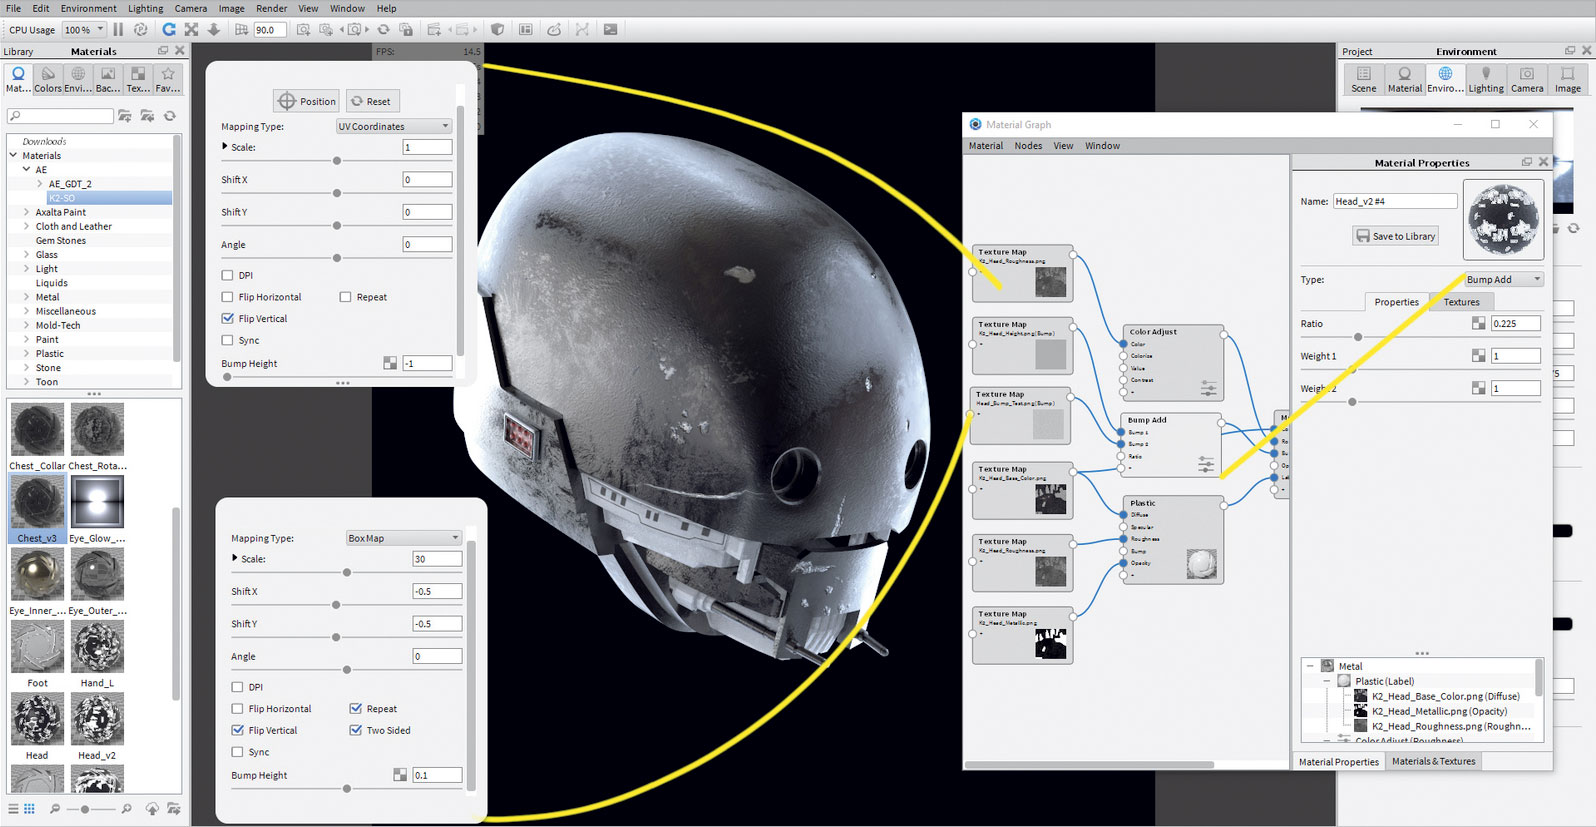
To further enhance that metal feeling, a subtle grain is added to the model by layering in a simple noise texture. Using a Bump Add utility in KeyShot, the Chest height map is assigned along with the supplied Metal_Noise_Bump. Be sure to untick Sync on this texture so you can change the mapping to Box Map. Adjust the Bump Add ratio slider and texture intensities to your liking to balance the damage scrapes with this texture.
15. Advance material tuning
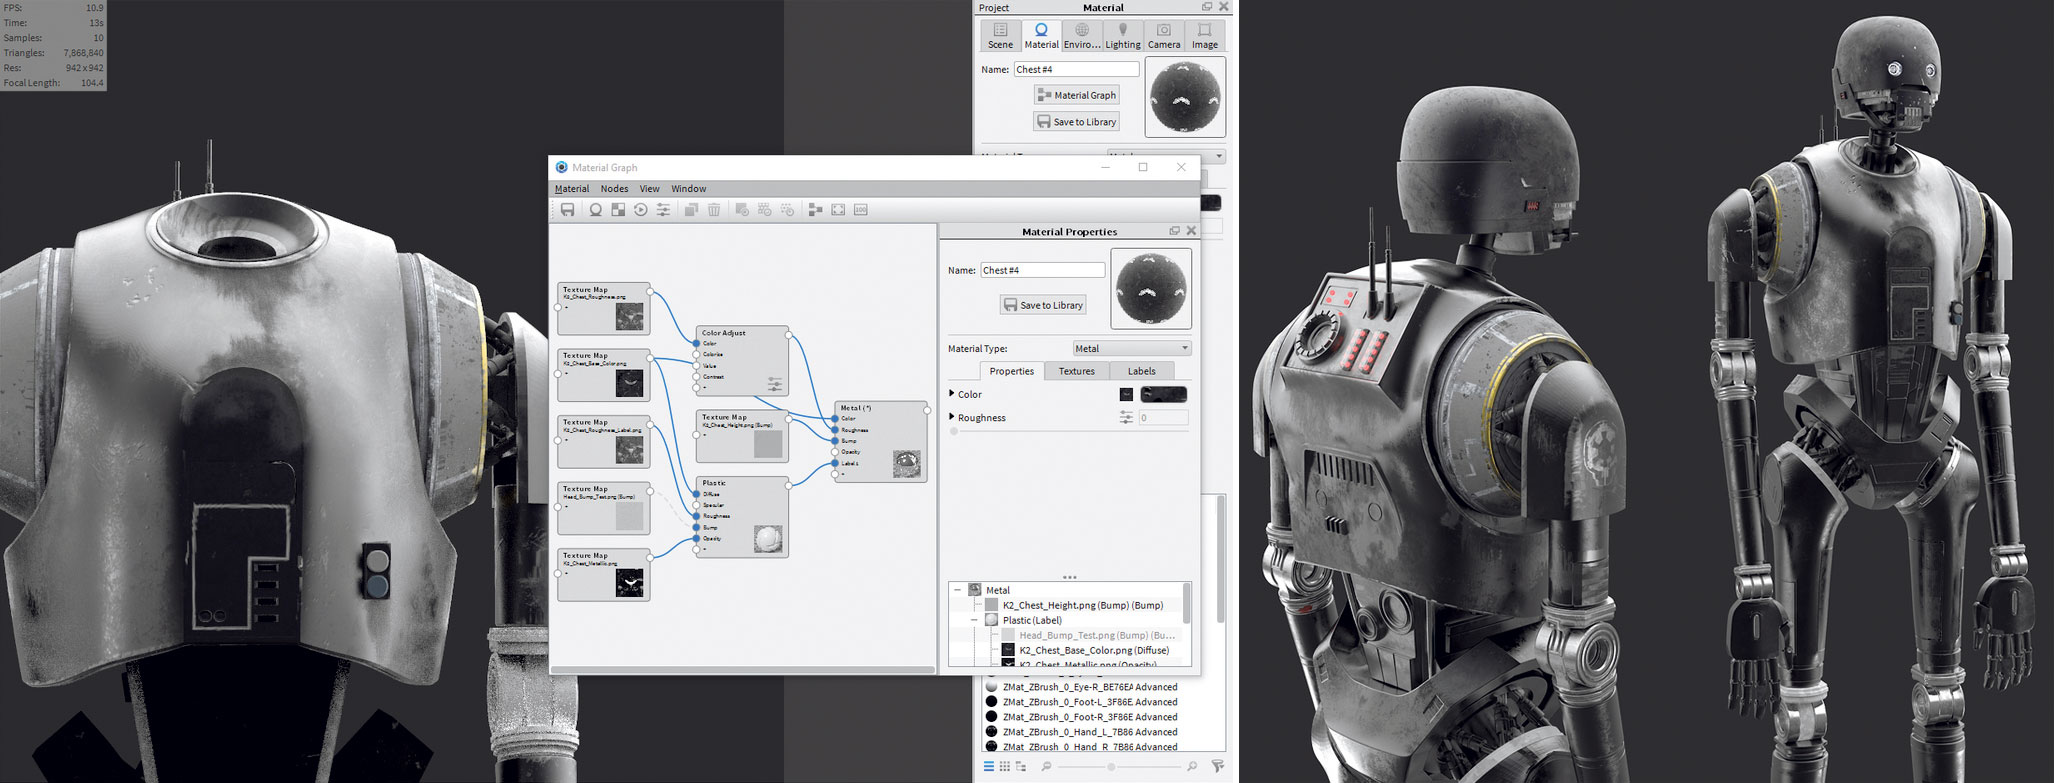
Finally, labels are used and our roughness textures are layered into our material again to provide more control over the grimy appearance. Once you're happy with this material setup, we can then duplicate this shader and roll it out to the other components for consistency and assign their respective textures.
16. Create a sandstorm effect
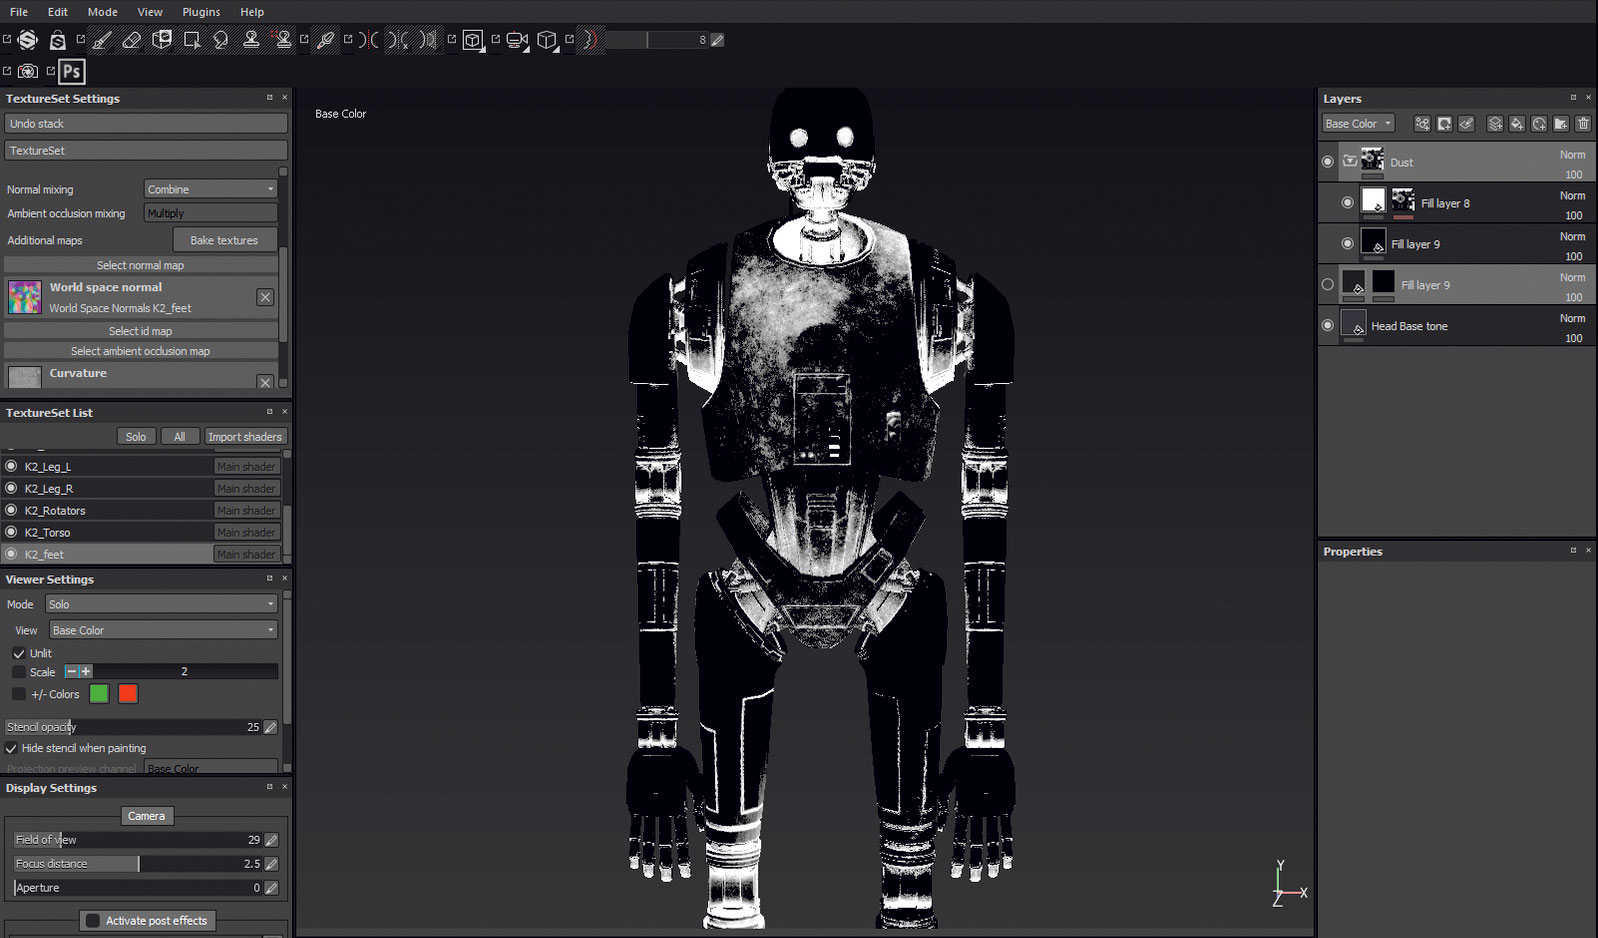
In Painter add a white fill layer with a mask and a Mask Builder Generator. Add a custom grunge texture such as Dirt 1, reduce the default grunge value to your liking and use the AO slider to build up sand deposits in the panel crevices. Increase the layer's roughness, add some height and apply a Sharpen filter.
17. Keyshot dust label
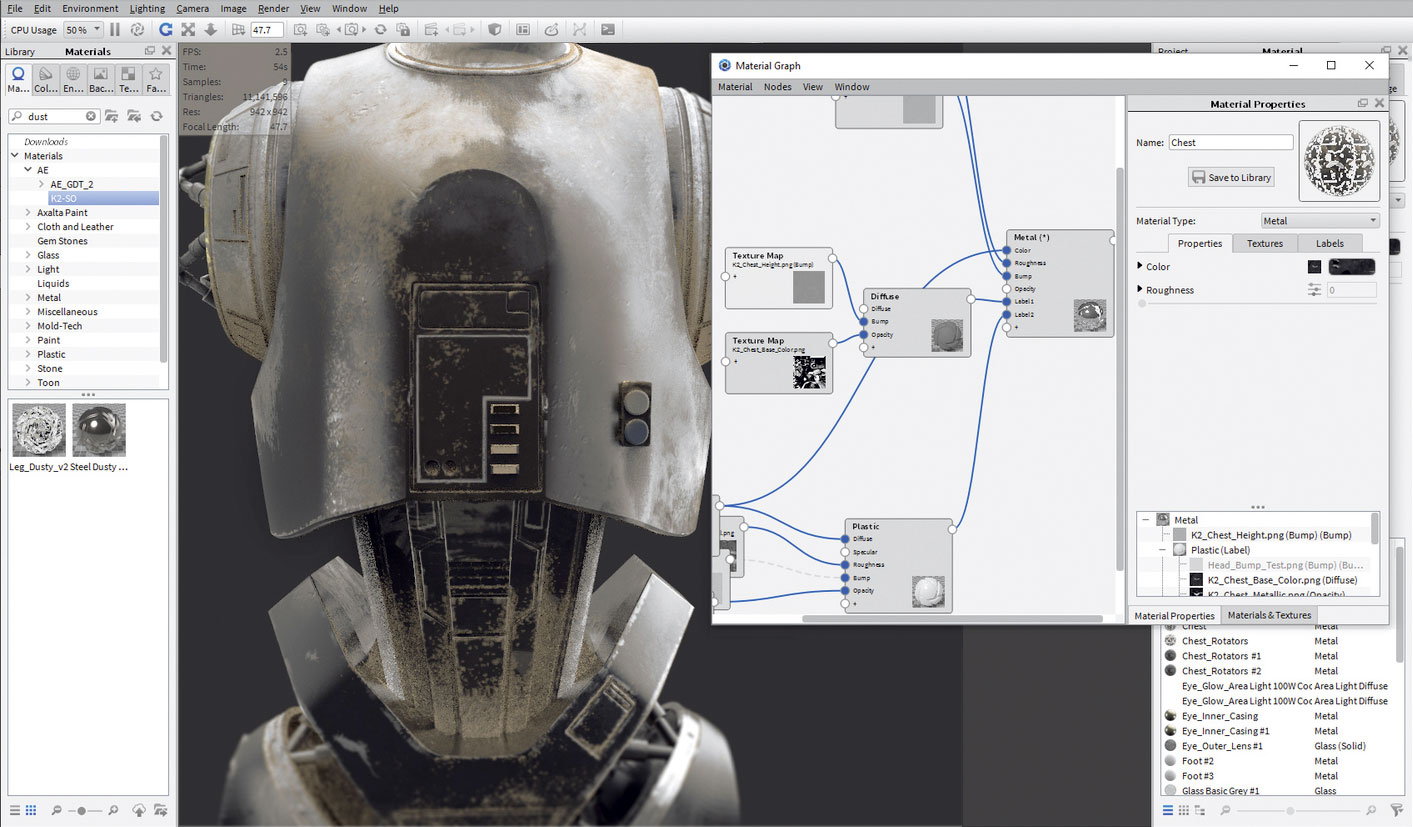
Back in KeyShot, a 'diffuse material type' is added as a label to my shader with a sand RGB colour value. Within the material graph, I import the new textures and assign the base colour texture as the opacity mask, adding the height map into the bump channel for extra definition. You can develop the look further from here.
Get the Creative Bloq Newsletter
Daily design news, reviews, how-tos and more, as picked by the editors.
This article originally appeared in 3D World issue 216; buy it here!

Thank you for reading 5 articles this month* Join now for unlimited access
Enjoy your first month for just £1 / $1 / €1
*Read 5 free articles per month without a subscription

Join now for unlimited access
Try first month for just £1 / $1 / €1
