Texture an authentically worn K-2SO droid
We explain how to texture Rogue One's sardonic droid using Substance Painter.
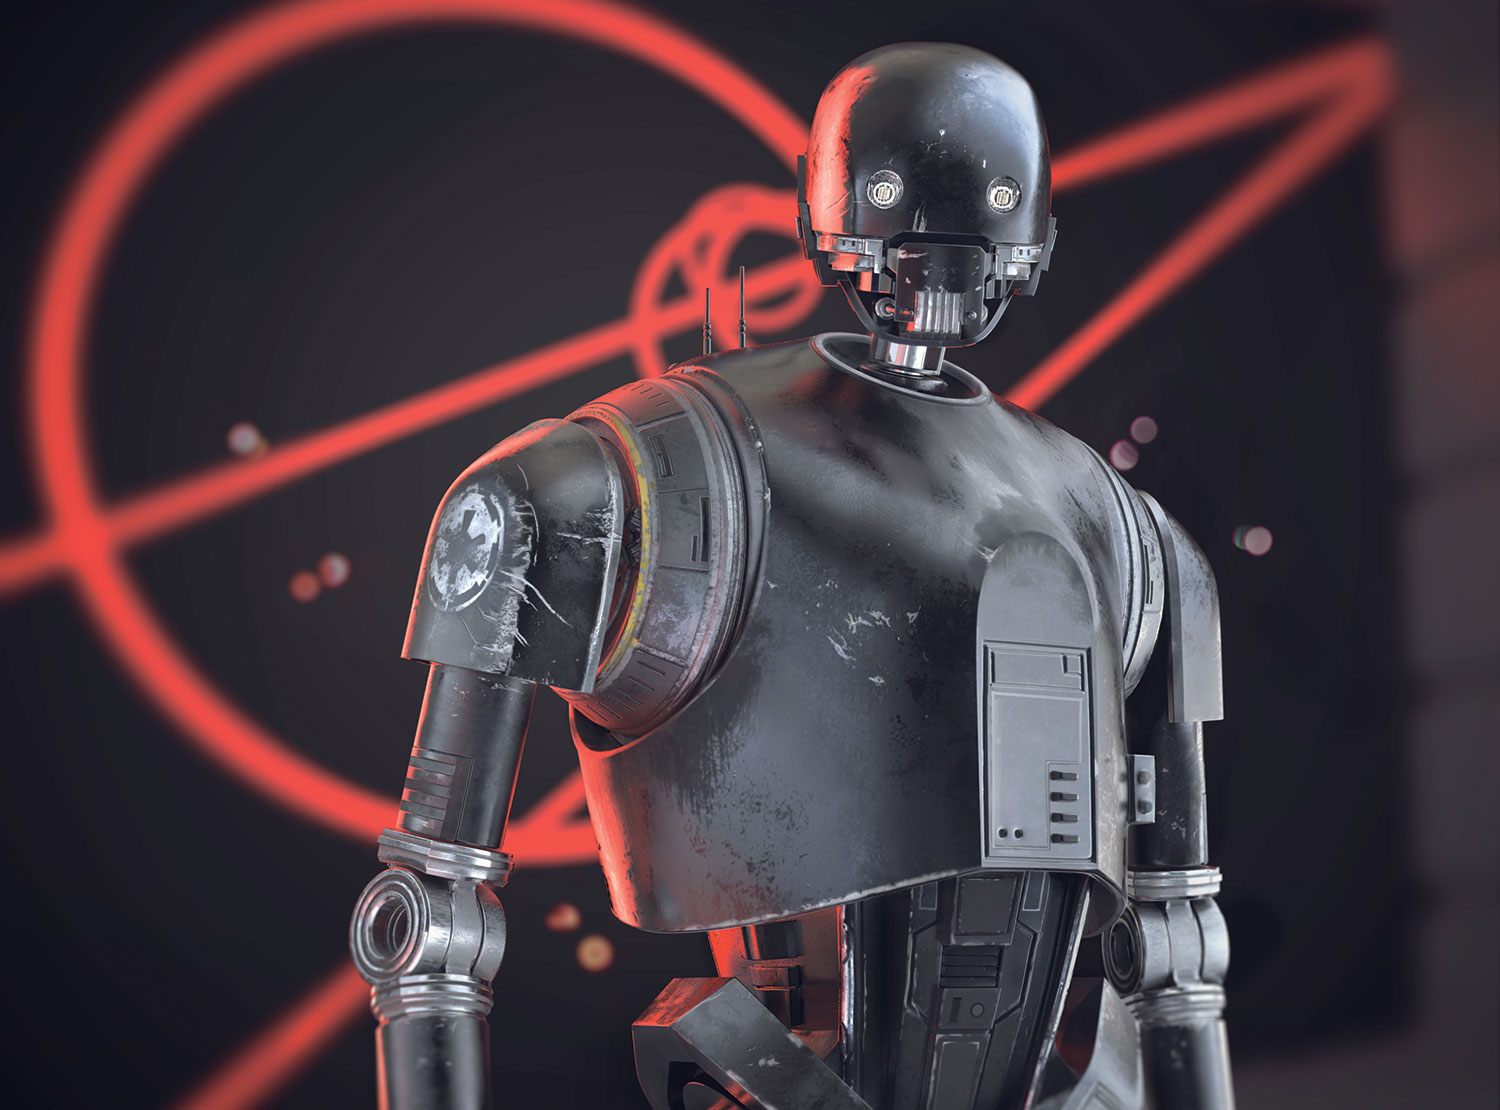
In this tutorial we'll be texturing and rendering K-2SO from Star Wars: Rogue One. We will focus on texturing the droid using Substance Painter to make him fit into the Star Wars universe; slightly reflective, yet dull and worn for that truly lived-in appearance. This will be broken down by surface damage, scratches, micro-noise and the roughness properties of the robot's surfaces, with a final layer of grime to build up depth like a true Star Wars prop.
Finally, we will output everything for rendering in KeyShot for that advertising poster look. The model has been built in quads using subdivided surfaces, so it can be smoothed at render time using the surface normals of the mesh.
Download the files you'll need for this tutorial and the accompanying video.
01. Initial setup
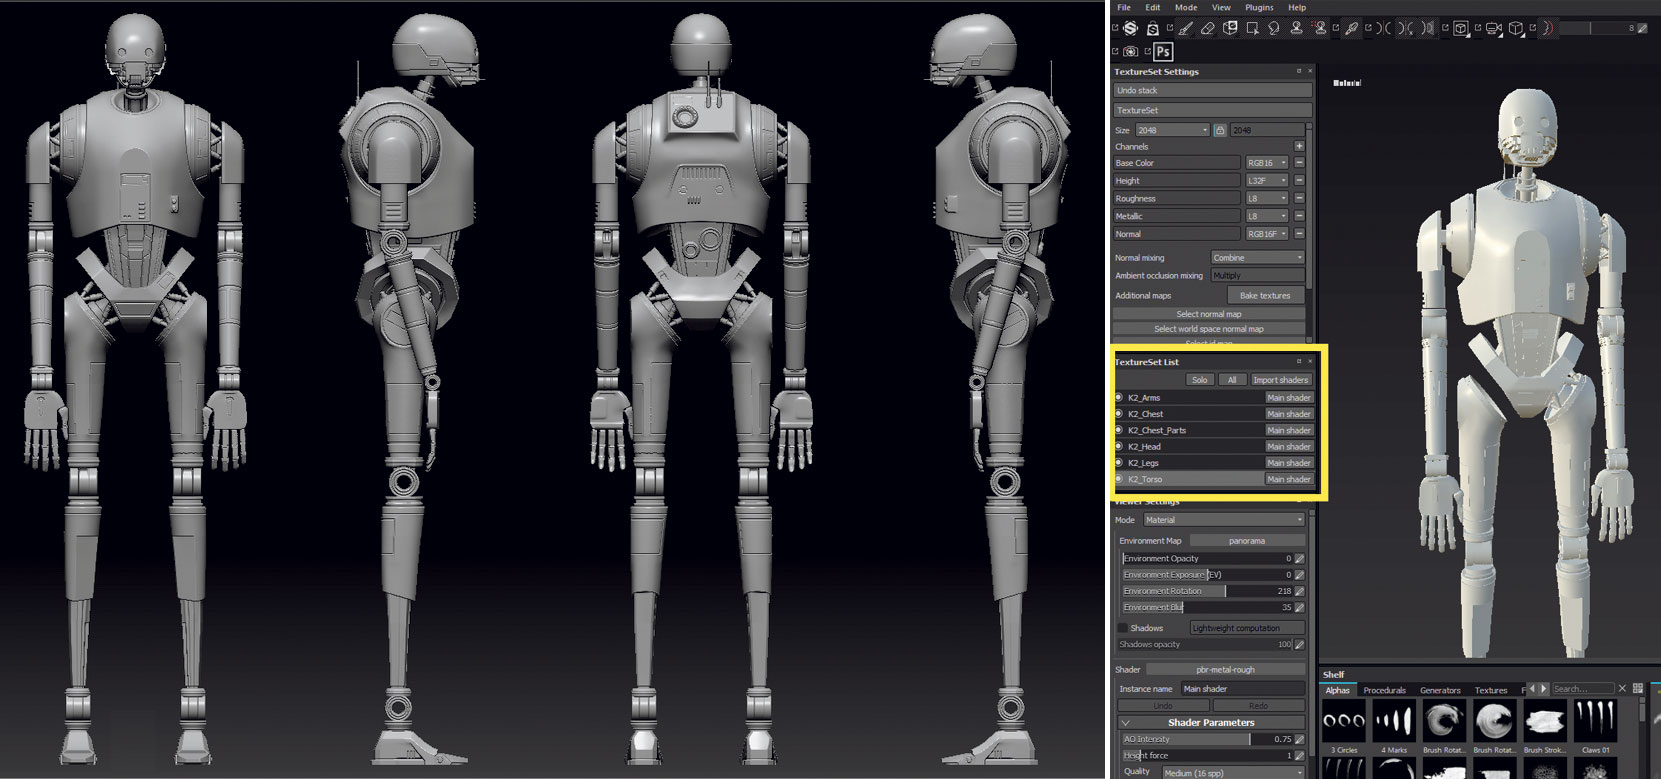
Download the model and you should find that it's ready for importing straight into Substance Painter. This has been set up for a VFX production pipeline in mind. We will render in KeyShot and use the surface normals of the geometry with multiple textures per component. On importing into Painter, shaders are applied to each respective model part that require their own texture. To select the model parts use the Texture Set List window. UDIM's are not used since KeyShot does not support them.
02. Blocking in: smart material presets
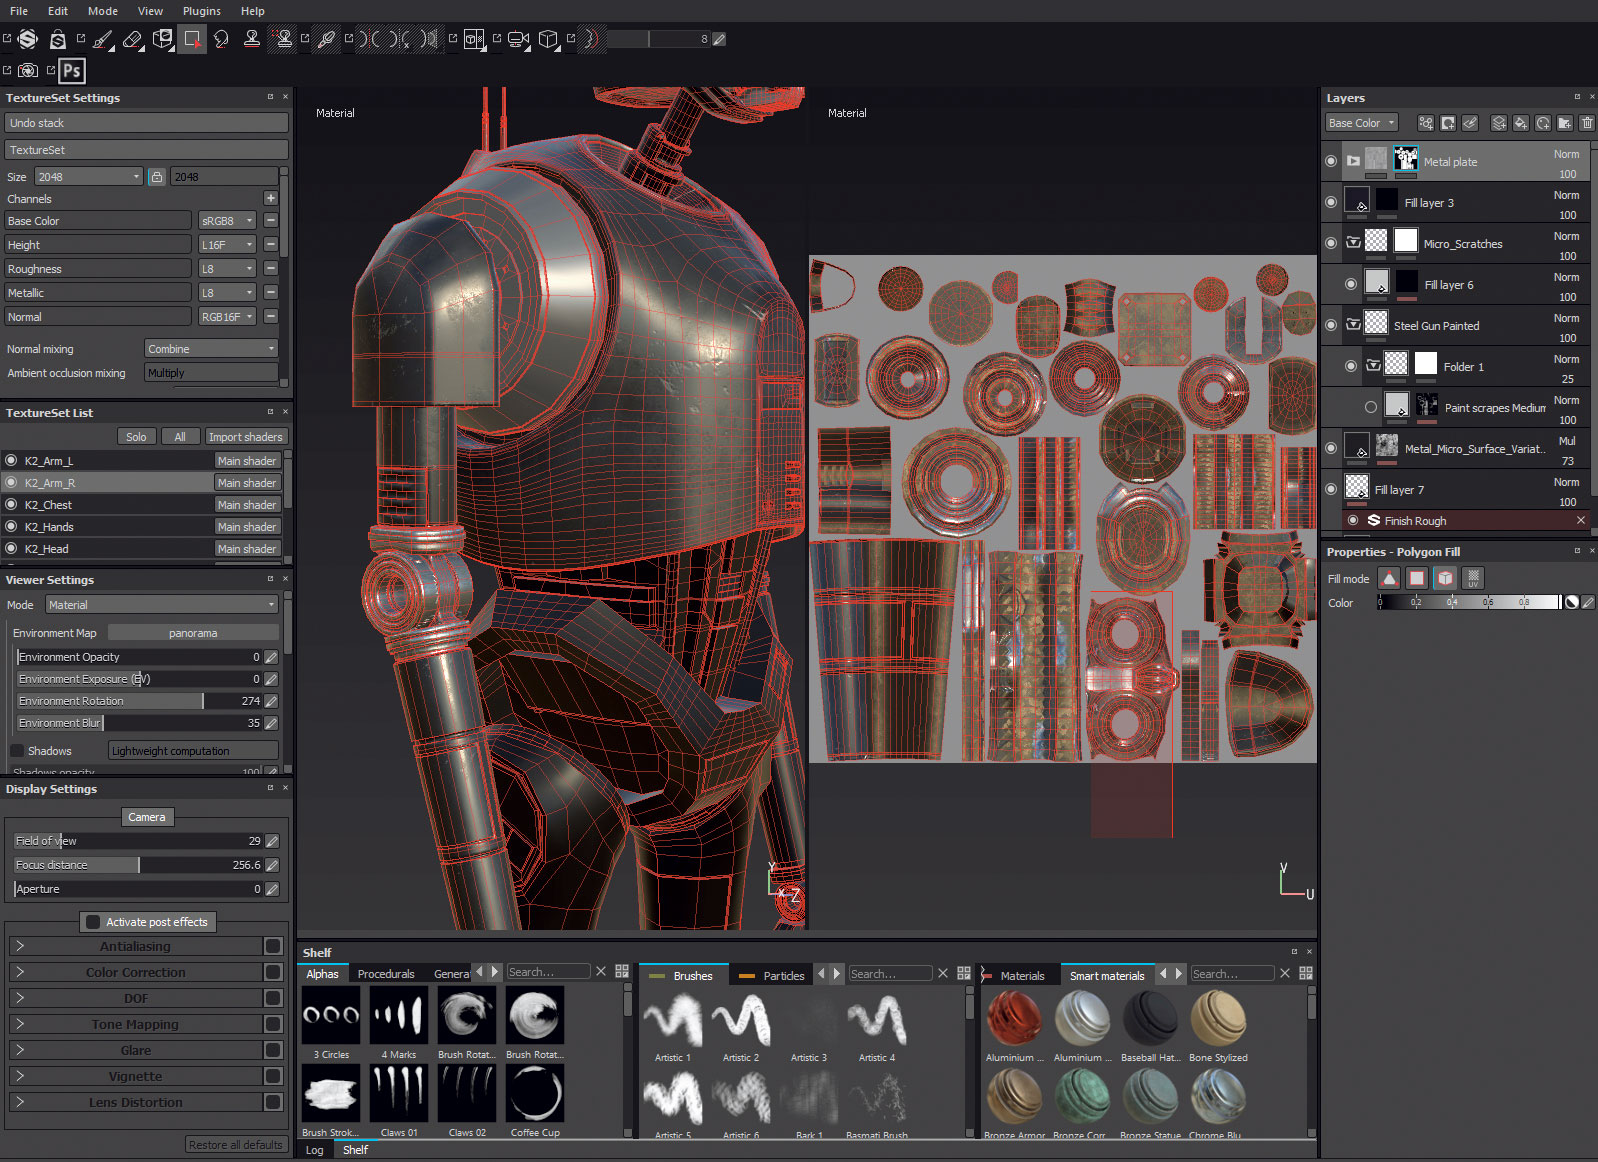
Using the presets that come with Painter, quickly block in the values and materials of the droid. Use Steel Gun metal that ships with Painter, and place this onto the model as a starting point, masking appropriately for the light trim and elbow joints by using the polygon fill tool, shortcut key [#4]. ZBrush is also used to create ID maps on the fly as and when required.
03. Building up the damage in layers and metal blemishes
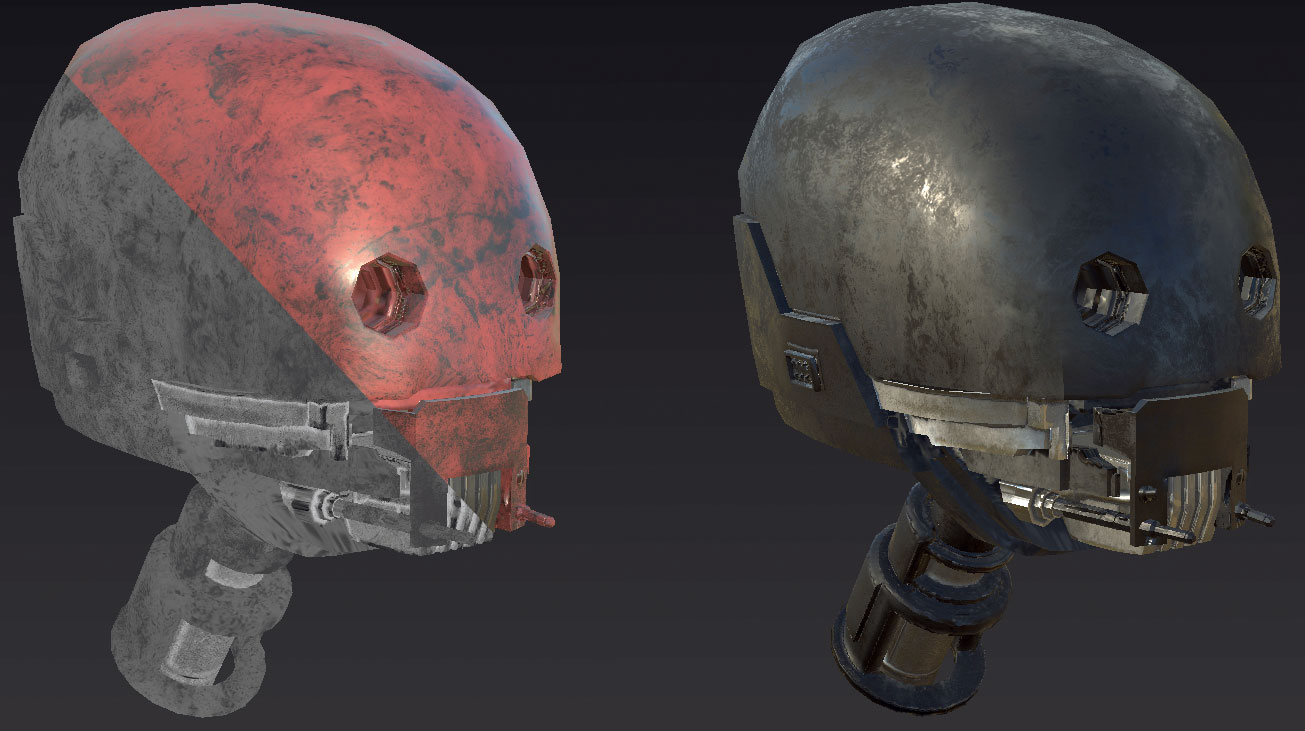
Although the smart presets serve as a good starting point, the layers are inspected one-by-one and replaced with custom layers better suited to this project as we want a custom appearance. The dark metal material properties of K2 are broken down into three categories; (Colours above are exaggerated in the images for clarity). Metal colour/roughness variety – In effect this is procedural noise to create a variety of metal blemishes all over the surface to make the surface appear more worn and even sun damaged. The roughness channel is tinted to help alter the light absorption.
04. Micro scratches
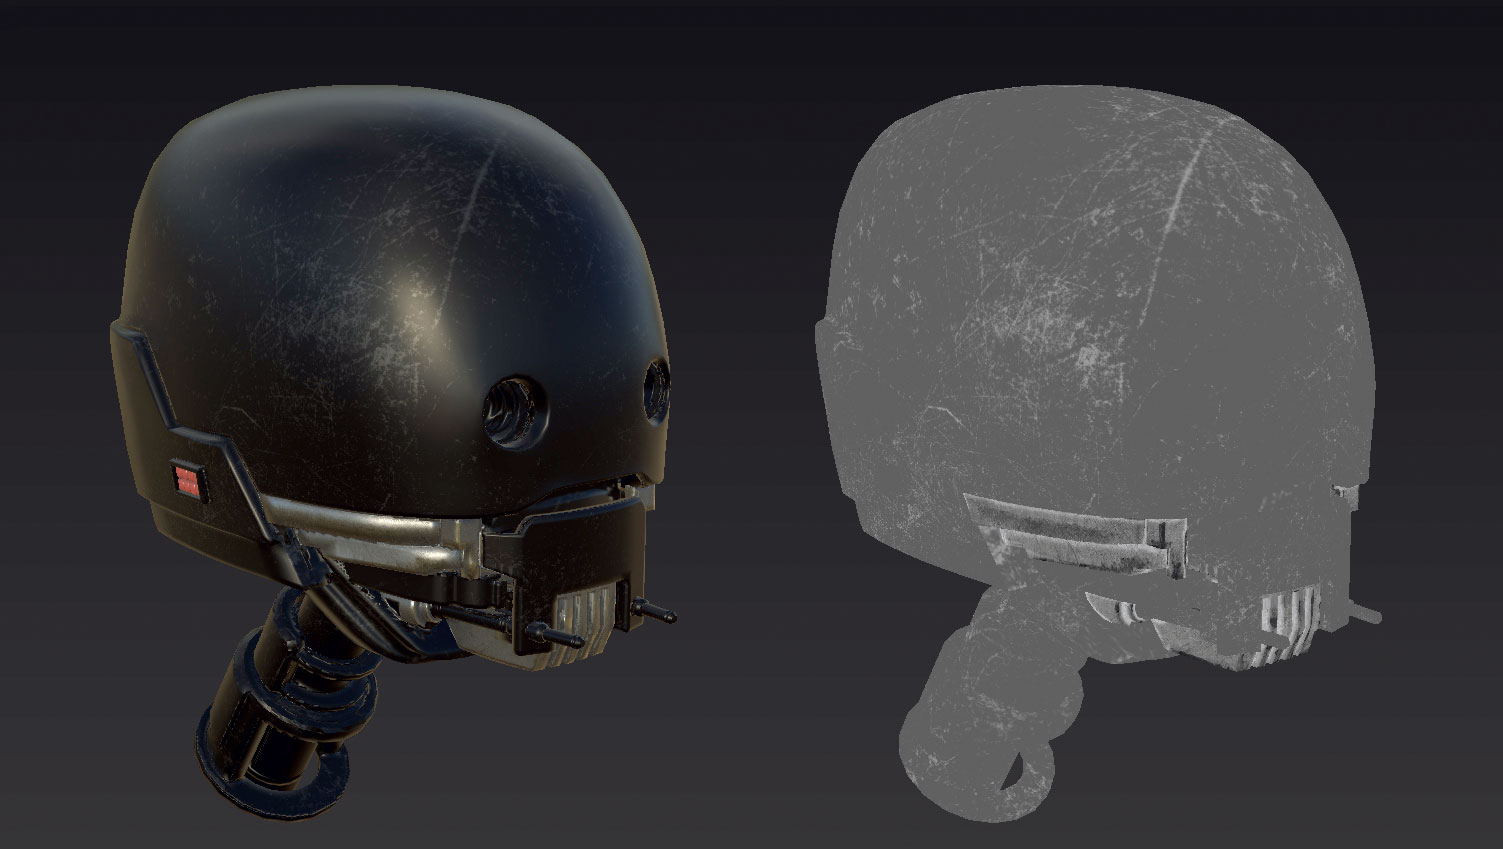
Next we want to add some scratches to give the droid a more used look. Create a new fill layer, mask it and then apply an MG Mask builder with a stock Grunge texture to Image Input #1 to apply scratches. Manipulate and balance to your liking by using the exposed sliders. With this layer, we are aiming to subtly help break up the surface highlights.
Get the Creative Bloq Newsletter
Daily design news, reviews, how-tos and more, as picked by the editors.
05. Paint surface scrapes
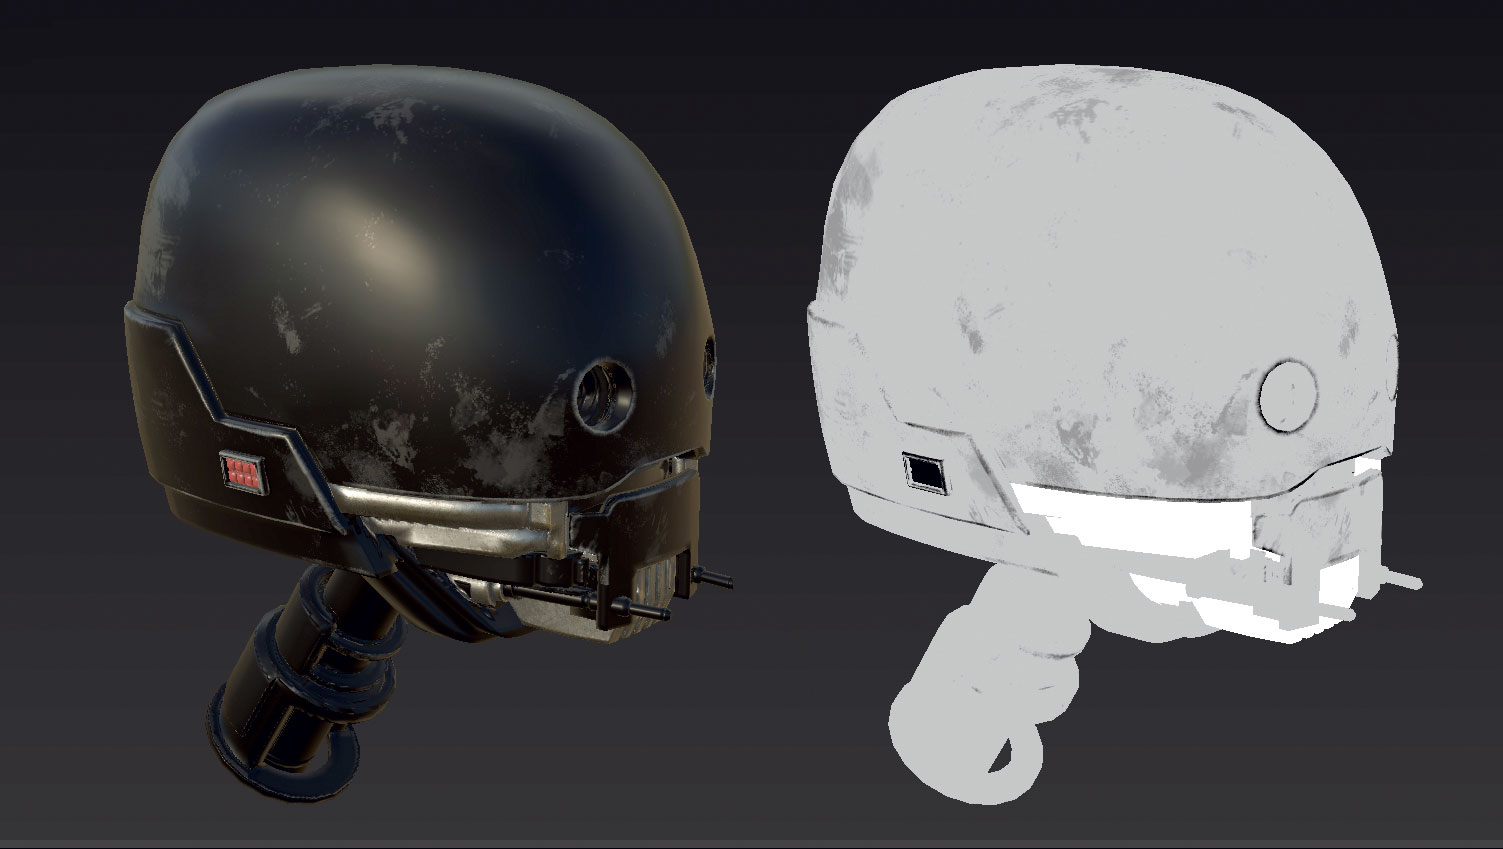
Again, use the MG Mask builder surface to create variety, for example, you could make it appear that the paint has worn off or picked up other coloured abrasions by K2 interacting with an environment. At this point, the metal texture is tinted to again add texture variety. Strengthen the idea that this droid has been around by adding deep battle damage: my approaches are shown on the accompanying video walkthrough.
06. Deep battle damage

Battle scars can be done by hand and/or by using generators. There are two approaches that are demonstrated by video. Ultimately ensure the diffuse fill layer is white with some opacity; this is the paint primer. The height channel for this layer is tinted darker so we can carve the scratches nice and deep. If they are not sharp enough, add a sharpen filter to the layer by right-clicking for that freshly sheared appearance.
07. Copy and paste
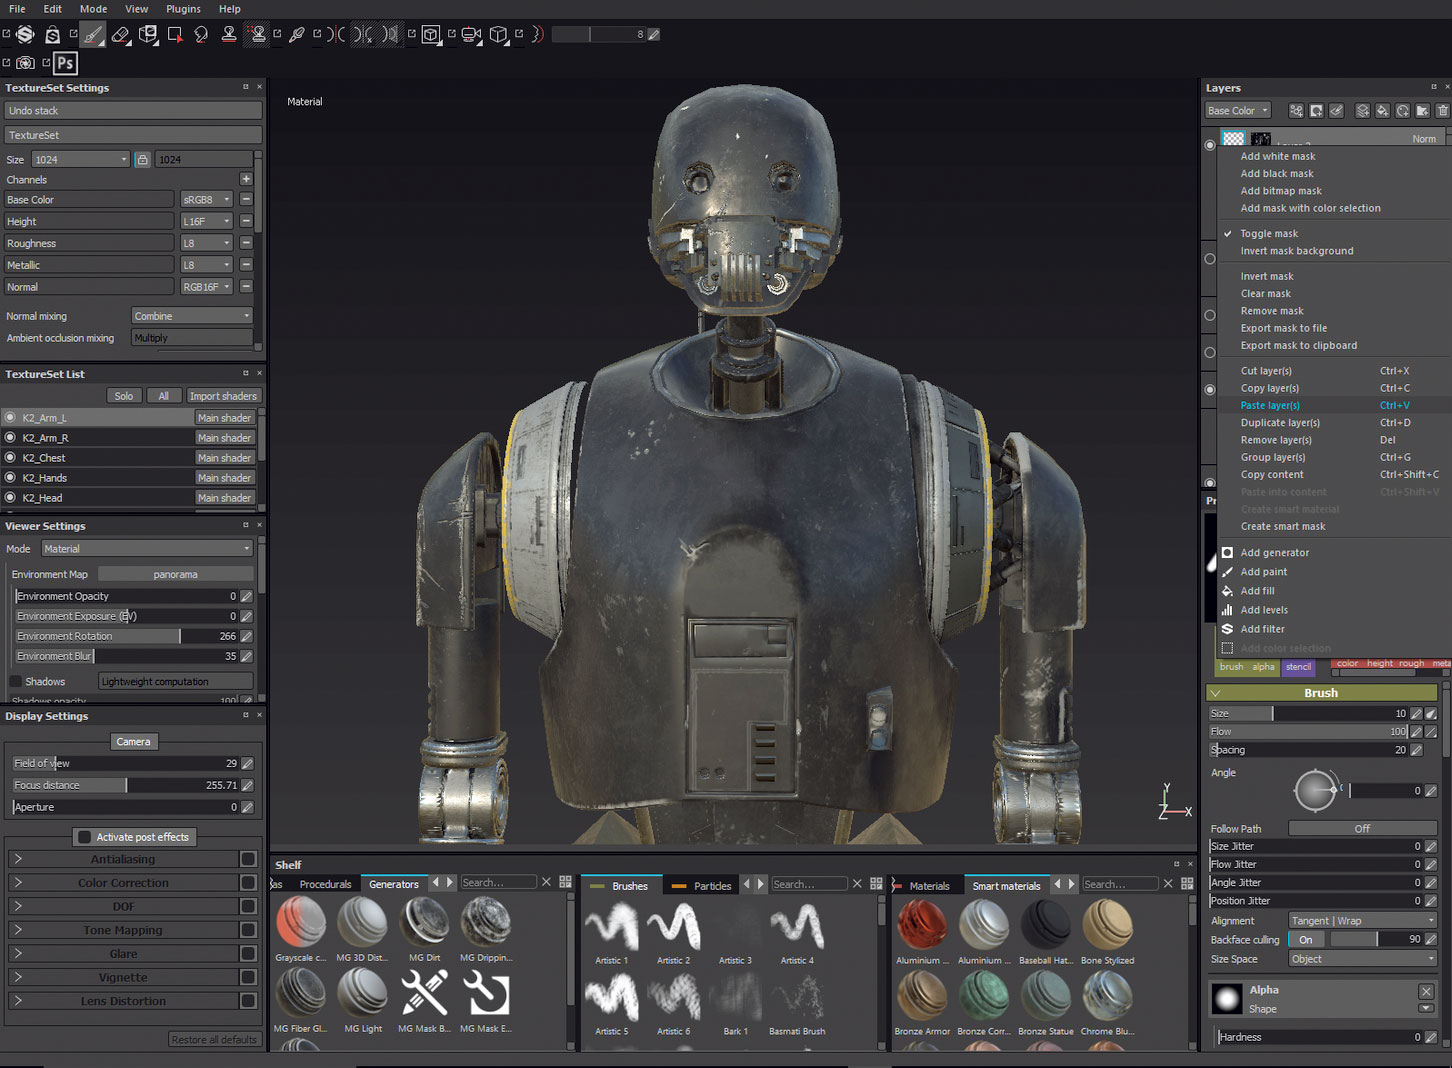
Now it's time to copy our material data across to the other nodes. To do so, group all your layers and name them appropriately, then right-click and create a Smart material. It will appear in your shelf ready to be used on the other components. By focusing on each component as we have done so far for the head, we can achieve the same level of detail for our other texture sets.
08. Dirt and grime for that weathered look
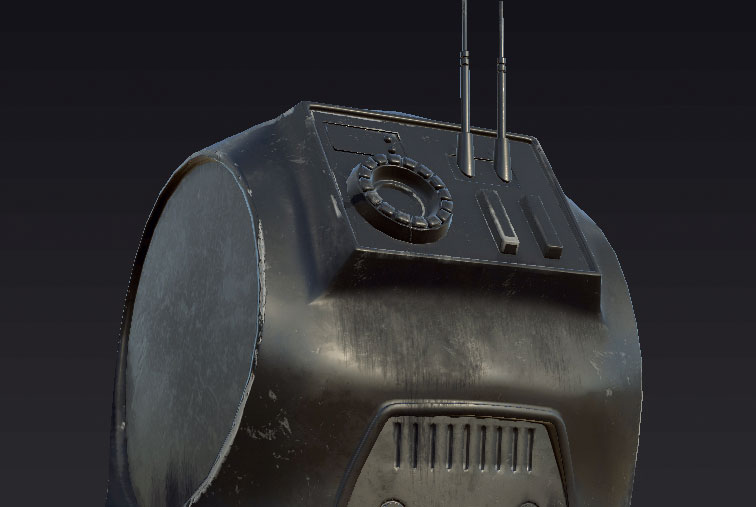
Finally, a custom dirt/residue pass is completed across the model. This could be done using the particle brush system, but I feel like I get too amazed by watching it and have more control this way. Apply a fill layer and paint in a dark value with the Dirt 1 brush, around areas where it would collect. By applying an alpha to this layer and changing the brush alpha to Drips, this layer is then customised further with weathering streaks. Since Dirt is not reflective, its roughness is made white and metalness is turned to zero.
09. The imperial icing
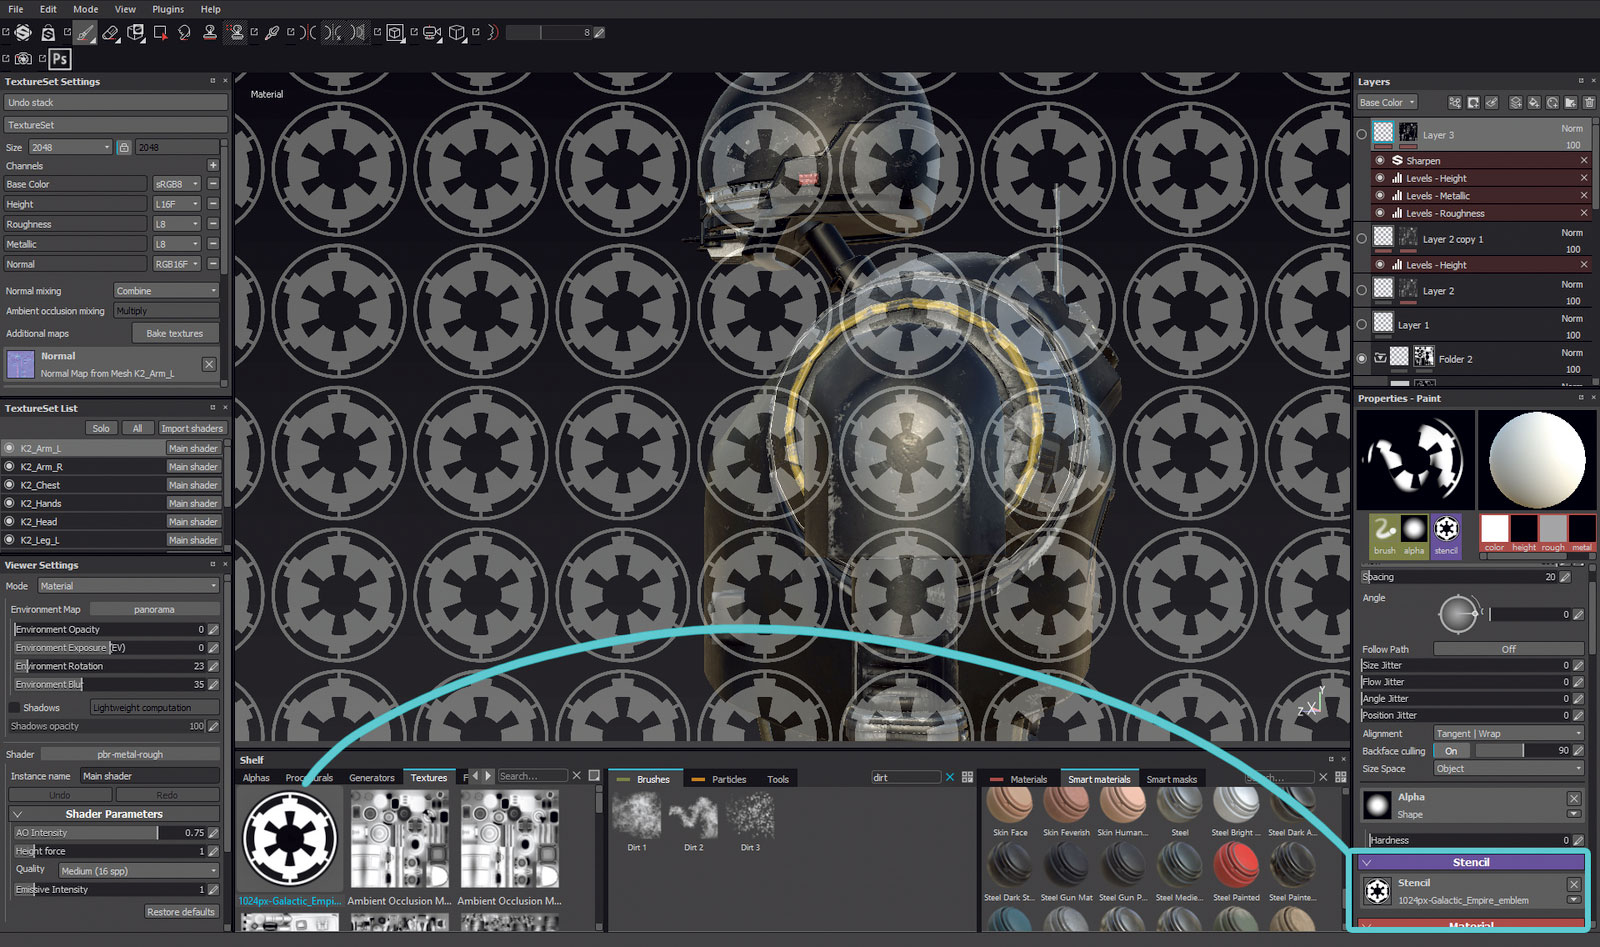
For the grand finale, we now get to add that rebel logo on the shoulder plate! Drag the logo provided into your texture shelf. Whilst in brush mode apply the decal as a stencil to your brush by dragging it into your stencil slot. You should see it immediately tile across your screen. Press the S key, a gizmo will appear and with the Alt key and MMB you can move the stencil to your chosen position and scale with RMB.
10. Emblem integration
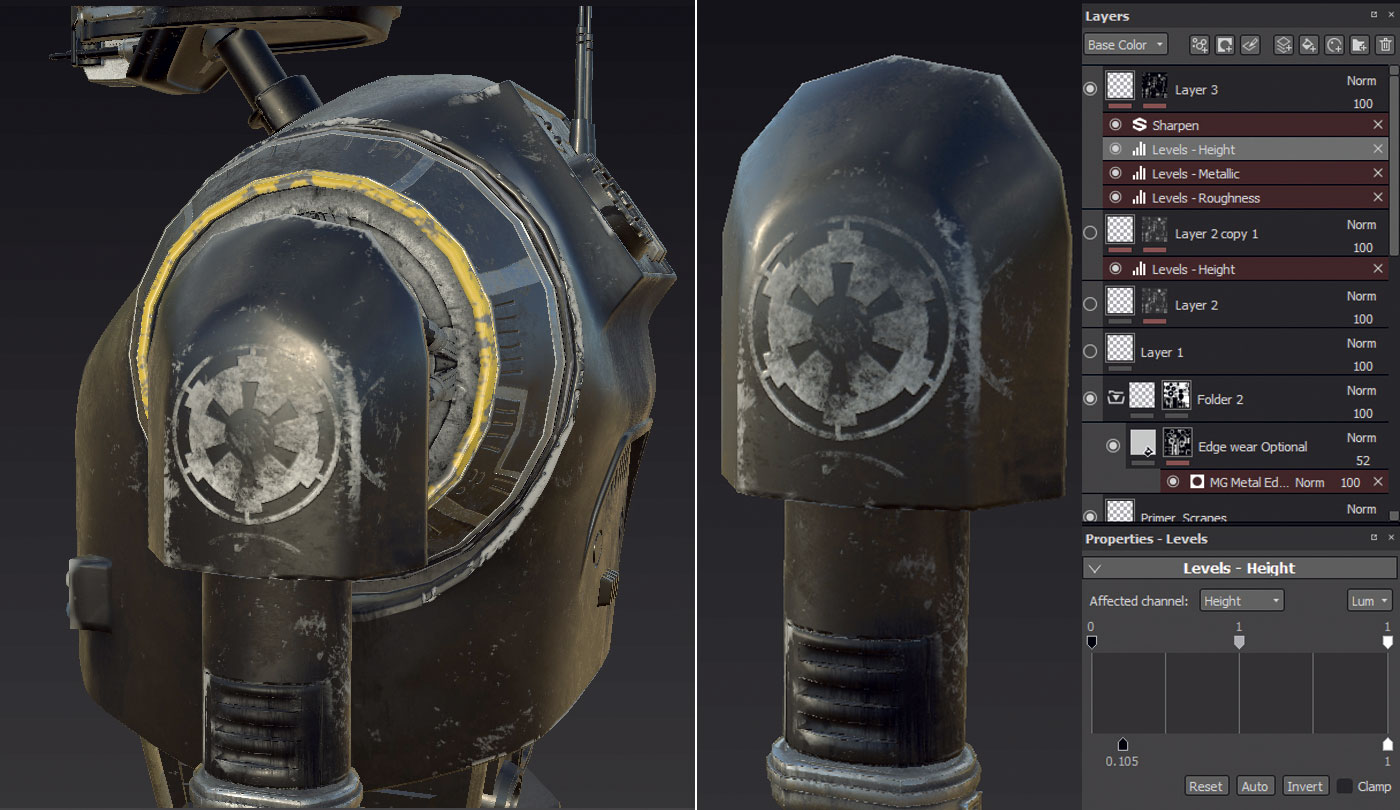
Rather than blocking in the decal 100 per cent as if it was brand new, I use a standard layer and the Crystal brush; as it has some noise in its alpha, from the outset I can give the emblem a worn appearance. To finish using the stencil, hit the X next to the brushes Stencil slot. To bed the decal into the metal surface I then apply a Surface Worn Smart Mask and alter the MG Mask Editor's Generator parameters to my liking. Roughness is then increased to break surface highlights by adding a level to only affect this channel.
Next page: Find out how to finish off your design

Thank you for reading 5 articles this month* Join now for unlimited access
Enjoy your first month for just £1 / $1 / €1
*Read 5 free articles per month without a subscription

Join now for unlimited access
Try first month for just £1 / $1 / €1
