If you want to know how to test React, you're in the right place. Do you really know your code does what it is supposed to do? Have you tested it in the browser? What if you haven’t, or you can’t test everything, and it breaks in production?
A testing library is a group of utilities developers use to write individual tests on application components. Some of the principle parts of a test are:
- Description: describes what the test is about
- Use/Render: uses the component in an environment where it can be tested
- Mocking: creates pretend functions, so that you can check your assumptions
Over the course of this article, I’m going to explore some examples from the React Testing Library in order to help you get started with this valuable way of improving the robustness of your code output, as well as ensuring your code doesn’t throw up any nasty surprises once it goes into production.
Want more useful resources? Here's a rundown of the best web design tools around that'll help you work smarter. Or if you need a new machine, try this roundup of the best laptops for programming. Or if you're building a new site, you might need a great website builder.
01. Get started with React testing library
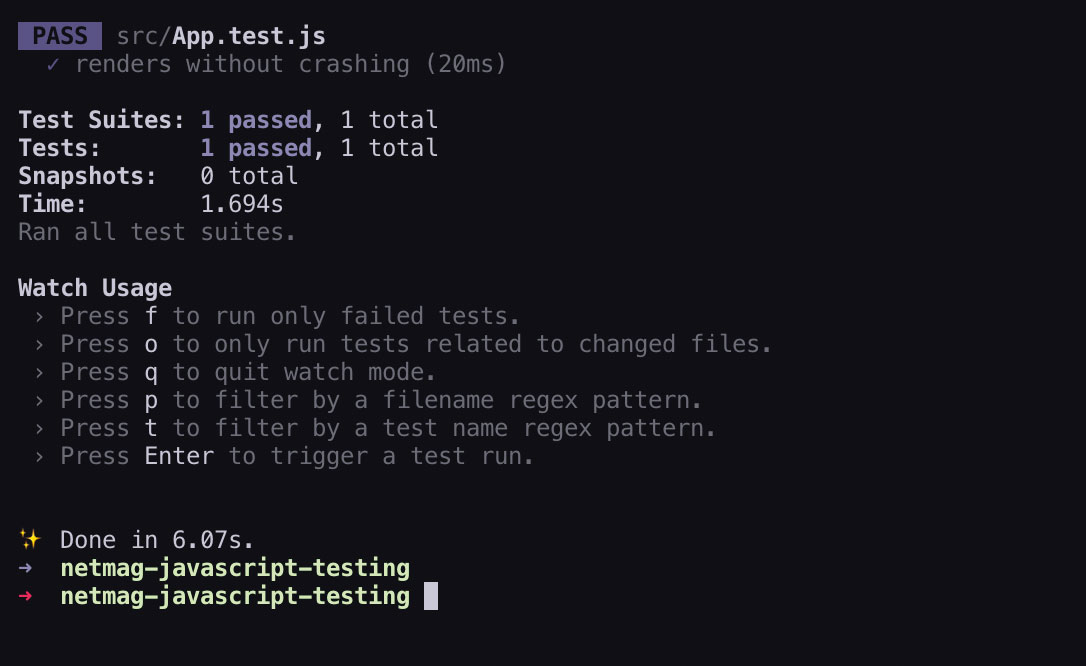
I’m going to use create-react-app for this demo because it already comes preconfigured with the testing library. If you’re using Gatsby or a custom setup, there might be some configuration you need to run through before you start using the testing library.
To begin, let’s create a new app. If you have a recent version of Node.js already, you can run the following command without installing anything else globally:
npx create-react-app netmag-javascript-testing02. Decide what to test
Imagine we have a simple component, say a button with some state. What are some of the things that need testing in a component like this?
● The appearance of the component:
We don’t want anything to change unexpectedly after we've written our component. So we're going to write a snapshot test to capture how it renders. Then, if anything changes, we will see it quickly without a manual or visual test. This is great for components that consist of many smaller components: you can see quickly when (and where) its appearance has been affected.
● The different branches that render:
Because we could have two or more different outputs, we need to test it's rendering all of them correctly, not just one of them. So we need to simulate a click event and have another snapshot test for the way it renders after this branch of code has been run.
● That functions get called as expected:
We want to ensure that the code we wrote to call another function works as we assume it will. But since that function is an external dependency, we don’t want to test that here. Our tests should encapsulate only the functionality we want them to.
03. Write your first test

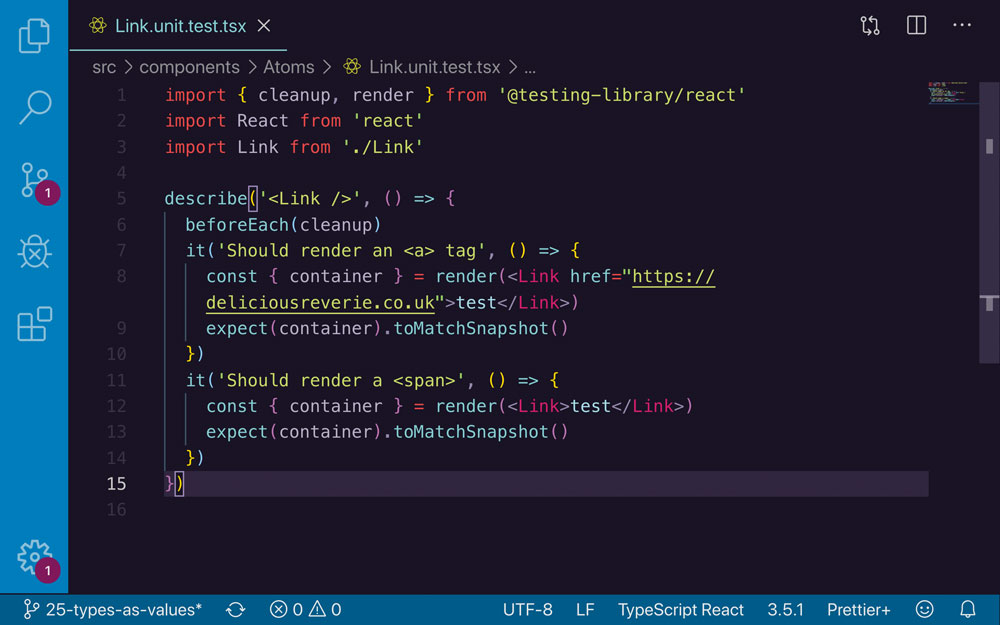
Let's write our first test. Create a new file called MyComponent.unit.test.js in the same folder as the component. By adding test.js at the end, it'll be automatically picked by the testing library. The contents of that file are below:
import React from ‘react’
import { render } from ‘@testing-library/react’
import MyComponent from ‘./MyComponent’
describe(‘the <MyComponent />’, () => {
    // tests go here
})
The first thing I want to draw your attention to is the describe() function, which takes two arguments: the first is a string that you can use to better describe – as a string of text – what your test is going to be doing. In our case we've simply said that it should render. This is very useful when someone else looks at your code or you have to remember what you did at a later stage. Writing good describe statements is a form of code documentation and another good reason for writing tests.
The second argument is your tests. The describe() function will run all of these tests one after the other.
04. Use cleanup function
Let’s introduce a helper function called beforeEach(). We need to use this because each time we do something with the component, we want a fresh copy without the props we previously had passed to it still existing in the component. Or we might need to re-render the component: beforeEach() does that for us and we can pass it the cleanup function.
import { render, cleanup } from ‘@testing-library/react’
...
describe(‘the component should render’, () => {
  beforeEach(cleanup)
}
05. Write a snapshot test

In this step, we're going to 'mount' our component (or render it).
describe(‘the component should render’, () => {
  beforeEach(cleanup)
  it(‘renders with basic props’, () => {
    render(<MyComponent />)
  })
}
This render gives us access to all of the rendered properties of the compiled component. It might be good to drop this into a console.log() so you can see more clearly what it does.
If you do, you’ll see that there are a few useful properties we can take advantage of here. I'm going to make an assertion (make a testable declaration) and test it by extracting the container. The container 'contains' the DOM nodes (all of the HTML) associated with the component.
it(‘renders with basic props’, () => {
    const { container } = render(<MyComponent />)
})
Now we have access to the container, how do I tell that it's rendered according to my assertion? By adding a snapshot test.
Think of a snapshot as being like a photograph. It takes a snapshot of our component at a specific point in time. Then whenever we make alterations to the code, we can see if it still matches the original snapshot. If it does, we can be confident that nothing has changed in the component. However, if it doesn't, we might have uncovered an issue that originated in another component, one that we might not have spotted previously:
06. Test properties
Props, or properties, of a component can be tested with snapshots, too. Testing the different props you provide to your component will give you greater coverage and confidence. You never know when a requirement is going to mean your component's props are refactored and the final output will change.
Add the following object to the top of your file:
const lightProperties = {
    backgroundColour: ‘white’,
    textColour: ‘darkblue’
}
We define the properties in an object and then use the spread operator (three dots followed by the object name: ...lightproperties) because we can only pass one argument in when we render this way. It's also useful to see what properties you're passing in isolation:
it(‘renders with basic props’, () => {
        const { container } = render(<MyComponent />
      )
     expect(container).toMatchSnapshot()
    })
    it(‘renders with the light version props’, () => {
        const { container } = render(
            <MyComponent { ...lightProperties } />
        )
        expect(container).toMatchSnapshot()
    })
07. Test changes in the UI
Imagine our component has a button and you want to make sure that something happens when the button is clicked. You might think that you want to test the state of the application; for example, you might be tempted to test that the state has updated. However, that's not the object of these tests.
This introduces us to an important concept in using a testing library: we're not here to test the state or the way our component works. We're here to test how people are going to use the component and that it meets their expectations.
So whether or not the state has updated is immaterial; what we want to test is what the outcome of that button press is.
Let's imagine we're testing the outcome of a function that changes the UI from dark mode to light mode. Here's the component:
const modeToggle = () => {
    const [mode, setMode] = useState[‘light’]
   const toggleTheme = () => {
     if (theme === ‘light’) {
       setTheme(‘dark’)
     } else {
       setTheme(‘light’)
     }
   }
    return (
        <ToggleButton data-testid=”mode-toggle” lightMode={mode} onClick={toggleMode}>
          Toggle mode
        </ToggleButton>
    )
}
First, we should add a test id onto the button so that we can find it in the render phase:
return (
    <ToggleButton
      data-testid=”mode-toggle”
      lightMode={mode}
      onClick={toggleMode}
     >
      Toggle mode
    </ToggleButton>
Did you notice that we added the new attribute data-testid to the button? Here's how you might test that. First, import a new function, fireEvent from the testing library:
import { cleanup,
          fireEvent,
          render
} from ‘@testing-library/react’
We can use that function to test there are changes in the UI and that those changes are consistent:
it(‘renders with basic props’, () => {
    const { container } = render(<ToggleButton />
  )
 expect(container).toMatchSnapshot()
})
it(‘renders the light UI on click’, () => {
    const { container, getByTestId } = render(<ToggleButton />)
    fireEvent.click(getByTestId(‘mode-toggle’))
    expect(container).toMatchSnapshot()
})
This is great: we don't have to manually go to the site and look around, then click the button and look around a second time – during which, you might admit, you'll likely forget or miss something! Now we can have confidence that, given the same input, we can expect the same output in our component.
When it comes to test IDs, I personally dislike using data-testid to find something in the DOM. After all, the object of tests is to mimic what the user is doing and to test what happens when they do. data-testid feels like a bit of a cheat – although data-testids will likely come in handy for your QA engineer (see the boxout The Role of Quality Assurance Engineers).
Instead, we could use getByText() and pass in the text of our button. That method would be a lot more behaviour specific.
08. Mock and Spy the function
Sometimes we might need to test a call to a function but that function is outside the scope of the test. For example, I have a separate module that contains a function that calculates the value of pi to a certain number of decimals.
I don't need to test what the result of that module is. I need to test that my function does as expected. For more information about why this is, please see the box Unit and Integration Tests. In this case, we could 'mock' that function:
const getPiValue = jest.fn()
it(‘calls the function on click’, () => {
    const { container, getByTestId } = render(<ToggleButton />)
    fireEvent.click(getByTestId(‘mode-toggle’))
    expect(getPiValue).toHaveBeenCalledTimes(1)
  )
})
The function toHaveBeenCalledTimes() is one of the many helper functions in the testing library that enable us
to test the output of functions. This lets us not only scope our tests only to the module we want to test but also means we can 'spy' on or see what our function does when it calls that function.
09. Start testing React applications

Writing tests can seem a little daunting to start with. I hope this tutorial has given you a little more confidence to try it. Since I started writing tests for my applications, I really can't go back: I can rest easier, knowing I'm leaving behind a much better legacy for those who will use my work in the future.
For more ideas about how to test your components, visit React testing library or React testing examples. If you're looking for some courses to help you get started, the one by Kent C Dodds (who wrote and maintains React Testing Library) is popular. I also enjoyed this one on Level Up Tutorials it's the one that got me started writing tests for my code.
Remember, if you're building a complex site, you'll want to get your web hosting service spot on. And if that site's likely to contain lots of assets, storing them in reliable cloud storage is crucial.
This content originally appeared in net magazine. Read more of our web design articles here.
Read more:
Get the Creative Bloq Newsletter
Daily design news, reviews, how-tos and more, as picked by the editors.

Thank you for reading 5 articles this month* Join now for unlimited access
Enjoy your first month for just £1 / $1 / €1
*Read 5 free articles per month without a subscription

Join now for unlimited access
Try first month for just £1 / $1 / €1
