Speed up your 3D modelling
Learn how to produce detailed 3D concepts using rapid symmetry.

This tutorial covers the process of building an asset – in this case a spaceship design – with a fair degree of complexity, in a short amount of time, using 'rapid symmetry concepting'.
This is a great technique for developing an idea when there's no firm design to begin with. It allows you to evolve the shape into a final concept through the exploration of symmetry and silhouette.
Rapid symmetry design is a loose term that I use to describe the process of generating 3D concepts. The final design arrives through an organic, evolving series of steps using symmetry tools found in most 3D programs, in this case 3ds Max. You begin by creating a very simple geometric shape and quickly produce very complex looking results, that would otherwise take hours, or even days to create, using a more traditional approach.
In addition, I would like to show how you can use path deformation techniques to create some very interesting shapes that would otherwise take a very long time.
The emphasis here is about finding new ways to create complex shapes in a short amount of time.
The process I use is relatively old school, however, with the exception of a few artists, I rarely see anyone using this technique anymore. So, with that in mind I wanted to draw attention to this old trick through creating this tutorial.
Get all the assets you'll need here.
Get the Creative Bloq Newsletter
Daily design news, reviews, how-tos and more, as picked by the editors.
01. Set up a basic shape
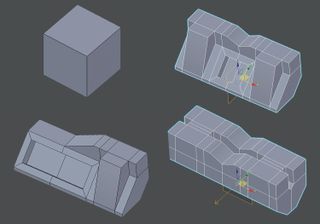
I begin the process with a very simple polygon cube and edit the cube into a simple shape. No real thought is given to this shape; to begin with it shouldn't be too complex. I then add a Symmetry Modifier to the cube and click Flip to get a new shape. You can develop this further by adding a second Symmetry Modifier on top of the previous one, and select a different Axis. Click Flip again for a new shape.
02. Using the Mirror plane
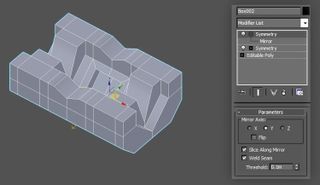
If you now expand the Symmetry Modifier it reveals the Mirror Plane. The Mirror Plane can be moved to provide different effects; to see the effects on your model you'll need to select the Mirror Plane in the Symmetry Modifier and then move the object manipulator around. Try using the Flip option and then move the Mirror Plane for a different shape.
03. Duplicate and evolve
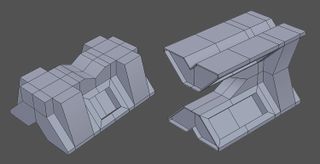
Each time you find an interesting shape, duplicate the object by holding down Shift + clicking the left mouse button, and dragging out another object. From the option box select Copy>OK to save it. Put it aside while you continue to explore different shapes. Eventually you will build up many objects that have all derived from the same original shape, but look very different – simply by using the Symmetry Modifier and duplicating each time.
04. Using the Rotate tool
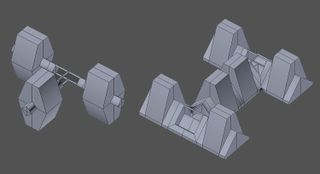
You can also rotate the Mirror Plane using the Rotation Manipulator (press E). Applying a Symmetry Modifier to this shape creates a new, more complex result. You can continue to move the Mirror Plane around, changing the Axis and using the Flip option to create more complexity. The object pictured would take more time to model traditionally, but using 'rapid symmetry' you can get a complex model in seconds.
05. Take the idea further
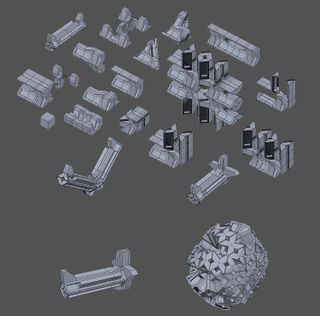
Soon you will have a library of simple, unique objects. To take your objects to the next level you will need to attach two of them together, then continue the same process with the new model: playing around with the Symmetry settings as I did previously. Simply joining two objects together results in even more complex shapes; I move one object into the other so they intersect, for a purely aesthetic approach.
06. Joining objects together
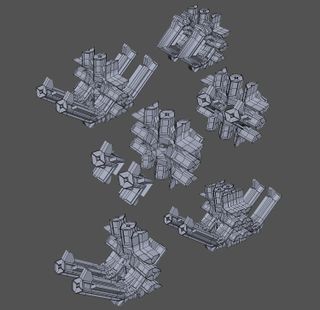
To attach two objects together, so they become one object, you first need to select one object (either is fine) and then go to the Object Modifier options panel and click the Attach button, then click on the object you wish to attach. They are now one object, which leaves you free to play around with the Symmetry Modifiers again.
07. Getting complex
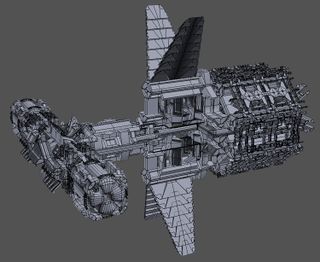
What happens when you get two very complex objects? Stick them together to make something even more complicated! You can continue to evolve your model to create a more complex shape that eventually begins to form a spaceship. Attempting this with traditional box modelling workflow would take many days, this object took me around an hour. The shapes look complex but are actually quite simple, so we need to find a way to create interesting forms in this framework.
08. Create a chain
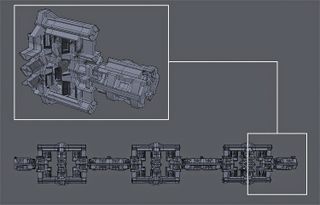
I want to create a 2001-influenced ring-shaped object to fit the end of my spaceship design, so we need to adapt the workflow. Begin with a polygon object created using the previous approach and then use the Symmetry Modifier to create a chain of these objects. Do this multiple times and finish the chain by moving the Mirror Plane to one of the ends, in order to create a linking object.
09. Use PathDeform
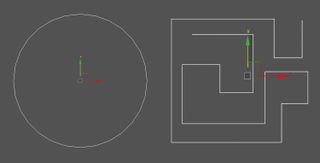
The next step is to create a path. To get the ring shape to attach to my spaceship, I need to use a Circle path located in the Object Type options menu, though you can use any shape path – even crazy and complicated ones – to create unusual results. I recommend a long path to give the object chain room to fit. Try to imagine your shapes deforming down the path like a chain.
10. Align to the path
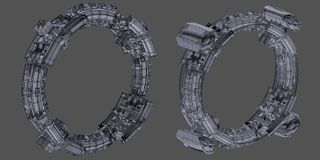
Select the object chain, then go to the Object Modifier menu and locate PathDeformer (WSM) from the World-Space Modifiers list. In the PathDeform Modifier options menu click the Pick Path button and then select the previously created path. Now click Move to Path and finally select either X, Y, or Z from the PathDeformer Axis menu. Check how this has affected your object; one of the axis will make the object align correctly to the path.
11. Troubleshooting
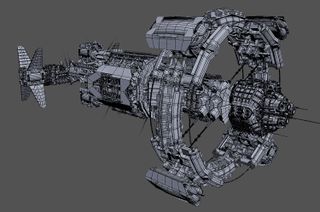
While the result is looking good, if you try to edit the object chain you're going to encounter some very strange issues, so you'll need to fix this problem by collapsing the Modifier stack and converting it back to a polygon object. Do this by locating the PathDeform modifier in the Object Modifier list and right-click on the Modifier itself (on the word Deform). From the menu that appears, select Collapse To and click Yes when the warning box appears.
This article originally appeared in 3D World issue 210; buy it here!

Thank you for reading 5 articles this month* Join now for unlimited access
Enjoy your first month for just £1 / $1 / €1
*Read 5 free articles per month without a subscription

Join now for unlimited access
Try first month for just £1 / $1 / €1
