Simulate a Ghost Rider transformation
Use Maya and After Effects to create a fiery transformation scene.
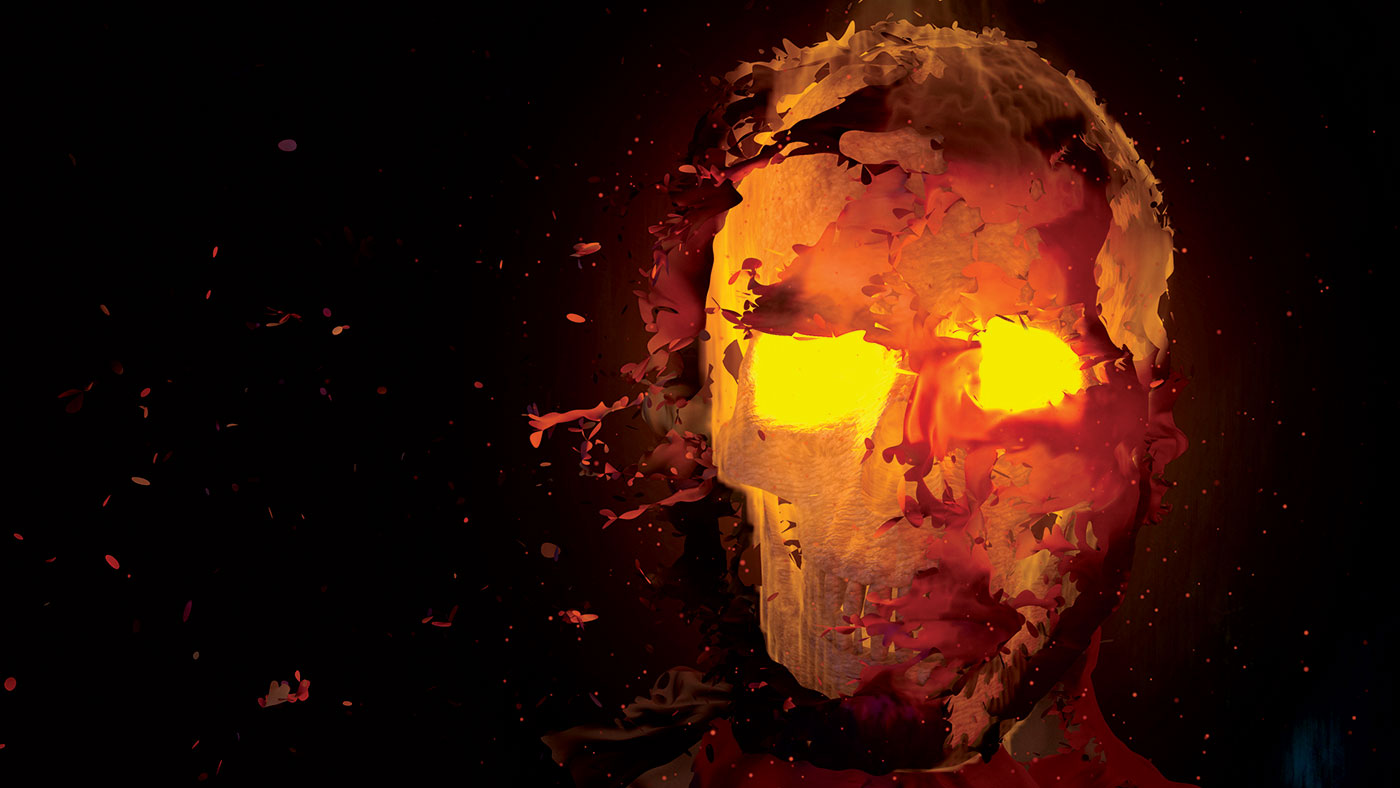
Ghost Rider shone as one of the new characters in Marvel's Agents of SHIELD. When Ghost Rider appears you know there are going to be some really cool Ghost Rider transformation scenes, where you'll see a living breathing dude turn into a fiery skeleton.
There are some interesting things that happen when Ghost Rider transforms and we'll be breaking all of them down in the same way as his skin changes: piece by piece.
The first thing that happens is that his skin starts to boil. You can see bubbles appearing, in a similar way to when you heat some plastic. Then, the skin starts to break off in patches; it's really interesting to see these cracks as they start appearing. Eventually, the skin starts flying off, thanks to environmental factors like wind. From below, his skull starts showing but there's a very neat and sort of controlled chaos in the way his skin cracks.
Let's take a look at how we can achieve these effects using Maya and a spot of After Effects.
You can download the files for this tutorial here. And to view images at a larger size, simply hit the expand icon in the top-right corner of the image.
01. Prepare the footage
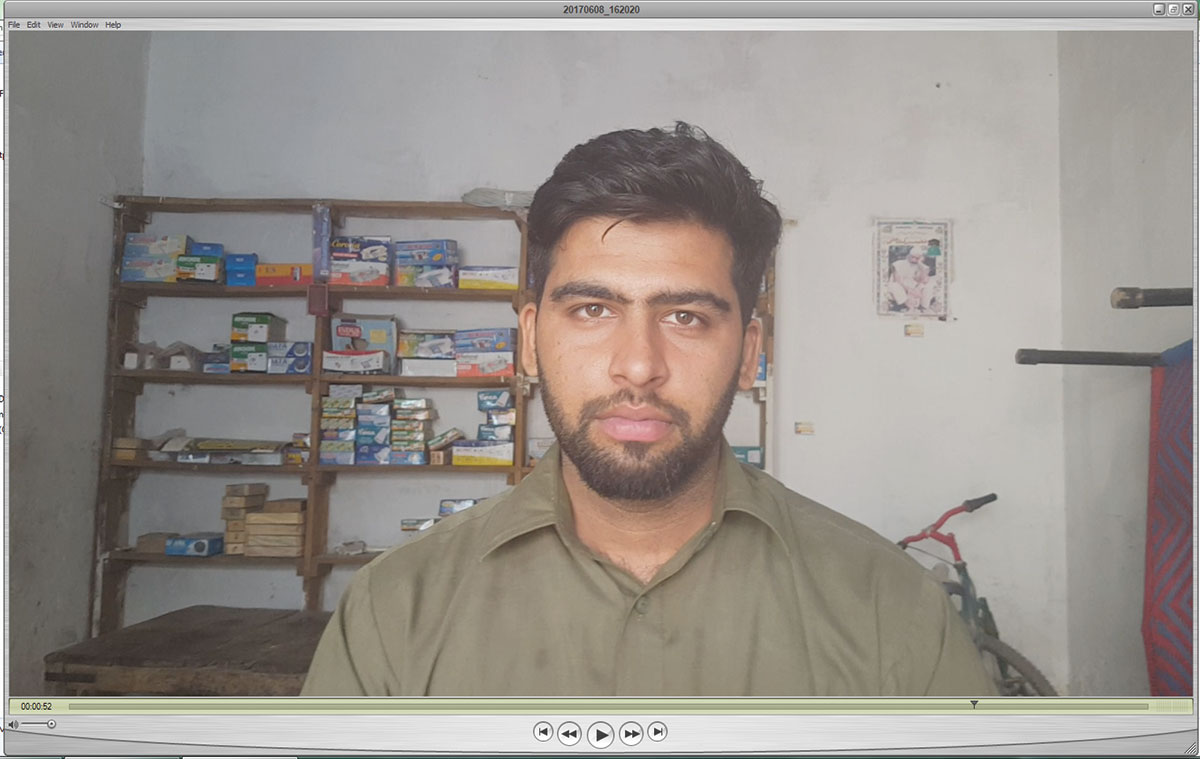
Before we jump into a 3D program – Autodesk's Maya, in this case – it's worth preparing for the shot. You need to capture good footage. The display is up to you but make sure you stabilise the footage or shoot it on a tripod. Get some sudden movements from the actor as well as slow ones, for when the fire is inside the character's head and burning him when he's human, before slowly turning into the Rider.
02. Stabilise the footage
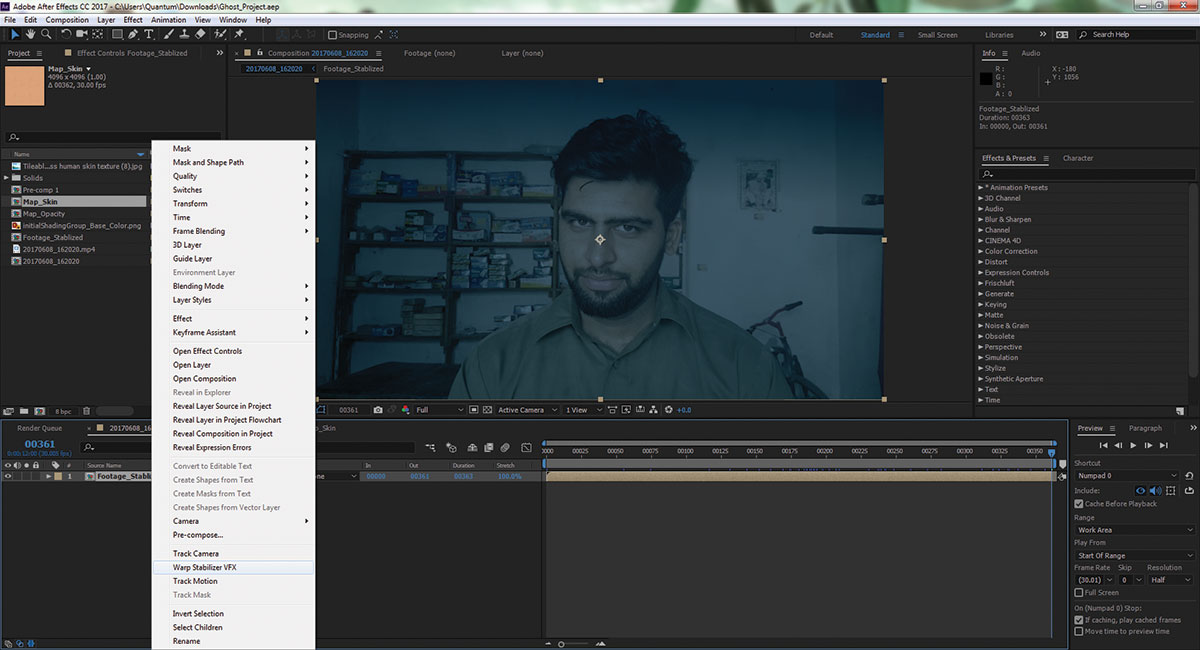
If you don't happen to have a tripod to shoot on, it isn't the end of the world. There are some useful compositing tricks that you can use in order to stabilise the footage. First of all, import your footage into Adobe After Effects, create a new composition, drag the footage into this composition and then right-click on the footage in the timeline.
Get the Creative Bloq Newsletter
Daily design news, reviews, how-tos and more, as picked by the editors.
You'll see a Warp Stabilizer VFX button appear. Click it, and then in the properties of the effect, simply change Smooth Motion to No Motion. Do this only if your footage is suffering from camera shake.
03. Sort the geometry
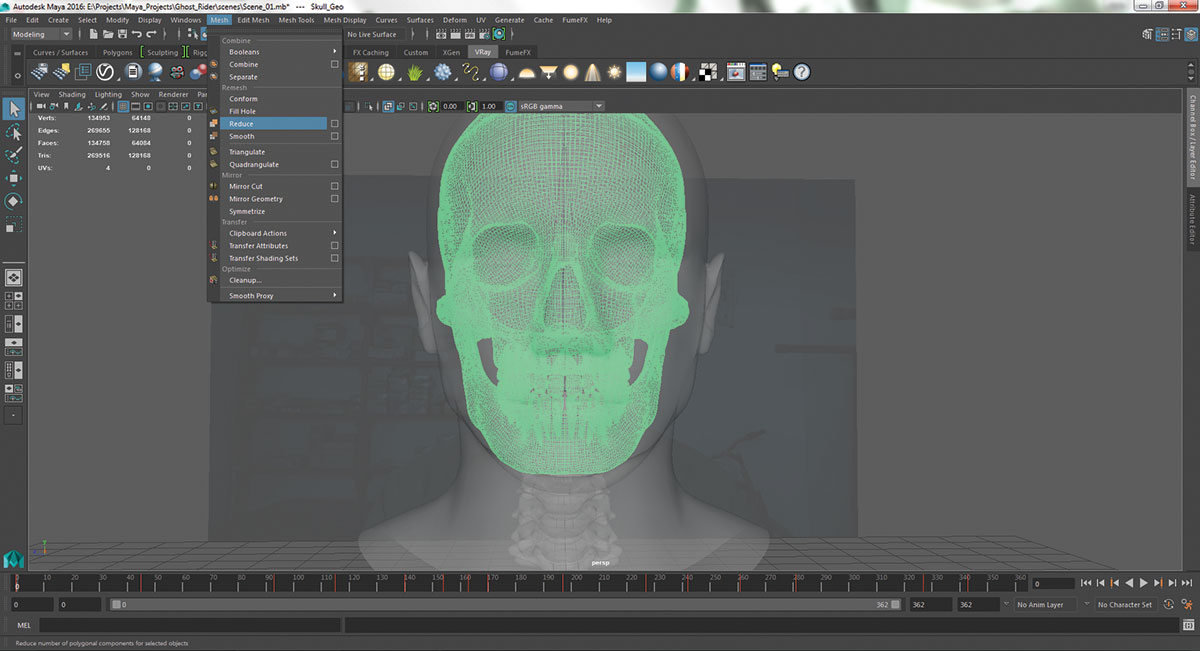
You'll need two models. First, a human base to simulate. This won't contribute to the final composite but it's what we'll burn. Second is the skeleton. Get both of these models, fit the skull inside the head as well as you can and clean the geometry. Weed out any holes. In Maya's modeling module, go to Mesh in the toolbar and find Reduce. This helps cut poly from the geometry.
04. Skinning geometry
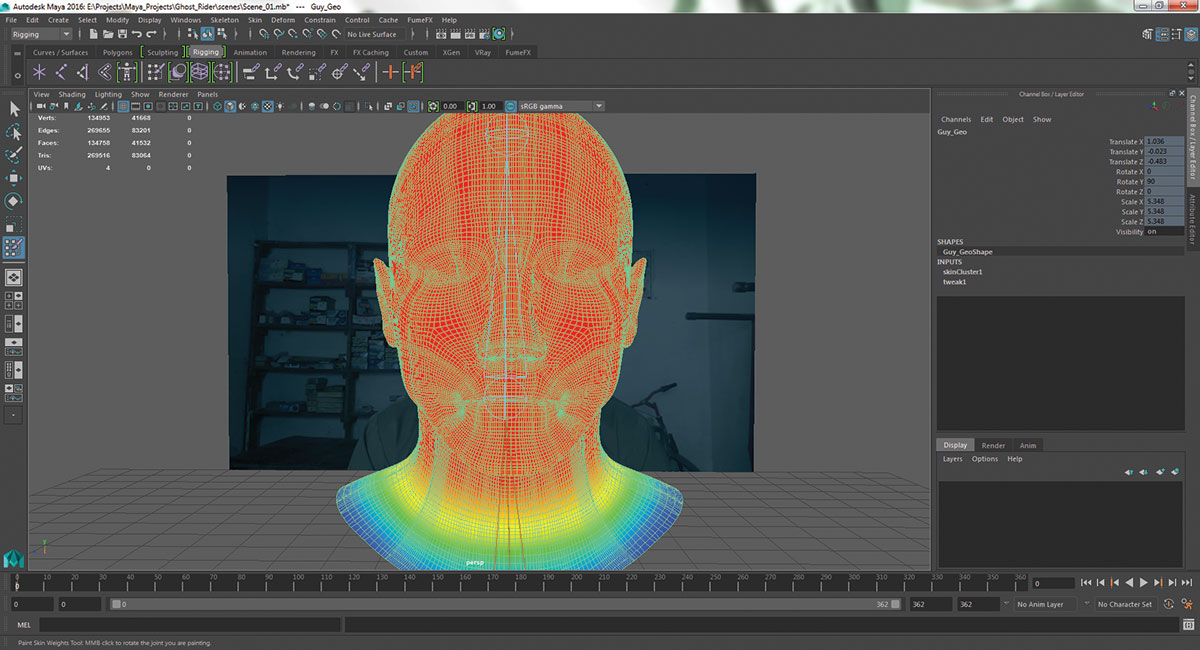
Make some joints based on the actor model and skin it. In my case, I only have the head, and only a small portion of the head. So I created three joints. One from the chest to the neck or the bottom of the skull, another from the neck all the way to the top of the head and a third one that doesn't really do anything but I like to have in case I need changes later.
05. Animate the geometry
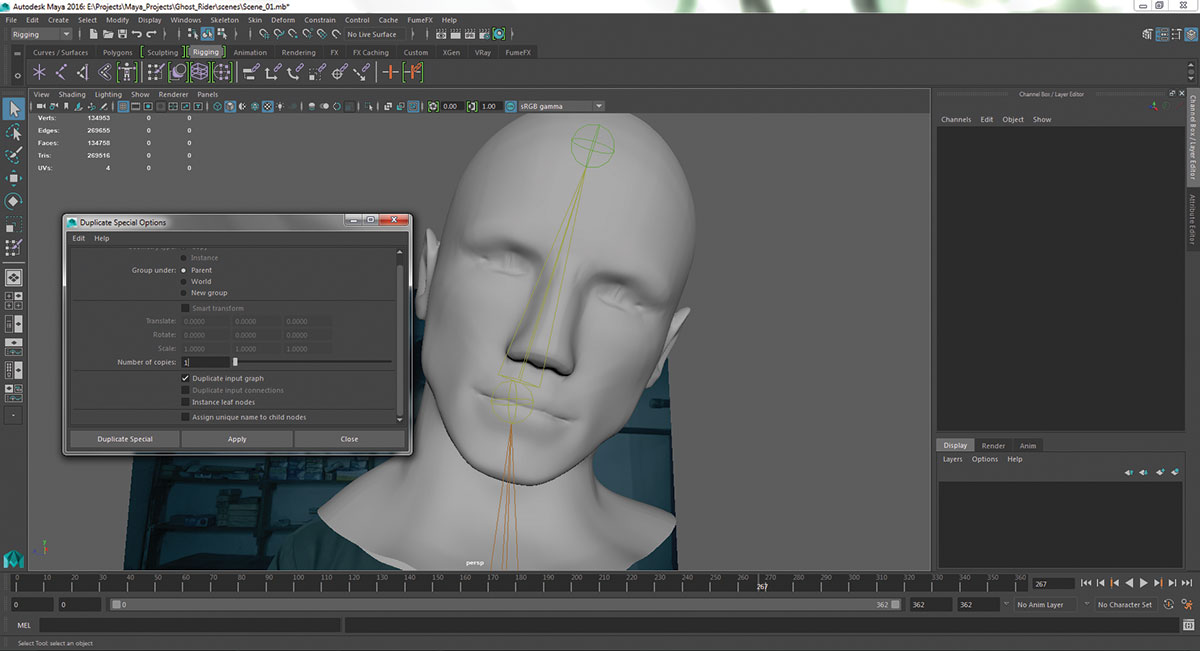
Now, animate the geometry to move like the actor in the footage. Get this as close as possible. Once done, create a copy of those animated joints using Edit> Duplicate Special (in the settings of that, check the Duplicate Input Graph to copy the animation) and skin this new joint system to the skull for a quick and accurate duplication of the actor model's motion.
06. Turn geometry into nCloth and rigid bodies
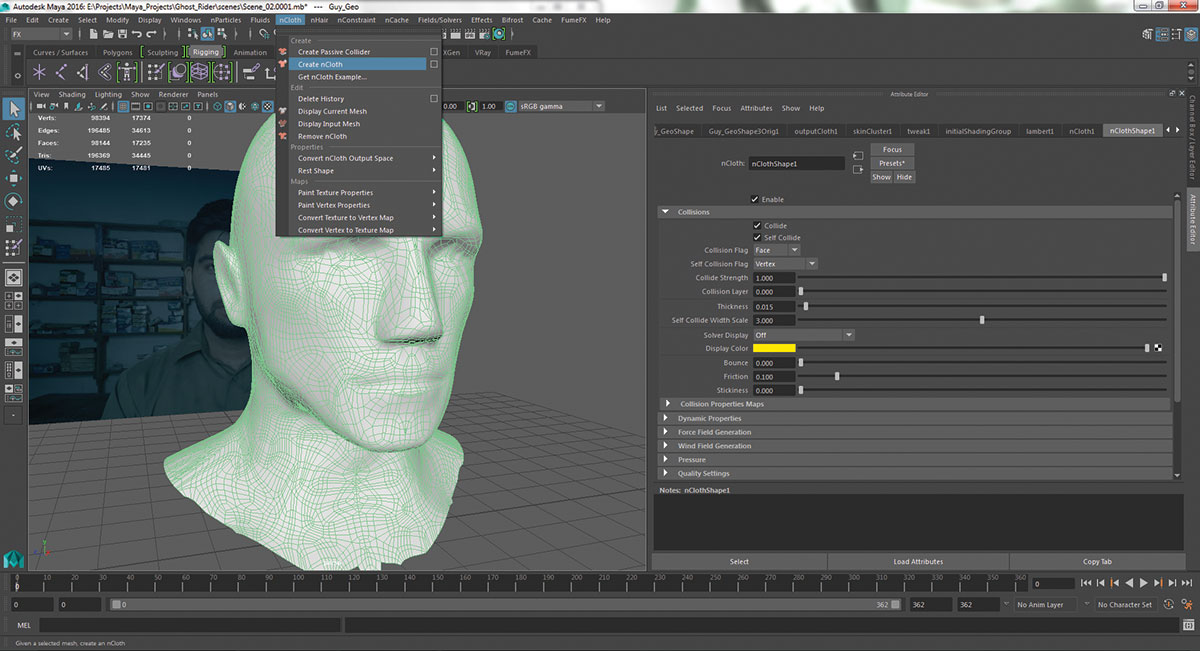
Under the FX module in Maya, go over to the nCloth menu bar and then click Create nCloth while selecting the actor model. This will transform your actor model into an nCloth on which simulations can then be made. In the same menu bar, you'll find the Create Passive Collider option. Click this button while selecting the skeleton model in order to turn it into a Rigid Body. By doing this, you can ensure that the skin on the actor model will be prevented from going through the skull.
07. Prepare for the maps
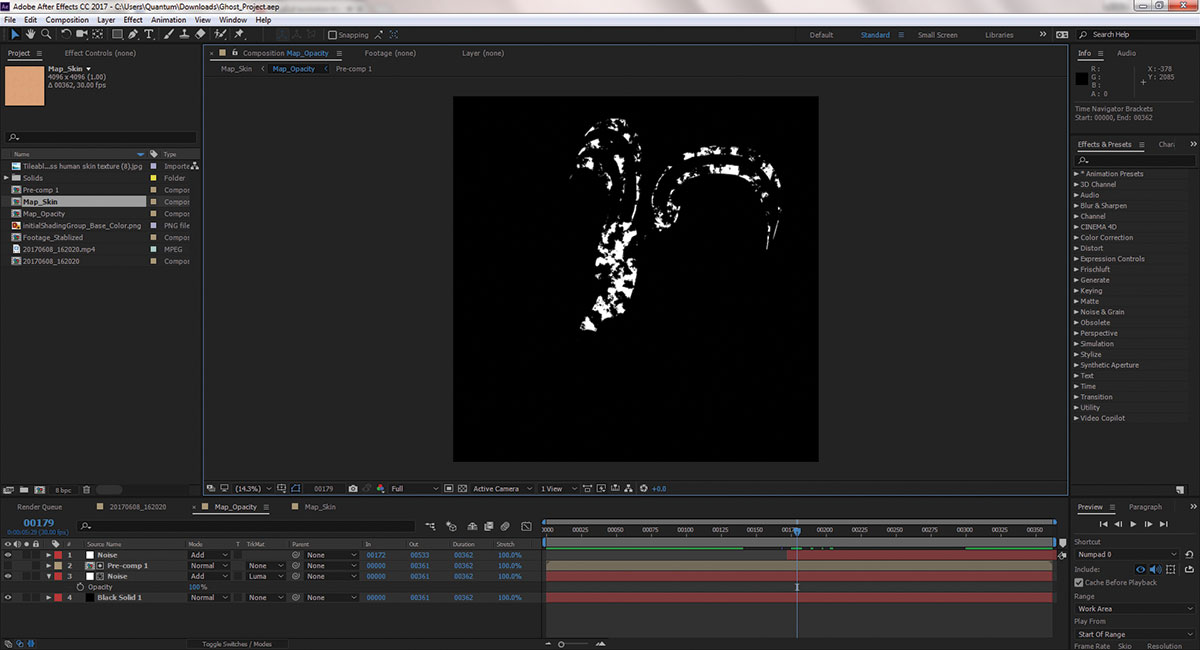
You'll need between two and three animated grayscale maps for this part of the tutorial. Firstly, you're going to need a simple map, which goes from total white to total black – let's call this one Dynamics Map. Secondly, you'll need another map that goes from total white to having some black patches but not total blackness – we're going to call this one Tearing Map. The third map you'll need is a copy of the Tearing Map. You just need to invert the colours, offset it by a few frames and then multiply it to the original, getting the edges of the animation.
08. Dynamics map
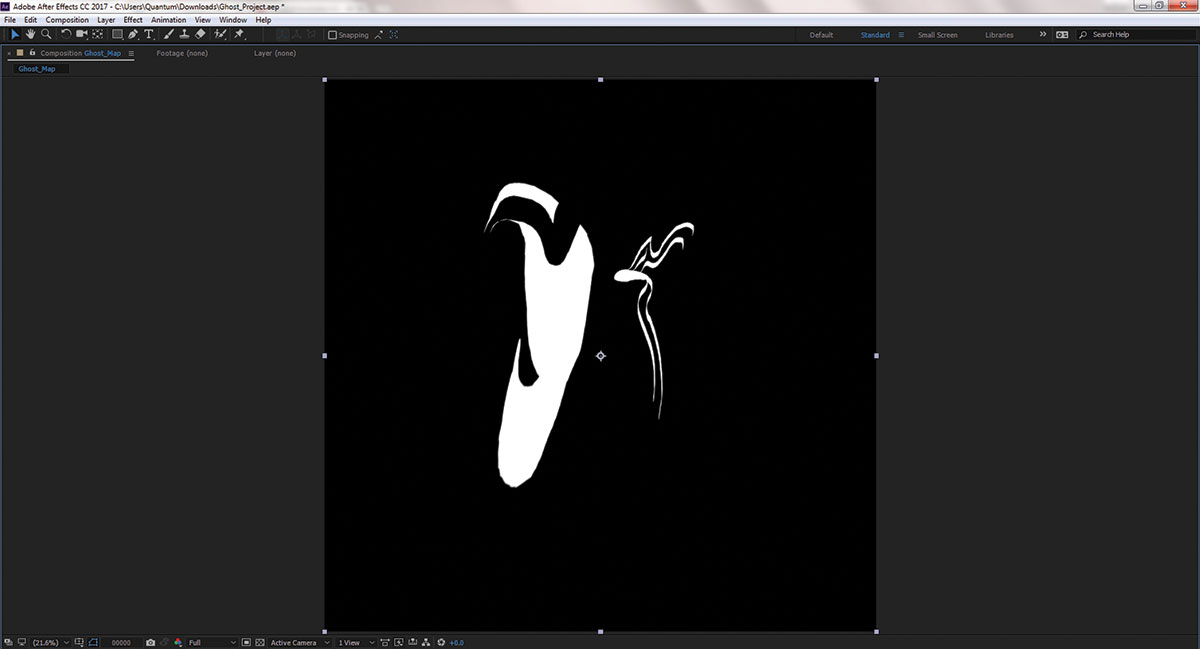
This map will control how much of your mesh is actually nCloth and how much of it isn't. Essentially, if the map is all white, no vertex on your mesh will be dynamically simulated as nCloth. This is very important if your mesh is deforming. In my case, I made some dark areas appear in the map as the actor was moving to make it more natural. You can use the Fractal Noise in After Effects to generate this.
09. Tearing map
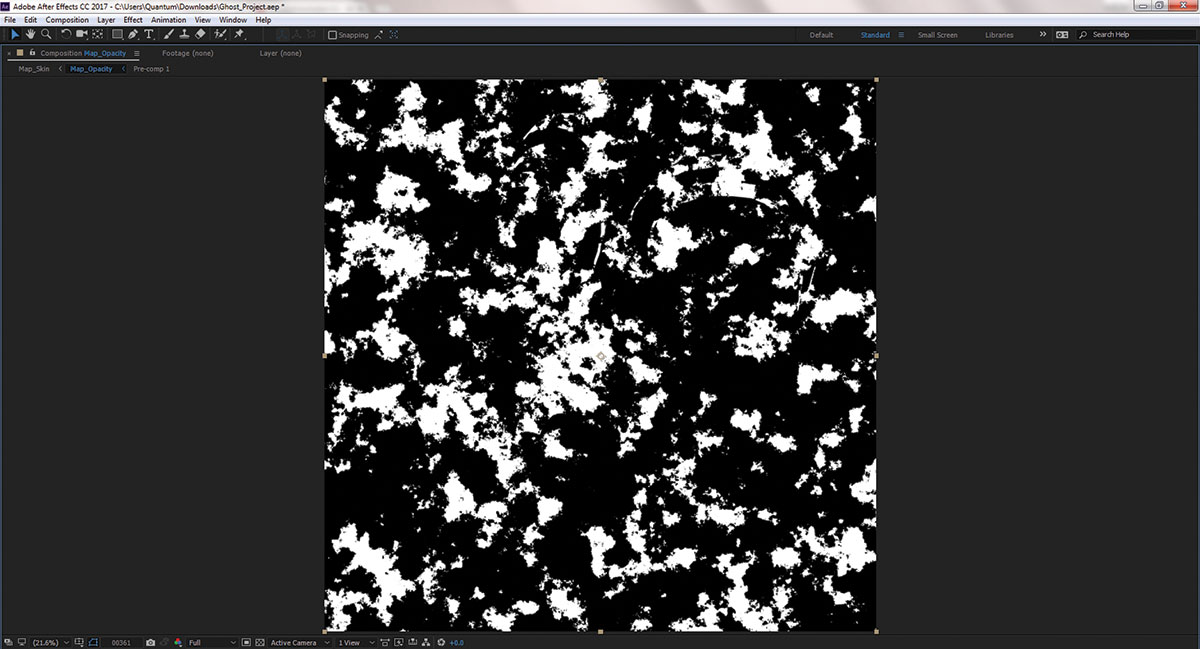
This map decides where the skin starts to break off from. Black areas will break off completely, meaning every single vertex in that area will separate. Create this like a fabric with white and black patches. Try to minimise the blackness but don't completely eradicate it. I'd say a number near 20 per cent is good. Copy this map and invert its colours. Multiply this new map with the original to create a third map. This will be used to generate sparks.
10. Input mesh attract
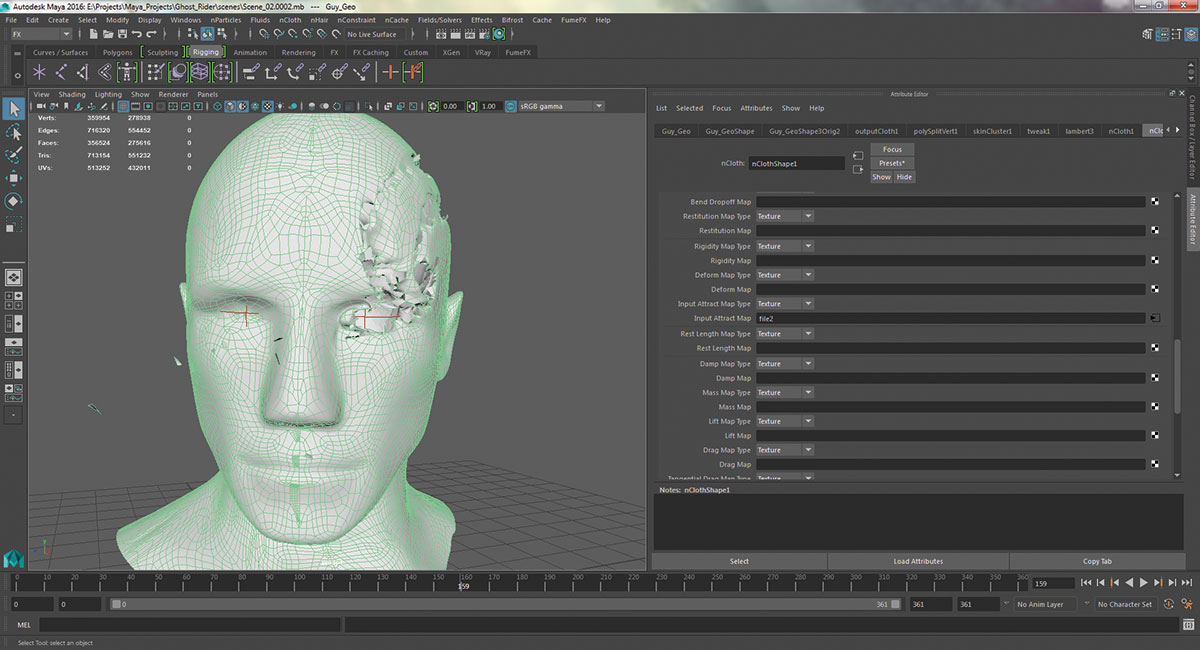
Usually when you turn a mesh into nCloth, you lose the animation. However, there's a setting under the nClothShape node's Dynamic Properties tab called Input Attract Mesh. Set it to 1, which disables nCloth simulation on the mesh and follows the deformation caused by the rigging. In the next tab, input the Dynamics Map into the Input Attract Map to multiply the attribute with your map.
11. Tear the skin
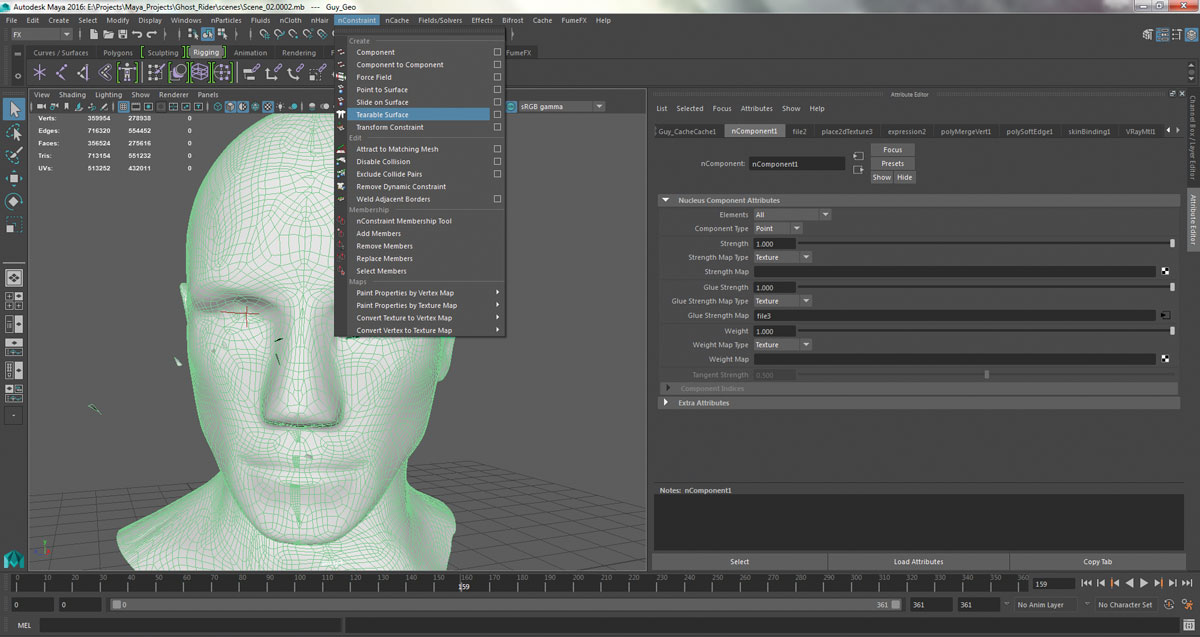
Select the actor model and under the FX module, go to the nConstraint menu. Click the Tearable Surface button. Your surface will tear like skin. Among the newly created nodes, find one called nComponent and under the Glue Strength Map, input the Tearing Map. This way, your cloth will become weakly bonded and patches of skin will start falling or flying, depending on your settings.
12. Tweak the environment
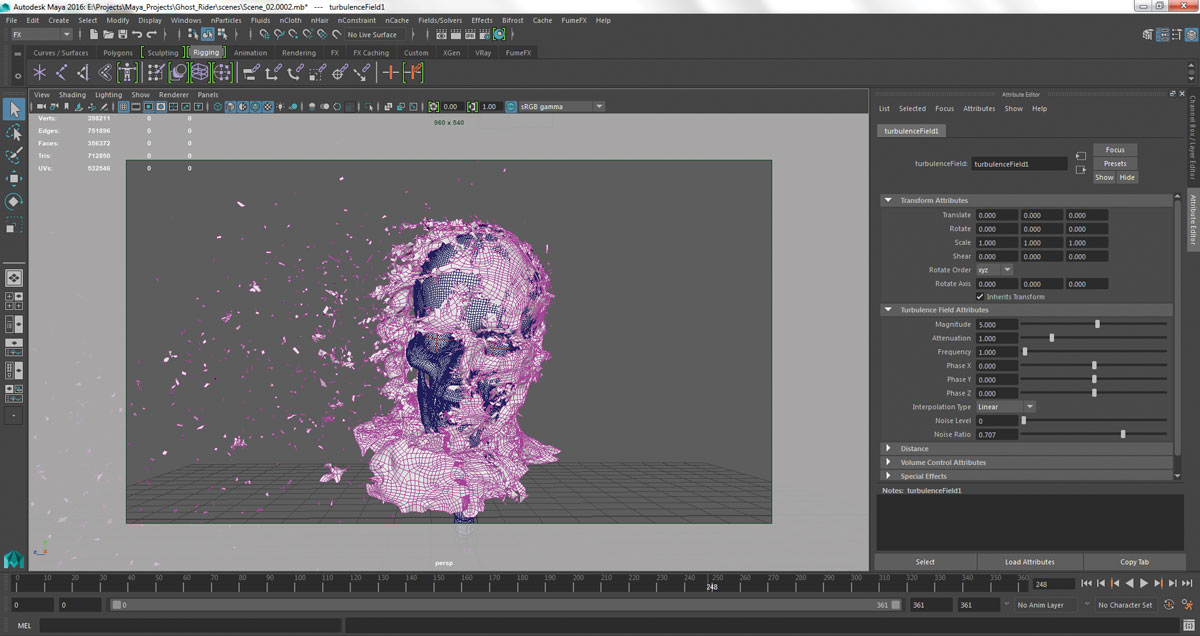
Now that the skin is breaking, make some changes to the environment. Create some wind under the Nucleus node. Under the nClothShape's Dynamic Properties tab, decrease the mass to something like 0.1 or so. The number depends on the scale of your scene. Finally, select the actor model, go to the Fields/Solvers menu bar and click the Turbulence button to add a turbulence field to create some really nice variation in how the skin flies. Without this, the cloth doesn't look good.
13. nCaching the dynamics
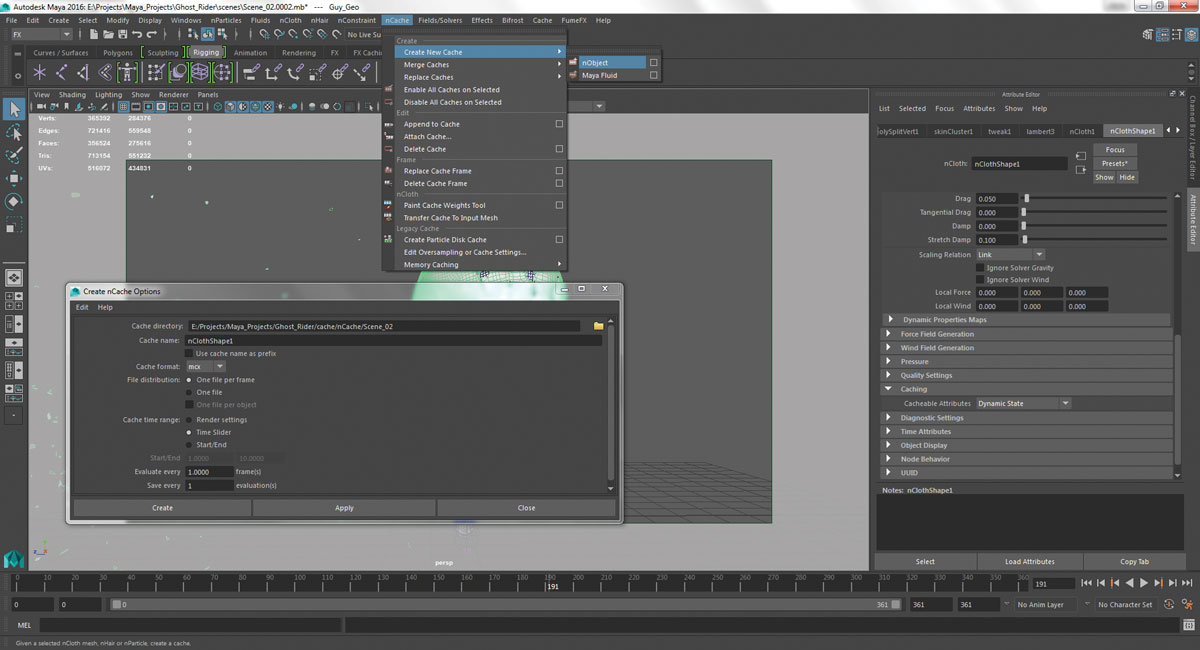
In the nClothShape, find the Caching tab. Change Cacheable Attributes to Dynamic State. Go to the nCache under the FX module and go to Create New Cache (you might have to first click Enable all Cache on Selected) and select nObject. Let it cache for a moment. This will save you having to resimulate every time you change the frame.
14. Light the eyes
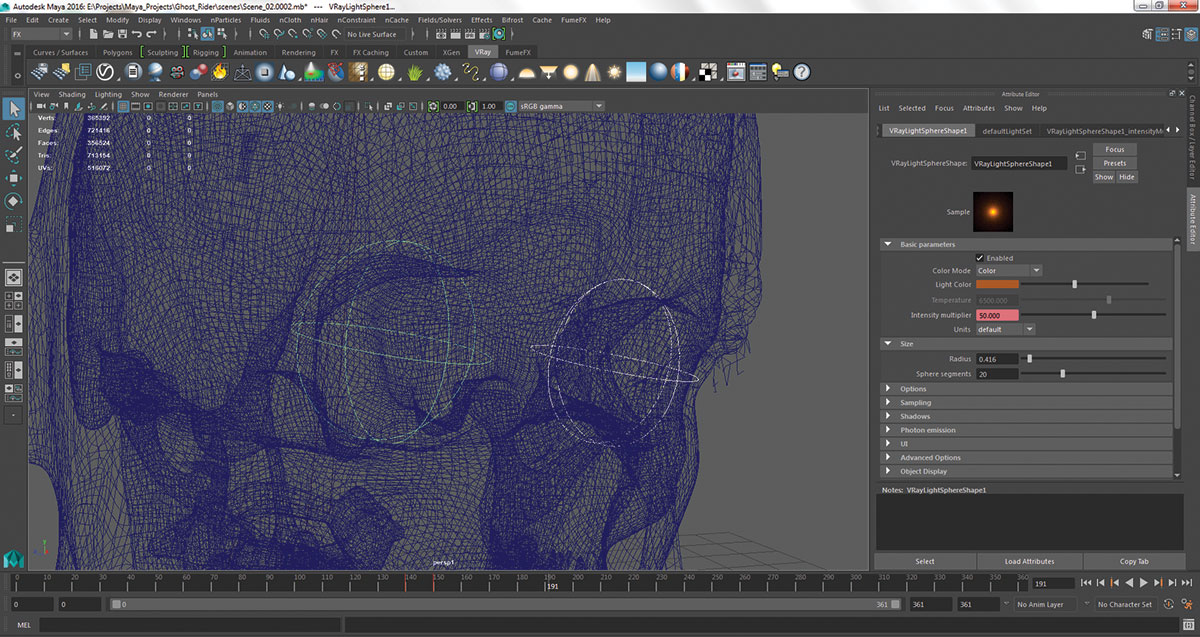
Now we need some fire in the eyes. One method would be to play with materials and self-illumination but that's too much work. Simply go ahead and create a V-Ray Sphere Light. Fit it into one of the eyes. Now, having already selected it, go to the Edit menu and access the Duplicate Special's settings by clicking the square next to it. Check the Duplicate Input Graph and Instance Leaf Nodes. The copy will now be able to take on the attributes of the first light.
15. Create FumeFX node
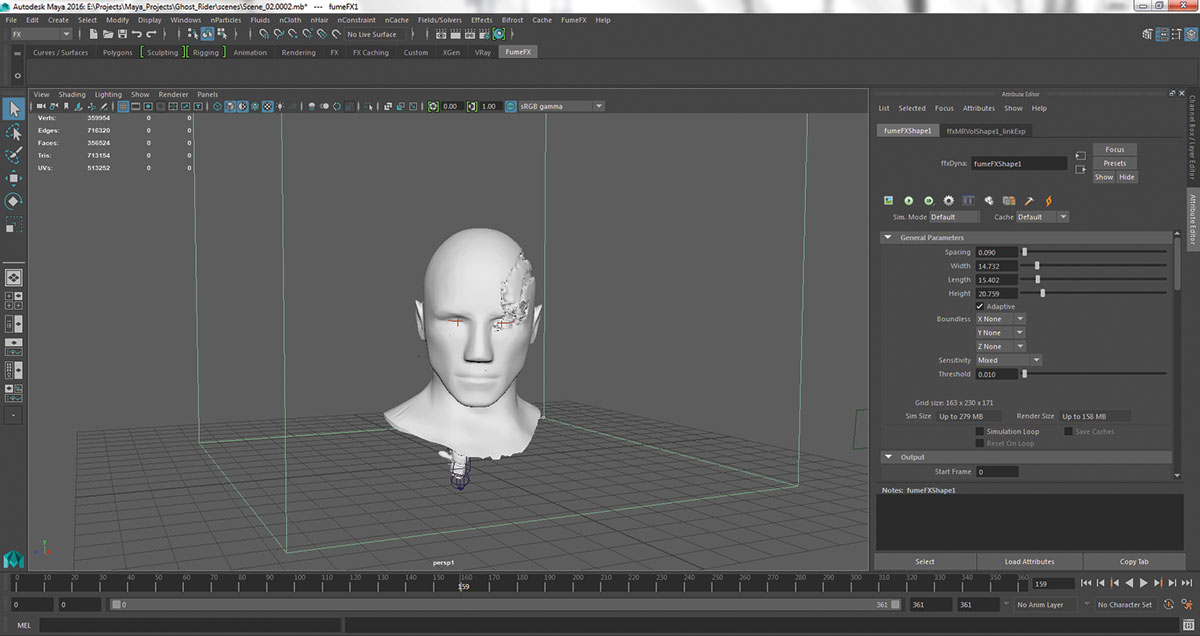
You'll need some basic knowledge of FumeFX. Save a copy at this point. Hide the actor model if you want, to speed things up. Go to the FumeFX menu and click FumeFX Node. Go to the Node's attributes and play with Width, Height and Length to better fit the skeleton mesh, basically, a rough location where the fire lights up. Spacing is the resolution of the simulation.
Next page: Create sparks, render your different elements, and finish off the model

Thank you for reading 5 articles this month* Join now for unlimited access
Enjoy your first month for just £1 / $1 / €1
*Read 5 free articles per month without a subscription

Join now for unlimited access
Try first month for just £1 / $1 / €1

A motion graphics and VFX artist from Pakistan with nine years' experience, Syawish loves motion graphics and making video tutorials.
