Sculpt realistic anatomy in ZBrush
How to create a realistic likeness in anatomy sculpts using ZBrush.
09. Exaggerate features

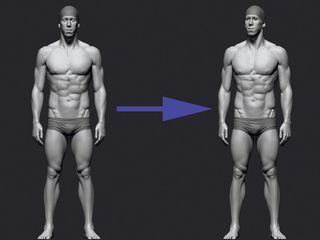
Sculpting likeness is the hardest task to perform in ZBrush, but also the most rewarding if you manage to do it. However, you don't have to make it perfect, unless you plan to do some close-up renders.
Search for the features that define the person. So for Phelps, it's the length of his face, narrow jaw, big orbicularis oris muscle and protruding ears.
To help me find these, I look at the work of caricature artists, because they always exaggerate the characteristics of the face.
10. Create clothing

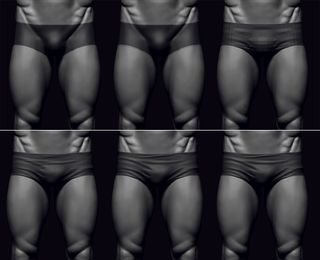
As always, the first thing you need to sculpt believable cloth is reference. Luckily for me there is no shortage of images of Michael Phelps wearing speedos on the internet. The extraction method is a good choice for creating clothing that sticks to the body.
To extract a new mesh:
- Hold Ctrl to paint the mask onto your model. Remember that the new mesh will extract in the same place as your mask.
- Once you're happy with the shape, go to SubTool > Extract and turn off Double, otherwise you will get an extraction on both sides of the mesh. Set your Thickness to 0.001 and click Extract.
- You should see a preview of the mesh that will be generated. Click Accept to create it and it will then appear in your SubTool list.
- Initially, the middle of the mesh is going to be masked. Use your Smooth brush to make the edges even.
To gain better control of the mesh, I use ZRemesher to achieve proper topology by doing the following:
- Go to Geometry > ZRemesher.
- Lower the Target Polygon Count to 0.1/0.2 and click ZRemesher (make sure that your symmetry [X] is turned on for that process).
- Now you have a mesh that you can easily manipulate and position however you like. Once you're done moving it, you can always use ZRemesher again in order to fix the topology.
The final step before sculpting is to give it some thickness:
Get the Creative Bloq Newsletter
Daily design news, reviews, how-tos and more, as picked by the editors.
- Go to Geometry > Edge Loop.
- Lower Loops to 1, set Bevel to 0 and experiment with thickness. It is best to roughly match the thickness of material that you're planning to sculpt.
When the mesh is ready to sculpt, I use the Standard brush with Alpha 37/38/39 to get some nice results with the wrinkles. Don't subdivide your mesh too high – do it step by step. The swimming cap will be done the same way.
11. Pose your model

Your work will always look a lot more interesting when you break the symmetry even more by changing pose for the final render. I have an interesting pose in my reference folder, so I will try to get something similar – again by using Transpose Master.
In this case, the rotation of the head and torso, combined with the head tilting upwards, gave an interesting result. Remember that we always have to adjust the anatomy after posing. I need to make his neck muscle more pronounced on one side.
12. Export the model

Before exporting models to 3D applications like Maya or 3ds Max, I need to ensure I will be able to use them. Unfortunately, when working on a mesh that has a few million polygons, this might not be possible.
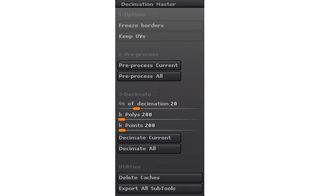
I will use the Decimation Master plugin to lower the polycount on the mesh and preserve all the high poly detail. To decimate your model, follow these steps:
- On the top menu, go to ZPlugin > Decimation Master.
- Click on Pre-Process All – this will recalculate all the information about all the SubTools.
- Once complete, select your desired percentage of decimation. For me, 20 per cent usually works perfectly. Next, click Decimate All and you will notice a huge drop in the number of polygons – but your detail shouldn't change.
- Select Export All SubTools. Now you can export everything as a single .obj file to use in Maya.
13. Move into V-ray
The final step is to import and render your model in V-Ray. I bought premade V-Ray scenes from flippednormals.com and want to make use of them when rendering Michael Phelps. After the purchase you can download everything you need from the website, including a video tutorial on how to set everything up. The wealth of material may seem overwhelming at first, but it won't take you more than five minutes to get a great looking render.
This article originally appeared in 3D World issue 217; Subscribe here!
Related articles:

Thank you for reading 5 articles this month* Join now for unlimited access
Enjoy your first month for just £1 / $1 / €1
*Read 5 free articles per month without a subscription

Join now for unlimited access
Try first month for just £1 / $1 / €1
